
1. Introduction
Thank you for choosing the GIGABYTE C102 Glass ICE PC Gaming Case. This mid-tower case is designed to provide excellent airflow and a premium aesthetic for your PC build. It supports motherboards ranging from Mini-ITX to m-ATX and features versatile connectivity options. This manual provides detailed instructions for setting up, operating, maintaining, and troubleshooting your new PC case. Please read this manual thoroughly before installation to ensure proper assembly and optimal performance.
2. Product Overview
The GIGABYTE C102 Glass ICE is a white mid-tower PC case featuring a tempered glass side panel and a mesh front panel for enhanced airflow. It comes with two pre-installed 120mm fans (one front, one rear) to assist with initial cooling. The case offers ample space for components and efficient cable management.

Figure 2.1: Front-left view of the GIGABYTE C102 Glass ICE PC case, showcasing the tempered glass side panel and the pre-installed rear fan.

Figure 2.2: Interior view of the GIGABYTE C102 Glass ICE PC case, highlighting the spacious layout and cable management cutouts.

Figure 2.3: Close-up of the GIGABYTE C102 Glass ICE PC case front panel, showing the mesh design for optimal airflow.
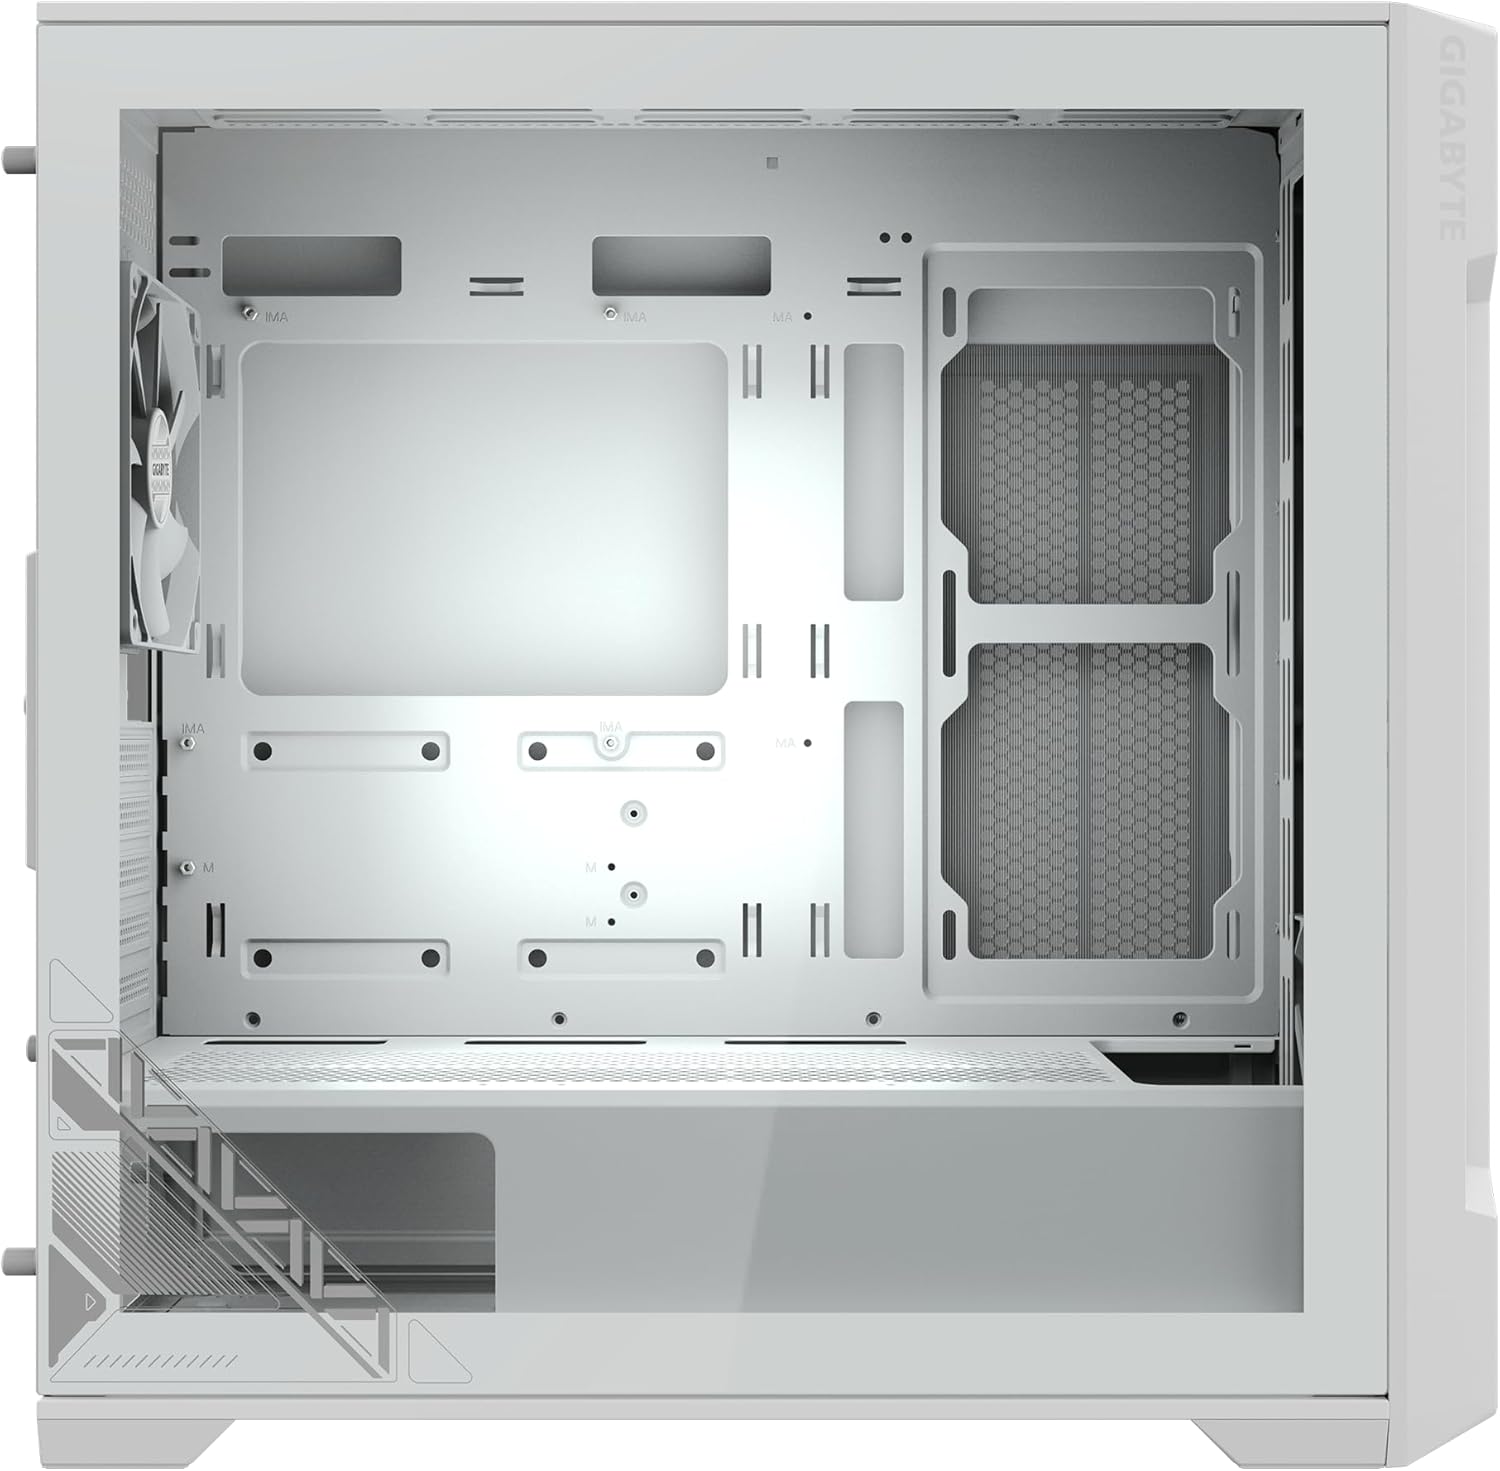
Figure 2.4: Top I/O panel of the GIGABYTE C102 Glass ICE PC case, featuring USB 3.0 ports, reset button, and audio jacks.
3. Key Features
- Mid-Tower Form Factor: Supports Mini-ITX and Micro-ATX motherboards.
- Tempered Glass Side Panel: Showcases your internal components.
- Optimized Airflow: Mesh front panel and support for multiple fans/radiators.
- Pre-installed Fans: Includes one 120mm front fan and one 120mm rear fan.
- Versatile Cooling Support:
- Radiator Support: Front (max 360mm), Top (max 360mm), Side (max 240mm), Rear (max 120mm).
- Fan Support: Front (3x 120mm / 3x 140mm), Top (3x 120mm / 2x 140mm), Side (2x 120mm), Rear (1x 120mm).
- Front I/O Panel: Two USB 3.0 ports, reset button, and audio ports.
- PSU Shroud: Integrated PSU shroud for a clean build.
4. Specifications
| Feature | Detail |
|---|---|
| Model Name | GIGABYTE C102 GLASS ICE (GB-C102GI) |
| Case Form Factor | Mid-Tower |
| Color | White |
| Material | Tempered Glass |
| Dimensions (W x D x H) | 282 x 525 x 517 mm |
| Motherboard Compatibility | Mini-ITX, Micro-ATX |
| Pre-installed Fans | Front: 1x 120mm, Rear: 1x 120mm |
| Front I/O Ports | 2x USB 3.0, Reset Button, Audio Ports |
| Radiator Support (Front) | Max 360mm |
| Radiator Support (Top) | Max 360mm |
| Radiator Support (Side) | Max 240mm |
| Radiator Support (Rear) | Max 120mm |
| Fan Support (Front) | 3x 120mm / 3x 140mm |
| Fan Support (Top) | 3x 120mm / 2x 140mm |
| Fan Support (Side) | 2x 120mm |
| Fan Support (Rear) | 1x 120mm |
| Special Features | PSU Shroud, Integrated Fan, Tempered Glass |
5. Setup Guide
Follow these steps to assemble your PC components within the GIGABYTE C102 Glass ICE case. Ensure your workspace is clean and static-free.
5.1. Unboxing and Preparation
- Carefully remove the case from its packaging.
- Inspect the case for any shipping damage. Contact your retailer immediately if damage is found.
- Remove the tempered glass side panel by unscrewing the thumb screws at the rear and gently pulling it away. Place it on a soft, flat surface to prevent scratches.
- Remove the opposite metal side panel to access the cable management area.
- Locate the accessory box inside the case, which contains screws, zip ties, and other mounting hardware.

Figure 5.1: The GIGABYTE C102 Glass ICE PC case shown alongside its retail packaging.
5.2. Motherboard Installation
- Install your CPU, CPU cooler (if air cooler), and RAM onto the motherboard before placing it into the case.
- Install the I/O shield (if not pre-attached to your motherboard) into the rear opening of the case.
- Carefully align your Mini-ITX or Micro-ATX motherboard with the standoffs inside the case. The case comes with pre-installed standoffs for m-ATX.
- Secure the motherboard using the provided screws. Do not overtighten.
5.3. Power Supply Unit (PSU) Installation
- The PSU mounts at the bottom rear of the case, within the PSU shroud.
- Slide the PSU into its designated bay from the rear of the case.
- Secure the PSU with screws from the rear of the case.
5.4. Storage Drive Installation
- 2.5" SSDs: Mount SSDs on the dedicated brackets behind the motherboard tray or on the PSU shroud.
- 3.5" HDDs: Install HDDs in the drive cage located under the PSU shroud.
- Secure all drives with the appropriate screws.
5.5. Graphics Card (GPU) and Expansion Cards
- Remove the necessary PCIe slot covers from the rear of the case.
- Insert your graphics card or other expansion cards into the motherboard's PCIe slots.
- Secure the cards with screws.
5.6. Fan and Radiator Installation
The case supports various fan and radiator configurations. Refer to the "Key Features" section for maximum sizes.
- Mount additional fans or radiators to the front, top, side, or rear positions using the provided screws.
- Ensure fans are oriented correctly for optimal airflow (intake or exhaust).
5.7. Cable Management
Utilize the cable routing cutouts and tie-down points behind the motherboard tray to manage cables. This improves airflow and aesthetics.
- Connect all necessary power cables from the PSU to your components (motherboard, GPU, drives).
- Connect the front panel I/O cables (USB, audio, power switch, reset switch, LED indicators) to the corresponding headers on your motherboard. Refer to your motherboard manual for pin assignments.
- Route cables neatly using zip ties or Velcro straps.
5.8. Final Assembly
- Once all components are installed and cables are managed, reattach the metal side panel.
- Carefully reattach the tempered glass side panel and secure it with the thumb screws.
- Place your assembled PC in its desired location.
6. Operating Instructions
After successfully assembling your PC, operating the GIGABYTE C102 Glass ICE case is straightforward.
- Power On/Off: Press the power button located on the top I/O panel to turn your system on or off.
- Reset: Use the reset button on the top I/O panel to restart your system if needed.
- USB Connectivity: Connect USB devices to the two USB 3.0 ports on the top I/O panel.
- Audio Connectivity: Use the audio jacks on the top I/O panel for headphones and microphones.
Ensure adequate ventilation around the case to maintain optimal operating temperatures for your components.
7. Maintenance
Regular maintenance helps ensure the longevity and optimal performance of your PC and case.
- Dust Filters: The GIGABYTE C102 Glass ICE case is equipped with dust filters (e.g., on the top and front panels). Regularly remove and clean these filters to prevent dust buildup and maintain good airflow. Use a soft brush or vacuum cleaner.
- Exterior Cleaning: Wipe the exterior of the case with a soft, damp cloth. Avoid abrasive cleaners or solvents. For the tempered glass panel, use a glass cleaner and a microfiber cloth.
- Interior Cleaning: Periodically open the case and use compressed air to remove dust from internal components, especially heatsinks and fan blades. Ensure the system is powered off and unplugged before performing interior cleaning.
- Cable Management Check: Occasionally check cable routing to ensure no cables are obstructing fans or airflow.
8. Troubleshooting
This section addresses common issues you might encounter during or after building your PC.
- System Does Not Power On:
- Ensure the PSU is properly connected to the wall outlet and the power switch on the PSU is in the "ON" position.
- Verify that the 24-pin ATX power cable and 8-pin (or 4+4-pin) CPU power cable are securely connected to the motherboard.
- Check that the front panel power switch cable is correctly connected to the motherboard's power header (refer to your motherboard manual).
- Confirm all components are seated correctly (RAM, GPU).
- No Display Output:
- Ensure your monitor is connected to the graphics card (not the motherboard's integrated graphics ports, unless you are using integrated graphics).
- Reseat the graphics card in its PCIe slot.
- Check the monitor's input source settings.
- Fans Not Spinning:
- Verify that all fan cables are securely connected to the appropriate fan headers on the motherboard or a fan controller.
- Check BIOS/UEFI settings for fan control.
- Overheating Issues:
- Ensure all case fans are installed and spinning correctly, with proper airflow direction (intake/exhaust).
- Clean dust filters and internal components.
- Verify CPU cooler and GPU cooler are properly seated and functioning.
- Front Panel USB/Audio Not Working:
- Check that the USB 3.0 header cable and HD Audio cable from the front panel are correctly connected to the corresponding headers on your motherboard.
For more complex issues, consult your motherboard manual or the GIGABYTE support website.
9. Warranty and Support
GIGABYTE products are covered by a limited warranty. The specific terms and duration of the warranty may vary by region and product type. Please retain your proof of purchase for warranty claims.
- Warranty Information: For detailed warranty terms and conditions, please visit the official GIGABYTE website or refer to the warranty card included with your product.
- Technical Support: If you encounter issues that cannot be resolved using this manual, please contact GIGABYTE technical support.
GIGABYTE Support Website - Product Registration: Registering your product on the GIGABYTE website may provide additional benefits and streamline support processes.


