
Netzu 6210PB
Netzu Projection Alarm Clock
Model: 6210PB
Product Overview
The Netzu Projection Alarm Clock is a versatile bedside device designed to enhance your daily routine. It features a 350° rotating projector that displays the time clearly on your ceiling or wall, a large LED screen with adjustable RGB color modes and brightness levels, and multiple alarm settings. This clock also includes a convenient USB charging port for your devices and a battery backup system to retain settings during power outages.

Image: The Netzu Projection Alarm Clock displaying time, temperature, and date, with its projector and a smartphone connected for charging.
Setup Guide
1. Power Connection
Connect the provided power cable to the alarm clock and plug it into a standard electrical outlet. The clock is primarily powered by mains electricity.
2. Battery Backup Installation
For memory backup during power outages, insert 2 AAA batteries (not supplied) into the battery compartment located at the bottom of the clock. This ensures that your time and alarm settings are retained.

Image: Close-up view of the battery compartment on the underside of the alarm clock, showing where to insert two AAA batteries for backup.
3. Setting Time and Date
Follow these steps to set the current time and date:
- Step 1: Set the Clock Time
- Hold the SET button for 2 seconds to enter time setting mode. The hour digits will begin to blink.
- Use the "+" or "-" buttons to adjust the hour.
- Short press SET to confirm the hour and move to minute adjustment.
- Use the "+" or "-" buttons to adjust the minute.
- Step 2: Set the Year
- Short press SET again to confirm the minute and enter year setting mode. The year digits will blink.
- Use the "+" or "-" buttons to adjust the year. (Note: The system default year is 2024; please update it to the current year, e.g., 2025).
- Step 3: Set the Month & Day
- Short press SET again to confirm the year and enter month and day setting mode. The month digits will blink.
- Use the "+" or "-" buttons to adjust the month.
- Short press SET to confirm the month and move to day adjustment.
- Use the "+" or "-" buttons to adjust the day.
- Short press SET one last time to exit the setting mode.
Tip: If the year, month, and day are set correctly, the day of the week will be displayed automatically.

Image: A visual guide illustrating the three steps to set the time, year, month, and day using the SET, +, and - buttons on the alarm clock.
Operating Instructions
1. Projection Feature
The alarm clock features a 350° rotatable projector that can display the time on your wall or ceiling. The optimal projection distance is between 0.5 to 3 meters. You can adjust the projection brightness through 4 levels and flip the projected image 180° to suit your viewing angle.

Image: An illustration demonstrating the alarm clock projecting time onto a ceiling in a room, highlighting the 350° rotation and 180° flip capabilities of the projector.
2. Display Settings
The large LED screen displays time, temperature, date, and day. You can customize the display with 10 different RGB color modes and adjust the brightness across 5 levels, from very bright to completely dim, to suit your preference and environment.

Image: A grid showing ten different RGB color modes available for the alarm clock's display, demonstrating the variety of visual options.
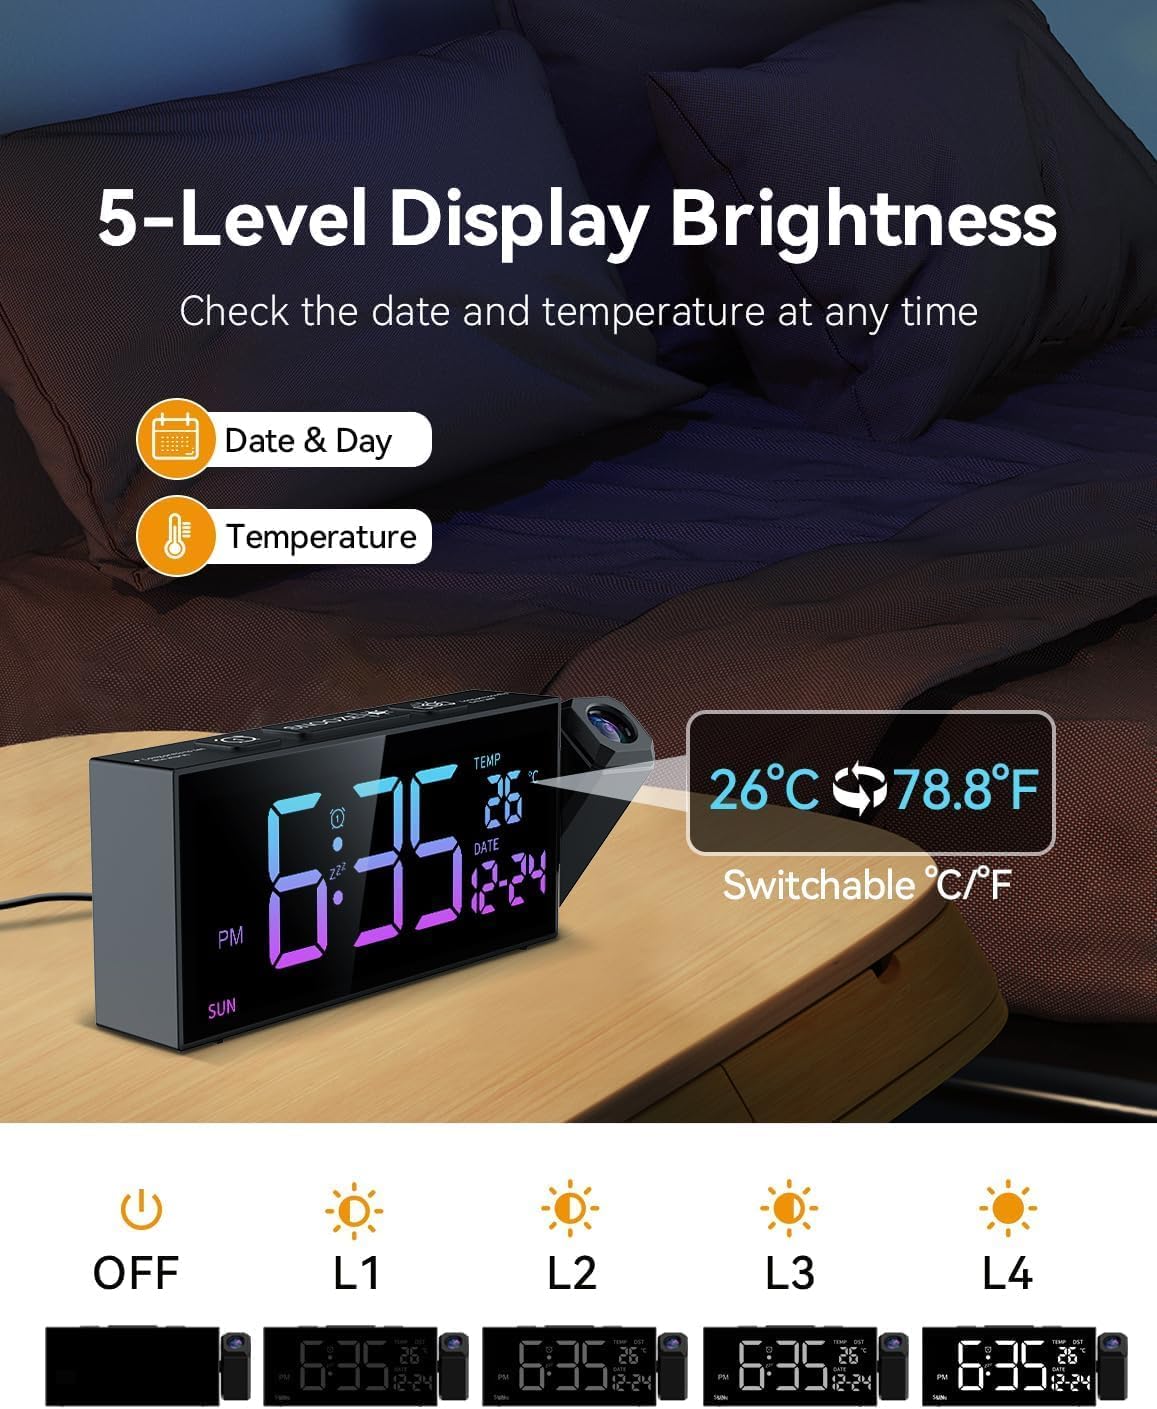
Image: A visual representation of the five different brightness levels for the alarm clock's display, ranging from off to maximum brightness, also showing temperature and date display.
3. Alarm Settings
The clock offers 10 distinct alarm tones and 4 adjustable volume levels. You can set alarms for daily, weekday (Monday-Friday), or weekend (Saturday-Sunday) modes. The large snooze button on top allows for a temporary 9-minute pause of the alarm.

Image: Icons representing ten different selectable alarm tones, including chime, various soft music options, ring, and beep, along with a volume bar indicating sound levels from 90dB to 110dB.

Image: A diagram illustrating the snooze function and the three alarm modes: Daily Mode (Mon-Sun), Weekday Mode (Mon-Fri), and Weekend Mode (Sat-Sun).
4. Time Format and DST
You can switch between 12-hour (AM/PM) and 24-hour time formats. The clock also includes a manual Daylight Saving Time (DST) function for easy adjustment during seasonal time changes.

Image: A visual guide showing the alarm clock's ability to display time in 24-hour format, 12-hour format (with AM/PM indicator), and how to activate or deactivate Daylight Saving Time (DST).
5. USB Charging Port
A convenient USB output port is located on the side of the clock, allowing you to charge your smartphone or other small electronic devices directly from the alarm clock.
Maintenance
- Cleaning: To clean the clock, gently wipe the surface with a soft, dry cloth. Avoid using abrasive cleaners or solvents, as they may damage the finish.
- Battery Replacement: If the clock loses its settings during a power outage, it indicates that the backup AAA batteries need to be replaced. Ensure the clock is connected to mains power before replacing batteries to avoid losing current settings.
- Storage: If storing the clock for an extended period, remove the AAA backup batteries to prevent leakage.
Troubleshooting
| Problem | Possible Cause | Solution |
|---|---|---|
| Display is blank or not working. | No power connection; power outage; display brightness set to off. | Ensure the power adapter is securely plugged in. Check if backup batteries are installed and functional during a power outage. Adjust display brightness using the appropriate button. |
| Projection is blurry or unclear. | Incorrect projection distance; projector lens needs cleaning. | Adjust the distance of the clock from the projection surface (0.5-3 meters). Gently clean the projector lens with a soft, lint-free cloth. |
| Alarm does not sound. | Alarm is not set; alarm volume is too low; incorrect alarm mode (e.g., weekday alarm set for weekend). | Verify that the alarm is activated and set to the correct time. Increase the alarm volume. Check that the alarm mode (daily, weekday, weekend) matches your desired schedule. |
| Time or date is incorrect after power interruption. | Backup batteries are not installed or are depleted. | Install new AAA backup batteries or replace existing ones. Reset the time and date as per the "Setting Time and Date" section. |
Specifications
| Brand | Netzu |
| Model Number | 6210PB |
| Color | RGB |
| Product Dimensions (L x W x H) | 20.5 x 3.81 x 7.8 cm |
| Item Weight | 330 g |
| Display Type | Digital |
| Special Features | Temperature display, Calendar display, Loud alarm, Large screen, Projection clock |
| Power Source | Corded Electric |
| Room Type | Bedroom, Living Room |
| Indoor/Outdoor Use | Indoor |
Warranty and Support
For information regarding product warranty, please refer to the documentation provided with your purchase or contact the seller directly. If you require technical support or have questions not covered in this manual, please reach out to the Netzu customer service or the retailer from whom you purchased the product.
Ask a question about this manual
Ask about setup, troubleshooting, compatibility, parts, safety, or missing instructions. Manuals+ will review the question and use this page’s manual context to help answer it.