
1. Introduction
The ELEGOO ESP-32 Development Board is a versatile microcontroller designed for Internet of Things (IoT) and embedded systems projects. It features a powerful dual-core processor, integrated Wi-Fi and Bluetooth capabilities, and a rich set of peripheral interfaces, making it suitable for a wide range of applications from simple sensor readings to complex network-connected devices.
This manual provides essential information for setting up, operating, and maintaining your ESP-32 Development Board.
2. Product Overview
The ESP-32 Development Board integrates a dual-core 32-bit processor operating at up to 240 MHz, offering significant processing power for demanding tasks. It includes 512 kB of RAM. Key features include:
- Wireless Connectivity: Built-in 2.4 GHz Wi-Fi and Bluetooth 4.2 (Dual Mode) for comprehensive wireless communication.
- Dual-Core Processor: Enhanced performance for complex applications.
- Power Efficiency: Low-power design with dynamic clock frequency adjustment, ideal for battery-powered IoT devices.
- Versatile Peripheral Interfaces: Supports GPIO, UART, SPI, I2C, and more for connecting various sensors and modules.
- USB-C Interface: Modern and convenient connectivity for power and data transfer.
- Over-the-Air (OTA) Firmware Upgrades: Allows for remote firmware updates and optimization.

Figure 2.1: The ELEGOO ESP-32 Development Board, highlighting the USB-C connection and integrated Wi-Fi/Bluetooth module.

Figure 2.2: Front and back views of the ESP-32 Development Board, showing components and pin headers.
3. Setup
3.1 Package Contents
Your package includes:
- 3 x ELEGOO ESP-32 Development Boards (USB-C)

Figure 3.1: The ESP-32 Development Boards are packaged in plastic boxes with foam cotton to prevent pin bending during transit.
3.2 Initial Connection
- Connect the ESP-32 board to your computer using a USB-C cable (not included). The board will draw power from the USB connection.
- Install the necessary drivers for the CP2102 chip if your operating system does not automatically recognize the device. These drivers are typically available on the Silicon Labs website.
- Install the ESP32 board support package in your preferred Integrated Development Environment (IDE), such as Arduino IDE or PlatformIO. Refer to the official ESP32 documentation or ELEGOO support resources for detailed installation instructions.
4. Operating Instructions
4.1 Programming the Board
The ESP-32 Development Board can be programmed using various environments. Arduino IDE is a popular choice due to its ease of use and extensive community support.
- Open your IDE and select the correct ESP32 board model (e.g., ESP32 Dev Module) and the corresponding COM port.
- Write or load your program (sketch).
- Click the 'Upload' button to compile and transfer the code to the ESP-32 board. The board typically enters programming mode automatically, eliminating the need to manually press the 'Boot' button.
4.2 Wireless Connectivity
The ESP-32 supports both Wi-Fi and Bluetooth for wireless communication:
- Wi-Fi: The board can operate in Station (STA), Access Point (AP), or combined AP+STA modes, allowing it to connect to existing Wi-Fi networks or create its own.
- Bluetooth: Supports Bluetooth 4.2 Dual Mode (Classic Bluetooth and Bluetooth Low Energy - BLE) for short-range communication with other devices.
4.3 Over-the-Air (OTA) Updates
The ESP-32 supports OTA firmware updates, allowing you to update the board's software wirelessly without needing a physical USB connection after initial setup. This feature is crucial for deployed IoT devices.
5. Pinout Diagram
Understanding the pinout is essential for connecting external components and utilizing the board's full capabilities. The ESP-32 offers a rich set of General Purpose Input/Output (GPIO) pins, along with dedicated pins for communication protocols like UART, SPI, and I2C, and analog-to-digital converters (ADCs).

Figure 5.1: Detailed pinout diagram of the ESP-32 Development Board, indicating GPIO numbers, power pins, and communication interfaces.
6. Dimensions
The physical dimensions of the ESP-32 Development Board are provided below for integration into projects and enclosures.
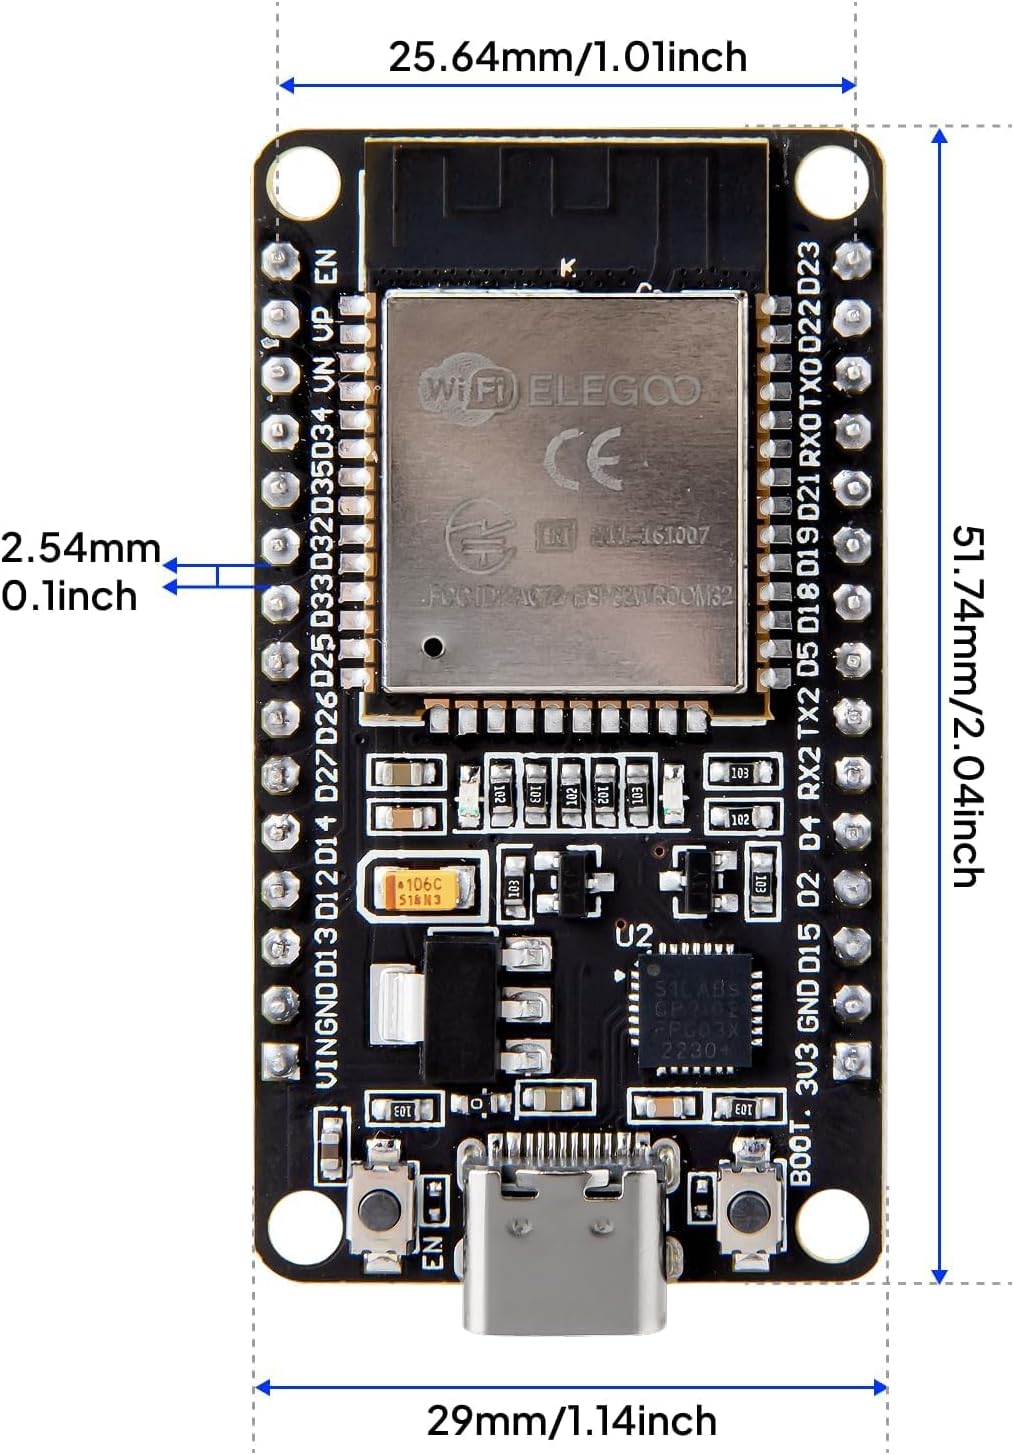
Figure 6.1: Dimensions of the ESP-32 Development Board: 51.74mm (2.04 inches) length, 29mm (1.14 inches) width, and 25.64mm (1.01 inches) between pin rows.
7. Project Examples
The ESP-32 module is highly versatile and can be used in numerous projects. For prototyping, it is recommended to use the board with two ELEGOO breadboards due to its width.
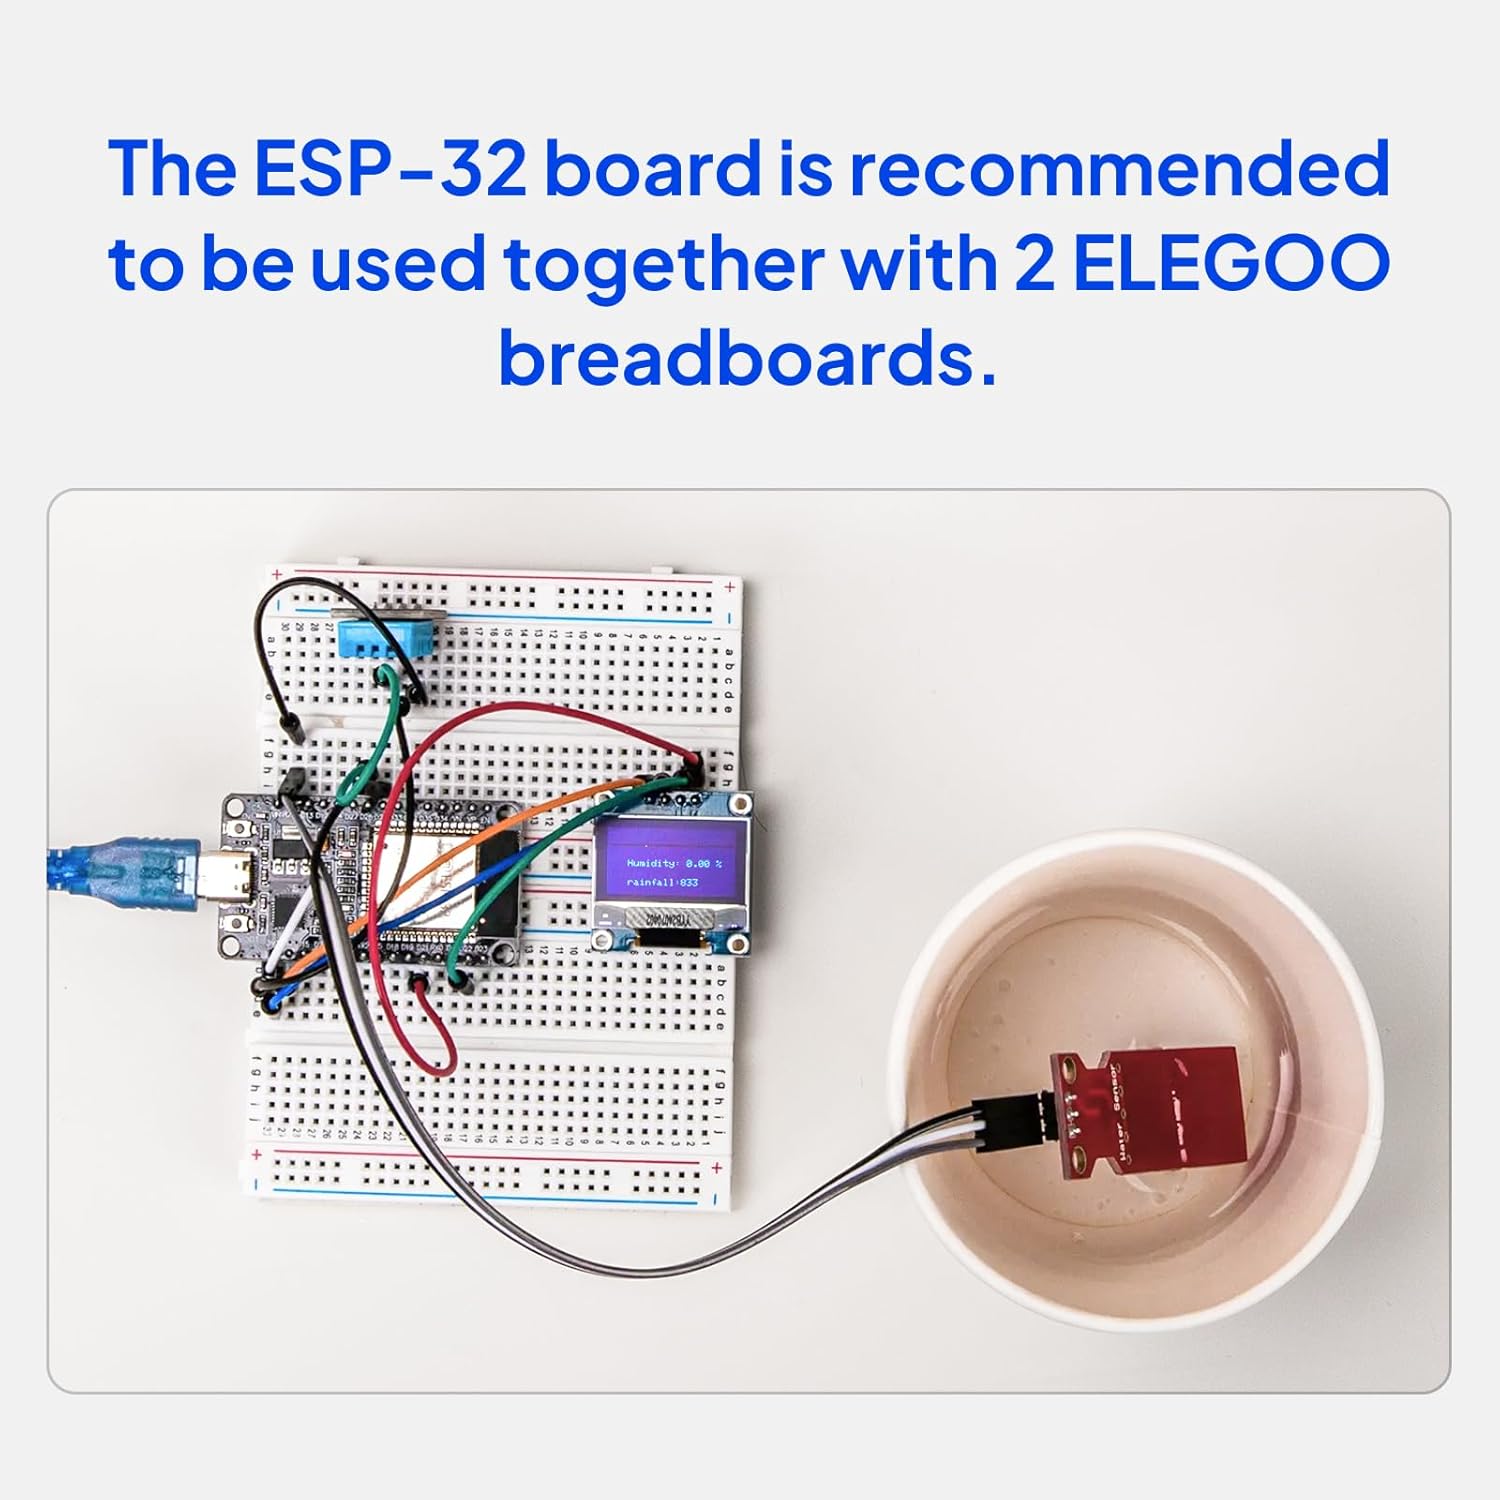
Figure 7.1: An ESP-32 board connected to two breadboards, demonstrating a setup with a humidity/temperature sensor and an LCD display.
Examples of projects you can create include:
- Environmental Monitoring: Connect sensors to measure temperature, humidity, and air quality, then transmit data via Wi-Fi to a cloud platform.
- Smart Home Automation: Control lights, appliances, or other devices wirelessly.
- Robotics: Use Bluetooth for communication with mobile devices or other robots.
- Custom Measurement Tools: Build devices for specific measurements, such as distance or light intensity.

Figure 7.2: An ESP32 module integrated into a custom enclosure, possibly for a distance measurement device.
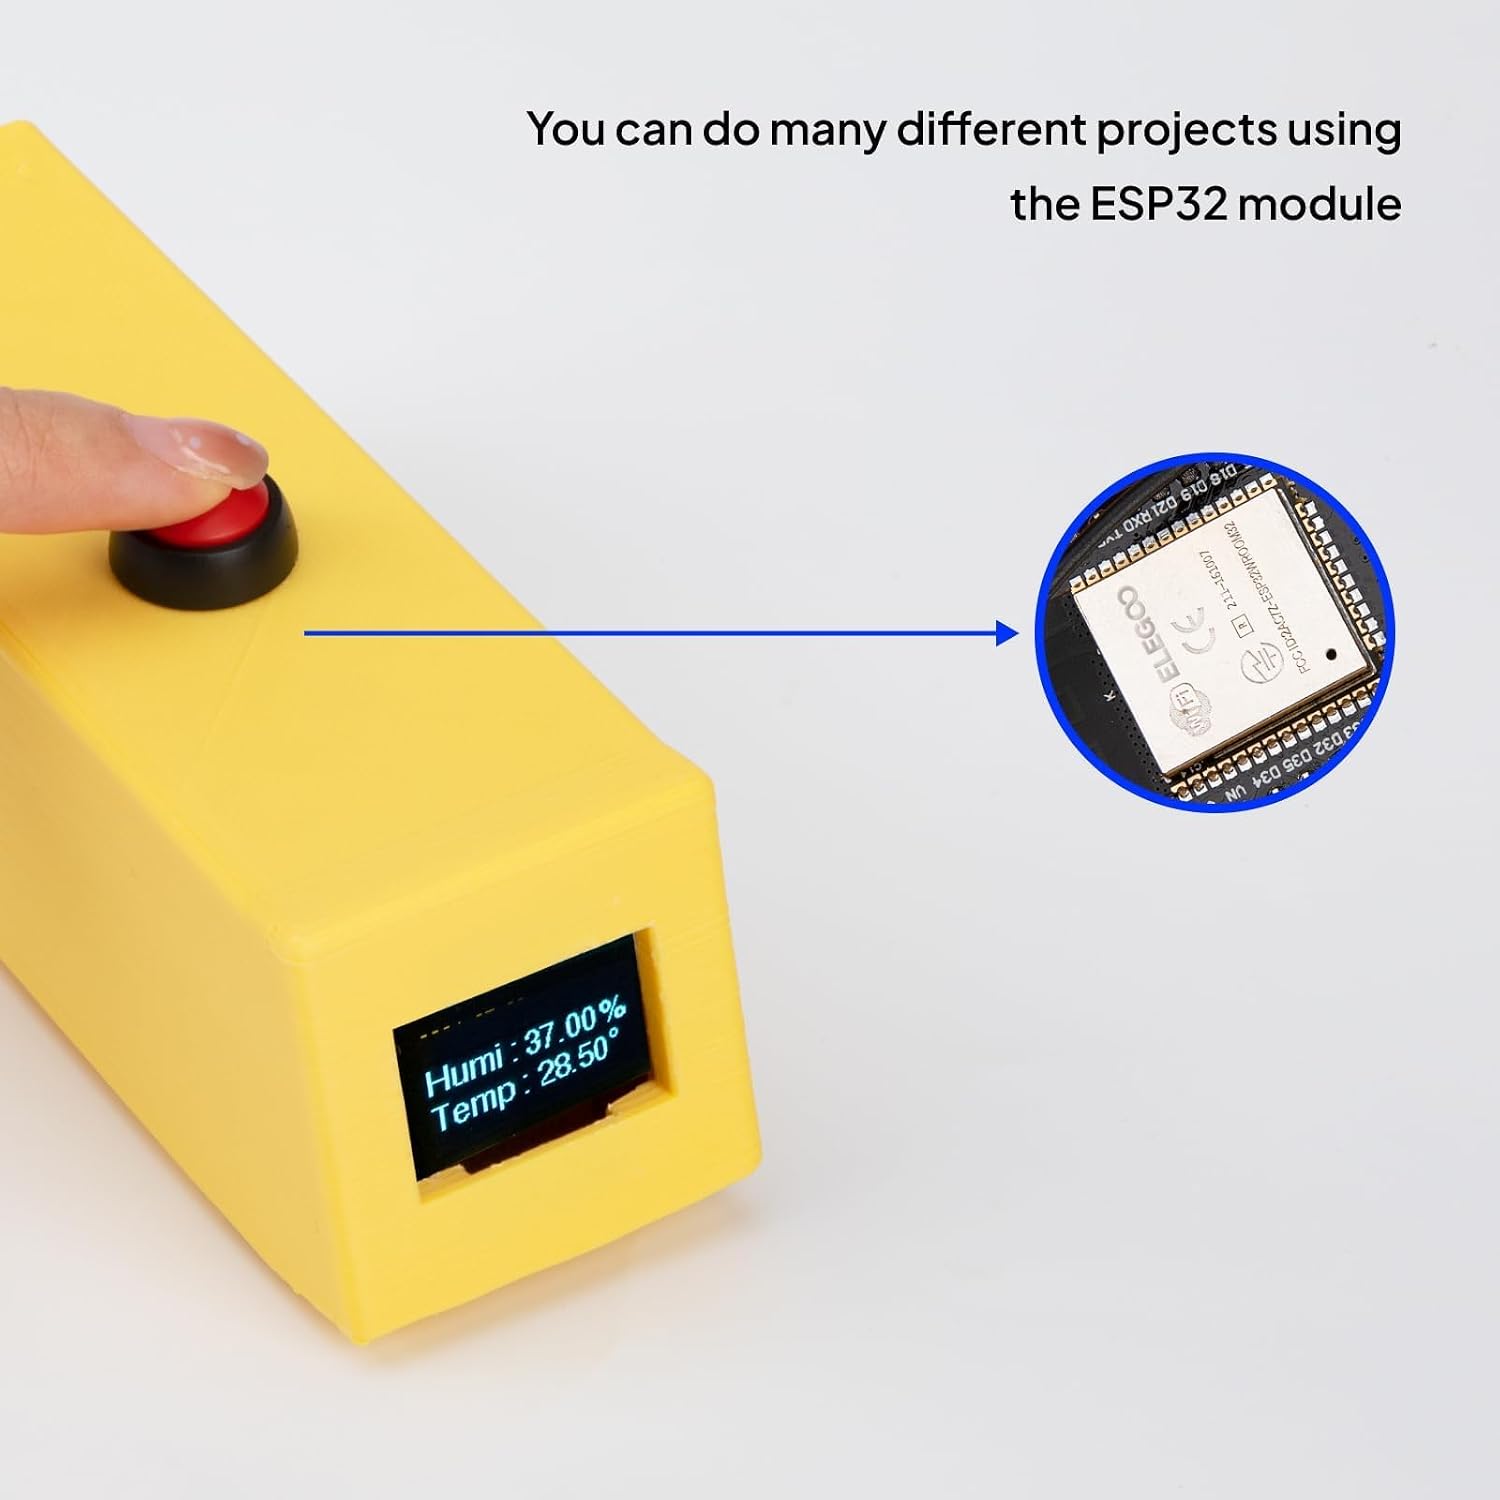
Figure 7.3: Another custom project enclosure featuring an ESP32 module, displaying humidity and temperature data.
8. Maintenance
The ESP-32 Development Board requires minimal maintenance. Follow these guidelines to ensure longevity:
- Keep the board clean and free from dust and debris.
- Avoid exposing the board to extreme temperatures or humidity.
- Handle the board by its edges to prevent damage to components or static discharge.
- Ensure proper ventilation when the board is in operation, especially within enclosures.
9. Troubleshooting
If you encounter issues with your ESP-32 Development Board, consider the following:
- Board Not Detected: Ensure USB-C cable is functional and securely connected. Verify CP2102 drivers are correctly installed on your computer.
- Upload Errors: Check that the correct board type and COM port are selected in your IDE. Sometimes, adjusting the upload flash frequency (e.g., to 40MHz) in the IDE settings can resolve upload issues.
- Program Not Running: After a successful upload, the board should reset and run the program. If not, try manually pressing the 'EN' (Enable/Reset) button on the board.
- Wi-Fi/Bluetooth Connectivity Issues: Verify your code for correct network credentials or Bluetooth pairing procedures. Ensure adequate power supply for wireless operations.
- Component Malfunction: Double-check all wiring and connections to external components. Ensure components are compatible with the ESP-32's voltage levels (3.3V for GPIO).
10. Specifications
| Feature | Specification |
|---|---|
| Processor | Dual-core 32-bit |
| Clock Frequency | Up to 240 MHz |
| RAM | 512 KB |
| Wi-Fi | 2.4 GHz, 802.11n (AP/STA/AP+STA) |
| Bluetooth | Bluetooth 4.2 Dual Mode |
| USB Interface | USB Type-C (CP2102 chip) |
| Operating System Compatibility | Linux (and other common OS with drivers) |
| Model Number | EL-SM-012 |
| Item Weight | 0.05 Kilograms |
11. Warranty and Support
The ELEGOO ESP-32 Development Board comes with a 1 Year Manufacturer Warranty. For technical support, documentation, or further assistance, please visit the official ELEGOO website or contact their customer service. ELEGOO is known for responsive support and providing accurate information.