
About Your HUTT W9
The HUTT W9 Auto Window Cleaning Robot is designed to provide efficient and thorough cleaning for various vertical and smooth surfaces, including windows, tiles, and glass. Featuring advanced technologies such as 4 water spray nozzles, 3 pressure compartments for enhanced suction, and 13 smart sensors for precise edge detection, the W9 ensures a comprehensive cleaning experience. Its intelligent path planning and self-regulating suction power adapt to different dirt levels, making window cleaning effortless and safe.
Important Safety Precautions
Always ensure the safety rope is securely attached to a solid object before operating the robot, especially for high-rise windows. The device is equipped with an emergency backup battery for power-off protection, providing approximately 20 minutes of additional power to prevent falls.
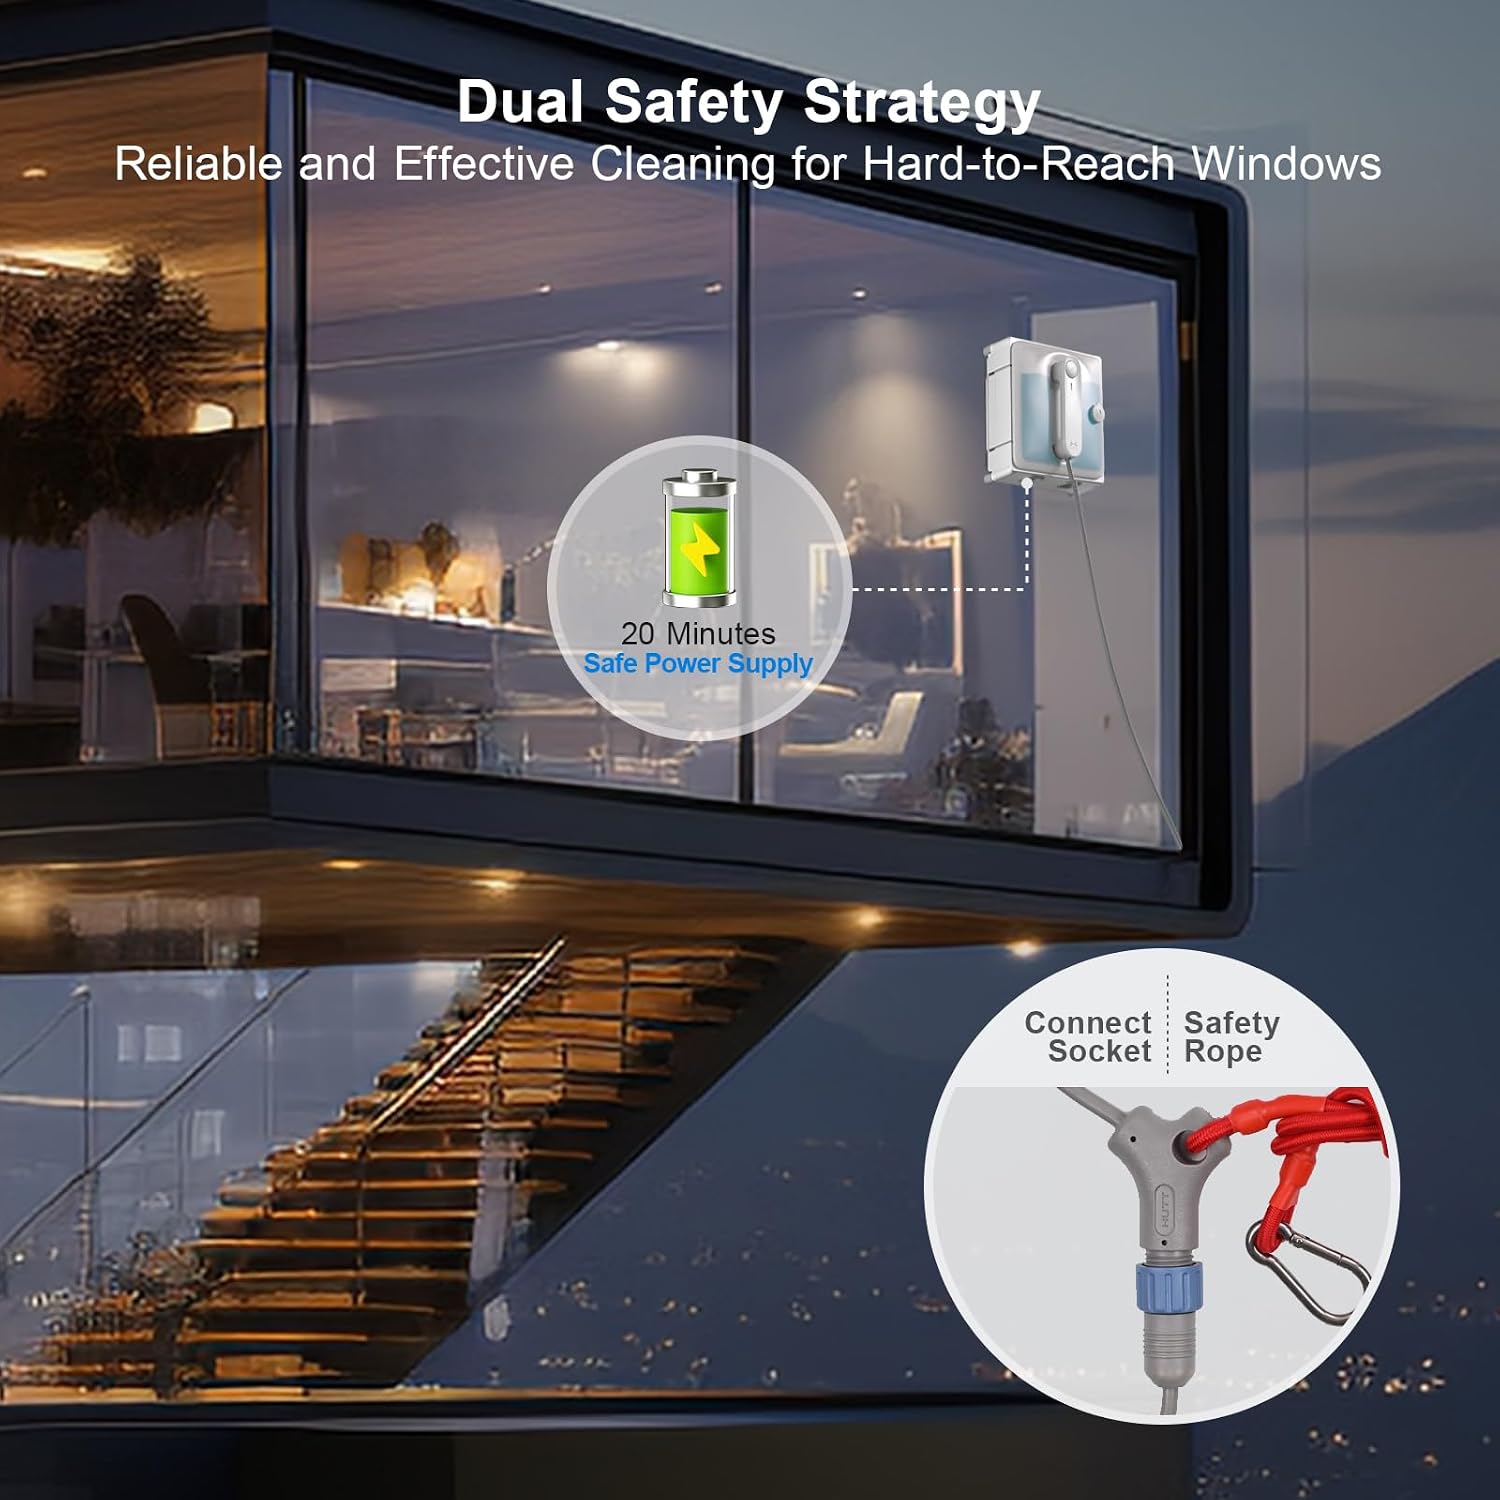
This image illustrates the dual safety strategy of the HUTT W9, highlighting the 20-minute safe power supply from the internal battery and the secure connection of the safety rope to a solid anchor point.
Operating Conditions
The HUTT W9 is designed to work on VERTICAL and smooth surfaces ranging from 24 inches up to 15 feet. Ensure the surface has a right-angled frame thicker than 6mm, without beveled or rounded edges or silicone protecting strips, for optimal performance and safety.
What's Included
Your HUTT W9 package includes:
- HUTT W9 Window Cleaning Robot
- Cleaning Pads (multiple)
- Remote Control
- Measuring Bottle
- Power Adaptor
- Power Cable
- Safety Rope

This image displays the complete set of items included with the HUTT W9, neatly organized within its storage box, including the robot, cleaning pads, remote control, and power accessories.
Getting Started
1. Attach the Cleaning Pad
Attach a clean cleaning pad to the bottom of the device. Ensure it is tight and flat to prevent air leakage. Avoid covering the detectors at the four corners.
2. Fill the Water Tank
Fill the 150ML water tank with plain water or a glass cleaner and water mixture (1:1 dilution ratio).
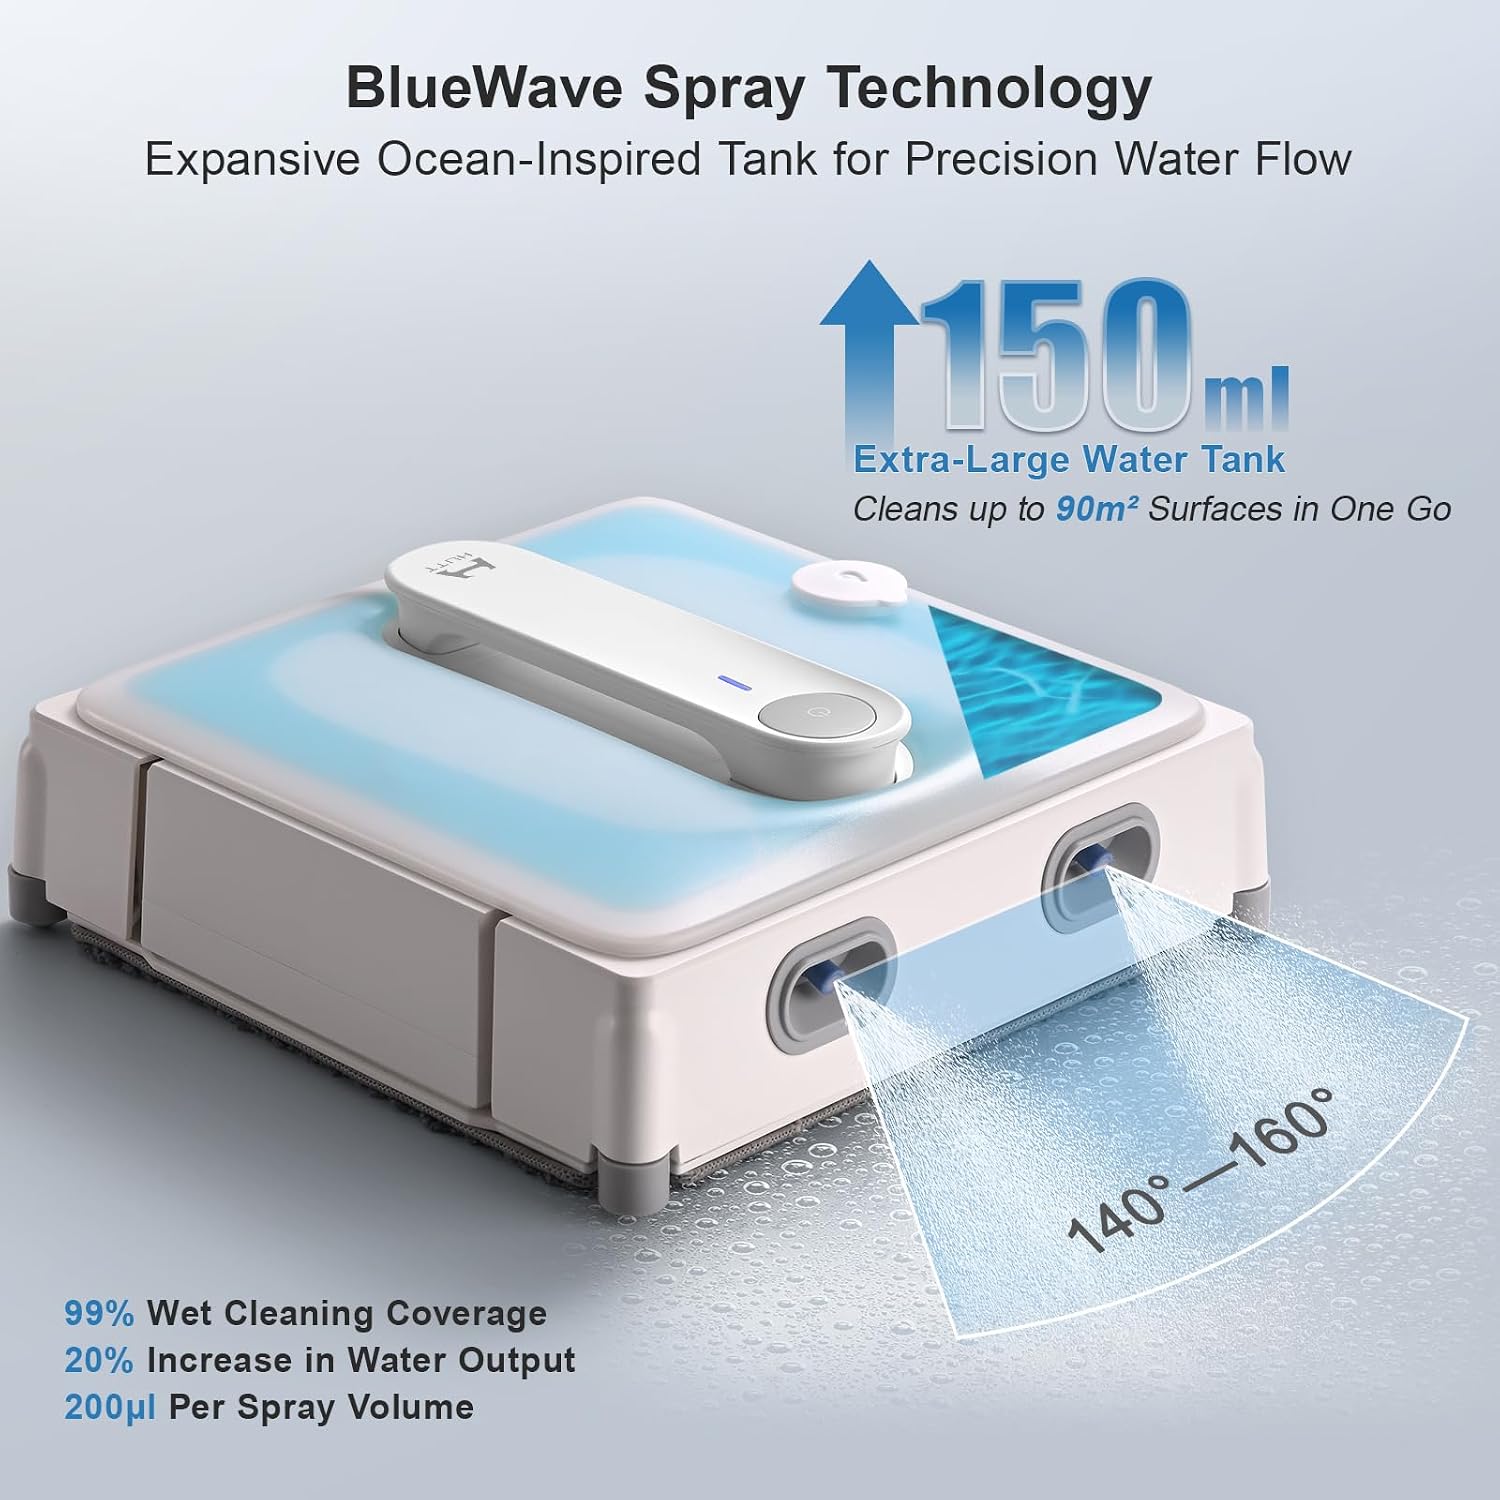
This image highlights the 150ml extra-large water tank and the four spray nozzles, demonstrating the robot's ability to spray sufficient water for effective cleaning.
3. Connect to Power
Connect the device to the adaptor, insert the plug cable into the adaptor, and plug it into a wall socket.
4. Attach the Safety Rope
Securely attach the safety rope to a solid object. Wrap it around the object for one or two more circles for added security.
5. Start the Device
After turning on the bottom switch, press the start button for more than 1 second to activate the device. Once the device is securely attached to the glass, release your hand and click the power button to begin cleaning.
This video demonstrates the initial setup and starting procedure for the HUTT W9, including attaching the pad, filling the water tank, connecting power, securing the safety rope, and initiating the cleaning process.
Operating Instructions
Intelligent Path Planning
The device is turned on with water spray and defaults to a "Z"-shaped cleaning path for wide windows. For narrow glass surfaces with a width less than 60cm, it is recommended to switch to the "N"-shaped cleaning path using the remote control.

This image illustrates the smart climbing technology and the dual cleaning modes (N-shaped for narrow windows and Z-shaped for wide windows) that the robot utilizes for efficient path planning.
Wet Wiping Mode
In wet wiping mode, the device dynamically adjusts the spraying angle and frequency according to the size of the glass, ensuring optimal coverage.
Using the Remote Control
The remote control allows for manual guidance and mode switching:
- Press the direction keys on the remote to move the device up/down/left/right. Note that water will not spray during manual remote operation.
- Press the "x1" key on the remote to restart wiping from the current position.
- Press the "N/Z wipe switch" key on the remote to switch between N-shaped and Z-shaped cleaning paths.
- Press the "cycle cleaning" button on the remote, and the device will clean at a fixed point.

This image shows the remote control and its function in guiding the robot for additional cleaning modes and manual movement.
Removing the Device
To remove the device, hold the handle and press the start button. When the working sound of the device is reduced, carefully take off the device and switch it off. If the device returns to a place out of your reach, use the remote control to guide it to a convenient location for removal.
Care and Cleaning
Clean and Replace the Cleaning Pad
Take the dirty pad off the device. Soak it in clean water for 2 minutes, then brush the dirt off with a soft brush. Lay it flat to dry without wringing it out.
Clean the Chassis
Clean the Air Suction Port:
Wipe it clean with a dry cloth to prevent damage to the suction.
Clean the Squeegee Blades:
Clean the blades with a dry cloth to maintain its cleaning performance.
Important: Always put the device with the pad facing up when not in use. Otherwise, particles and other substances will stick to the pad and wheels, which may scratch the glass in the next use.

This image shows the underside of the robot with accumulated dirt on the pad and wheels, emphasizing the need for regular cleaning to prevent scratching surfaces.
Clean the Wheels
Clean the wheels when they get dirty. Long press the start button until the wheels start rotating, then use a wet wipe to wipe off the dirt on the wheels.
Common Issues and Solutions
Robot not adhering to the glass or falling
- Ensure the cleaning pad is attached tightly and flat, without air leakage.
- Verify the power cable is securely connected and the device is receiving continuous power.
- For very wet glass, wipe off excess moisture at the attachment point before placing the robot.
- Check for any obstructions or debris on the suction ports or cleaning pads that might reduce suction.
Streaks or incomplete cleaning
- Ensure the cleaning pads are clean and not overly saturated or dry. Replace dirty pads with new, clean ones.
- Use the recommended water or 1:1 glass cleaner and water mixture. Avoid using too much or too little cleaner.
- For severely dirty windows, perform a dry-wiping cycle first, then a wet-wiping cycle with a new, clean cloth.
- Ensure the squeegee blades are clean and free of debris.
Robot not moving or responding to remote
- Check if the device is properly powered on and connected.
- Ensure the remote control batteries are not depleted.
- Verify there are no physical obstructions preventing movement.
Product Specifications
| Feature | Detail |
|---|---|
| Brand | HUTT |
| Model Name | W9 |
| Suction Power | 1800Pa to 3800Pa (Self-regulating) |
| Water Tank Capacity | 150ML |
| Spray Nozzles | 4 |
| Sensors | 13 High-Precision Edge Detection & Collision Sensors |
| Battery Life | 30 minutes (Emergency Backup) |
| Product Dimensions | 1"L x 1"W x 1"H |
| Item Weight | 8.69 pounds |
Storing Your Device
After each cleaning, drain any remaining water from the water tank. Remove the dirty pad and either clean it or replace it with a new one for the next use. Before storing the device, place it in a dry, ventilated, and cool place for 1-2 days to totally disperse any water vapor inside the device. Once dry, store it in its original packaging or a suitable storage case.
Warranty and Customer Support
The HUTT W9 comes with a 12-month warranty. For any inquiries or support, you may contact HUTT US Store. Before placing an order, you may contact us with a picture of your window to double-check if the robot would work perfectly on it. This would greatly make the most out of the robot and save time.
For additional support or to purchase accessories, please visit the official HUTT Store: HUTT US Store.


