
Introduction
This manual provides comprehensive instructions for the safe and effective use of your LeLuv Magna Pro+ Electric Penis Pump. This device features an LCD Smart Handheld controller, USB rechargeable battery, wide flange, and an untapered clear acrylic cylinder, designed for consistent vacuum performance and ease of use.
Safety Information
General Safety Guidelines
- Consult a healthcare professional before use, especially if you have pre-existing medical conditions.
- Do not exceed recommended vacuum levels or session durations.
- Discontinue use immediately if you experience pain, discomfort, or unusual sensations.
- Keep out of reach of children.
- This device is for adult use only.
- Clean the device thoroughly before and after each use.
- Do not use if any part of the device is damaged.
Components
Display Screen and Buttons Overview

This image illustrates the various components of the LeLuv Magna Pro+ handheld controller, including the LCD display and control buttons.
- 1. Battery Charge Indicator: Displays current battery level.
- 2. Current Vacuum (inHg or mmHg): Shows the real-time vacuum pressure.
- 3. Manual/Smart Modes Indicator: Shows the active operating mode.
- 4. Power Button: Turns the device on/off.
- 5. Vacuum Release Valve: Releases vacuum pressure.
- 6. Smart Button: Activates Smart Modes and saves custom presets.
- 7. Vacuum Unit Button: Toggles between inHg and mmHg units.
Cylinder and Tubing

This image shows the wide flange design of the acrylic cylinder, highlighting the contact surface and inside diameter.
The device includes a seamless 3mm-thick clear acrylic cylinder with a wide flange design for a secure seal. The cylinder features printed inch and centimeter markings for monitoring progress.

This image displays the durable, non-collapsable silicone tubing with a slippery coating for easy handling.
An 18-inch slippery-coated silicone hose connects the pump to the cylinder, featuring quick-disconnect fittings.
Setup
Connecting the Cylinder

This image demonstrates how to connect the male fitting to the cylinder by pushing the metal tab inward until it clicks, ensuring an airtight lock.
- To unlock the fitting, push the metal tab inward.
- When you hear a "click" of the pin, the fitting is unlocked and ready to be connected.
- Insert the male fitting into the cylinder's connection point. This will push the pin down and cause the metal tab to "click" outward again.
- The fittings should now be locked and air-tight.
- Proper use of the fittings will prevent damage to your O-rings.
Charging the Device
The device is USB rechargeable. Connect the provided USB-C cable to the charging port and a suitable power source.
The LED light will flash while charging and glow solid when fully charged.
Operation
Manual Mode
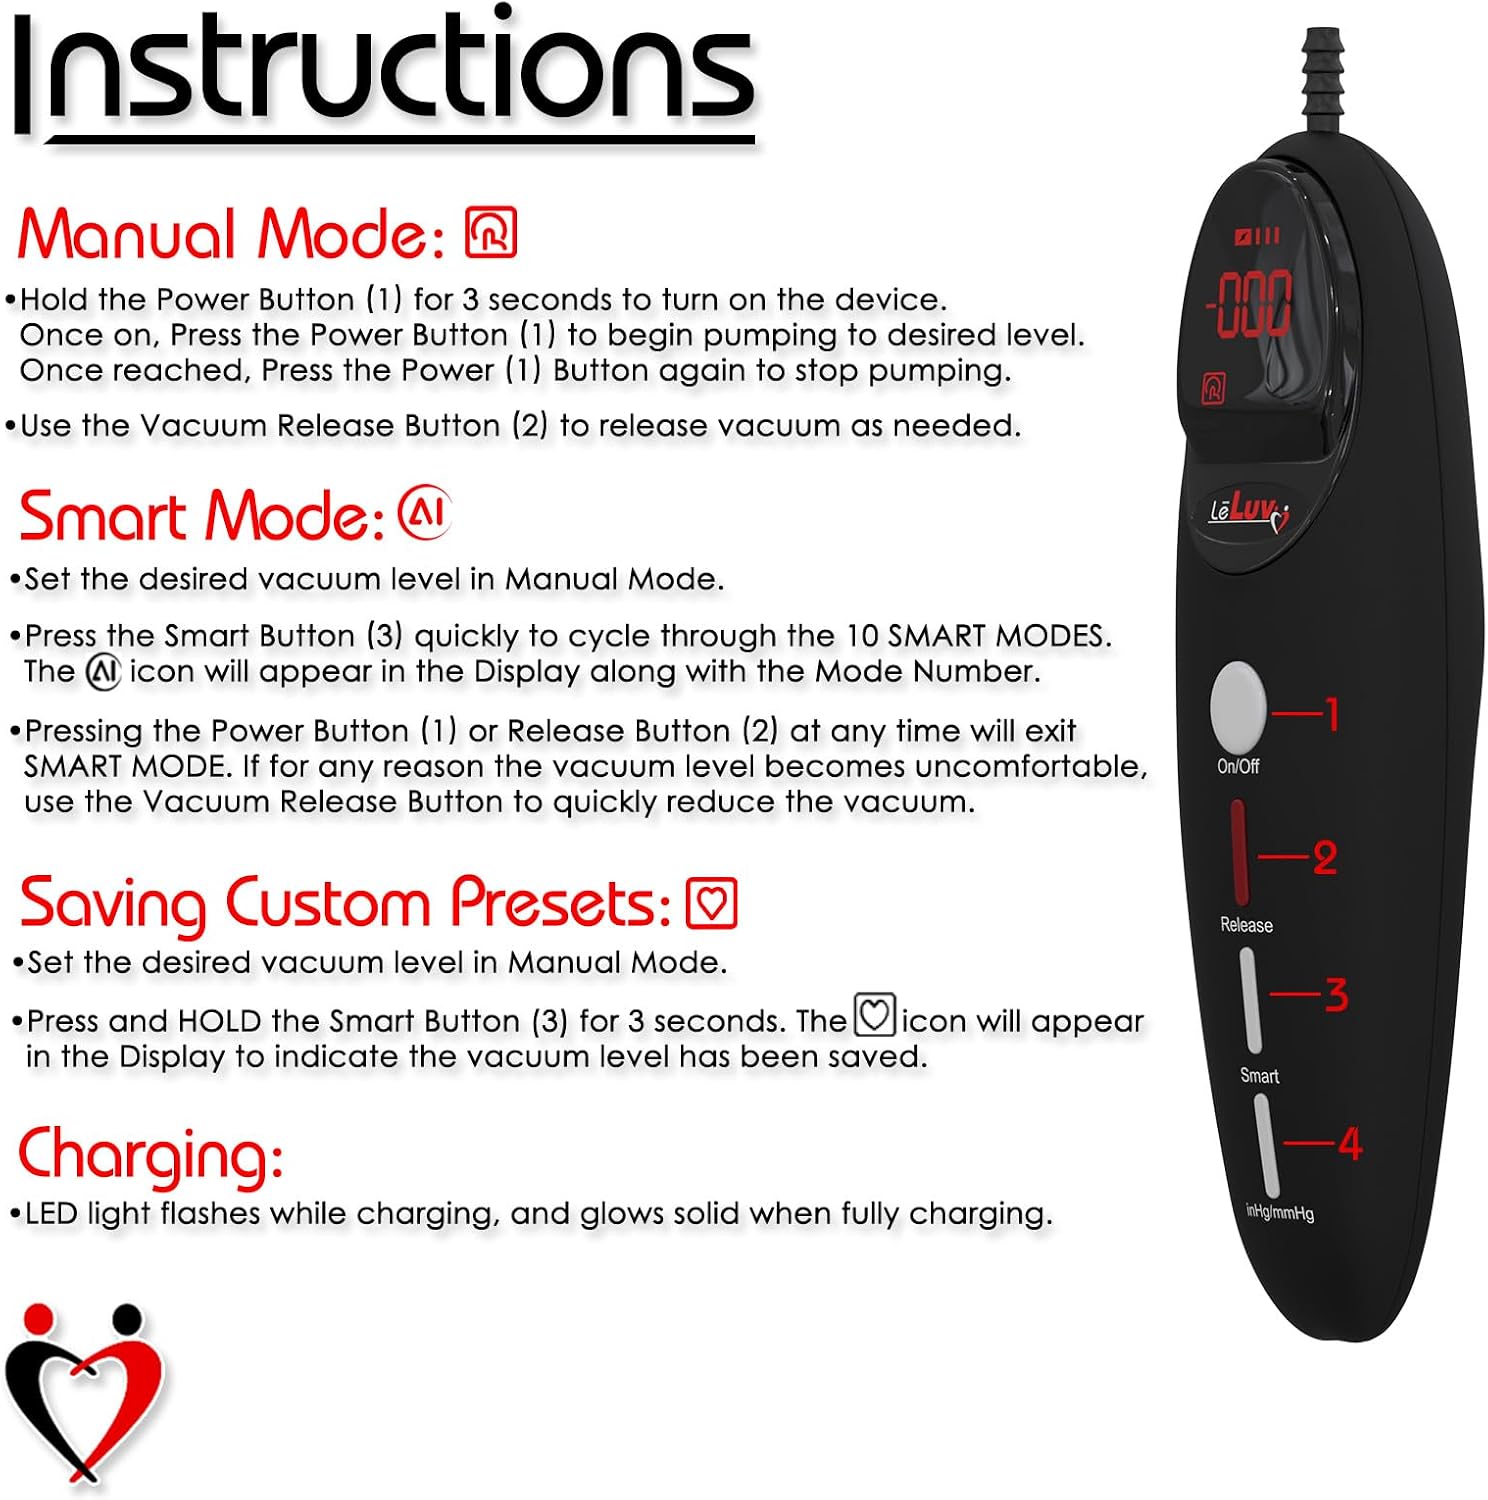
This image provides a visual guide for operating the device in Manual Mode.
- Hold the Power Button (1) for 3 seconds to turn on the device.
- Once on, press the Power Button (1) to begin pumping to the desired vacuum level.
- Once the desired level is reached, press the Power Button (1) again to stop pumping.
- Use the Vacuum Release Button (2) to release vacuum as needed.
Smart Mode

This image details the various Smart Modes available on the device, including how to save custom values and cycle through modes.
The desired vacuum level must be set in Manual Mode before entering Smart Mode.
- Press the Smart Button (3) quickly to cycle through the 10 Smart Modes. The Smart Mode icon will appear on the display along with the Mode Number.
- Pressing the Power Button (1) or Release Button (2) at any time will exit Smart Mode.
- If the vacuum level becomes uncomfortable, use the Vacuum Release Button to quickly reduce the vacuum.
Saving Custom Presets
Set the desired vacuum level in Manual Mode.
Press and HOLD the Smart Button (3) for 3 seconds. The "heart" icon will appear on the display to indicate the vacuum level has been saved.
Smart Mode Details Table

This table outlines the various Smart Modes (0-9), their names, vacuum levels, hold durations, cycle counts, and total session times.
Disassembly and Cleaning
Disconnecting the Cylinder

This image demonstrates how to disconnect the hose from the cylinder by pushing the metal tab inward.
- To disconnect the hose, push the metal tab inward.
- When you hear a "click" of the pin, the fitting is unlocked and ready to be disconnected.
- Proper use of the fittings will prevent damage to your O-rings.
Cleaning Instructions
After each use, disassemble the cylinder and hose. Wash all components with warm water and a mild, antibacterial soap. Rinse thoroughly and allow to air dry completely before storage.
Do not submerge the handheld controller in water. Wipe it clean with a damp cloth.
Troubleshooting
Common Issues and Solutions
- Device not turning on: Ensure the device is fully charged. If the issue persists, contact customer support.
- No vacuum or weak vacuum: Check all connections to ensure they are airtight. Ensure the cylinder is properly sealed against the skin. Inspect the silicone hose and cylinder for any cracks or damage.
- Vacuum not holding: Verify that the quick-disconnect fittings are securely locked. Check for any leaks around the cylinder flange or hose connections.
- Display not working: Ensure the device is charged. If the display remains unresponsive, contact customer support.
Specifications
| Feature | Detail |
|---|---|
| Model | Magna Pro+ |
| Cylinder Size | 12" x 2.25" |
| Color | Red |
| Brand | LeLuv |
| Vacuum Range | 0 to -18 inHg (60 KPA) |
| Display | LCD Smart Handheld |
| Charging | USB Rechargeable (USB-C) |
| Cylinder Material | 3mm-thick Clear Acrylic |
| Hose Length | 18 inches |
| UPC | 195023211592 |
| First Available | January 27, 2023 |
Cylinder Size Guide

This table provides a guide for selecting the appropriate cylinder diameter based on measured circumference.
Warranty and Support
Warranty Information
For detailed warranty information, please refer to the product packaging or contact LeLuv customer service directly. Warranty terms may vary.
Customer Support
If you have any questions, require assistance, or encounter issues not covered in this manual, please contact LeLuv customer support through their official website or the retailer where the product was purchased.