
1. Introduction
The AITRIP ESP32-WROOM-32 Development Board is a versatile and powerful module designed for a wide range of applications, including smart home devices, mobile IoT, and mesh networking. It integrates dual-mode WiFi and Bluetooth connectivity, an ultra-low power consumption design, and a CP2102 USB-to-serial chip for easy programming via a Type-C interface. This manual provides essential information to help you get started with your development board.
2. Product Overview
The ESP32-WROOM-32 module is an MCU module that supports both low-power Bluetooth and WiFi connectivity. It features an integrated SPI flash for data storage and an onboard PCB antenna. The board's design facilitates efficient wireless communication and data transfer, making it suitable for various embedded projects.

Figure 2.1: Front and Back View of the ESP32-WROOM-32 Development Board.
3. Package Contents
Verify that all items are present in your package:
- 10 x AITRIP 30Pin CP2102 Type-C ESP-WROOM-32 Dual Core ESP-32 Development Board
4. Specifications
Key technical specifications for the ESP32-WROOM-32 Development Board:

Figure 4.1: ESP32-WROOM-32 Development Board Pinout and Interface Details.
| Feature | Detail |
|---|---|
| Working Voltage | TYPE-C 5V |
| SPI FLASH | Default 32MBIT (4MB) |
| Serial Port Speed | 115200BPS |
| Frequency Range | 2412-2484MHZ |
| Bluetooth Protocol | Bluetooth 4.2 BR/EDR and BLE standards |
| WiFi Protocol | 802.11B/G/N |
| Antenna Form | Onboard PCB antenna, gain 2DB |
| Supported Interfaces | UART, SPI, SDIO, I2C, PWM, I2S, IR, ADC, DAC |
| Product Dimensions (LxWxH) | 54 x 28 x 10mm (2.12 x 1.10 x 0.39 inches) |
| Number of Processors | 2 (Dual Core) |
| USB Interface | Type-C |
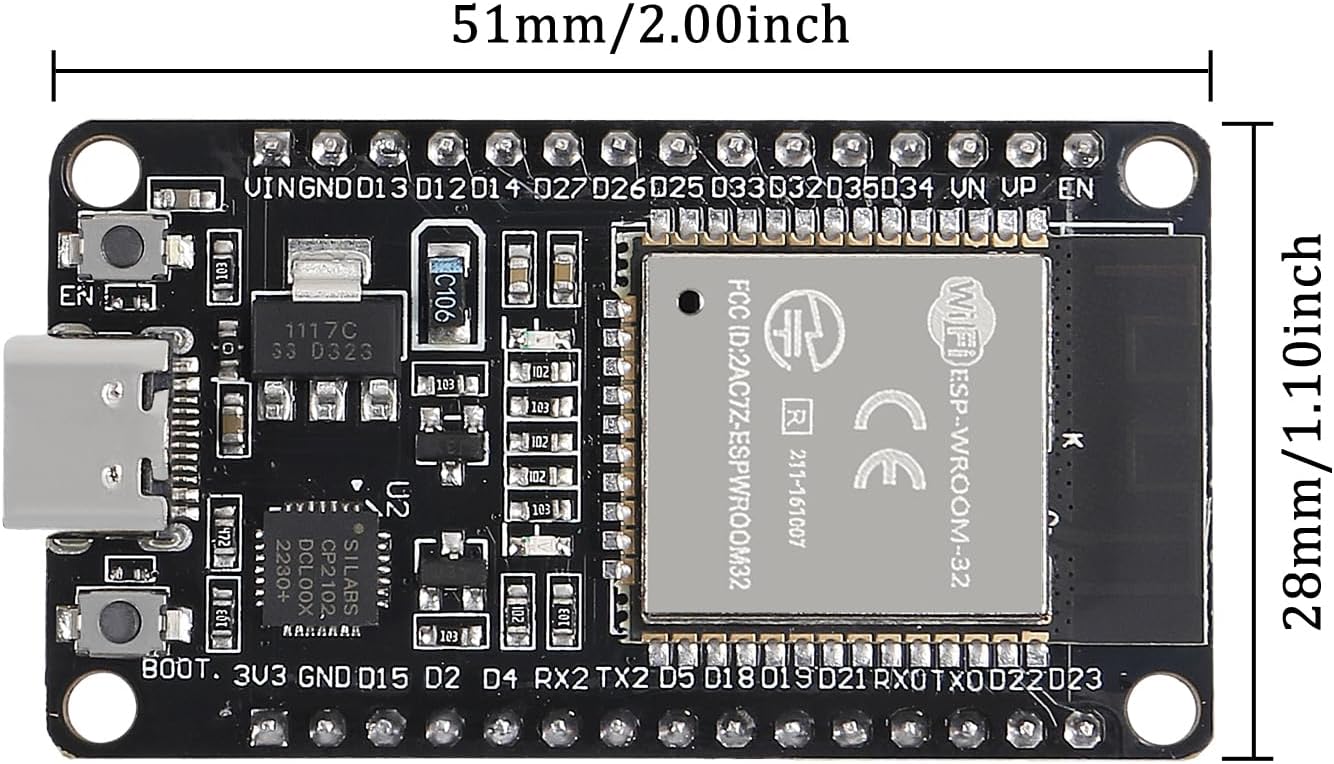
Figure 4.2: Physical Dimensions of the Development Board.
5. Setup Guide
Follow these steps to set up your ESP32-WROOM-32 Development Board:
- Driver Installation: The board uses a CP2102 USB-to-serial chip. Before connecting the board, download and install the appropriate CP210x drivers for your operating system from the Silicon Labs website.
- Connect the Board: Use a Type-C USB cable to connect the development board to your computer. Ensure the cable is capable of data transfer, not just charging.
- Integrated Development Environment (IDE) Setup:
- Arduino IDE: Download and install the Arduino IDE. Add ESP32 board support by navigating to File > Preferences, then adding
https://raw.githubusercontent.com/espressif/arduino-esp32/gh-pages/package_esp32_index.jsonto the "Additional Board Manager URLs." Go to Tools > Board > Board Manager, search for "ESP32," and install the package. Select the correct board (e.g., "ESP32 Dev Module") and COM port under Tools > Board and Tools > Port. - ESP-IDF: For more advanced development, consider using Espressif IoT Development Framework (ESP-IDF). Follow the official Espressif documentation for installation and setup.
- ESPHome: For Home Assistant integration and easy configuration, ESPHome is a popular choice. Visit the ESPHome website for detailed installation and usage instructions.
- Arduino IDE: Download and install the Arduino IDE. Add ESP32 board support by navigating to File > Preferences, then adding
- Power Supply: The board is powered via the Type-C USB port. Ensure your USB power source provides a stable 5V.
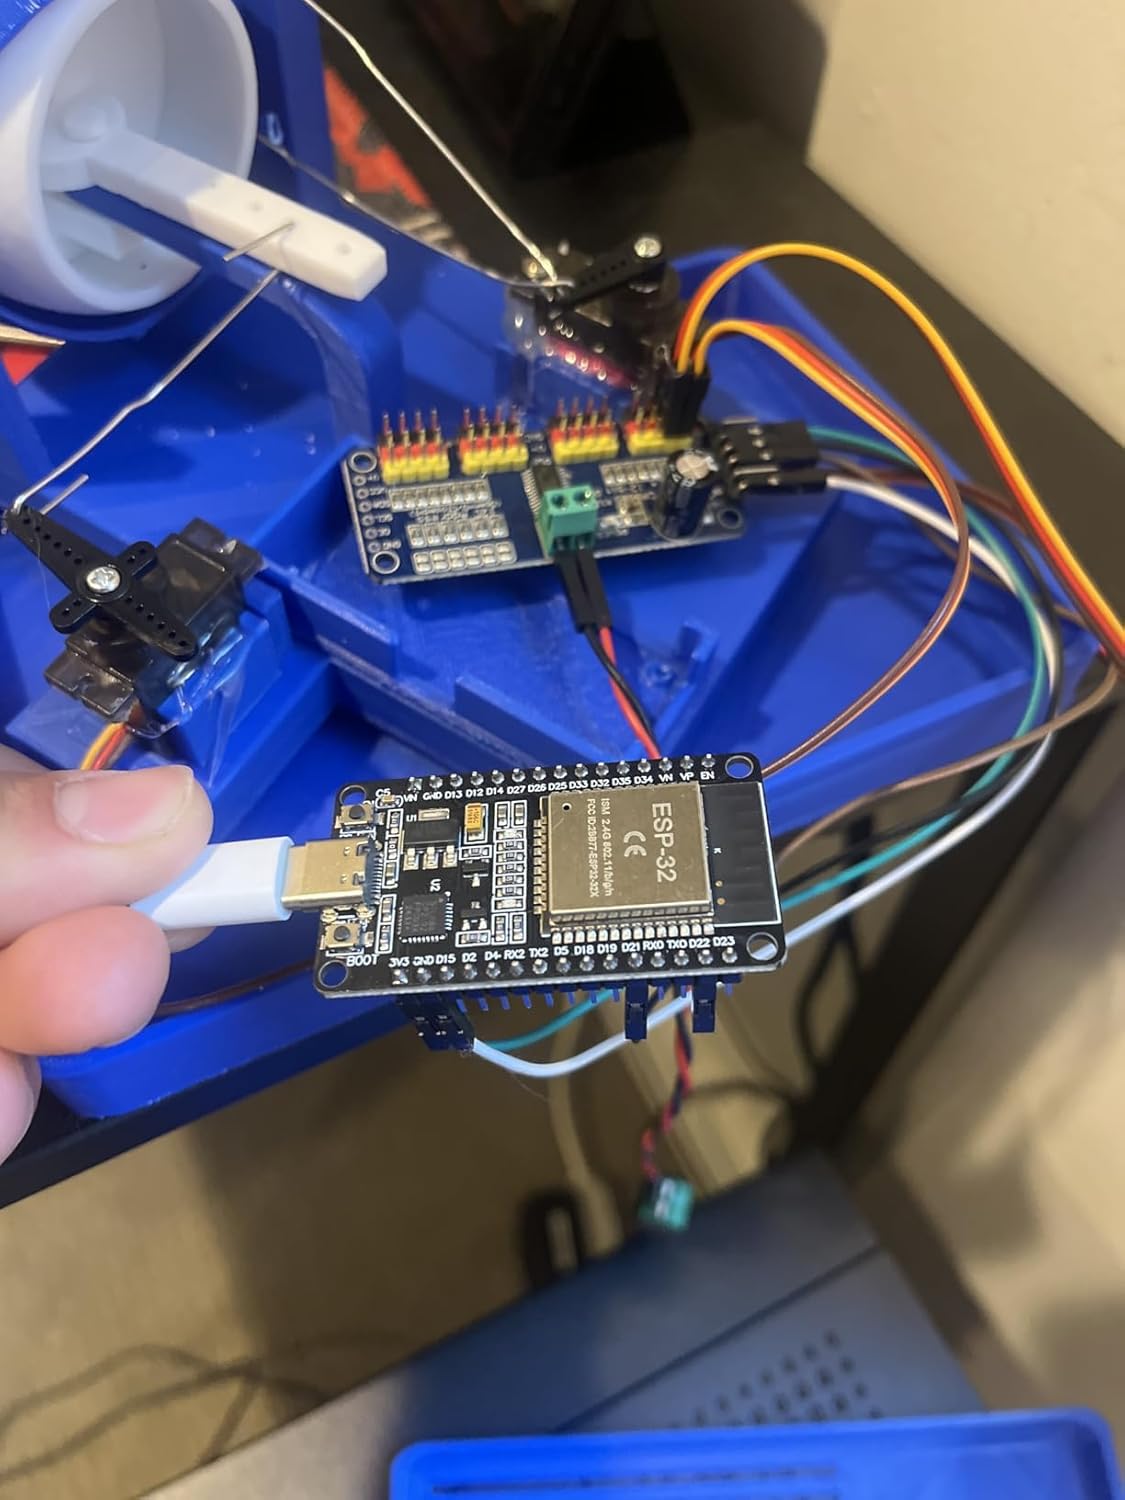
Figure 5.1: ESP32-WROOM-32 Board in a typical project setup.
6. Operating Instructions
Once set up, the ESP32-WROOM-32 board can be programmed to perform various tasks:
- Programming: Upload your compiled code (firmware) to the board using the Arduino IDE, ESP-IDF, or ESPHome tools. The CP2102 chip handles the serial communication for flashing.
- WiFi Connectivity: Utilize the integrated 802.11b/g/n WiFi to connect to local networks, access the internet, or create an access point (AP) for other devices.
- Bluetooth Connectivity: Leverage Bluetooth 4.2 BR/EDR and BLE (Bluetooth Low Energy) for short-range wireless communication with other Bluetooth-enabled devices, such as mobile phones or sensors.
- GPIO Usage: The 30 pins provide access to various General Purpose Input/Output (GPIO) pins, allowing you to connect sensors, actuators, displays, and other peripherals using interfaces like UART, SPI, I2C, PWM, ADC, and DAC.
- Low Power Modes: The ESP32 is designed for ultra-low power consumption. Implement deep sleep or light sleep modes in your code to conserve power for battery-operated applications.
7. Maintenance
Proper care ensures the longevity and reliable operation of your development board:
- Handling: Handle the board by its edges to avoid touching components, especially the ESP32 module, which can be sensitive to electrostatic discharge (ESD).
- Storage: Store the board in an anti-static bag when not in use, away from moisture, dust, and extreme temperatures.
- Cleaning: If necessary, gently clean the board with a soft, dry brush or compressed air. Avoid using liquids.
- Firmware Updates: Regularly check for updates to the ESP32 core for Arduino, ESP-IDF, or ESPHome to benefit from bug fixes, new features, and performance improvements.
8. Troubleshooting
If you encounter issues, consider the following troubleshooting steps:
- Board Not Detected: Ensure CP210x drivers are correctly installed. Try a different USB Type-C cable and USB port. Restart your computer.
- Failed to Upload/Flash:
- Verify the correct board and COM port are selected in your IDE.
- Ensure the board is in flashing mode. Some boards require holding the BOOT button while pressing and releasing the EN (RESET) button, then releasing BOOT.
- Check for power supply issues.
- WiFi/Bluetooth Connection Issues:
- Double-check network credentials (SSID, password).
- Ensure the antenna is not obstructed.
- Verify the code correctly initializes and manages the WiFi/Bluetooth modules.
- Unexpected Behavior: Review your code for logical errors. Check power supply stability. Consult online forums and communities for ESP32 development, as many common issues have documented solutions.
9. Warranty and Support
For specific warranty information and technical support, please refer to the AITRIP official seller page on Amazon or contact the seller directly through the Amazon platform. Keep your purchase records for any warranty claims.
Online resources and community forums for ESP32 development are also excellent sources for assistance and project ideas.
