
1. Introduction
Thank you for purchasing the Yoidesu 2.7K HD Camcorder. This manual provides detailed instructions for the proper use, setup, and maintenance of your device. Please read this manual thoroughly before operating the camcorder to ensure optimal performance and longevity.
2. Safety Information
- Do not expose the camcorder to water or moisture.
- Avoid dropping the device or subjecting it to strong impacts.
- Keep out of reach of children.
- Use only the specified battery type (NP-40 3.7V 1500mAh lithium battery).
- Do not attempt to disassemble or modify the camcorder.
- Clean the lens with a soft, dry cloth.
3. Package Contents
Verify that all items are present in your package:
- Yoidesu 2.7K HD Camcorder
- User Manual
- Battery (NP-40 3.7V 1500mAh lithium battery)
- USB Cable
- Storage Bag

Image: Yoidesu 2.7K HD Camcorder with included accessories.
4. Product Overview
The Yoidesu 2.7K HD Camcorder is designed for capturing high-quality video and photos. Key features include:
- 2.7K Video Resolution and 50MP Image Resolution
- 2.8-inch TFT LCD Rotatable Screen (270-degree rotation)
- 16x Digital Zoom
- Built-in LED Fill Light
- Webcam Functionality via USB
- Support for Recording While Charging
- 1/4 inch Threaded Connector for Tripod Mounting
- Multiple functions: Face Recognition, Timer Shooting, Self-Timer, Continuous Shooting, Silent Shooting, Pause Function, Delay Recording.

Image: Front view of the camcorder, highlighting the lens and screen.

Image: Side view of the camcorder with the screen open, showing control buttons and ports.
5. Setup
5.1. Battery Installation
- Locate the battery compartment on the bottom of the camcorder.
- Slide the battery compartment cover to open it.
- Insert the provided NP-40 lithium battery, ensuring the correct orientation.
- Close the battery compartment cover until it clicks securely.

Image: Steps for installing the battery into the camcorder.
Video: Demonstrates the process of installing the battery, powering on, and using the screen rotation and zoom functions.
5.2. Powering On/Off
To power on the camcorder, open the LCD screen. To power off, close the LCD screen or press and hold the power button (if available, refer to specific button layout).
5.3. Memory Card Installation (Not Included)
This camcorder requires a compatible SD card (not included) for storing videos and photos. Locate the SD card slot, typically near the battery compartment or under the LCD screen. Insert the SD card with the contacts facing the correct direction until it clicks into place.
6. Operating Instructions
6.1. Basic Video Recording
- Ensure the camcorder is powered on and a memory card is inserted.
- Open the LCD screen and rotate it to your desired viewing angle.
- Press the Record button (usually marked with a red dot) to start recording.
- Press the Record button again to stop recording.

Image: The camcorder's rotatable screen displaying a live view, demonstrating its 2.7K video capability.
6.2. Digital Zoom (16x)
Use the zoom lever (marked 'W' for Wide and 'T' for Telephoto) to adjust the 16x digital zoom. Slide the lever towards 'T' to zoom in and towards 'W' to zoom out.

Image: Visual representation of the 16x digital zoom feature, showing a zoomed-in comparison.
6.3. Webcam Function
Connect the camcorder to your computer using the provided USB cable. The camcorder can be used as a webcam for video calls or live streaming. Select the webcam mode on the camcorder if prompted, or select it as the video input device in your computer's software settings.

Image: The camcorder functioning as a webcam, connected to a laptop for video calls.
6.4. Built-in LED Fill Light
Activate the built-in LED fill light for improved illumination in low-light conditions. Refer to the camcorder's button layout for the specific light control button.

Image: Demonstrates the effect of the built-in LED fill light, showing improved clarity with the light on.
6.5. Recording While Charging
The camcorder supports recording while connected to a power source via the USB cable. This feature allows for extended shooting sessions without interruption due to battery depletion.

Image: The camcorder actively recording video while connected to a power source for continuous operation.
6.6. Tripod Mounting
A standard 1/4 inch threaded connector is located on the bottom of the camcorder. This allows for mounting the device on a tripod (not included) for stable video recording and photography.
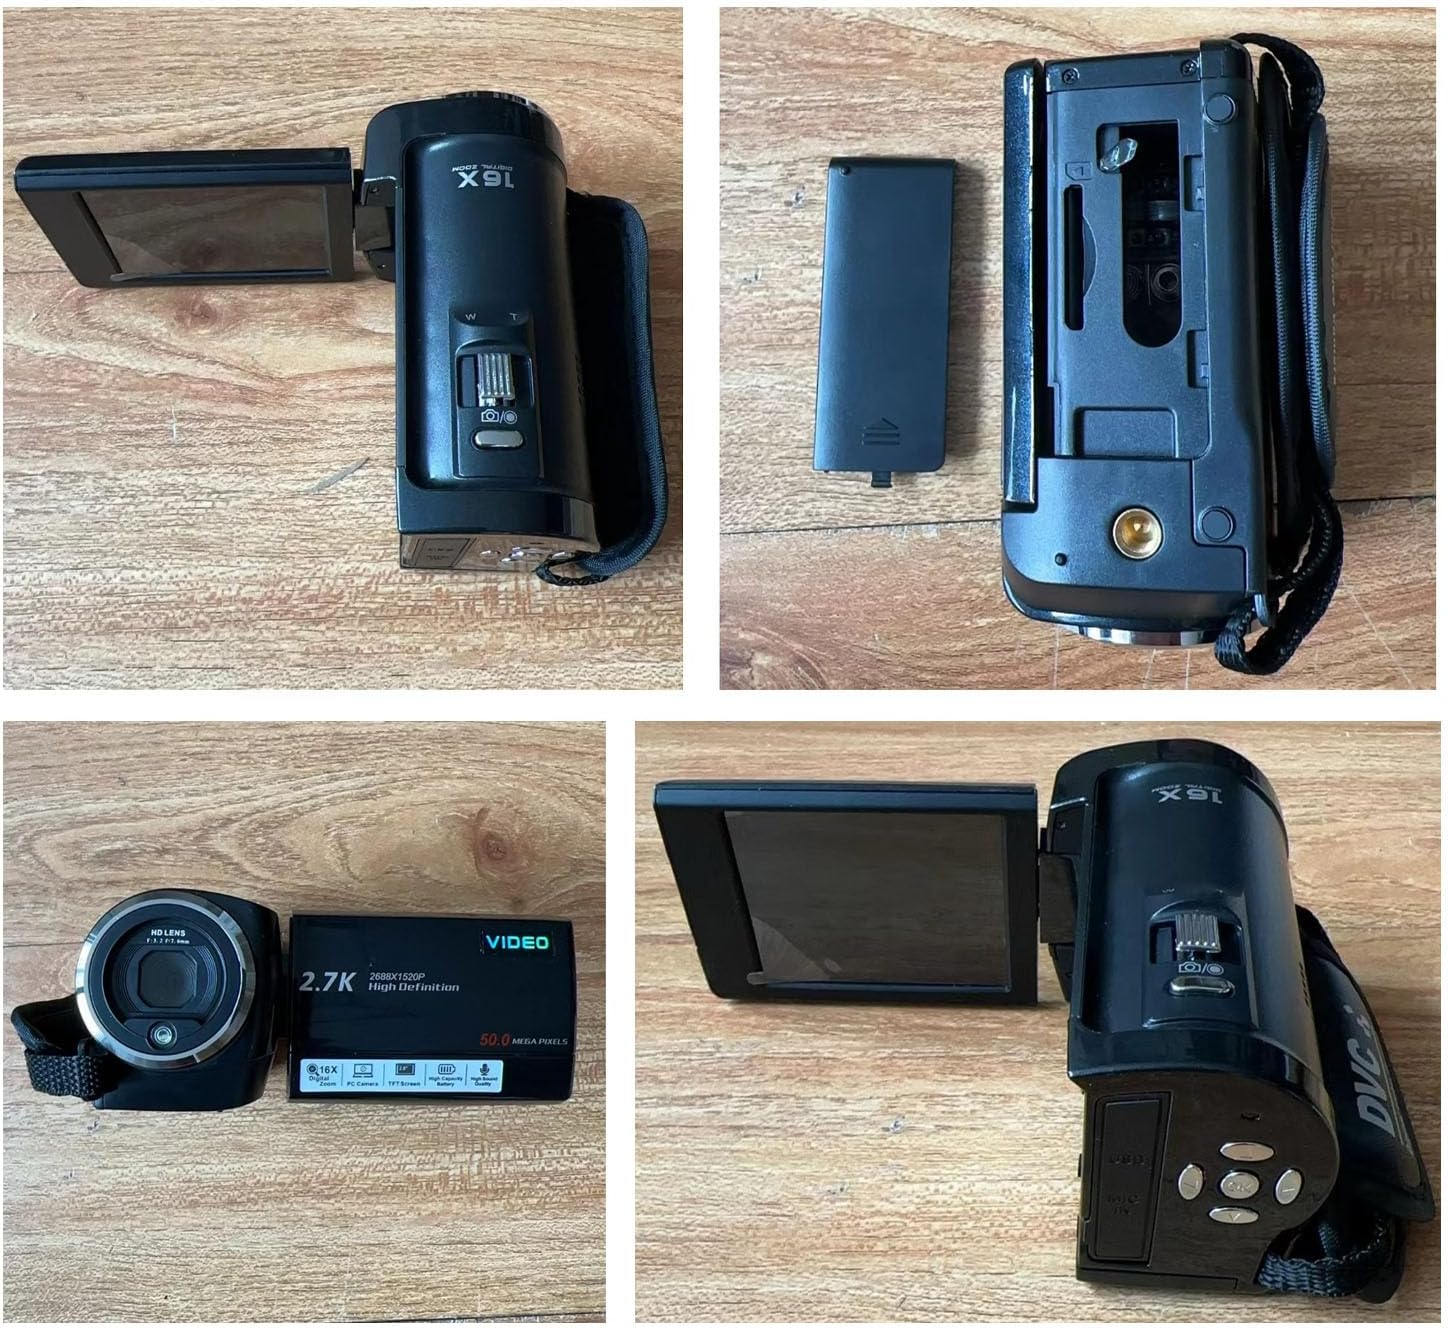
Image: The bottom of the camcorder, showing the 1/4 inch threaded connector for tripod attachment.
6.7. Additional Functions
The camcorder includes several advanced features:
- Face Recognition: Automatically detects and focuses on faces.
- Timer Shooting: Set a delay before taking a photo.
- Self-Timer: Allows for delayed photo capture.
- Continuous Shooting: Capture multiple photos in quick succession.
- Silent Shooting: Disables shutter sounds.
- Pause Function: Temporarily pause video recording.
- Delay Recording: Start recording after a set delay.

Image: Overview of the camcorder's multi-functional capabilities, including photo, face detection, selfie, and continuous shooting modes.
7. Maintenance
- Cleaning: Use a soft, lint-free cloth to clean the camcorder body. For the lens, use a specialized lens cleaning cloth and solution.
- Storage: When not in use, store the camcorder in a dry, cool place, away from direct sunlight and extreme temperatures. Remove the battery if storing for extended periods.
- Battery Care: Fully charge the battery before first use. Avoid completely draining the battery frequently to prolong its lifespan.
8. Troubleshooting
| Problem | Possible Solution |
|---|---|
| Camcorder does not power on. | Ensure the battery is correctly installed and fully charged. Try charging the camcorder with the USB cable. |
| Cannot record video/take photos. | Check if a memory card is inserted and has sufficient free space. Ensure the camcorder is in the correct mode (video or photo). |
| Poor image/video quality. | Clean the lens. Ensure adequate lighting; use the built-in fill light if necessary. Check resolution settings. |
| Camcorder not recognized as webcam. | Ensure the USB cable is securely connected. Select webcam mode on the camcorder. Check computer's device manager or camera settings. |
9. Specifications
| Feature | Detail |
|---|---|
| Video Resolution | Up to 2.7K |
| Image Resolution | 50 MP |
| Screen | 2.8 inch TFT LCD (270-degree rotatable) |
| Digital Zoom | 16x |
| Image Stabilization | Digital |
| Battery | NP-40 3.7V 1500mAh Lithium Battery |
| Recording Time (Full HD) | Up to 80 minutes |
| Webcam Function | Yes |
| Fill Light | Built-in LED |
| Tripod Mount | Standard 1/4 inch threaded connector |
| Dimensions | 5.51 x 3.94 x 3.15 inches |
| Item Weight | 13.5 ounces |
| Model Number | Yoidesu5ns20h3q8b |
10. Warranty and Support
Yoidesu products come with a standard manufacturer's warranty. For detailed warranty information, technical support, or service inquiries, please refer to the contact information provided on the product packaging or visit the official Yoidesu website.
Please retain your proof of purchase for warranty claims.