
1. Introduction
Thank you for choosing the Qcwwy Portable Solar Power Station. This device is a versatile and reliable power solution designed for outdoor activities, emergency backup, and general portable power needs. It features a 5000mAh rechargeable battery, a solar charging panel, and multiple output ports to power various electronic devices and LED lights. Please read this manual thoroughly before use to ensure proper operation and to maximize the lifespan of your product.
2. Safety Information
- Do not disassemble, repair, or modify the device. Improper assembly may cause fire or electric shock.
- Keep the device away from water, fire, and high temperatures.
- Ensure proper ventilation during use and charging to prevent overheating.
- Use only the provided charger and solar panel for charging.
- The integrated Battery Management System (BMS) protects against short circuits, overcurrent, undervoltage, and overheating. Do not attempt to bypass these safety features.
- Keep out of reach of children.
- Dispose of the product according to local regulations at the end of its life cycle.
3. Package Contents
Please check the package for the following items:
- 1 x Qcwwy Portable Solar Power Station
- 1 x Solar Panel (6V)
- 1 x AC Charger (100-240V)
- 1 x Remote Control
- 1 x 1-to-5 Connection Cable
- 3 x LED Light Bulbs
- 1 x User Manual (this document)
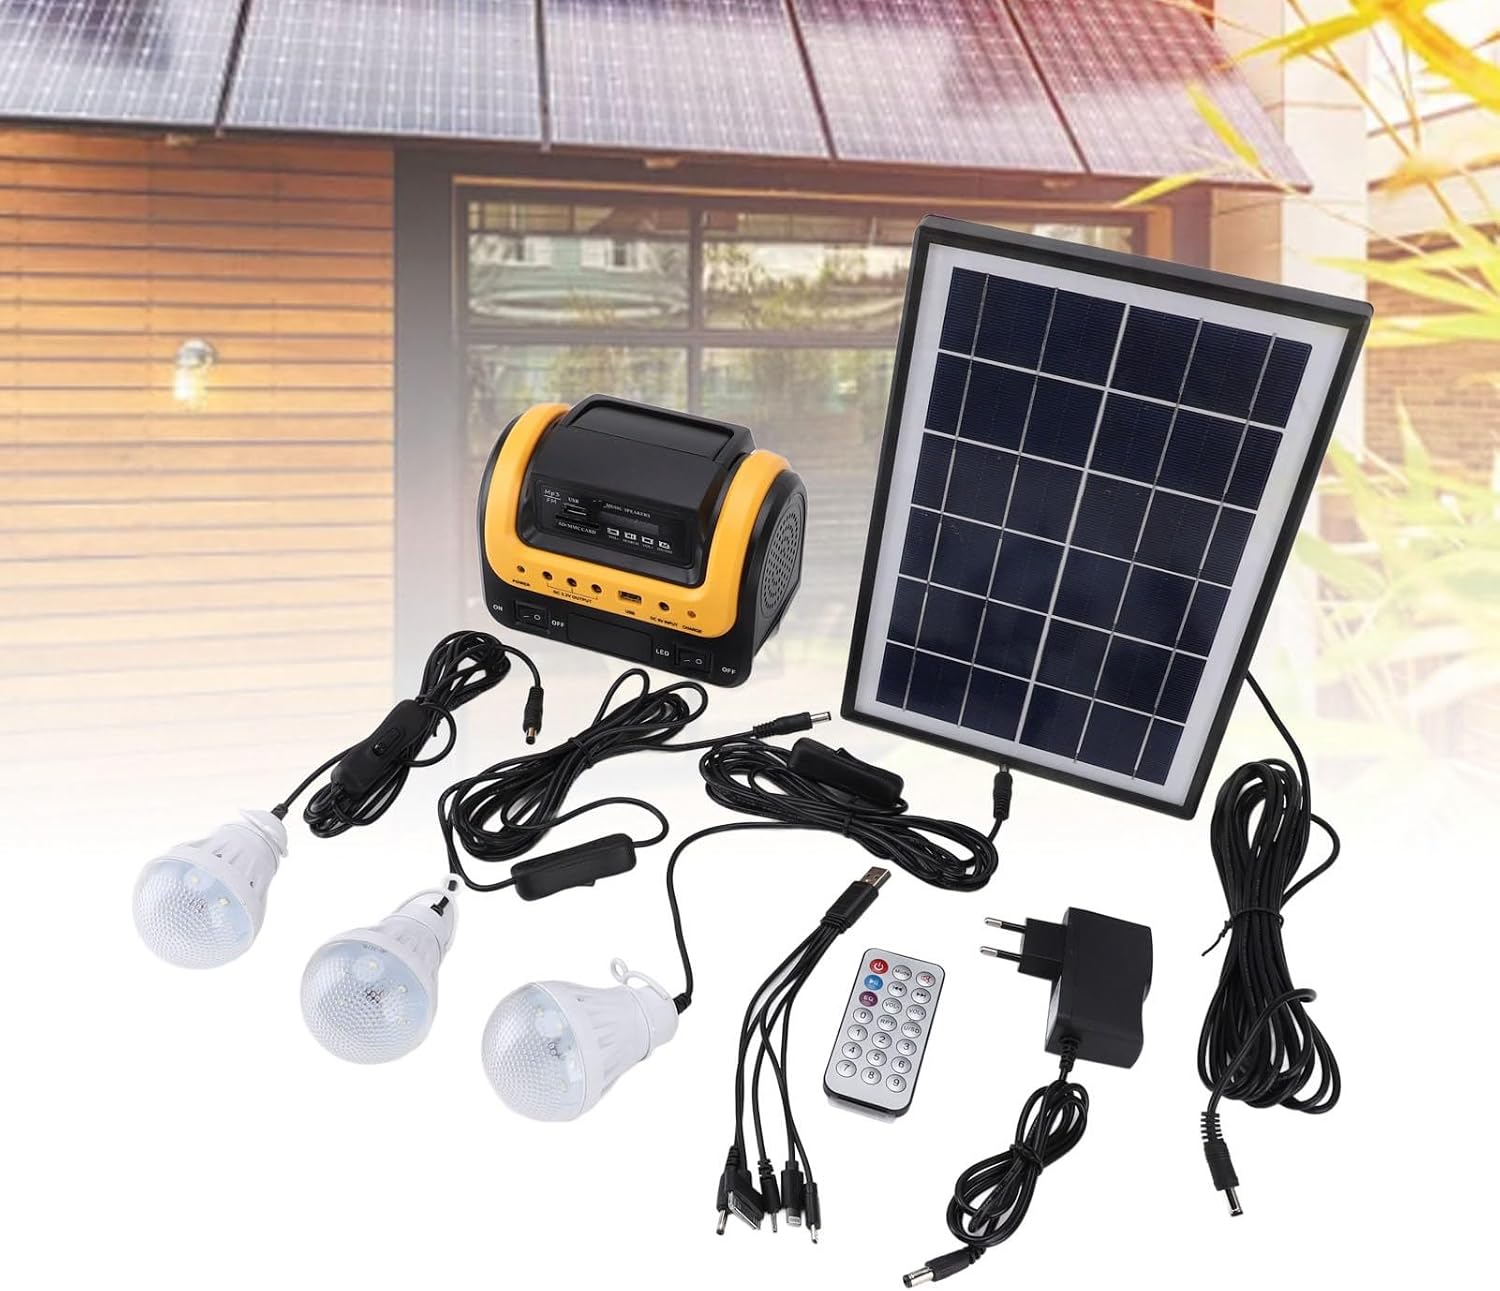
Image 3.1: All components included in the package for the Qcwwy Portable Solar Power Station.
4. Product Overview
The Qcwwy Portable Solar Power Station is designed for convenience and versatility. It integrates multiple functions into a compact unit:
- Digital LED Display: Shows battery status and other operational information.
- Integrated MP3 Player & FM Radio: Supports USB and storage card input for audio playback.
- Multiple Output Ports: Includes 3x 3.2V DC ports for LED lights, 1x 6V DC port, and 1x USB output port for charging mobile devices.
- High Capacity Battery: 5000mAh lithium-ion battery provides extended power.
- Solar Charging Capability: Can be recharged using the included 6V solar panel.

Image 4.1: Front panel of the power station highlighting its multifunctionality.

Image 4.2: Visual representation of the power station's large battery capacity.
5. Setup
Before first use, ensure the power station is fully charged. Refer to the 'Charging Instructions' section for details.
5.1 Connecting LED Lights
- Locate the three 3.2V DC output ports on the front panel.
- Connect the provided LED light bulbs to these ports.
- Turn on the power station using the 'ON/OFF' switch. The LED lights will illuminate.
5.2 Connecting Other Devices
- For USB-powered devices (e.g., smartphones, tablets), connect your device's USB charging cable to the USB output port.
- For 6V DC devices, use the 6V DC output port.
6. Operating Instructions
6.1 Powering On/Off
To turn the power station ON or OFF, use the main 'ON/OFF' switch located on the front panel.
6.2 Using the MP3 Player and FM Radio
- Insert a USB drive or storage card (not included) containing MP3 files into the designated slot.
- Use the control buttons (VOL-, VOL+, SEARCH, MODE) on the front panel or the remote control to navigate tracks, adjust volume, or switch between MP3 and FM radio modes.
- For FM radio, use the 'SEARCH' button to scan for available stations.
6.3 Digital LED Display
The digital LED display provides real-time information about the power station's status, including battery level and current mode (e.g., MP3, FM).

Image 6.1: The power station in use during outdoor camping, demonstrating its lighting and charging capabilities.

Image 6.2: Various applicable scenarios for the portable power station.
7. Charging Instructions
The power station can be charged using two methods: the included AC charger or the solar panel.
7.1 AC Charging (Home)
- Connect the AC charger to the 'CHARGE' input port on the power station.
- Plug the charger into a standard wall outlet (100-240V).
- The indicator light on the power station will turn red, indicating it is charging.
- Charging typically takes approximately 4 hours for a full charge. The indicator light will change color or turn off when fully charged (refer to product specifics for exact behavior).
7.2 Solar Charging
- Connect the 6V solar panel to the 'CHARGE' input port on the power station.
- Place the solar panel in direct sunlight.
- The indicator light on the power station will turn green, indicating it is charging via solar power.
- Solar charging time will vary depending on sunlight intensity.

Image 7.1: Demonstrating both solar and AC charging methods for the power station.
8. Maintenance
- Cleaning: Wipe the device with a soft, dry cloth. Do not use abrasive cleaners or solvents.
- Storage: Store the power station in a cool, dry place away from direct sunlight and extreme temperatures. For long-term storage, charge the battery to about 50-70% every 3-6 months to maintain battery health.
- Battery Care: Avoid fully discharging the battery frequently. Recharge promptly after use.
- Solar Panel: Keep the solar panel clean from dust and debris to ensure optimal charging efficiency.
9. Troubleshooting
- Device not turning on: Ensure the battery is charged. Connect to the AC charger and check the indicator light.
- No output from ports: Check if the device is turned on. Ensure the connected device is compatible with the port's voltage/current.
- Slow solar charging: Ensure the solar panel is clean and placed in direct, unobstructed sunlight. Adjust the angle for maximum exposure.
- MP3 player not working: Check if the USB drive or storage card is inserted correctly and contains compatible audio files. Ensure the device is in MP3 mode.
- FM radio not receiving stations: Try repositioning the device or extending any antenna if available. Perform a station search.
- If problems persist, contact customer support.
10. Specifications
| Brand | Qcwwy |
| Model Name/Number | Qcwwytz4rkg8i7v |
| Material | ABS |
| Color | Yellow |
| Generator Battery | 5000mAh Lithium-ion |
| Power (Rated) | 30 Watts |
| Peak Starting Power | 60 Watts |
| Runtime | Up to 16 hours (depending on load) |
| Input Voltage (AC Charger) | 100 - 240 V |
| Solar Panel Input | 6V |
| DC Output Ports | 3 x 3.2V, 1 x 6V |
| USB Output Port | 1 |
| Special Features | USB Port, Digital Display, MP3 Player, FM Radio |
| Product Dimensions (L x W x H) | 29 x 21 x 13 cm (approx. 11.4 x 8.3 x 5.1 inches) |
| Generator Size (approx.) | 108x168x125mm / 4.3x6.6x4.9 inches |
| Gross Weight (approx.) | 1863g / 4.1lb |

Image 10.1: Dimensions of the portable power station.
11. Warranty and Support
Qcwwy products are manufactured to high-quality standards. For warranty information or technical support, please refer to the contact details provided with your purchase or visit the official Qcwwy website. Please retain your proof of purchase for any warranty claims.