
1. Important Safety Information
Please read and understand all instructions before assembly and use. Keep this manual for future reference.
- Exercise caution around sharp edges and metal support feet during assembly and use.
- Ensure proper assembly to prevent instability or collapse.
- Do not exceed the maximum weight capacity of the bed frame.
- Keep children away from small parts during assembly.
- Periodically check all connections and tighten as necessary.
2. Package Contents
Verify that all components are present before beginning assembly. All parts are typically labeled and packaged within one box.
- Upholstered Headboard with Wingback and Charging Station
- Side Rails (Left and Right)
- Footboard
- Solid Wood Slats
- Metal Frame Components
- Support Legs
- Assembly Hardware (screws, bolts, Allen wrench)
- Power Cord for Charging Station

Figure 2.1: Bed Frame Dimensions and Features Overview. This image illustrates the overall dimensions of the twin bed frame, including length, width, and height, along with icons indicating a charging station, 1000lbs weight capacity, and 30 minutes assembly time.
3. Assembly Instructions (Setup)
Assembly typically takes approximately 30 minutes with the provided tools. It is recommended to assemble with two people.
- Unpack Components: Carefully remove all parts from the packaging. Lay them out on a clean, soft surface to prevent scratches. Identify each part using the labels.
- Assemble Headboard: Attach any necessary support brackets or legs to the upholstered headboard as per the included diagram.
- Connect Side Rails: Securely attach the left and right side rails to the headboard using the provided hardware. Ensure all bolts are tightened.
- Attach Footboard: Connect the footboard to the other end of the side rails. Verify that all connections are firm and stable.
- Install Center Support (if applicable): If your model includes a center support beam, install it now according to the instructions.
- Place Wood Slats: Position the solid wood slats across the bed frame. Many slats feature a Velcro design for quick setup and to hold them tightly in place, preventing movement and noise.
- Connect Charging Station: Ensure the power cord for the charging station is routed correctly and plugged into a suitable power outlet.
- Final Check: Double-check all bolts and connections to ensure they are tight and secure. The bed frame should be stable and free from wobbling.

Figure 3.1: Construction Details. This image shows the Velcro design for securing slats, the robust solid metal frame for support, and the well-built, eco-friendly wood slats.
4. Operating Instructions
4.1. Using the Charging Station
The integrated charging station provides convenient power access for your electronic devices.
- The charging station includes two 110V/12A AC outlets, one Type-C port, and one USB port.
- Plug the bed frame's power cord into a standard wall outlet.
- Connect your devices to the appropriate ports on the headboard's storage ledge.
- The 4-inch wide top storage ledge can hold small items like phones, tablets, or books while charging.

Figure 4.1: Charging Station Functionality. This image details the charging station, featuring two AC outlets, one Type-C port, and one USB port, along with a 6.6-foot power cord, demonstrating how devices can be charged directly from the headboard.
4.2. Under-Bed Storage
The bed frame offers 8 inches of under-bed clearance for additional storage.
- Utilize this space for storage boxes, seasonal items, or for easy access for cleaning robots.
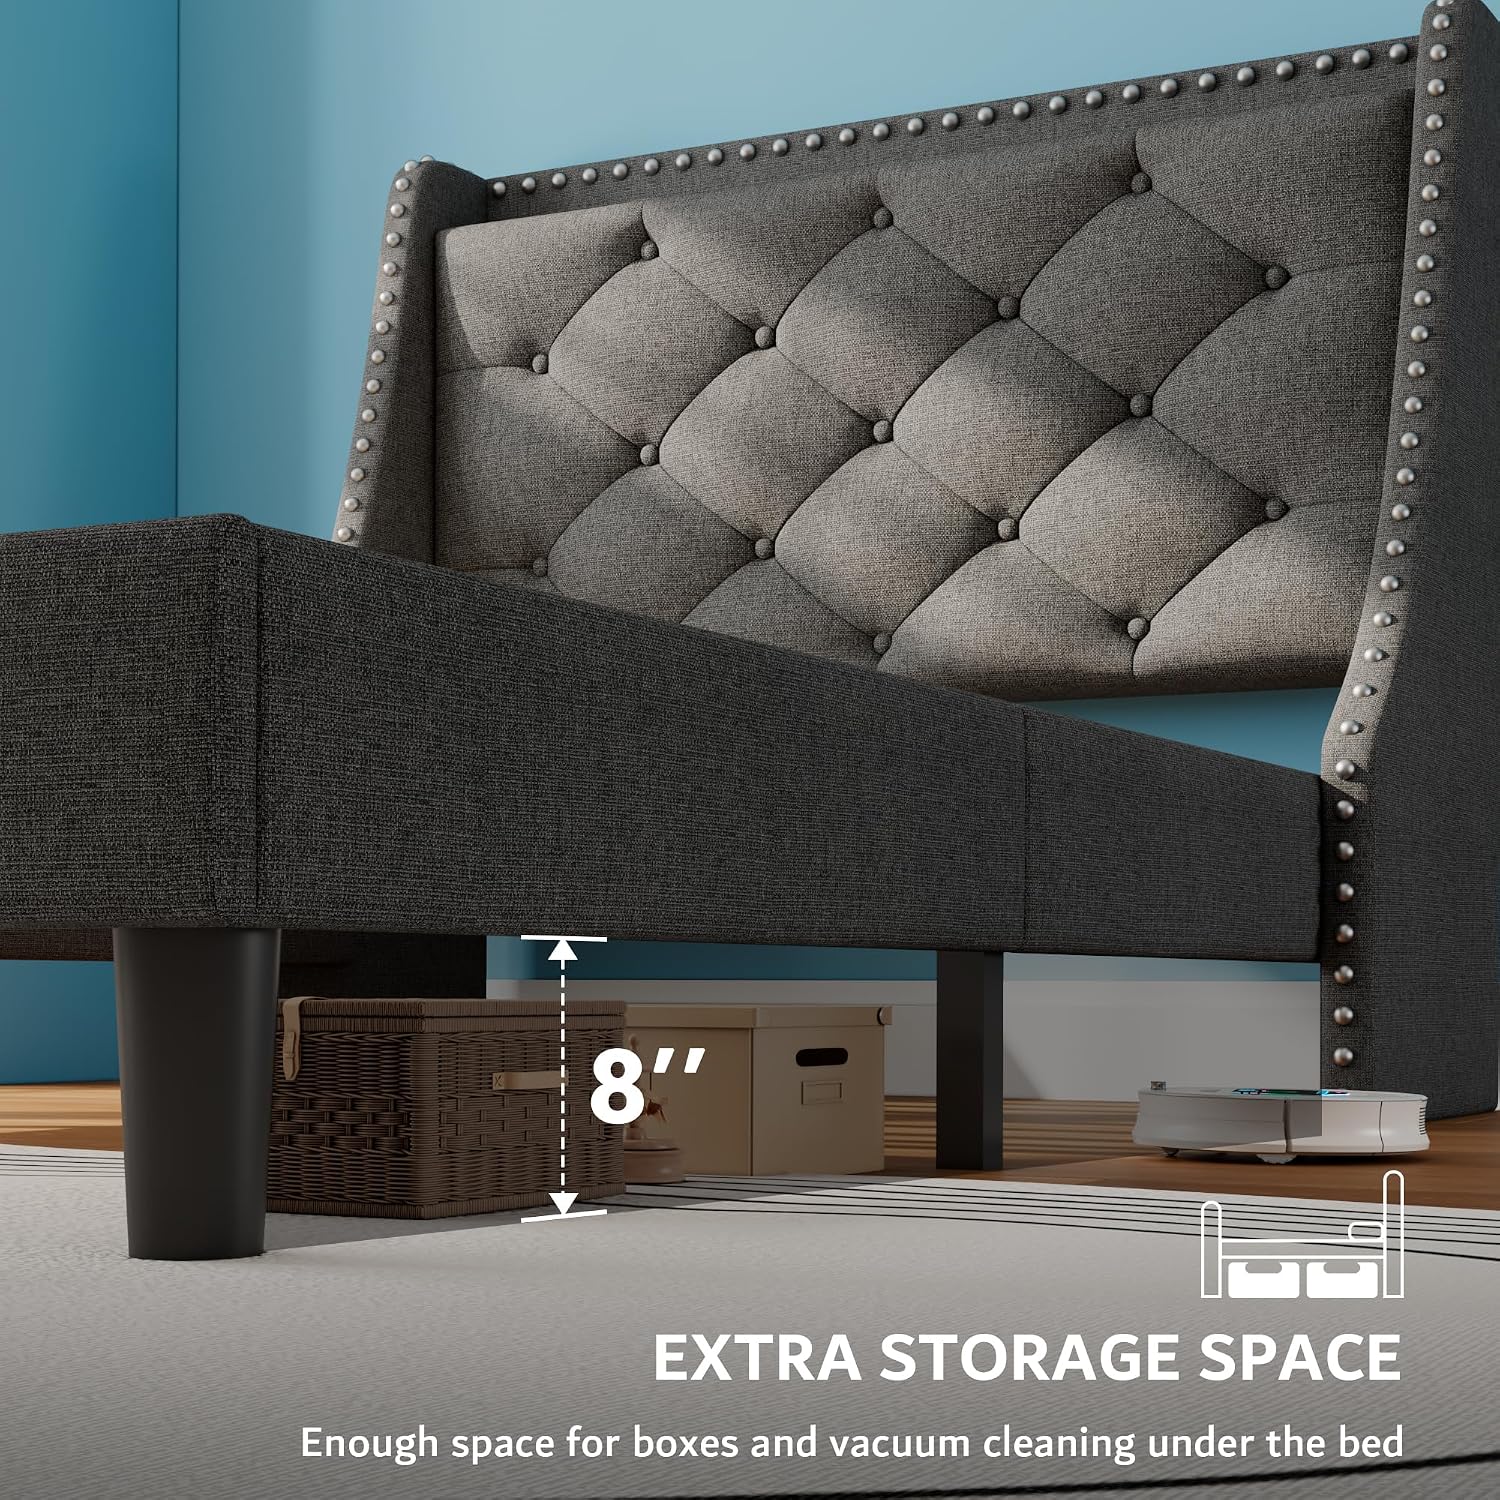
Figure 4.2: Under-Bed Storage Space. This image highlights the 8-inch clearance beneath the bed frame, suitable for storing items in baskets or allowing robotic vacuum cleaners to operate.
5. Maintenance
Proper care will extend the life and appearance of your bed frame.
- Cleaning Upholstery: For general cleaning, gently vacuum the upholstered surfaces to remove dust and debris. For spills, blot immediately with a clean, dry cloth. For stubborn stains, use a mild fabric cleaner following the product's instructions, testing on an inconspicuous area first.
- Frame Inspection: Periodically check all bolts and screws for tightness. Re-tighten any loose fasteners to maintain stability and prevent squeaking.
- Slats: Ensure slats remain properly seated and secured by the Velcro.
- Charging Station: Keep the charging ports free of dust and debris. Do not expose the charging station to liquids.
6. Troubleshooting
| Problem | Possible Cause | Solution |
|---|---|---|
| Bed frame is wobbly or unstable. | Loose bolts or incorrect assembly. | Review assembly instructions and ensure all bolts are securely tightened. Check that all parts are correctly aligned. |
| Squeaking noises from the bed frame. | Loose connections, friction between metal parts, or shifting slats. | Tighten all bolts. Ensure slats are properly seated and the Velcro is holding them firmly. The design includes EVA foam for noise reduction. |
| Charging station not working. | Power cord not plugged in, faulty outlet, or device issue. | Verify the bed frame's power cord is securely plugged into a functional wall outlet. Test the outlet with another device. Ensure your device's charging cable is working. |
| Difficulty during assembly (e.g., misaligned holes). | Manufacturing variation or incorrect part orientation. | Double-check part orientation against diagrams. If parts are significantly misaligned, contact customer support for assistance. Do not force parts together. |
7. Specifications
| Feature | Detail |
|---|---|
| Model | Twin Bed Frame |
| Brand | iPormis |
| Size | Twin |
| Product Dimensions (L x W x H) | 79"L x 54"W x 43"H |
| Color | Dark Grey |
| Headboard Features | Button Tufted, 16" Wingback, 4"W Top Storage Ledge with Charging Ports |
| Charging Ports | 2 x 110V/12A AC Outlets, 1 x Type-C Port, 1 x USB Port |
| Power Cord Length | 6.6 Feet |
| Under-Bed Clearance | 8 inches |
| Frame Material | Heavy-Duty Metal Frame, Solid Wood Slats |
| Special Features | Squeak Resistant, Noise-Free (EVA Foam, Velcro design) |
| Assembly Required | Yes |
| Recommended Mattress Height | 8" - 12" |
8. Warranty and Support
Warranty information is typically included with your product packaging or can be obtained directly from the manufacturer. Please retain your proof of purchase for any warranty claims.
For customer support, missing parts, or further assistance, please contact iPormis customer service. You can often find contact information on the manufacturer's website or through the retailer where the product was purchased.
Visit the official iPormis Store on Amazon for more information: iPormis Amazon Store