
ACTIVLIFE CMXGTAM202501, 25A-262J793
ACTIVLIFE Carburetor Kit Instruction Manual
Model: CMXGTAM202501, 25A-262J793, ST-120
Introduction
This instruction manual provides essential information for the installation, operation, and maintenance of your ACTIVLIFE Carburetor Kit. This kit is designed to restore optimal fuel flow and performance for Craftsman CMXGTAM202501 (25A-262J793) and ST-120 walk-behind trimmer models, as well as other compatible engine layouts including BC201. Proper installation and maintenance are crucial for ensuring the longevity and efficient operation of your equipment.
The kit includes a carburetor, mounting gaskets, an oil tube, an oil filter, and a spark plug, providing a comprehensive solution for replacing worn or damaged components.
Safety Precautions
Always prioritize safety when working with fuel systems and internal combustion engines. Failure to follow these precautions may result in serious injury or damage to equipment.
- Ensure the engine is cool before beginning any work.
- Disconnect the spark plug wire to prevent accidental starting.
- Work in a well-ventilated area to avoid inhaling fuel fumes.
- Wear appropriate personal protective equipment (PPE), such as gloves and eye protection.
- Keep open flames, sparks, and other ignition sources away from fuel.
- Dispose of old fuel and parts responsibly according to local regulations.
Setup and Installation
This section outlines the general steps for replacing your trimmer's carburetor. Specific procedures may vary slightly depending on your exact trimmer model. Refer to your trimmer's original service manual for detailed instructions if necessary.
Kit Contents
Your ACTIVLIFE Carburetor Kit includes the following components:
- 1 x Carburetor
- 3 x Mounting Gaskets
- 1 x Oil Tube (Fuel Line)
- 1 x Oil Filter (Fuel Filter)
- 1 x Spark Plug

Image: Complete ACTIVLIFE Carburetor Kit, showing the carburetor, three gaskets, fuel line, fuel filter, and spark plug.
Tools Required (Typical)
- Socket wrench set or combination wrenches
- Screwdrivers (Phillips and flathead)
- Pliers
- Fuel-resistant container for draining fuel
- Clean rags
Installation Steps
- Prepare the Trimmer: Ensure the trimmer is turned off and the engine is cool. Disconnect the spark plug wire. Place the trimmer on a stable, level surface.
- Drain Fuel: If the fuel tank is full, drain the fuel into a suitable, approved container.
- Remove Air Filter Assembly: Locate and remove the air filter cover and the air filter element. Then, remove any housing or components that obstruct access to the carburetor.
- Disconnect Fuel Lines: Carefully disconnect the fuel lines from the old carburetor. Be prepared for some fuel spillage. Note the routing of the fuel lines for reinstallation.
- Remove Old Carburetor: Unbolt the old carburetor from the engine. There are typically two nuts or bolts holding it in place. Remove any old gaskets.
- Inspect and Clean: Clean the mounting surface on the engine block to ensure a good seal with the new gaskets. Inspect the intake manifold for any damage or debris.
- Install New Gaskets: Place the new mounting gaskets in their correct positions. Ensure they are properly aligned with the bolt holes and intake ports.
- Install New Carburetor: Carefully position the new ACTIVLIFE carburetor onto the mounting studs/bolts. Secure it with the nuts/bolts, tightening them evenly to prevent warping.
- Connect Fuel Lines: Reconnect the fuel lines to the new carburetor. If the old fuel lines are cracked or brittle, replace them with the new oil tube (fuel line) provided in the kit. Install the new fuel filter into the fuel tank end of the fuel line if applicable.
- Replace Spark Plug: Remove the old spark plug and install the new spark plug provided in the kit. Tighten to the manufacturer's specifications (typically hand-tight plus a quarter turn).
- Reassemble: Reinstall the air filter assembly, air filter element, and any other components removed during disassembly.
- Refill Fuel: Refill the fuel tank with fresh, appropriate fuel for your trimmer.
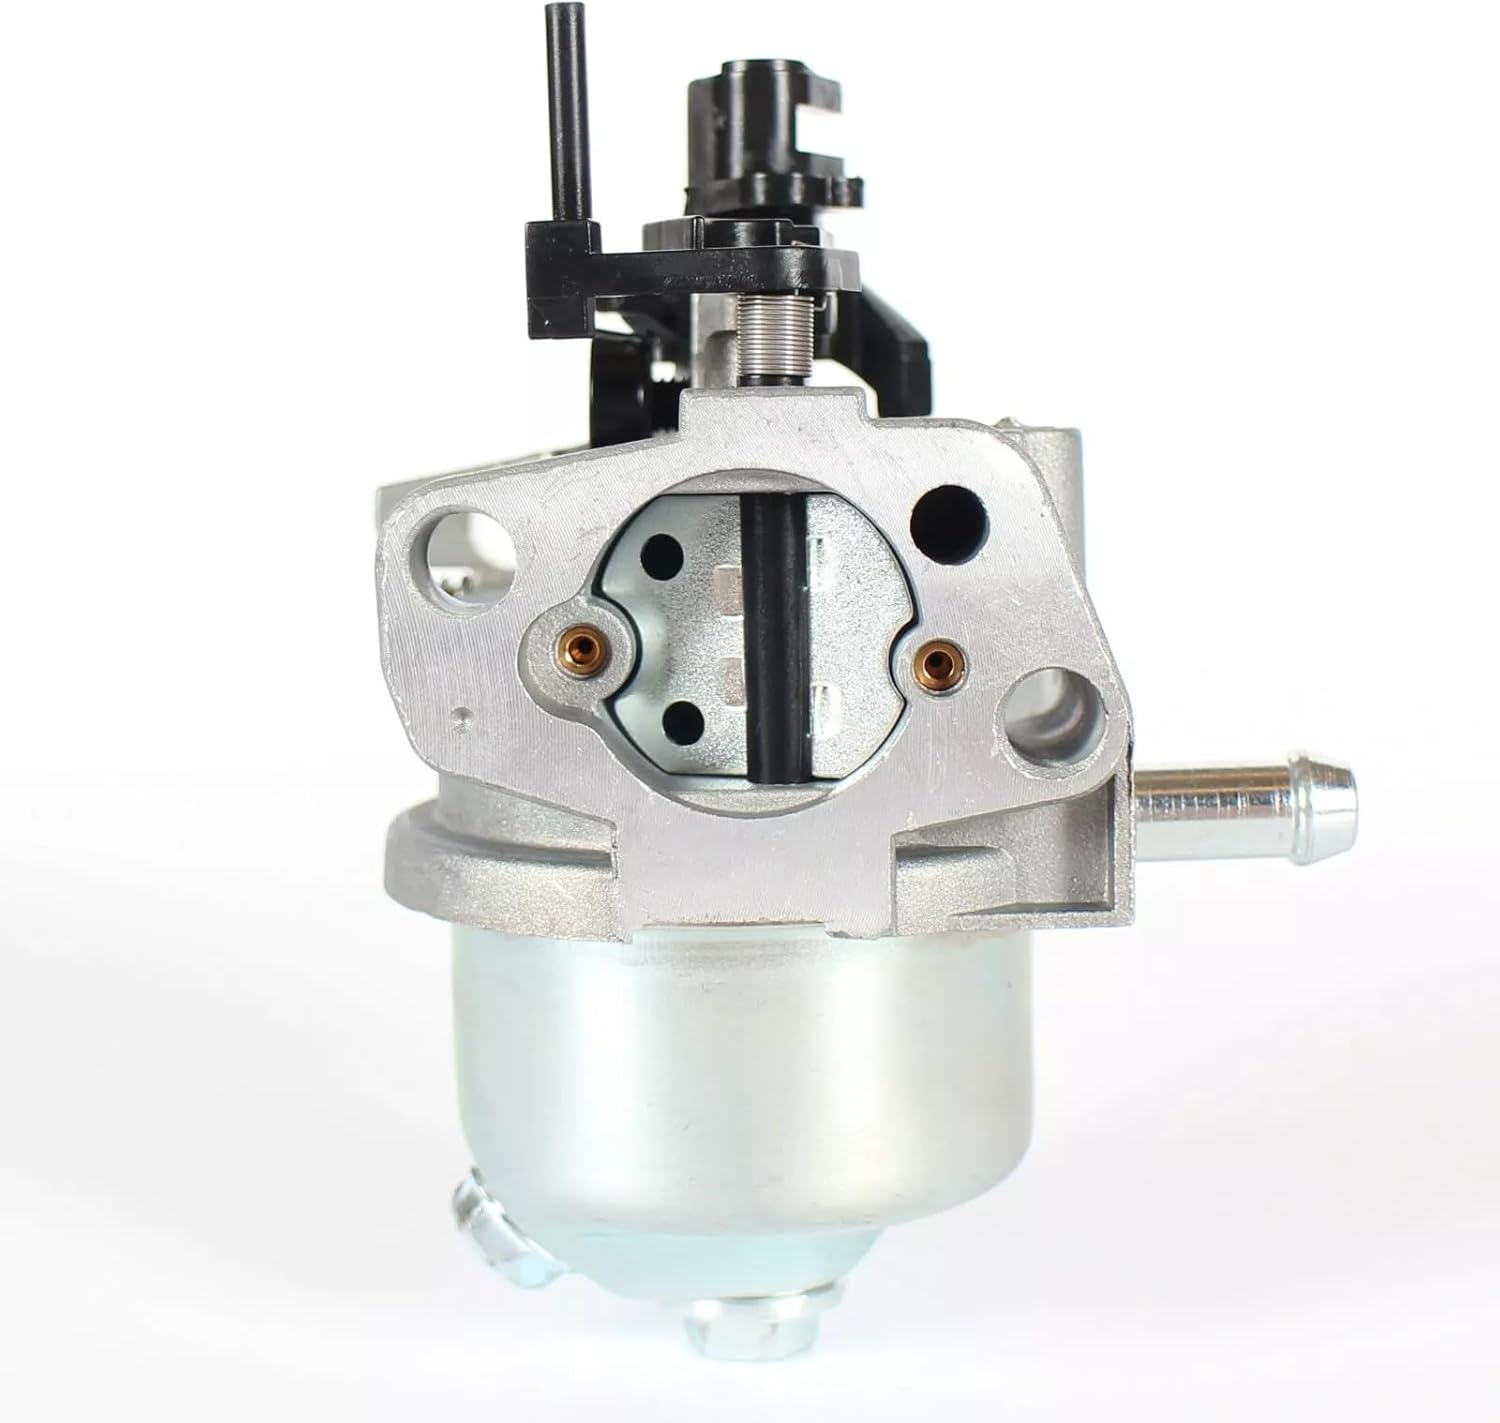
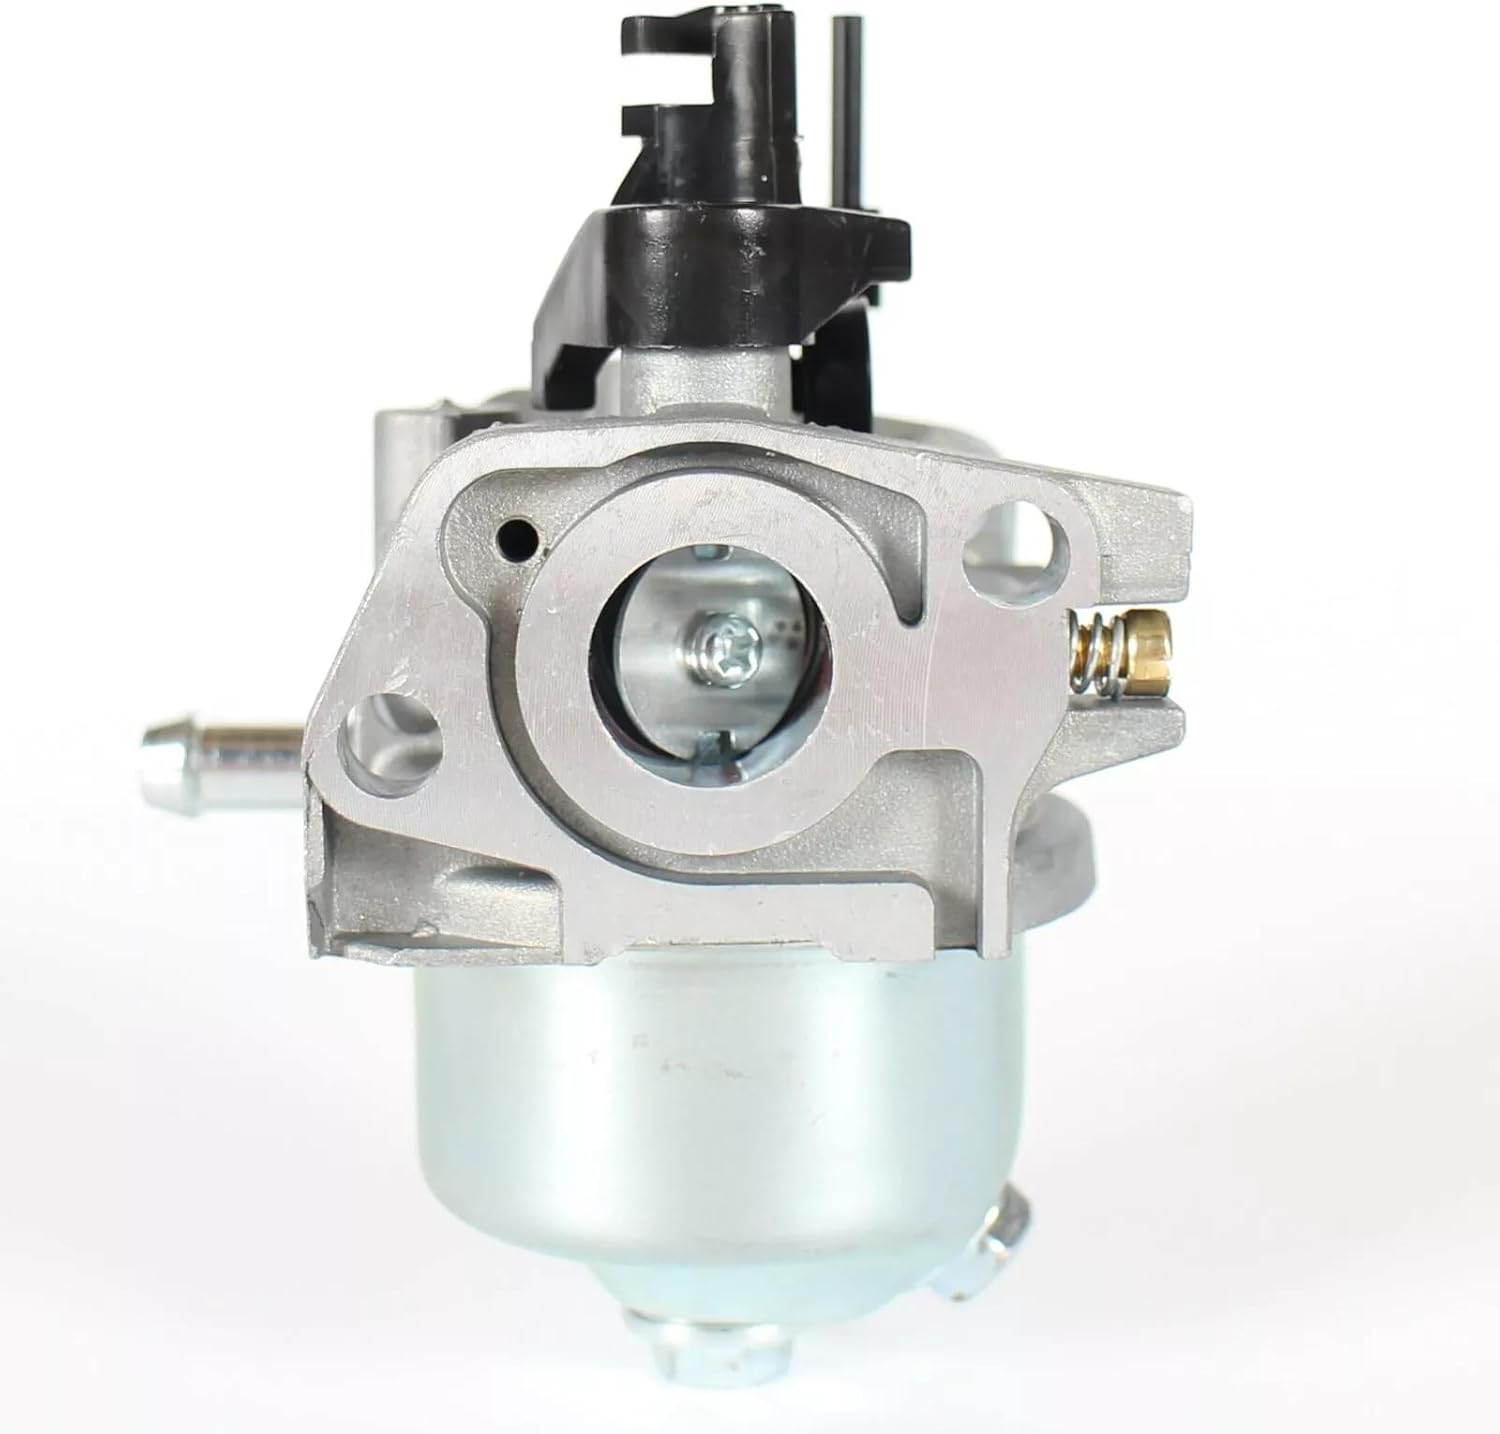
Image: Various views of the ACTIVLIFE Carburetor, highlighting its design and connection points.
Operating Instructions (After Carburetor Replacement)
After installing the new carburetor, follow these steps for initial startup and operation:
- Reconnect Spark Plug: Reconnect the spark plug wire.
- Prime the System: If your trimmer has a primer bulb, press it several times until fuel is visible in the bulb and it feels firm.
- Set Choke: Move the choke lever to the "FULL CHOKE" position for a cold start.
- Start Engine: Pull the starter rope firmly until the engine attempts to start or "pops."
- Adjust Choke: Once the engine pops, move the choke lever to the "HALF CHOKE" or "RUN" position (depending on your trimmer model).
- Restart and Warm Up: Pull the starter rope again until the engine starts and runs smoothly. Allow the engine to warm up for a few minutes before operating under load.
- Idle Adjustment (if necessary): The carburetor is typically pre-set. If the engine idles too fast or too slow, consult your trimmer's service manual for instructions on adjusting the idle speed screw. Avoid adjusting the air-fuel mixture screws unless you have proper tools and experience.
Maintenance
Regular maintenance of your trimmer's fuel system and related components will ensure optimal performance and extend the life of your equipment.
- Air Filter: Inspect the air filter regularly (e.g., every 10-20 operating hours or before each use in dusty conditions). Clean or replace it if it's dirty. A clogged air filter can restrict airflow and affect carburetor performance.
- Fuel Filter: The fuel filter (included in this kit) should be replaced periodically, typically annually or if fuel flow issues are suspected. This prevents debris from reaching the carburetor.
- Spark Plug: Inspect the spark plug (new one included) annually or every 50 operating hours. Check for fouling, wear, or incorrect gap. Replace if necessary.
- Fuel Lines: Inspect fuel lines for cracks, leaks, or hardening. Replace them if any damage is observed.
- Fuel Quality: Always use fresh, clean gasoline mixed with the correct ratio of 2-stroke oil (if applicable to your trimmer model). Stale or contaminated fuel is a common cause of carburetor issues.
- Storage: Before long-term storage (e.g., off-season), drain the fuel tank and run the engine until it stops from lack of fuel, or use a fuel stabilizer to prevent gum and varnish buildup in the carburetor.
Troubleshooting
If you encounter issues after installing the new carburetor, consider the following common problems and solutions:
| Problem | Possible Cause | Solution |
|---|---|---|
| Engine won't start or starts hard. |
|
|
| Engine runs rough or stalls. |
|
|
| Loss of power during operation. |
|
|
If problems persist after attempting these solutions, it is recommended to consult a qualified service technician or refer to your trimmer's specific service manual.
Specifications
| Feature | Detail |
|---|---|
| Brand | ACTIVLIFE |
| Compatible Models | Craftsman CMXGTAM202501 (25A-262J793), ST-120 Walk-Behind Trimmer, Maruyama BC201 (and similar engine layouts) |
| Fuel Type | Gasoline |
| Product Dimensions (Approx.) | 6"D x 6"W x 7"H |
| Item Weight (Approx.) | 2 pounds |
| OEM Part Number | CMXGTAM202501, 25A-262J793 |
| UPC | 669978922389 |
Warranty and Support
ACTIVLIFE products are manufactured to high-quality standards. For information regarding warranty coverage or technical support, please refer to the product packaging or contact ACTIVLIFE customer service through the retailer where the product was purchased.
Always retain your proof of purchase for warranty claims.
Ask a question about this manual
Ask about setup, troubleshooting, compatibility, parts, safety, or missing instructions. Manuals+ will review the question and use this page’s manual context to help answer it.