
Allparts Equipment & Accessories 7108750
Allparts Equipment & Accessories Simpson 7108750 OEM Replacement Valve Repair Service Kit Instruction Manual
Model: 7108750
1. Introduction
This instruction manual provides detailed guidance for the installation and maintenance of the Allparts Equipment & Accessories Simpson 7108750 OEM Replacement Valve Repair Service Kit. This kit is designed to restore optimal pressure to compatible AAA pressure washer pumps by replacing worn or damaged valves.
2. Kit Components
The 7108750 Valve Repair Service Kit includes the following components:
- 6 x OEM Replacement High and Low Pressure Valves
- Pre-installed O-Rings on each valve
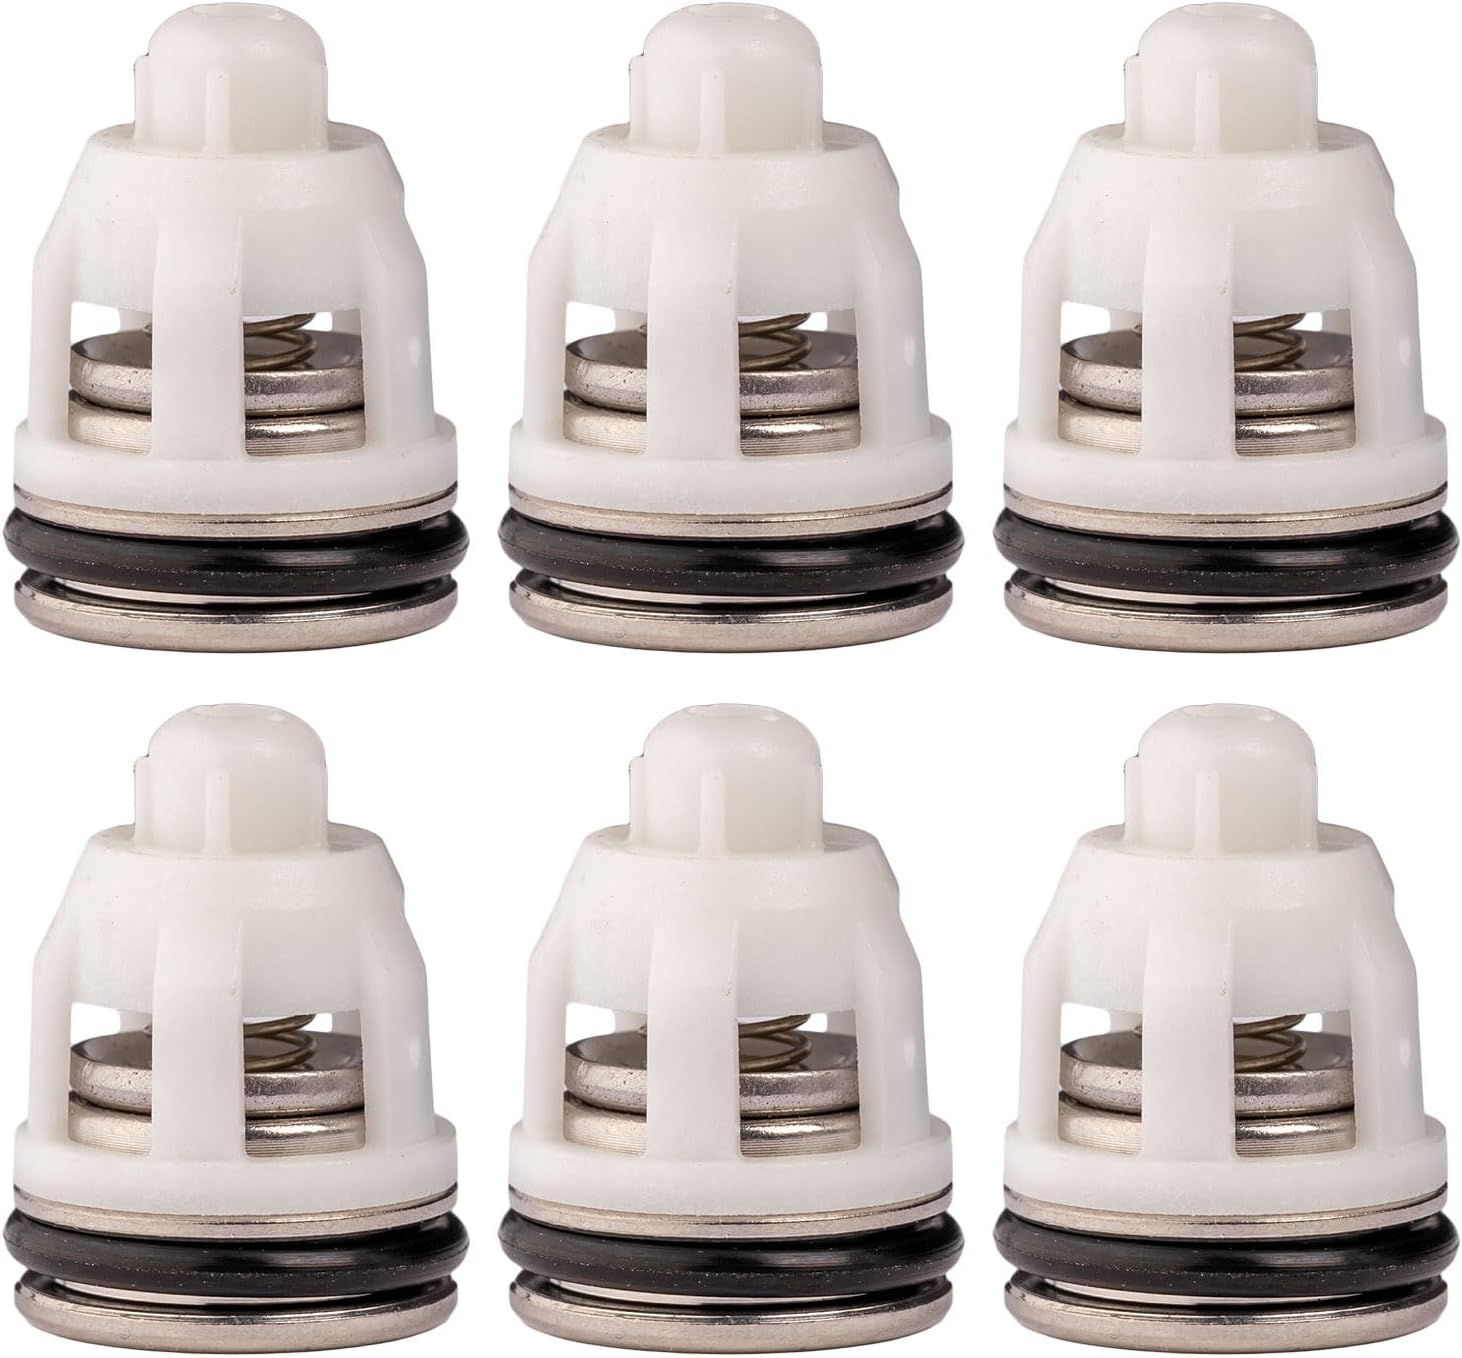
Image 2.1: Six complete replacement valves with pre-installed O-rings, as included in the kit.

Image 2.2: Detailed breakdown of a single valve component (cage, spring, disc, seat with O-ring) and the complete set of six valves.
3. Specifications
| Attribute | Value |
|---|---|
| Product Dimensions (per valve) | 0.6 x 0.6 x 0.85 inches (15.60 mm base diameter, 21.60 mm total height) |
| Item Weight (total kit) | 3.2 ounces |
| Model Number | 7108750 |
| Manufacturer | Simpson FNA Group |

Image 3.1: Dimensional specifications of a single replacement valve.
4. Compatibility
This valve repair kit is compatible with various Simpson and other models of pressure washer pumps, specifically those with AAA High Pressure Pumps that produce 3600-4400 PSI. Please consult your pressure washer manual to confirm compatibility before installation.
Known compatible models include:
- 90038 10.0GA13 AAA High Pressure Pump
- 530010 C-41 Series AAA High Pressure Pump
- 530060 C-43 Series AAA High Pressure Pump
- 53BRD35 AAA High Pressure Pump
- 90039 9.4GA13 AAA High Pressure Pump
- 90034 11.6GA AAA High Pressure Pump
- 530012 C-41 Series AAA High Pressure Pump
- 53BRD40 C-45 Series AAA High Pressure Pump
- 530007 C-45 Series Belt Drive AAA High Pressure Pump
5. Installation Instructions
Follow these steps carefully to install the replacement valves:
- Remove Old Valves: Ensure all components of the old valves are completely removed from the pump. This includes the cage, spring, disc, and the seat with its O-ring. It is crucial that the old seat and O-ring are removed.
- Prepare New Valves: After complete removal of the old valves, apply a small amount of grease to the O-ring on each of the new replacement valves. This aids in proper seating and prevents damage during installation.
- Insert New Valves: Use a small socket that fits over the nipple protruding from the top of the valve cage and rests on the shoulder of the valve cage. Gently push each new valve into the valve cavity until you feel it seat firmly. A 1/4-inch drive, deep well socket is typically suitable for this application.
- Re-assemble: Once all new valves are fully seated, re-assemble your pressure washer pump according to the manufacturer's instructions.

Image 5.1: Visual guide for removing old valves and installing new ones using a socket.
6. Operating After Installation
After installing the new valves and re-assembling your pressure washer, perform a test run. Connect the water supply and turn on the pressure washer. Observe for any leaks and ensure the pump builds and maintains the correct operating pressure. If pressure issues persist, refer to the troubleshooting section or your pressure washer's main manual.
7. Maintenance
Regular inspection of your pressure washer's pump valves is recommended to ensure optimal performance. If you notice a decrease in pressure or water leakage from the pump head, it may indicate worn valves or O-rings. Replace valves as needed to maintain efficiency and prevent further damage to the pump.
8. Troubleshooting
If you experience issues after replacing the valves, consider the following:
- Low or No Pressure: Ensure all old valve components, especially the seat and O-ring, were completely removed. Verify that the new valves are fully seated and not obstructed. Check for proper re-assembly of the pump head.
- Water Leaks: Confirm that the O-rings on the new valves are intact and properly greased. Ensure the valves are seated correctly and the pump head is tightened to the manufacturer's specifications.
- Intermittent Pressure: This could indicate a partially obstructed valve or an issue with other pump components. Re-inspect the valves for proper seating and cleanliness.
If problems persist, consult your pressure washer's comprehensive service manual or contact technical support.
9. Support
For technical assistance or questions regarding the Allparts Equipment & Accessories Simpson 7108750 OEM Replacement Valve Repair Service Kit, please contact Allparts Equipment & Accessories. Our team offers technical support to assist with any inquiries or issues you may encounter.
Contact information can typically be found on the official Allparts Equipment & Accessories website or through your purchase documentation.
10. Warranty Information
Specific warranty details for the Allparts Equipment & Accessories Simpson 7108750 OEM Replacement Valve Repair Service Kit are not provided within this document. Please refer to the product packaging, the official Allparts Equipment & Accessories website, or your purchase receipt for comprehensive warranty information. Standard manufacturer warranties typically cover defects in materials and workmanship.
Related documents7108750


Ask a question about this manual
Ask about setup, troubleshooting, compatibility, parts, safety, or missing instructions. Manuals+ will review the question and use this page’s manual context to help answer it.