
1. Introduction
This manual provides instructions for the safe and effective use of your SKYBASIC 2" IPS Screen 1000X Handheld Digital Microscope. Please read this manual thoroughly before operating the device and retain it for future reference.

Image: The SKYBASIC Handheld Digital Microscope, showing the main unit, USB cables, and a lanyard, alongside a monitor displaying a magnified leaf and a ladybug on leaves.
2. Product Overview
The SKYBASIC Handheld Digital Microscope is designed for exploring the microscopic world with ease. It features a 2-inch IPS color display, up to 1000X magnification, and adjustable LED illumination.
2.1 Key Features
- 2.0 Inch IPS Color Display: Provides a clear and intuitive real-time observation experience with vibrant colors.
- 1000X Magnification: Suitable for observing various small objects and details.
- High Resolution & 8 LED Lights: Offers excellent detail and optimal clarity with adjustable illumination.
- Portable Design: Compact and lightweight, with a detachable screen decoration kit and lanyard for easy outdoor use.
- Photo and Video Recording: Capture images and videos of observations. Built-in storage for up to 400 photos; TF memory card (not included) required for video recording.
- PC Compatibility: Connects to a computer for a larger viewing experience.
2.2 Components

Image: Illustration of the 2.0 Inch IPS Color Display, demonstrating how high-definition observation images are transmitted in real-time.

Image: Diagram showing the microscope's lens assembly with 8 adjustable LED lights and indicating 1000X magnification, with examples of objects that can be viewed (skin, insect, PCB, plant, coin, jewelry).
3. Setup
Follow these steps to prepare your microscope for first use.
3.1 Unpacking
Carefully remove all components from the packaging. Verify that all items listed below are present:
- SKYBASIC Handheld Digital Microscope
- USB Charging Cable (Type-C)
- Lanyard
- User Manual

Image: An illustration showing the microscope, manual, Type-C cable, and anti-lost rope (lanyard) as included package contents.
3.2 Charging the Device
Before initial use, fully charge the microscope. Connect the provided USB Type-C cable to the microscope's charging port and the other end to a standard USB power adapter (not included) or a computer USB port. The charging indicator will show the charging status.
3.3 Inserting a TF Card (Optional for Video Recording)
The microscope has built-in storage for up to 400 photos. For video recording, a TF (microSD) memory card must be inserted (not included). Locate the TF card slot, gently insert the card until it clicks into place. Ensure the card is inserted in the correct orientation.
4. Operating Instructions
4.1 Power On/Off
- To power on, long press the power button located on the device.
- To power off, long press the power button again until the screen turns off.

Image: A visual guide demonstrating the four easy steps for using the microscope: 1. Turn on, 2. Rotate the focus wheel, 3. Observe details on the HD screen, 4. Connect to a computer for a larger view.
4.2 Focusing
After powering on, place the microscope over the object you wish to observe. Slowly rotate the focus wheel (typically located on the barrel of the microscope) until the image on the 2-inch IPS screen appears clear and sharp.
4.3 Adjusting LED Lights
The microscope is equipped with 8 adjustable LED lights to illuminate your subject. Use the light adjustment buttons (refer to the device's physical buttons) to increase or decrease the brightness for optimal viewing conditions.
4.4 Taking Photos
With the desired image in focus on the screen, press the photo capture button (usually marked with a camera icon) once to take a still image. The image will be saved to the internal storage.

Image: The microscope's screen interface, illustrating the options for taking photos (with a leaf texture example) and recording videos (with an insect eye example). It notes built-in storage for photos and the requirement of a TF card for videos.
4.5 Recording Videos
To record video, ensure a TF memory card is inserted. Press the video recording button (usually marked with a video camera icon) once to start recording. Press it again to stop recording. Videos will be saved to the TF card.
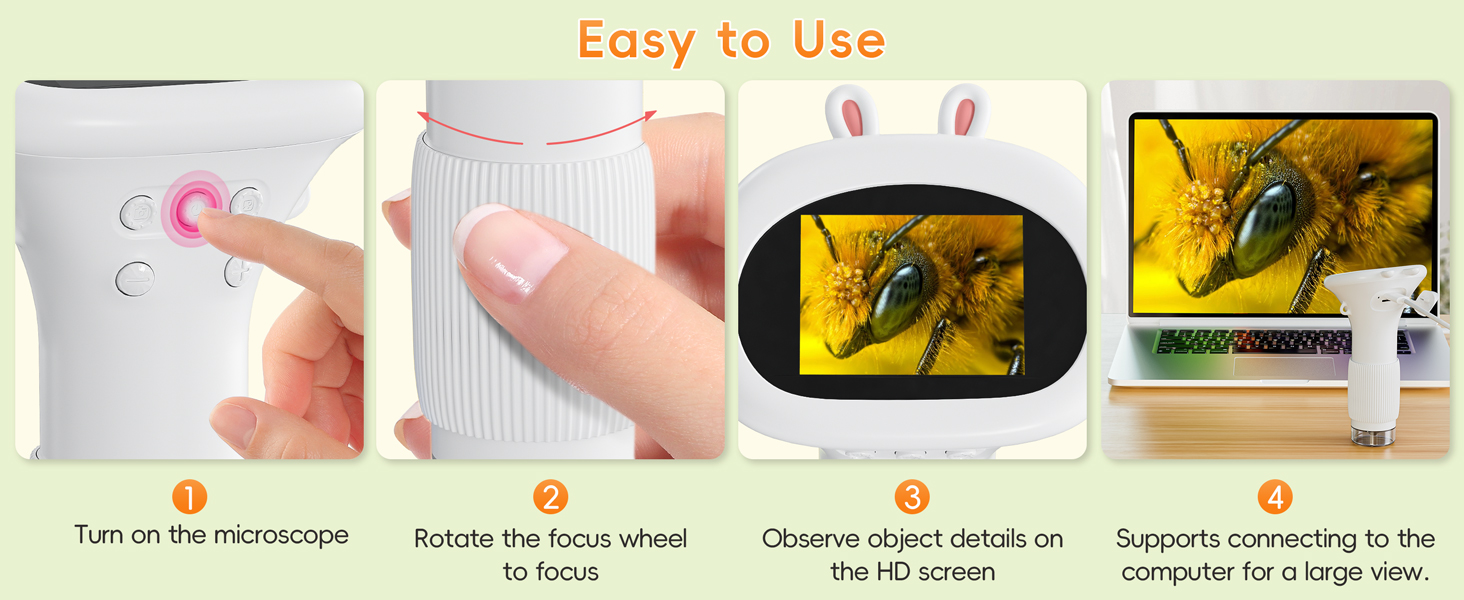
Image: A visual representation of the microscope's videography and photography capabilities, highlighting that built-in storage supports up to 400 photos, and a TF card is needed for video recording.
4.6 Connecting to a PC
For a larger viewing experience, you can connect the microscope to a computer. Use the provided USB cable to connect the microscope to your PC. The device is compatible with Windows Vista/XP/7/8/10/11 and MacOS x 11.0 or higher. Once connected, the microscope should be recognized as a webcam or storage device, allowing you to view live feed or access stored media.

Image: The microscope connected to a laptop via a USB cable, demonstrating its PC compatibility for a larger viewing experience on Windows and MacOS.
5. Maintenance
Proper care ensures the longevity and optimal performance of your microscope.
- Cleaning: Use a soft, dry cloth to clean the exterior of the microscope. For the lens and screen, use a specialized lens cleaning cloth and solution to avoid scratches.
- Storage: Store the microscope in a cool, dry place away from direct sunlight and extreme temperatures.
- Battery Care: To maintain battery health, avoid fully discharging the battery frequently. Charge the device regularly, even if not in use for extended periods.
- Avoid Impact: Handle the microscope with care to prevent drops or impacts that could damage internal components.
6. Troubleshooting
If you encounter issues with your microscope, refer to the following common problems and solutions:
| Problem | Possible Cause | Solution |
|---|---|---|
| Device does not power on. | Low battery or device is off. | Charge the device fully. Long press the power button to turn on. |
| Image is blurry. | Improper focus or insufficient lighting. | Rotate the focus wheel until the image is clear. Adjust the LED light brightness. |
| Cannot take photos or record videos. | Internal storage full (for photos) or no TF card inserted (for videos). | Delete old photos or transfer them to a PC. Insert a TF card for video recording. |
| Cannot connect to PC. | Faulty USB cable, incorrect port, or driver issue. | Try a different USB cable or port. Ensure your PC's operating system is compatible. |
7. Specifications
| Feature | Detail |
|---|---|
| Model Number | inskam372 |
| Brand | SKYBASIC |
| Display | 2.0 Inch IPS Color Screen |
| Magnification | Up to 1000X |
| Light Source | 8 Adjustable LED Lights |
| Photo Storage | Built-in, up to 400 photos |
| Video Storage | Requires TF (microSD) card (not included) |
| PC Compatibility | Windows Vista/XP/7/8/10/11, MacOS x 11.0+ |
| Power Source | Battery Powered (1 Lithium Ion battery included) |
| Material | Plastic |
| Item Weight | 8.4 ounces |
| Package Dimensions | 6.65 x 4.25 x 3.11 inches |
8. Warranty and Support
For warranty information and customer support, please refer to the documentation included with your purchase or visit the official SKYBASIC website. If you experience any issues not covered in this manual, please contact SKYBASIC customer service for assistance.
Manufacturer: Shenzhen Sulang Technology Co.,ltd
For further assistance, you may visit the SKYBASIC Store on Amazon.


