
1. Introduction
Thank you for choosing the XOSS XL-800 Headlight and XR01 Taillight Rechargeable Bike Light Set. This manual provides essential information for the proper setup, operation, and maintenance of your new bike lights. Please read these instructions carefully before use to ensure optimal performance and safety.
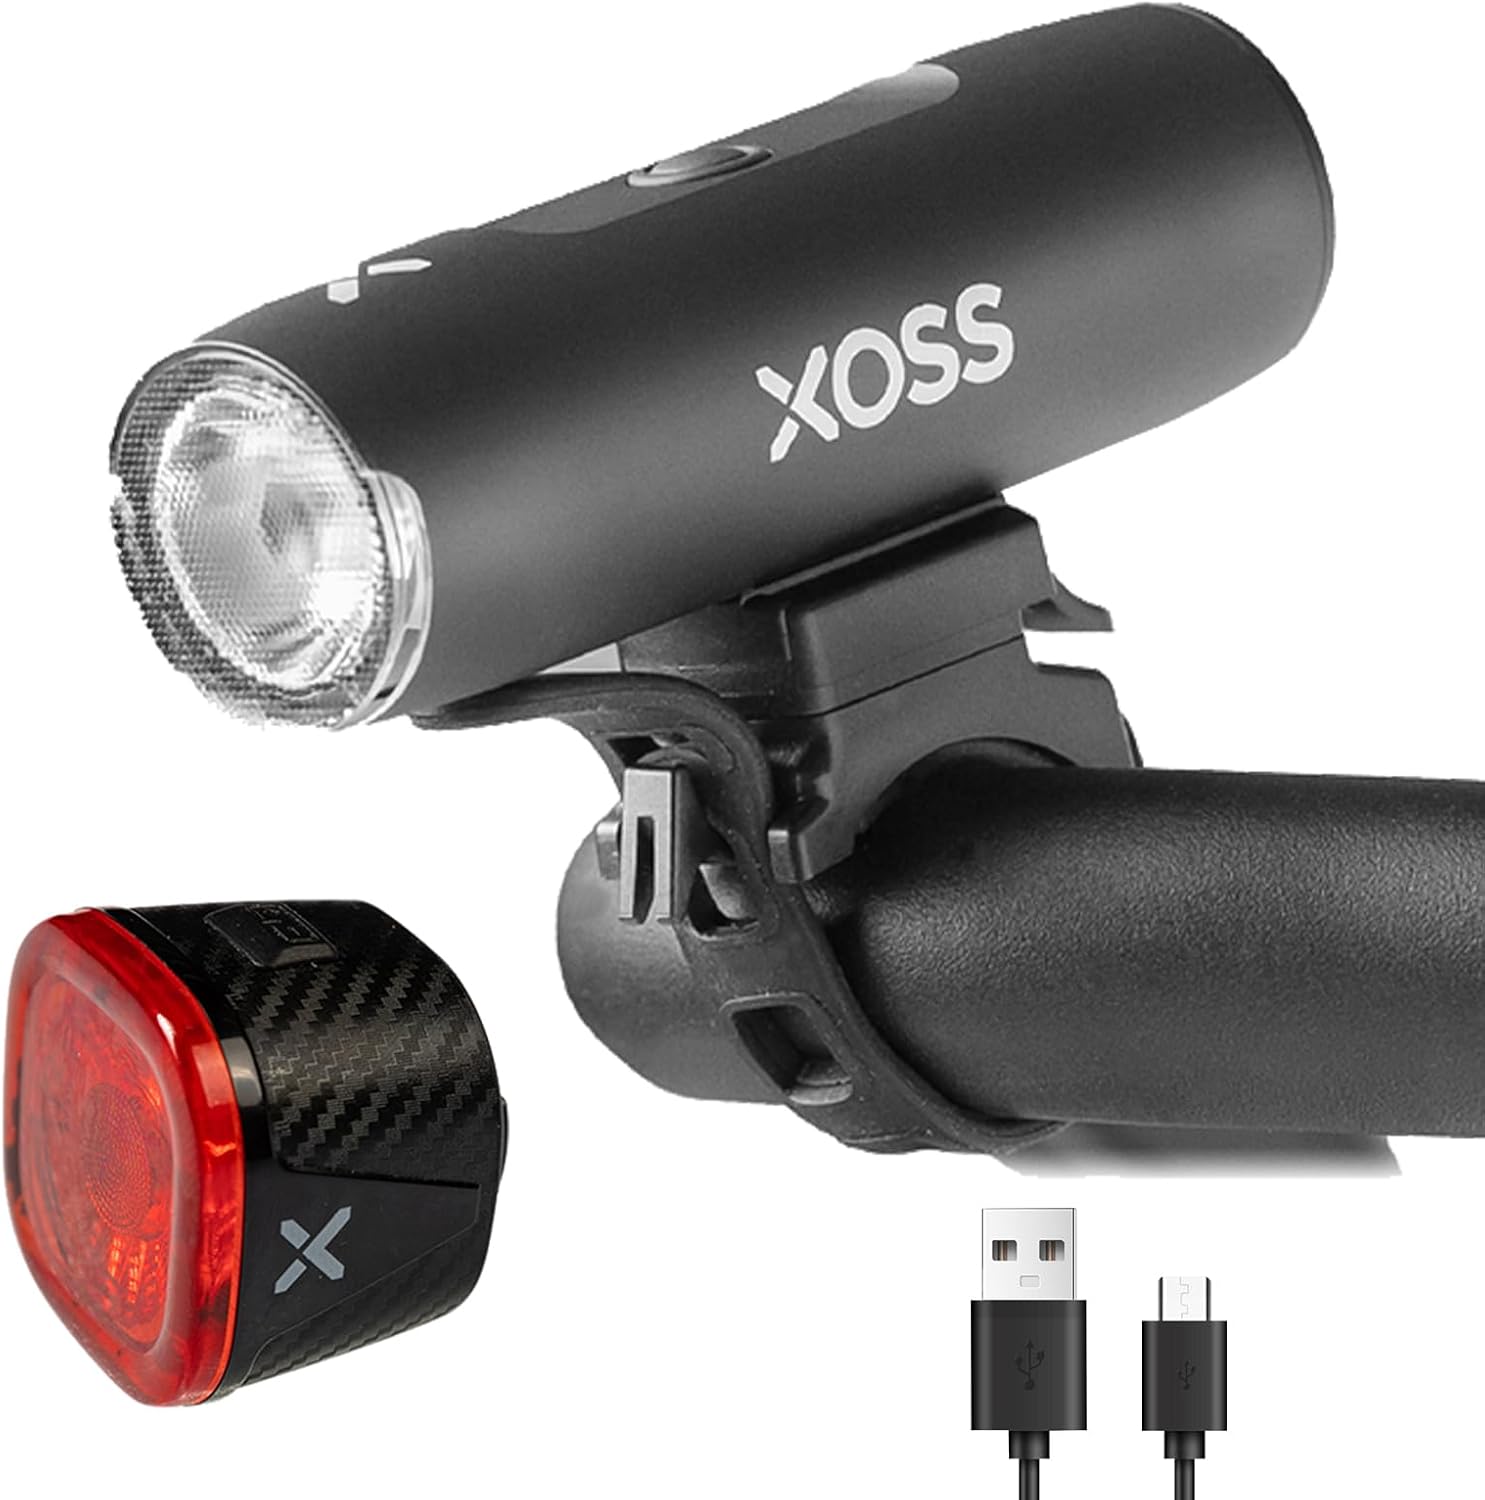
Figure 1: The XOSS XL-800 Headlight and XR01 Taillight, along with their charging cables.
2. Package Contents
Please verify that all items listed below are included in your package:
XL-800 Headlight Components:
- XL-800 Headlight (x1)
- Handlebar Mount (x1)
- GoPro Adaptor (x1)
- GoPro Adaptor Bolt (x1)
- Charging Cable (x1)
- User Manual (x1)
XR01 Taillight Components:
- XOSS XR01 Taillight (x1)
- Seat Cushion Bracket (x1)
- Seat Tube Bracket (x1)
- Rubber Strap (x1)
- Cable Tie (x4)
- Type-C Charging Cable (x1)
- User Manual (x1)

Figure 2: Visual representation of the components included for both the XL-800 Headlight and XR01 Taillight.
3. Setup and Installation
3.1. XL-800 Headlight Installation
- Select the appropriate handlebar mount for your bicycle.
- Securely attach the handlebar mount to your bicycle's handlebar. Ensure it is tight enough to prevent movement during riding.
- Slide the XL-800 Headlight onto the mounted bracket until it clicks into place.
- Adjust the angle of the headlight to illuminate the path ahead without blinding oncoming traffic.
3.2. XR01 Taillight Installation
- Choose between the seat cushion bracket or seat tube bracket based on your preference and bicycle design.
- Attach the chosen bracket to your bicycle's seat post or seat cushion rails using the rubber strap or cable ties provided.
- Slide the XR01 Taillight onto the mounted bracket until it is firmly in place.
- Ensure the taillight is visible from the rear and not obstructed by any other bicycle components.
4. Operating Instructions
4.1. XL-800 Headlight Operation
The XL-800 Headlight features multiple lighting modes for various riding conditions:
- High Light Mode: Provides maximum illumination for dark environments.
- Medium Light Mode: Balanced brightness for general night riding.
- Low Light Mode: Conserves battery for extended use or dimly lit areas.
- Flash Light Mode: Increases visibility during day or night.
- SOS Mode: Emergency signal.
Press the power button to cycle through the modes. Press and hold the power button to turn the light off.
4.2. XR01 Taillight Operation
The XR01 Taillight offers several modes for rear visibility and includes smart features:
- Slow Flash Mode: Gentle flashing for consistent visibility.
- Breathing Flash Mode: Pulsating light pattern.
- Fast Flash Mode: Rapid flashing for high attention.
- Steady On Mode: Constant illumination.
Press the power button to cycle through the modes. The XR01 also features an Auto Turn On/Off function, activating with riding vibration and turning off after 30 seconds of inactivity. Its Mode Memory function ensures it returns to the last used mode upon reactivation.

Figure 3: Overview of the available lighting modes for both the XL-800 Headlight and XR01 Taillight.
5. Charging Instructions
Both the XL-800 Headlight and XR01 Taillight are USB-C rechargeable. Use the provided USB-C cables to charge the devices.
- XL-800 Headlight: Equipped with a 2600mAh battery, providing approximately 6 hours of working time after a full charge (charging time approximately 3.5 hours).
- XR01 Taillight: Equipped with a 260mAh battery, providing approximately 7-16 hours of working time after a full charge (charging time approximately 1 hour).
The XL-800 Headlight can also function as a power bank to provide a small charge to other USB-powered devices in emergencies.

Figure 4: USB-C charging details for the XL-800 Headlight and XR01 Taillight, including charge duration and working hours.
6. Maintenance
- Waterproof Rating: Both lights are IPX6 waterproof, making them suitable for use in rainy weather. However, avoid submerging them in water.
- Cleaning: Wipe the lights with a soft, damp cloth to remove dirt and debris. Do not use abrasive cleaners or solvents.
- Storage: Store the lights in a cool, dry place when not in use. If storing for an extended period, ensure they are partially charged to prolong battery life.

Figure 5: The XOSS bike light set is designed with IPX6 waterproofing, ensuring functionality in various weather conditions.
7. Specifications
| Brand | XOSS |
| Model | XL-800 (Headlight) & XR01 (Taillight) |
| Material | Aluminum, Plastic |
| Color | Black |
| Power Source | Battery Powered |
| Headlight Battery Capacity | 2600mAh |
| Taillight Battery Capacity | 260mAh |
| Water Resistance Level | IPX6 Waterproof |
| Headlight Modes | 5 (High, Medium, Low, Flash, SOS) |
| Taillight Modes | 4 (Slow Flash, Breathing Flash, Fast Flash, Steady On) |
| Mounting Type | Handlebar Mount (Headlight), Seat Post/Cushion Mount (Taillight) |
| Item Weight | 300 g (Total) |
8. Troubleshooting
- Light not turning on: Ensure the battery is charged. Connect to a power source using the USB-C cable.
- Light is dim: The battery may be low. Recharge the light.
- Taillight auto-off not working: Ensure the light is securely mounted and not experiencing constant vibrations that might keep it active.
- Charging issue: Check the USB-C cable and charging adapter for damage. Try a different cable or power source.
9. Warranty and Support
For warranty information or technical support, please refer to the specific warranty card included with your product or visit the official XOSS website. Keep your purchase receipt as proof of purchase.
For further assistance, you may contact XOSS customer service through their official channels.


