
Important Safety Information
- Read all instructions carefully before using the device.
- Do not expose the device to rain, moisture, or extreme temperatures.
- Avoid placing the device near heat sources or in direct sunlight.
- Use only the power adapter provided with the device.
- Do not attempt to open or repair the device yourself. Refer to qualified service personnel.
- Ensure proper ventilation to prevent overheating.
Package Contents
- 1 x Beelink Mini PC SER3 3200U
- 1 x HDMI Cable
- 1 x Power Adapter
- 1 x User Manual
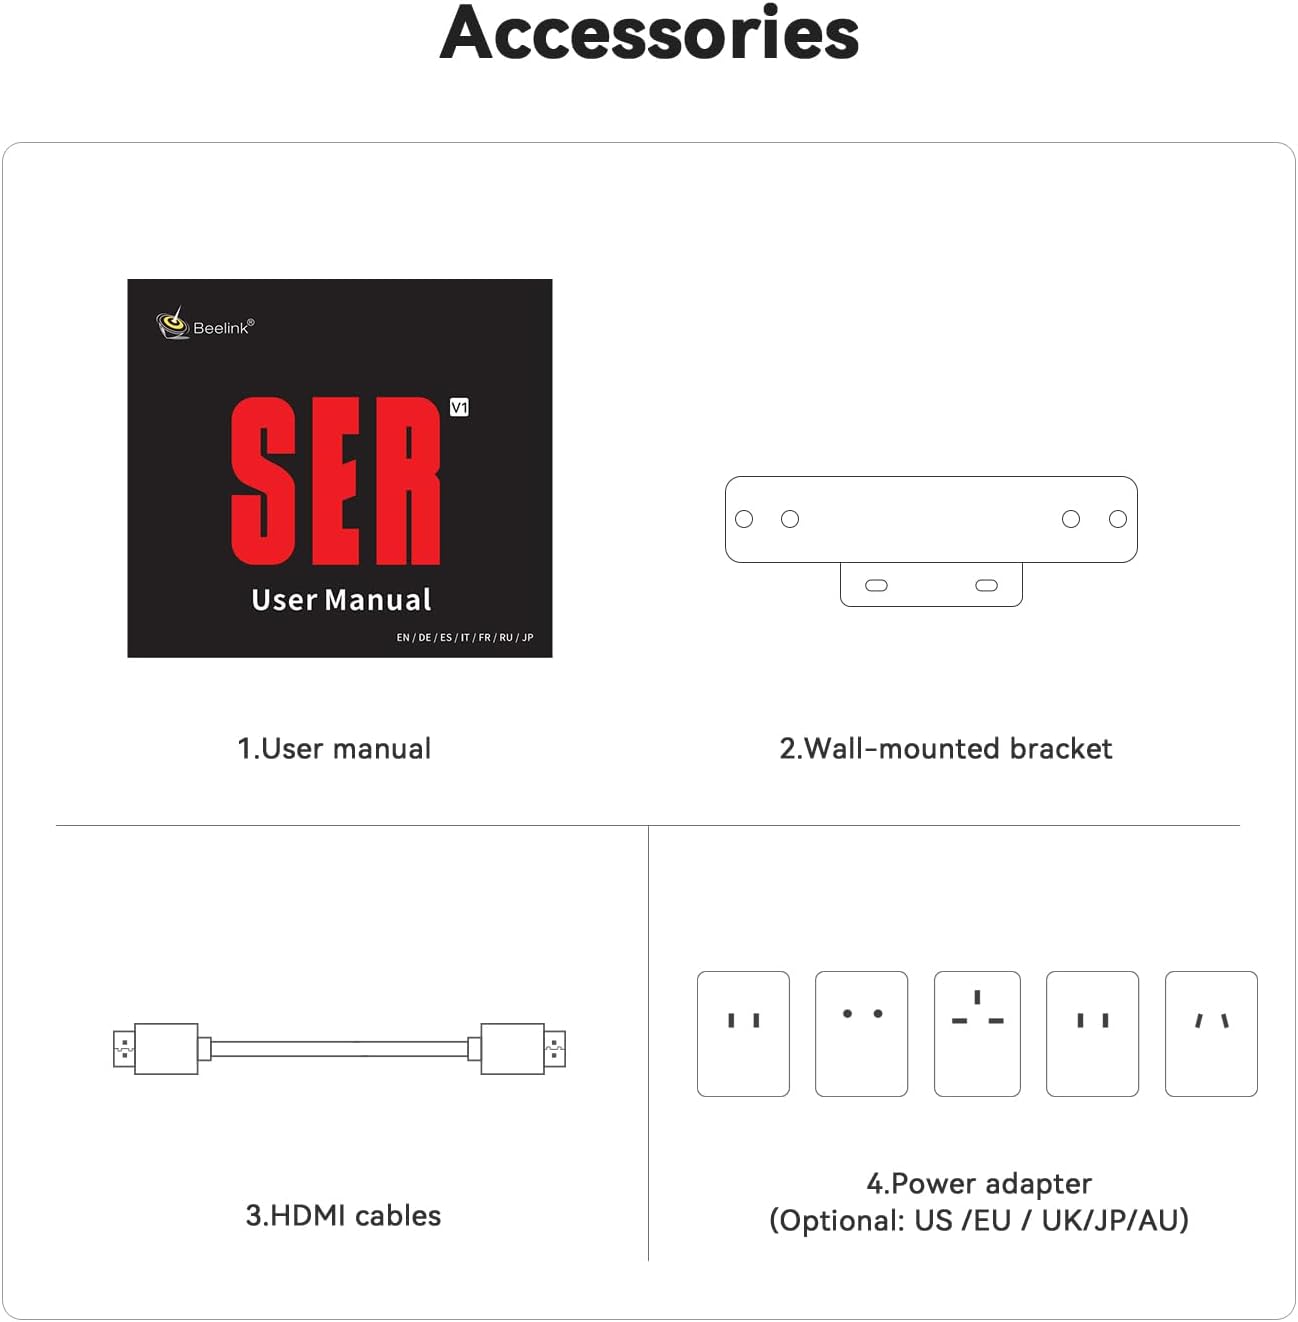
Image: Included accessories for the Beelink Mini PC SER3 3200U.
Product Overview
Front Panel
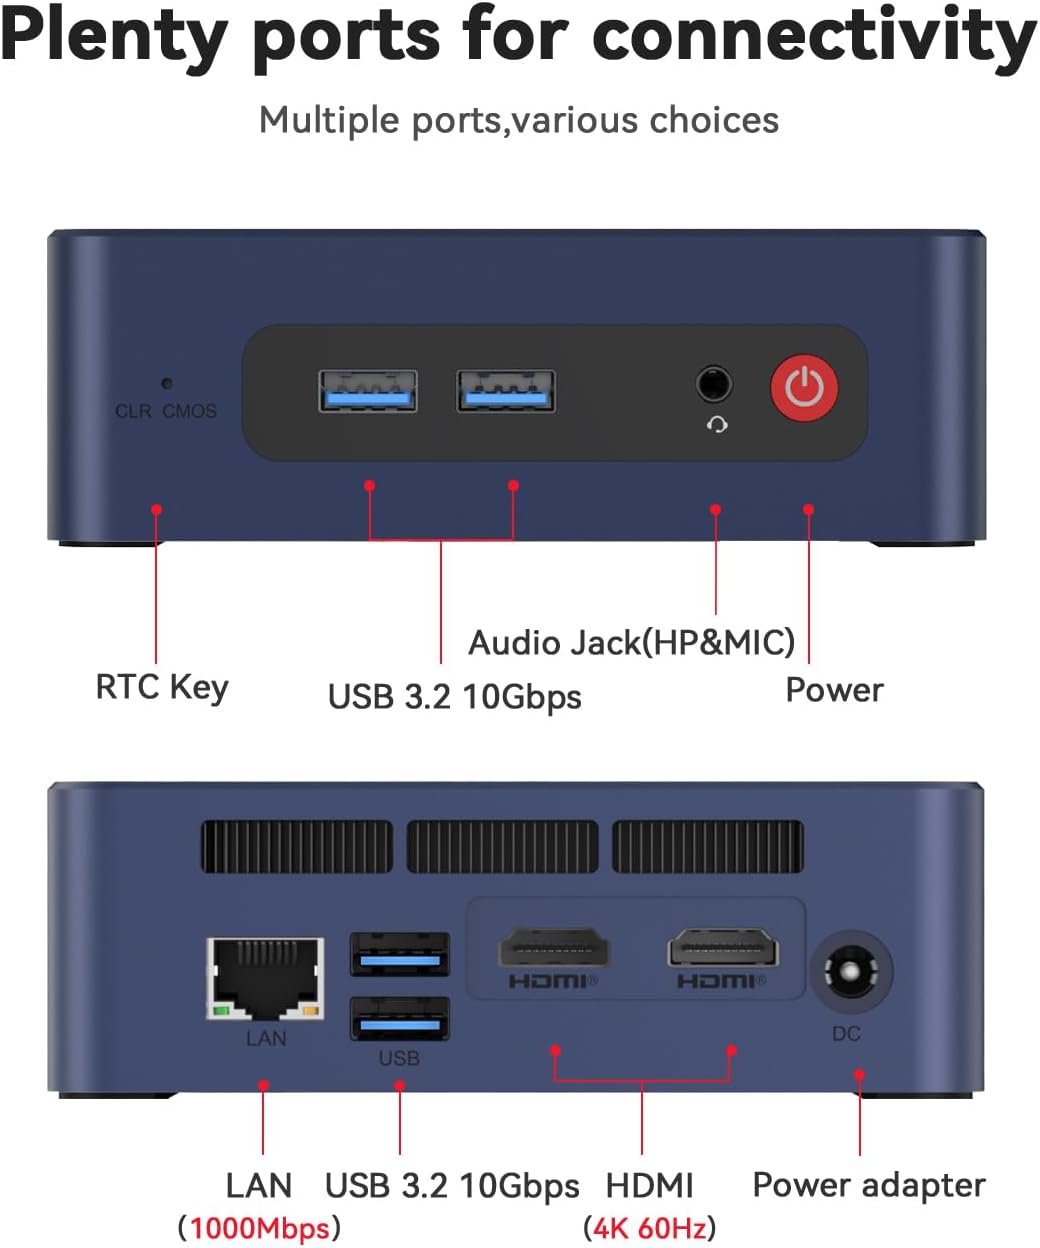
Image: Front and rear panel ports of the Beelink Mini PC SER3 3200U.
- CLR CMOS: Clear CMOS button.
- USB 3.2 10Gbps: High-speed USB ports for peripherals.
- Audio Jack (HP&MIC): Combined headphone and microphone port.
- Power: Power button with LED indicator.
Rear Panel
- LAN (1000Mbps): Gigabit Ethernet port for wired network connection.
- USB 3.2 10Gbps: Additional high-speed USB ports.
- HDMI (4K 60Hz): Dual HDMI ports for display output.
- DC: Power adapter input.
Internal Components (Exploded View)
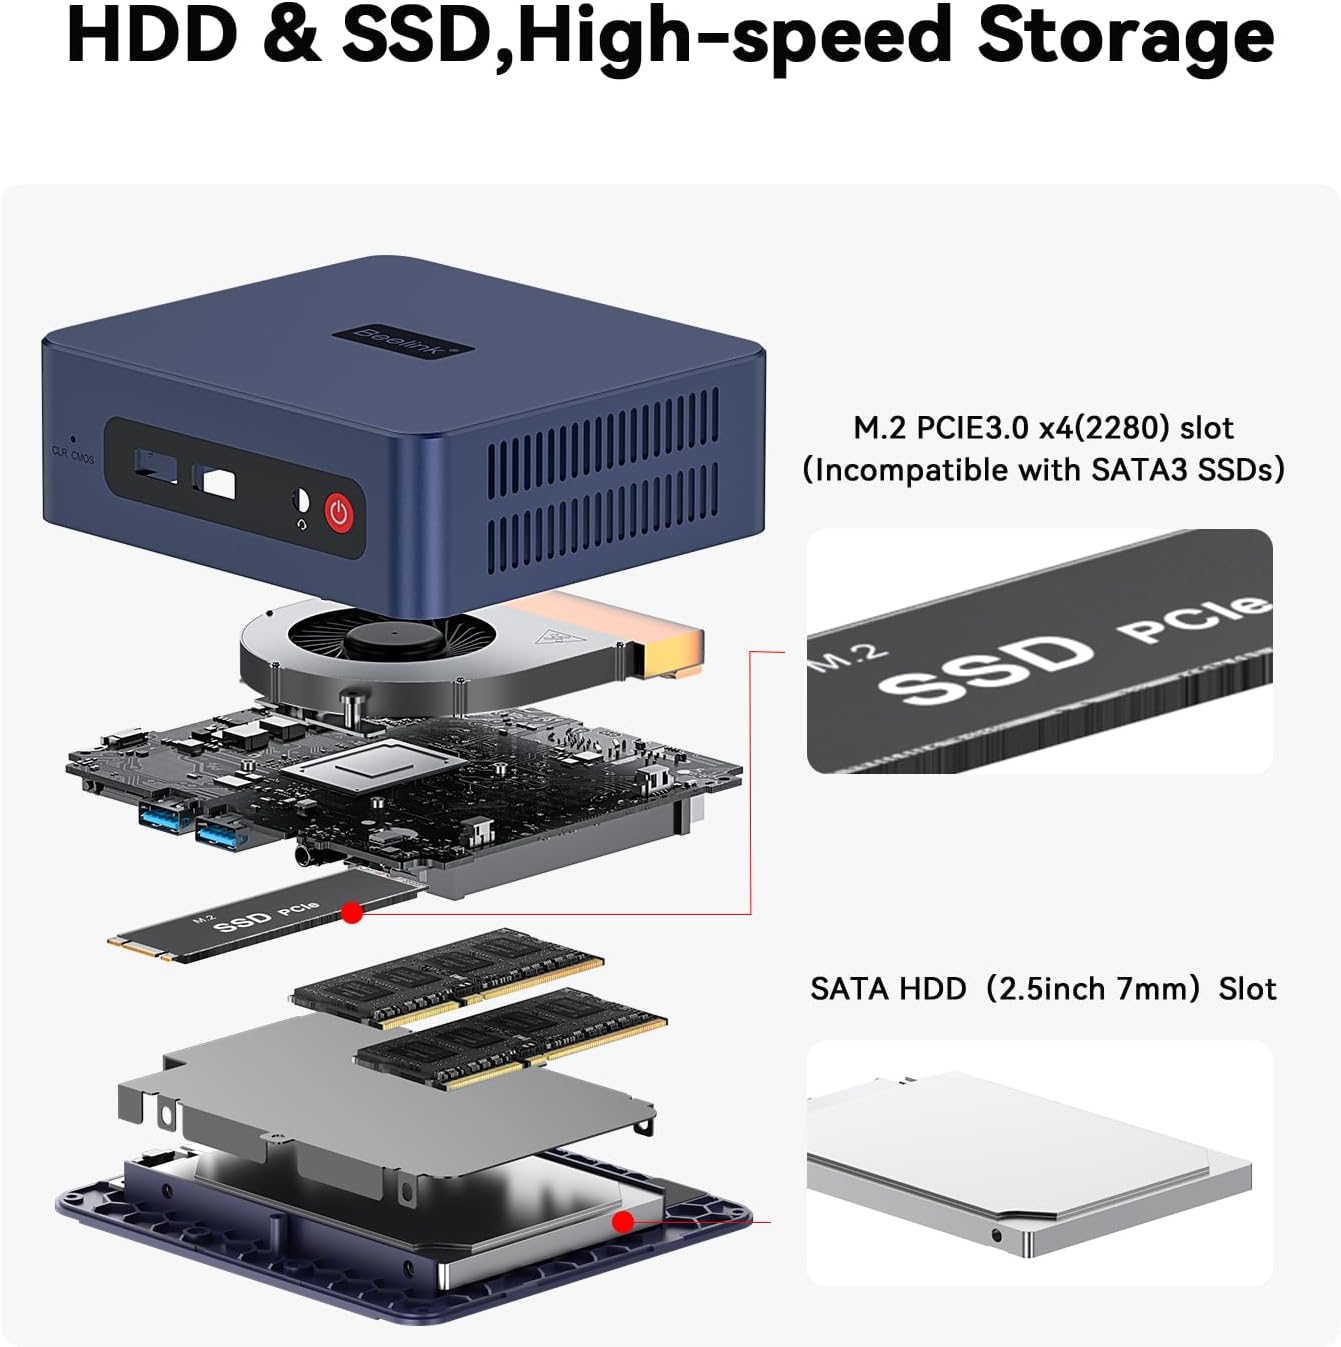
Image: Exploded view of the Beelink Mini PC SER3 3200U, showing the plastic case, cooling fan, CPU, motherboard, M.2 2280 PCIe SSD, SO-DIMM DDR4 memory, shielding can, and 2.5-inch HDD slot.
The internal design includes a compact motherboard housing the AMD Ryzen 3 3200U processor, SO-DIMM DDR4 memory slots, and an M.2 PCIe SSD slot. A dedicated cooling fan and heat sink assembly ensure efficient thermal management. The chassis also accommodates a 2.5-inch SATA drive for additional storage.
Setup Guide
Initial Setup
- Connect your monitor(s) to the HDMI ports on the rear panel.
- Connect your keyboard and mouse to the available USB ports.
- Connect the power adapter to the DC input port and then to a power outlet.
- Press the power button on the front panel to turn on the Mini PC.
Operating System Configuration
The Beelink Mini PC SER3 3200U comes pre-installed with Windows 11 Pro. Upon first boot, you will be guided through the initial Windows setup process, which includes:
- Selecting your region and keyboard layout.
- Connecting to a Wi-Fi network.
- Signing in with your Microsoft account or creating a local account.
- Setting up a PIN for quick login.
- Reviewing and accepting privacy settings.
Video: Tutorial on how to wipe a memory stick, which can be useful for clean OS installations or data management.
Storage Expansion
Installing a 2.5-inch SATA HDD/SSD
The Mini PC supports adding a 2.5-inch SATA hard disk drive (HDD) or solid-state drive (SSD) for expanded storage.
- Power off the Mini PC and disconnect all cables.
- Carefully remove the bottom cover of the Mini PC.
- Connect the SATA data and power cable to your 2.5-inch drive.
- Secure the drive into the designated bay on the bottom cover.
- Connect the other end of the SATA cable to the motherboard.
- Reattach the bottom cover and secure it with screws.
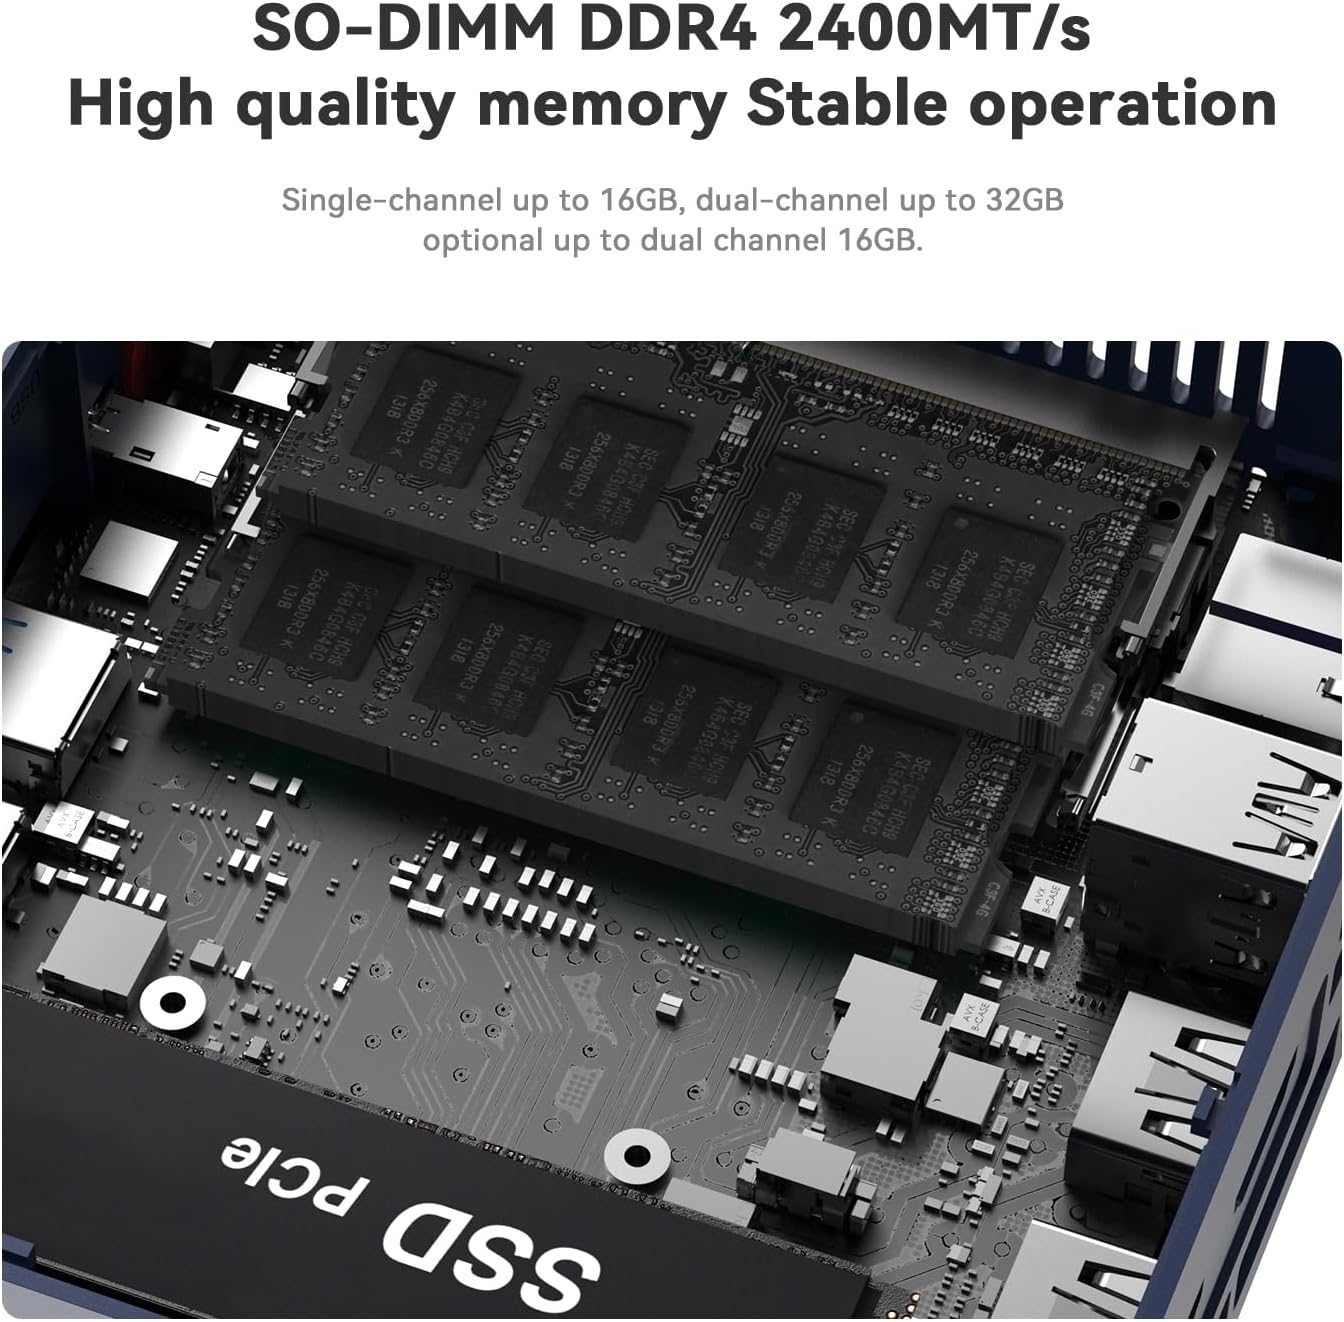
Image: Internal view illustrating the installation process for a 2.5-inch SATA drive.
Video: Detailed tutorial on how to replace or install an SSD in the Beelink Mini PC.
Maintenance
Cleaning the Cooling System
Regular cleaning of the cooling system helps maintain optimal performance and prevents overheating.
- Power off the Mini PC and disconnect all cables.
- Carefully remove the bottom cover of the Mini PC.
- Locate the cooling fan and heat sink assembly.
- Gently clean any dust accumulation from the fan blades and heat sink fins using compressed air or a soft brush.
- Ensure all components are dry before reattaching the bottom cover.

Image: Diagram illustrating the cooling system components and airflow.
Video: Short tutorial demonstrating how to remove the cooling fan for cleaning or replacement.
Troubleshooting
- No Display: Ensure the monitor is properly connected and powered on. Try a different HDMI cable or monitor. Check if the Mini PC is powered on (power LED should be lit).
- No Power: Verify the power adapter is securely connected to both the Mini PC and the power outlet. Try a different power outlet.
- No Internet Connection: For wired connection, ensure the Ethernet cable is properly connected to the LAN port and your router. For Wi-Fi, check Wi-Fi settings in Windows and ensure you are connected to the correct network.
- Slow Performance: Close unnecessary applications. Check for background processes consuming high CPU or RAM. Ensure sufficient free storage space. Consider upgrading RAM or SSD if performance issues persist.
- Peripheral Not Detected: Ensure the peripheral is correctly plugged into the USB port. Try a different USB port. Update or reinstall drivers for the peripheral.
Specifications
| Processor | AMD Ryzen 3 3200U (2C/4T, up to 3.5GHz) |
| Graphics | Radeon Vega 3 Graphics (3 core, 1200 MHz) |
| RAM | 16GB DDR4 (Dual SO-DIMM slots, Max 32GB) |
| Storage | 500GB PCIe3.0 SSD (M.2 2280 slot) |
| Expandable Storage | 1 x 2.5-inch SATA HDD/SSD slot |
| Video Output | 2 x HDMI (4K@60Hz, Dual Display Support) |
| Wireless Connectivity | WiFi 6, Bluetooth 5.2 |
| Wired Connectivity | 1 x RJ45 1000M LAN port |
| USB Ports | 4 x USB 3.2, 1 x USB 2.0 |
| Operating System | Windows 11 Pro |
| Dimensions | 6.1 x 6.02 x 4.21 inches |
| Weight | 2.09 pounds |
Warranty and Support
All Beelink Mini PCs undergo strict inspection before shipping. The product comes with:
- FCC, ROHS, CE certification.
- Free and reliable lifetime after-sales technical support.
- 7*24 hours online customer service.
For support, please refer to the contact information provided in your user manual or visit the official Beelink website.