
1. Safety Information
Warning: This product contains small parts. Please keep it out of reach of small children to prevent choking hazards.
2. Product Overview
The ROBOTIME Marble Run Connection Set LG01 is an accessory designed to link two specific ROBOTIME 3D wooden marble run puzzles: the Spaceport (model LGC01) and the Night City (model LGA01). This set enhances the play experience by providing a continuous track and motorized operation between the two main models. Please note that this connection set cannot function as a standalone marble run.

Image: The LG01 connection set shown linking the Spaceport (LGC01) and Night City (LGA01) marble runs.
2.1. Components
The LG01 kit includes various wooden parts, a motor, a circuit board, a light strip, a synchronous belt, and a screwdriver for assembly. Ensure all parts are present before beginning assembly.
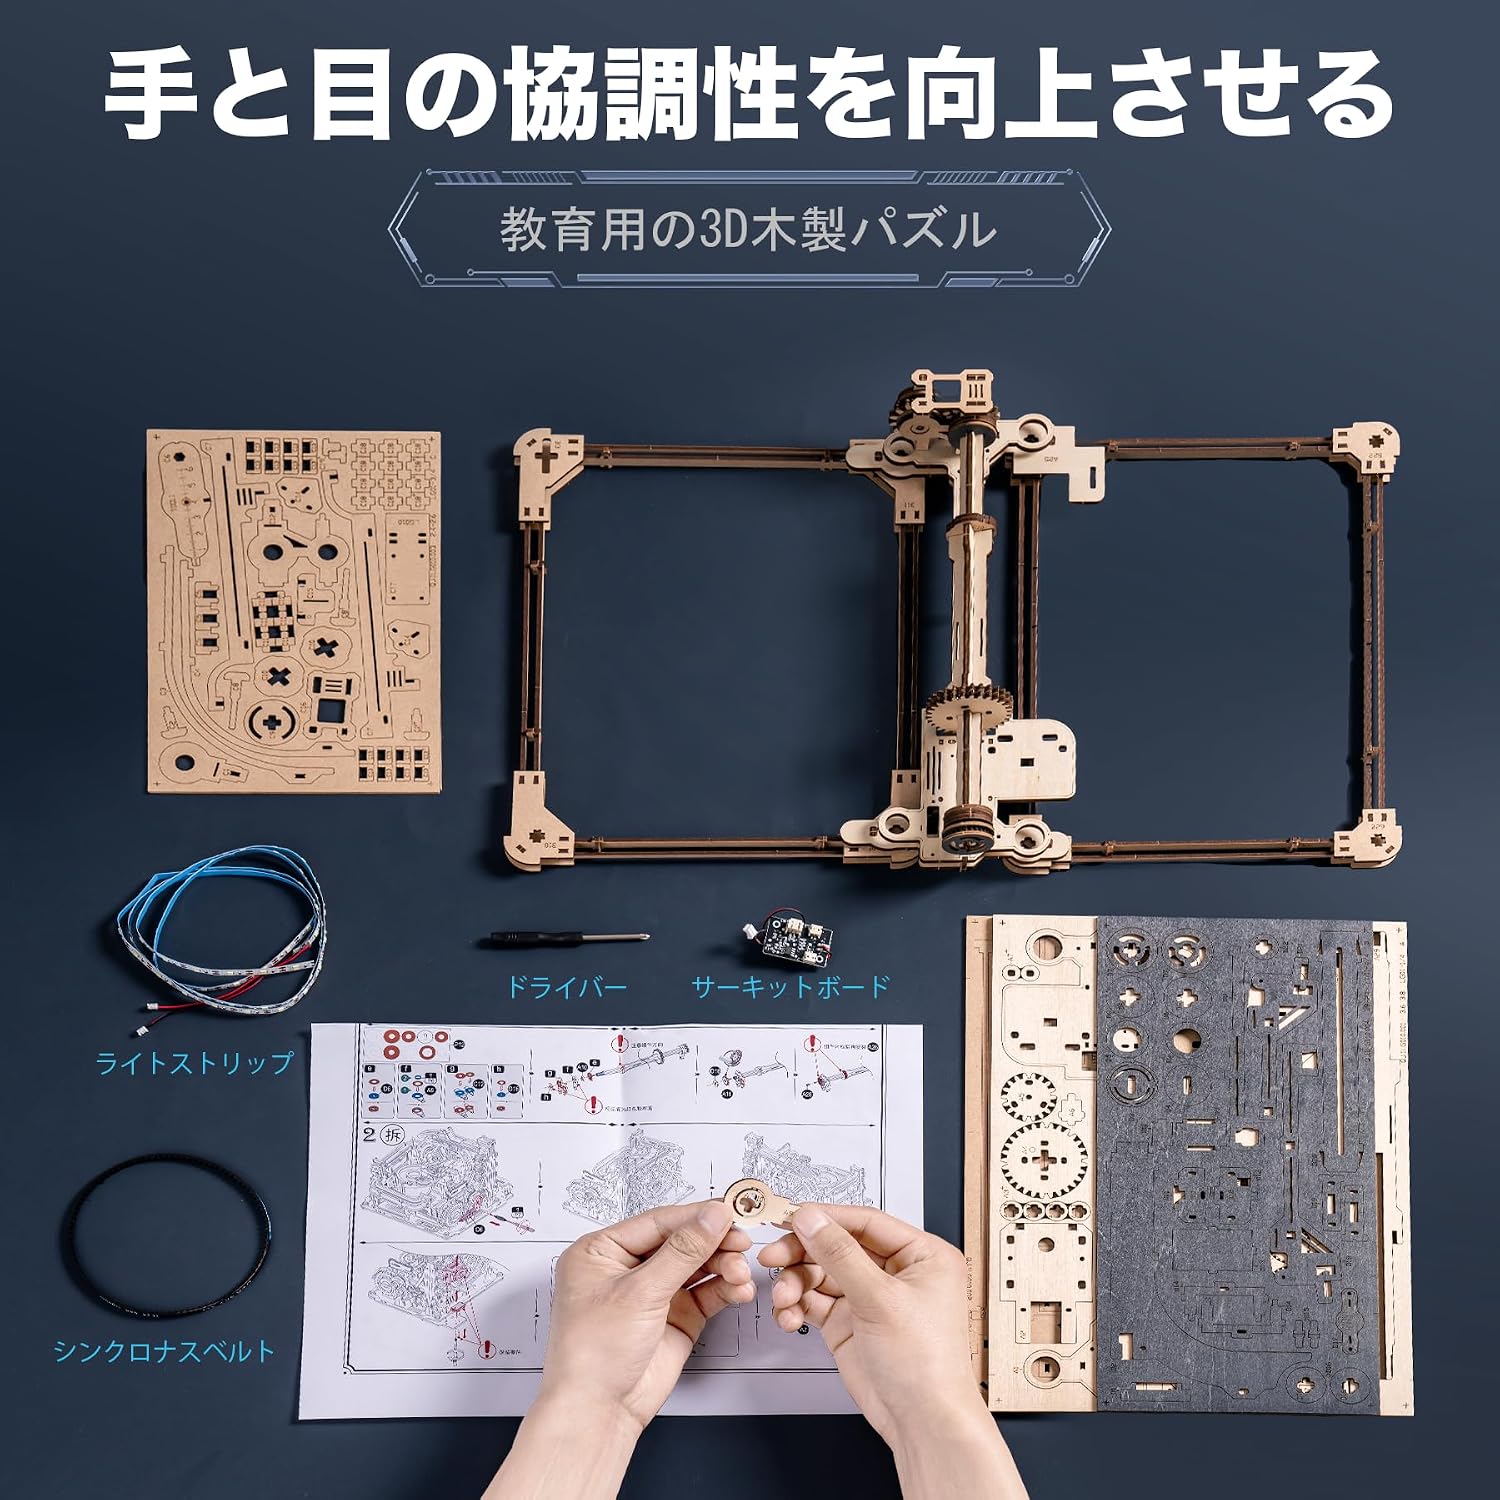
Image: All components included in the LG01 connection set, laid out for inspection.
3. Specifications
| Feature | Detail |
|---|---|
| Brand | ROBOTIME |
| Model Number | LG01 |
| Product Type | Connection Set Accessory |
| Puzzle Type | Assembly and Disassembly |
| Recommended Age (Months) | 168+ (14+ Years) |
| Number of Pieces | 1 (Set) |
| Product Dimensions (L x W) | 30 x 22 cm |
| Operation Location | Tabletop |
| Theme | Space, City |
| Material Type | Wood |
4. Setup and Assembly
This connection set requires assembly. Follow the detailed instructions provided in the physical kit. The general steps involve:
- Preparation: Ensure you have both the LGC01 Spaceport and LGA01 Night City marble runs fully assembled and ready for connection.
- Part Identification: Carefully identify all wooden pieces, gears, belts, and electrical components (motor, circuit board, light strip) from the LG01 kit.
- Assembly of Connection Track: Assemble the wooden track sections that will bridge the LGC01 and LGA01 units. Pay close attention to the interlocking mechanisms and ensure all parts fit snugly.
- Motor and Gear Installation: Install the motor, gears, and synchronous belt according to the diagrams. Ensure the gears mesh correctly and the belt is properly tensioned to allow smooth operation.
- Electrical Connections: Connect the light strip and motor to the circuit board. Ensure all connections are secure.
- Integration: Carefully position the assembled LG01 connection set between the LGC01 and LGA01 units, aligning the tracks and ensuring a stable connection.
- Power Connection: Connect the USB-C power cable (not included) to the circuit board.
Important: Refer to the step-by-step visual guide included with your physical product for precise assembly instructions.

Image: Key features of the LG01 connection set, including the illuminated base, conveyor belt, interchangeable track, and drive shaft.
5. Operating Instructions
The ROBOTIME Marble Run Connection Set LG01 features an electric mode with ice-blue cyber-style lighting effects. A single touch button controls the power and lighting modes.

Image: The touch button and indicators for controlling the electric and lighting functions.
5.1. Powering On and Mode Selection
- Initial Power On (Breathing Light & Motor Start): Lightly press the touch button once. The ice-blue breathing light will turn on, the motor will activate, and the marbles will begin to roll through the connected tracks.
- Constant Light Mode (Motor Continues): Lightly press the touch button a second time. The ice-blue breathing light will change to a constant, static illumination. The motor will continue to operate, and marbles will keep rolling.
- Power Off: Press and hold the touch button for a few seconds. Both the light and the motor will turn off completely.
The system includes a 10-minute automatic power-off protection mechanism to conserve energy and prevent overheating.
Note: A USB-C power cable is required but not included. You can use a standard mobile phone charging cable for power.

Image: Illustration of the different lighting effects available during operation.
6. Maintenance
To ensure the longevity and smooth operation of your ROBOTIME Marble Run Connection Set LG01, consider the following maintenance tips:
- Lubrication: Apply a small amount of wax (often included with wooden puzzle kits) to the gears and moving parts. This reduces friction and ensures smoother, quieter operation. Reapply periodically as needed.
- Cleaning: Gently wipe down the wooden surfaces with a dry, soft cloth to remove dust. Avoid using water or chemical cleaners, as these can damage the wood.
- Inspection: Periodically check all connections, especially the track joints and electrical wiring, to ensure they are secure and undamaged.
- Storage: When not in use for extended periods, store the marble run in a dry, stable environment away from direct sunlight and extreme temperature changes.
7. Troubleshooting
If you encounter issues with your ROBOTIME Marble Run Connection Set LG01, refer to the following common problems and solutions:
| Problem | Possible Cause | Solution |
|---|---|---|
| Marbles stop or move slowly. |
|
|
| Motor does not run or lights do not turn on. |
|
|
| Parts do not fit together or are misaligned. |
|
|
8. Warranty and Support
For information regarding product warranty, returns, or technical support, please refer to the documentation included with your purchase or contact ROBOTIME customer service directly. Contact details can typically be found on the product packaging or the official ROBOTIME website.


