
1. Important Safety Information
Please read all instructions carefully before operating the Zstar Commercial Ice Maker Machine. Retain this manual for future reference.
- Ensure the ice maker is kept upright for at least 24 hours before initial use to allow the refrigerant to settle.
- This appliance is designed for commercial use.
- Always connect to a grounded power outlet.
- Do not operate the machine with a damaged power cord or plug.
- Keep ventilation openings clear of obstructions.
- Only use potable water for ice production.
- Do not store explosive substances such as aerosol cans with a flammable propellant in this appliance.
2. Product Overview
The Zstar Commercial Ice Maker Machine is designed for efficient and quiet ice production, suitable for various commercial settings. It features a robust compressor, intelligent controls, and a self-cleaning function.
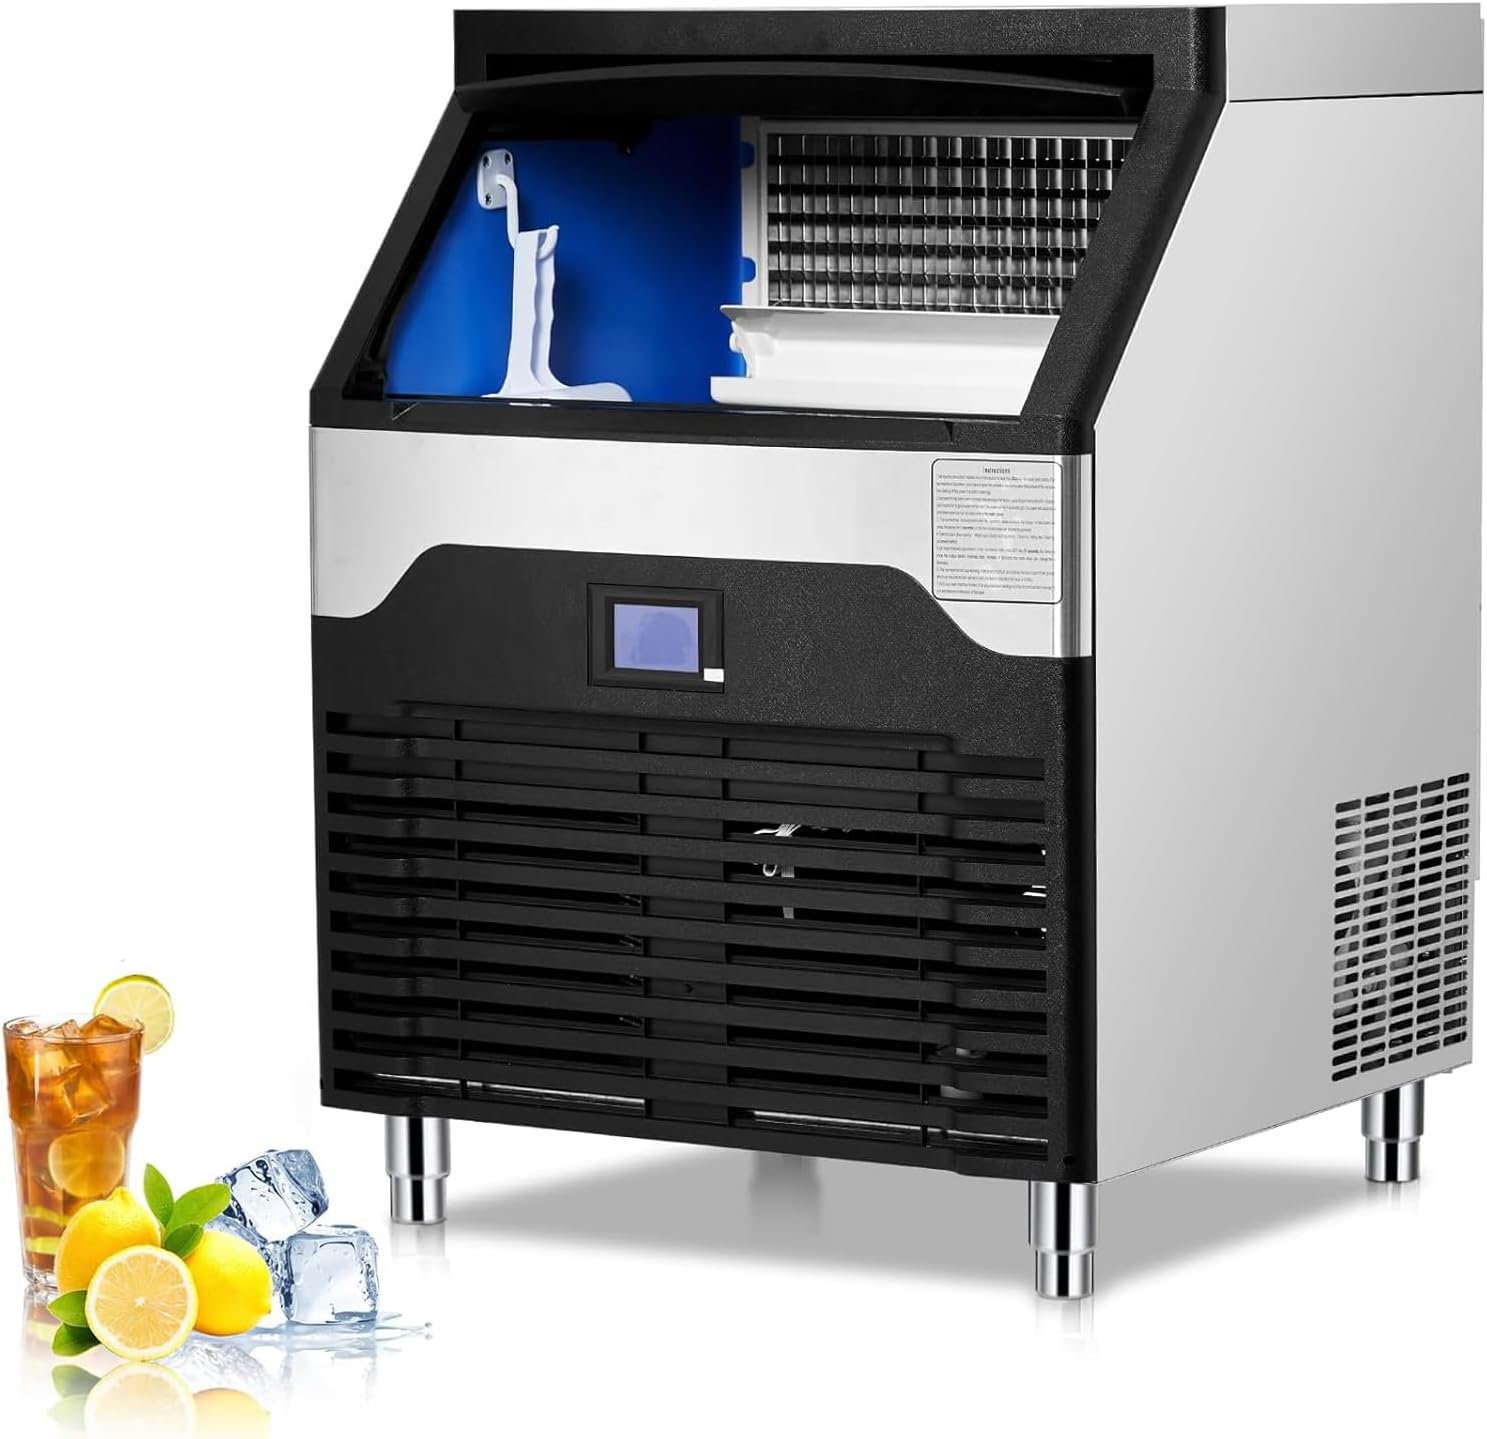
Figure 2.1: Front view of the Zstar Commercial Ice Maker Machine.
Included Components:

Figure 2.2: Included accessories with the ice maker, including water filter and hoses.
- Zstar Commercial Ice Maker Machine
- Water Purifier (1 set)
- Inlet Pipes (2 pieces)
- Outlet Pipes (1 piece)
- Ice Shovel (1 piece)
3. Setup and Installation
3.1 Unpacking and Placement
- Carefully remove the ice maker from its packaging.
- Place the unit on a flat, stable surface. The machine can be installed as a countertop or undercounter unit.
- Allow the ice maker to stand upright for at least 24 hours before plugging it in. This ensures the refrigerant settles properly, preventing potential damage to the compressor.

Figure 3.1: The ice maker can be placed under a counter or as a freestanding unit.
3.2 Water Connection
The ice maker is designed to automatically filter incoming water for hygienic ice production.
- Connect the water inlet pipe to a potable water supply.
- Install the provided water purifier in line with the inlet pipe.
- Connect the outlet pipe for drainage. Ensure the drain hose is properly positioned to allow water to flow away from the unit.
- Check all connections for leaks before proceeding.
3.3 Power Connection
Plug the ice maker into a dedicated 110 Volt, grounded electrical outlet.
4. Operating Instructions
4.1 Control Panel Overview
The intelligent LCD control panel allows for easy operation and customization of ice production.

Figure 4.1: The LCD control panel for managing ice production settings.
4.2 Initial Operation
- After connecting water and power, turn on the machine using the power button on the control panel.
- The machine will begin the ice-making cycle automatically.
- The first few batches of ice may be smaller or irregular. Discard these initial batches.
4.3 Adjusting Ice Cube Thickness
The control panel allows you to adjust the ice-making time, which directly affects the thickness of the crescent ice cubes.

Figure 4.2: Ice cube thickness can be adjusted via the control panel.
- Thin Ice (5-8 minutes): Ideal for smoothies or seafood displays.
- Medium Ice (8-11 minutes): Suitable for mixed drinks and cocktails.
- Thick Ice (11-15 minutes): Best for chilling beer barrels or whiskey.
Refer to the control panel interface for specific buttons or menu options to adjust the ice-making duration.
4.4 Smart Timer Settings
Utilize the smart timer function to schedule ice production according to your needs.

Figure 4.3: Example of using the smart timer for scheduled ice production.
This feature allows you to set a start or stop time for ice production, ensuring fresh ice is available when required.
5. Maintenance
5.1 Automatic Self-Cleaning Function
The Zstar ice maker includes a one-button automatic cleaning function to maintain hygiene and ensure clear ice cubes.

Figure 5.1: The automatic self-cleaning function simplifies maintenance.
- Locate the self-cleaning button on the LCD control panel.
- Press the button to initiate the cleaning cycle. Follow any on-screen prompts.
- The machine will perform an internal rinse and drain cycle.
- Regular use of this function helps prevent mineral buildup and maintains ice quality.
5.2 Water Filter Replacement
The included water filter helps ensure clean and hygienic ice. Replace the filter periodically according to usage or when ice quality diminishes.
- Turn off the ice maker and disconnect it from the power supply.
- Shut off the water supply to the unit.
- Follow the instructions provided with the replacement filter for proper installation.
- Flush the new filter before reconnecting to the ice maker.
5.3 Exterior Cleaning
The stainless steel exterior can be cleaned with a soft cloth and mild detergent. Avoid abrasive cleaners or scouring pads that could scratch the surface.
6. Troubleshooting
If you encounter issues with your Zstar Commercial Ice Maker Machine, please refer to the following common troubleshooting steps. For problems not listed here, or if issues persist, contact customer support.
| Problem | Possible Cause | Solution |
|---|---|---|
| Machine does not turn on | No power supply | Check power cord connection and wall outlet. Ensure the power switch is on. |
| No ice production | No water supply or clogged filter | Ensure water supply is connected and turned on. Check water filter for clogs and replace if necessary. |
| Ice cubes are too thin/thick | Incorrect ice thickness setting | Adjust ice-making time via the LCD control panel. |
| Unusual noise during operation | Unit not level or internal component issue | Ensure the machine is on a level surface. If noise persists, contact customer support. |
| Water leakage | Loose connections or clogged drain | Check all water inlet and outlet connections for tightness. Clear any obstructions in the drain hose. |
7. Specifications
| Feature | Specification |
|---|---|
| Brand | Zstar |
| Model Name | 160LBS Commercial Ice Maker Machine |
| Product Dimensions (D x W x H) | 26.37" x 26.37" x 35.82" (67cm x 67cm x 91cm) |
| Ice Making Capacity | 160 lbs (72.5 kg) per 24 hours |
| Ice Storage Capacity | 132 lbs (60 kg) |
| Wattage | 433 watts |
| Voltage | 110 Volts |
| Refrigerant | R410a |
| Material | Stainless Steel |
| Item Weight | 145 pounds (65.7 kg) |
| Installation Type | Countertop, Undercounter |
| Noise Level | Less than 65dBA |
| Ice Cube Type | Crescent Ice Cube (approx. 0.9 inches / 22 mm) |
| UPC | 198290885756 |
8. Warranty and Support
8.1 Protection Plans
Optional protection plans may be available for purchase to extend coverage beyond the standard manufacturer's terms. Please refer to your retailer for details on available plans, such as 3-Year Protection Plans or Complete Protect options.
8.2 Returns and Customer Support
This product typically includes a 30-day easy return policy. For technical assistance, warranty claims, or any operational questions, please contact Zstar customer support through your purchase platform or the contact information provided with your product documentation.