
RILAND MMA160
RILAND Stick Welder 200A User Manual
Model: MMA160
1. Important Safety Information
Always prioritize safety when operating welding equipment. Read and understand all instructions before use. Failure to follow safety guidelines can result in serious injury or death.
- Ensure proper ventilation to avoid inhaling welding fumes.
- Wear appropriate personal protective equipment (PPE), including a welding helmet, gloves, and protective clothing.
- Verify power connections are secure and match the welder's voltage requirements (110V/220V).
- Do not operate the welder in damp or wet conditions.
- Keep flammable materials away from the welding area.
- The unit features a built-in overheat protection system; allow the machine to cool if it activates.
- The flame-retardant, shockproof housing enhances durability, but proper handling is still essential.
2. Product Overview
The RILAND Stick Welder 200A is a portable, IGBT inverter-based MMA welding machine designed for both ARC and Lift TIG welding. It features a digital display, synergic control, Hot Start, Arc force, and Anti-Stick functions, supporting both 110V and 220V power inputs.
Key Features:
- Digital Display: Provides clear readings for precise current control.
- Dual Voltage (110V/220V): Automatic adjustment for versatile power source compatibility.
- IGBT Inverter Technology: Ensures stable arc and powerful performance.
- Synergic Control: Simplifies parameter settings for various welding tasks.
- Hot Start: Improves arc ignition, especially in low-voltage environments.
- Arc Force: Optimizes arc stability during welding.
- Anti-Stick: Reduces the possibility of electrodes sticking to the molten pool.
- Portable Design: Lightweight and compact for easy transport.
Product Views:

Figure 2.1: Front view of the RILAND Stick Welder 200A, showing the digital display and control knob.

Figure 2.2: The RILAND Stick Welder 200A connected with electrode holder and ground clamp, highlighting its high-end machine and excellent performance.

Figure 2.3: Illustration of the advanced IGBT Inverter Technology, emphasizing portability, synergic control, multi-functional use, and safety features.
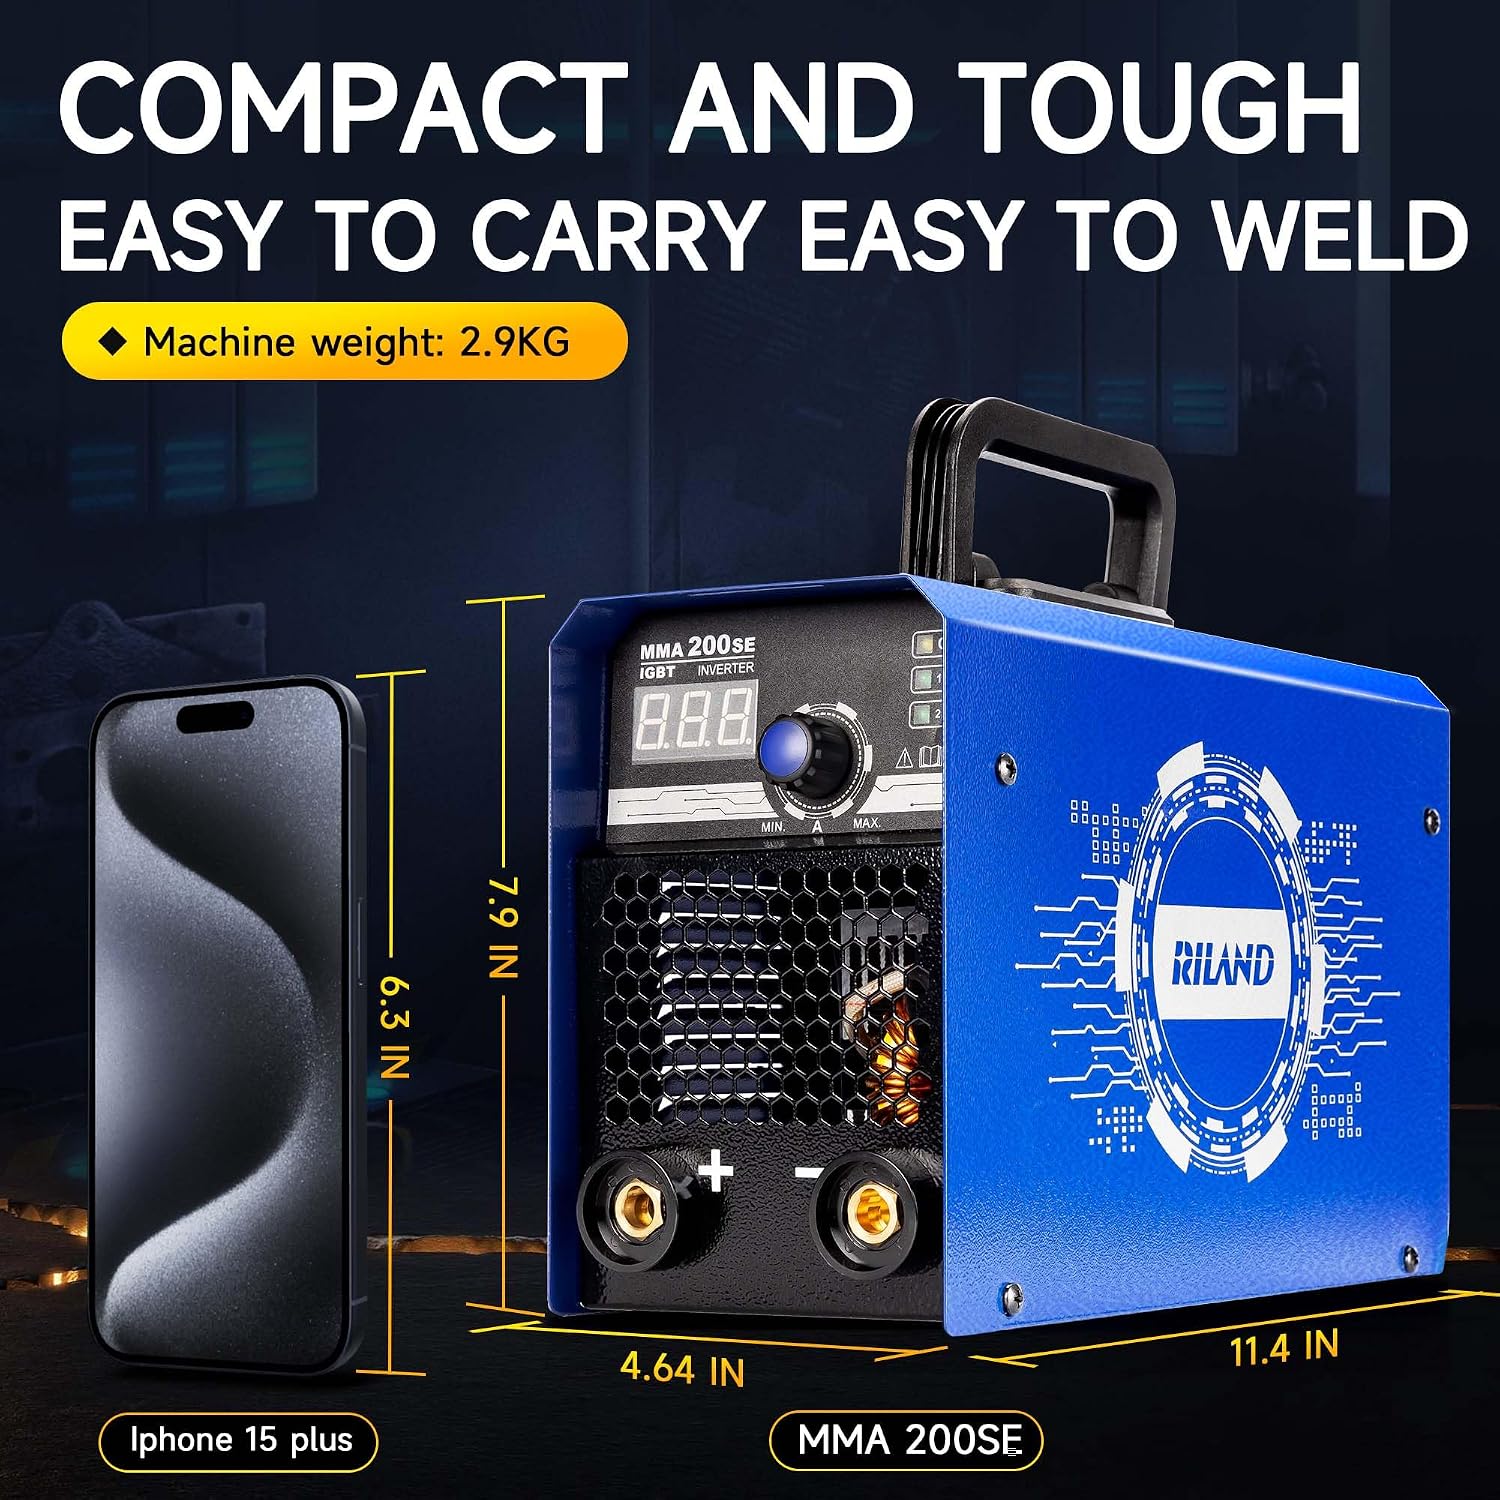
Figure 2.4: The compact and tough design of the RILAND MMA 200SE welder, shown next to a smartphone for size comparison, indicating its portability.

Figure 2.5: Close-up of the smart chip welder's digital display, showing maximum current of 200A and voltage 220V±15%, designed for easy welding for novices.
Product Video:
Video 2.1: An overview of the RILAND 200A Stick Welder, demonstrating its features and capabilities in a workshop setting. The video highlights its compact size, dual voltage compatibility, and ease of use for various welding tasks, including frame repair.
3. Setup
3.1 Unpacking and Inspection
Carefully remove the welding machine and all accessories from the packaging. Inspect all components for any signs of damage during transit. Ensure all included items are present:
- 1x MMA 200SE Welding machine
- 1x Power Cord
- 1x Convenient Mask
- 1x Power Adapter (for 220V)
- 1x Earth clamp
- 1x Electrode holder
- 1x Mask Goggles
- 1x Mask Handle
- 1x Brushes
- 5x Bonus welding rods

Figure 3.1: All accessories included with the RILAND Stick Welder 200A, ensuring it is fully equipped and ready for use right out of the box.
3.2 Power Connection
The RILAND Stick Welder 200A supports both 110V and 220V power inputs with automatic voltage adjustment. Connect the power cord to a suitable power outlet. If using 220V, utilize the provided power adapter.
Note: The video demonstrates connecting the welder to a 220V outlet using an adapter, and also mentions direct wall plug-in for 110V.
3.3 Connecting Electrode Holder and Ground Clamp
Connect the electrode holder cable to the positive (+) terminal and the ground clamp cable to the negative (-) terminal on the front panel of the welder. Ensure connections are tight and secure.
Note: The video shows the electrode holder and ground clamp connections, emphasizing their quality and functionality.
4. Operating Instructions
4.1 Powering On and Amperage Adjustment
Turn on the power switch located at the back of the unit. The digital display will illuminate. Use the control knob on the front panel to adjust the welding amperage. The welder is adjustable from 30 Amps all the way up to 200 Amps, allowing for precise control based on your welding needs.
Note: The video demonstrates adjusting the amperage from 30A to 200A using the control knob.
4.2 Welding Features
- Hot Start: This feature briefly increases the welding current at the start to improve arc ignition, especially useful in low-voltage environments or with difficult-to-start electrodes.
- Arc Force: Optimizes arc stability by automatically adjusting the current to prevent the arc from extinguishing when the electrode gets too close to the workpiece.
- Anti-Stick: Automatically reduces the current if the electrode sticks to the workpiece, preventing the electrode from overheating and making it easier to detach.

Figure 4.1: Illustration of the Hot Start feature, which improves arc ignition by briefly increasing welding current.

Figure 4.2: Illustration of the Arc Force feature, designed to optimize arc stability during the welding process.

Figure 4.3: Illustration of the Anti-Sticking feature, which helps reduce the possibility of electrodes sticking to the molten pool.
4.3 Welding Rods
The welder comes with 5 bonus welding rods. For optimal performance and specific applications, it is recommended to use high-quality welding rods suitable for the material and thickness you are welding. The unit can be applied to 2.5mm-4.0mm welding rods.
Note: The video suggests that while the included rods are functional, purchasing higher quality Lincoln rods (e.g., Excalibur 7018 H4R) can improve welding results.
4.4 Scenario Applications
This versatile welder is suitable for a wide range of applications and metals:

Figure 4.4: Various scenario applications for the RILAND Stick Welder, including Home Repairs, DIY Design, Automotive Work, and Farm and Garden Projects.

Figure 4.5: The RILAND welder is suitable for a wide range of metals, including Carbon steel, Stainless steel, Low alloy steel, and Cast iron.
- Metals: Cast Iron, Mild Steel, Sheet Metal, Stainless Steel, Carbon Steel, Low Alloy Steel.
- Projects: Home Repairs, DIY Design, Automotive Work, Farm and Garden Projects, Metal Cage, Square Pipe.
5. Maintenance
5.1 Cleaning
Regularly remove dust from the machine, especially from the ventilation openings, to ensure proper airflow and prevent overheating. Use compressed air for effective cleaning.
5.2 Storage
Store the welder in a dry, clean environment, away from excessive dust and moisture. Ensure the power cord is fully pulled out of the power socket when not in use.
5.3 Overheat Protection
The welder is equipped with an overheat protection system. If the machine becomes too hot during extended use, it will automatically shut down to prevent damage. Allow the unit to cool down before resuming operation.

Figure 5.1: Icons representing the welder's protection features: Thermostat, Over current, Over voltage, Ambient voltage, and Generator set compatibility.
6. Troubleshooting
This section addresses common issues you might encounter during operation.
| Problem | Possible Cause | Solution |
|---|---|---|
| Welder does not start or frequently trips. | Low voltage environment, insufficient power supply, or internal protection activation. | Ensure stable power supply. The unit is designed for strong arc starts even in low-voltage environments. Check for proper circuit breaker rating. |
| Insufficient power or unexpected shutdowns. | Overheating due to prolonged use or blocked ventilation. | Allow the machine to cool down. Ensure ventilation openings are clear. The built-in overheat protection system prevents damage. |
| Electrodes sticking to the workpiece. | Incorrect amperage setting, improper welding technique, or low-quality welding rods. | Adjust amperage using the control knob (lower for thinner materials, higher for thicker). Utilize the Anti-Stick feature. Consider using higher quality welding rods. |
| Poor weld penetration or burn-through. | Amperage too low (poor penetration) or too high (burn-through). | Adjust amperage accordingly. For thin materials, lower the amperage significantly (e.g., to 65A as demonstrated in the video for thin frame repair). Practice on scrap material to find optimal settings. |
For further assistance, refer to the detailed illustrated manual included with your product or contact customer support.
7. Specifications
| Attribute | Value |
|---|---|
| Manufacturer | RILAND |
| Item Weight | 11.31 pounds |
| Product Dimensions | 8.66 x 8.86 x 13.43 inches |
| Item Model Number | MMA160 |
| Size | MMA200SE |
| Color | Blue |
| Style | Stick Welder 200A |
| Material | Metal |
| Power Source | AC |
| Voltage | 110 Volts / 220 Volts (Dual Voltage) |
| Item Package Quantity | 1 |
| Included Components | 1*Electrode Holder, 1*Ground clamp, 1*Power cord |
| Date First Available | August 10, 2024 |
8. Warranty and Support
The RILAND Stick Welder 200A comes with a full 2-year warranty for peace of mind after purchase. RILAND is committed to providing excellent customer service.
- Professional Support: Backed by a professional support team with 12-hour emergency response.
- Contact: For any issues or support during welding, please contact the Riland Official Store.
- User Manual PDF: A detailed User Manual in PDF format is available for download: Download User Manual (PDF).
Related documentsMMA160

Ask a question about this manual
Ask about setup, troubleshooting, compatibility, parts, safety, or missing instructions. Manuals+ will review the question and use this page’s manual context to help answer it.