
Introduction
The Progress Lighting Standby 7.75 inch Surface Mount LED Motion Sensor Light with Photocell is an advanced lighting solution designed for efficiency and convenience. This fixture integrates motion-sensing technology with energy-saving features, making it suitable for various residential and commercial applications. It activates upon motion detection and includes a photocell to ensure operation only when ambient light is insufficient, optimizing energy use.
Key Features:
- Dual technology motion detection for reliable activation.
- Integrated PIR motion sensor turns light on within a 12-15 ft radius.
- Photocell sensor prevents activation during daylight hours (triggers below 12 lux).
- Automatic shut-off after 30 seconds of no motion.
- Energy-efficient LED technology with 3000K warm light and 90 CRI.
- Dimmable when used with a compatible wall dimmer.
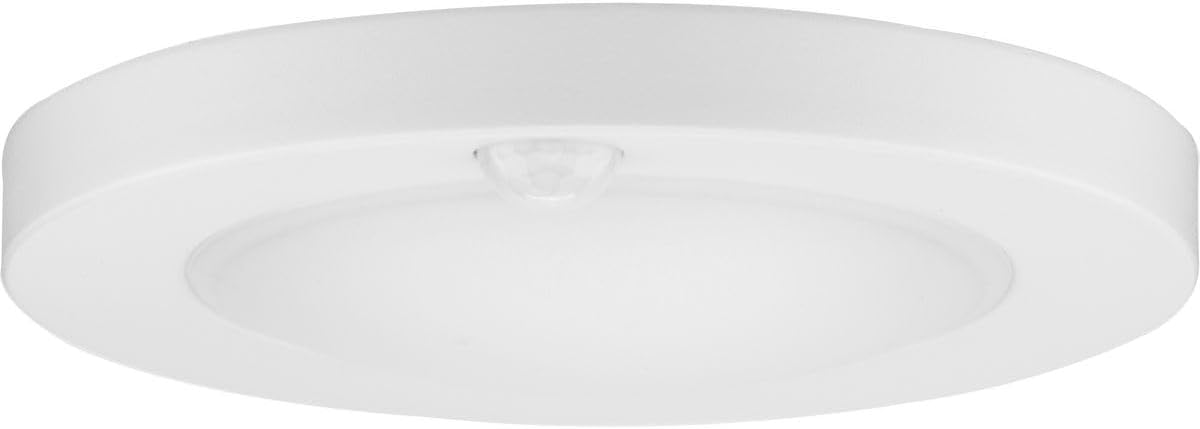
Figure 1: Front view of the Progress Lighting Standby LED Motion Sensor Light.

Figure 2: The light fixture installed in a laundry room, demonstrating its application.
Safety Information
Please read and understand all instructions before beginning installation. Failure to do so may result in electric shock, fire, or other injuries that could be hazardous or even fatal. Installation should be performed by a qualified electrician in accordance with all local electrical codes.
- WARNING: Risk of electric shock. Disconnect power at the circuit breaker or fuse box before installation or servicing.
- Ensure all electrical connections are made according to local codes, ordinances, and the National Electric Code (NEC).
- Verify that the supply voltage is correct by comparing it with the luminaire information.
- Do not attempt to alter the fixture in any way.
- This fixture is designed for indoor use. While it has some resistance, it is not fully water resistant.
Package Contents
Carefully unpack your fixture and check that all parts are included. If any parts are missing or damaged, do not attempt to assemble or install the product. Contact customer service for assistance.
- LED Motion Sensor Light Fixture
- Mounting Hardware (bracket, screws, wire nuts)
- Instruction Manual

Figure 3: Exploded view of the light fixture with included mounting hardware.
Specifications
| Feature | Specification |
|---|---|
| Model Number | P810041-028-30 |
| Dimensions (L x W x H) | 7.72" x 7.72" x 1.38" |
| Material | Alloy Steel, Polycarbonate (Shade) |
| Color | Satin White |
| Light Source | Integrated LED |
| Wattage | 14 Watts |
| Voltage | 120 Volts |
| Brightness | 950 Lumens |
| Color Temperature | 3000K (Warm White) |
| Color Rendering Index (CRI) | 90 |
| Control Method | Motion Sensor, Photocell |
| Installation Type | Surface Mount |
| Indoor/Outdoor Usage | Indoor |
| Water Resistance Level | Not Water Resistant |
| Certification | UL Listed |

Figure 4: The fixture features integrated LED technology and is dimmable with compatible wall dimmers.
Setup and Installation
Follow these steps to properly install your LED motion sensor light. Ensure power is disconnected at the circuit breaker before starting.
- Prepare the Installation Area: Turn off power at the main circuit breaker. Ensure the mounting surface is clean and dry.
- Attach Mounting Bracket: Secure the mounting bracket to the junction box using the provided screws. Ensure the bracket is firmly attached.
- Make Electrical Connections: Connect the fixture's wires to the corresponding house wires. Typically, black to black (live), white to white (neutral), and green/bare copper to green/bare copper (ground). Use the provided wire nuts and ensure connections are secure.
- Mount the Fixture: Align the fixture with the mounting bracket and secure it in place. Refer to the installation sequence diagram for visual guidance.
- Restore Power: Once the fixture is securely mounted and all connections are made, restore power at the circuit breaker.

Figure 5: Back view of the light fixture, showing the wiring for installation.

Figure 6: Installation sequence diagram, showing how the light attaches to the junction box.
Operating Instructions
The Standby LED Motion Sensor Light is designed for automatic operation based on motion and ambient light levels.
- Motion Sensor: The built-in Passive Infrared (PIR) sensor detects movement within its range. When motion is detected, the light will activate. The detection radius is approximately 12 feet when mounted at 8 feet height, and 15 feet when mounted at 10 feet height.
- Photocell Sensor: The integrated photocell ensures that the light only turns on when the ambient light level is below 12 lux (i.e., when it's dark enough). This prevents unnecessary activation during daylight hours, conserving energy.
- Automatic Shut-off: After motion is no longer detected, the light will remain on for approximately 30 seconds before automatically turning off.

Figure 7: Close-up of the integrated motion sensor on the light fixture.

Figure 8: Diagram illustrating the motion detection angle and radius of the light fixture in a room.
Maintenance
Regular maintenance helps ensure the longevity and optimal performance of your light fixture.
- Cleaning: To clean the fixture, ensure power is off. Wipe with a soft, dry, or slightly damp cloth. Do not use abrasive cleaners or solvents, as these may damage the finish or electrical components.
- LEDs: The integrated LED light source is designed for long life and is not user-replaceable.
- Inspection: Periodically check for any loose wiring or damage. If any issues are found, disconnect power and consult a qualified electrician.
Troubleshooting
If you experience issues with your light fixture, refer to the following common problems and solutions:
| Problem | Possible Cause | Solution |
|---|---|---|
| Light does not turn on. | No power, incorrect wiring, photocell detecting too much ambient light, motion sensor not triggered. | Check circuit breaker. Verify wiring connections. Ensure ambient light is below 12 lux. Test motion sensor by moving within its range. |
| Light stays on continuously. | Constant motion detected, wiring issue. | Ensure no continuous motion is within the sensor's range. Check wiring for proper connections. |
| Light flickers. | Loose wiring, incompatible dimmer switch. | Check all wiring connections. Ensure a compatible LED dimmer switch is used if dimming functionality is desired. |
| Motion sensor range is poor. | Obstructions, incorrect mounting height. | Clear any obstructions from the sensor's view. Verify mounting height is within recommended range (8-10 ft). |
If these steps do not resolve the issue, please contact customer support.
Warranty and Support
Warranty Information: All products purchased have a 30-day replacement parts policy to ensure a fully working item. All products are covered under a 1-year warranty when purchased on Amazon. The warranty period begins on the day the product is originally shipped. The warranty covers all items and conditions identified in the original manufacturer's warranty. Items specifically not covered by the warranty include loss and theft, water damage, customer abuse, and finish deterioration due to UV or coastal exposure.
Customer Support: For technical assistance, replacement parts, or warranty claims, please contact Progress Lighting customer service. You can find contact information on the official Progress Lighting website or through your Amazon purchase history.
Online Resources: For additional information, product updates, and FAQs, visit the Progress Lighting Store on Amazon.