
1. Introduction and Overview
This manual provides essential information for the safe and effective use of your AENBUSLM 80W Laser Module with Air Assist. This module features an 80W machine power and a 10W optical output, designed for precision laser engraving and cutting tasks. It incorporates a fixed-focus design and built-in FAC technology for a double ultra-fine compressed spot, enhancing performance on various materials. The integrated air assist system helps maintain a clean working environment and improves cutting efficiency.
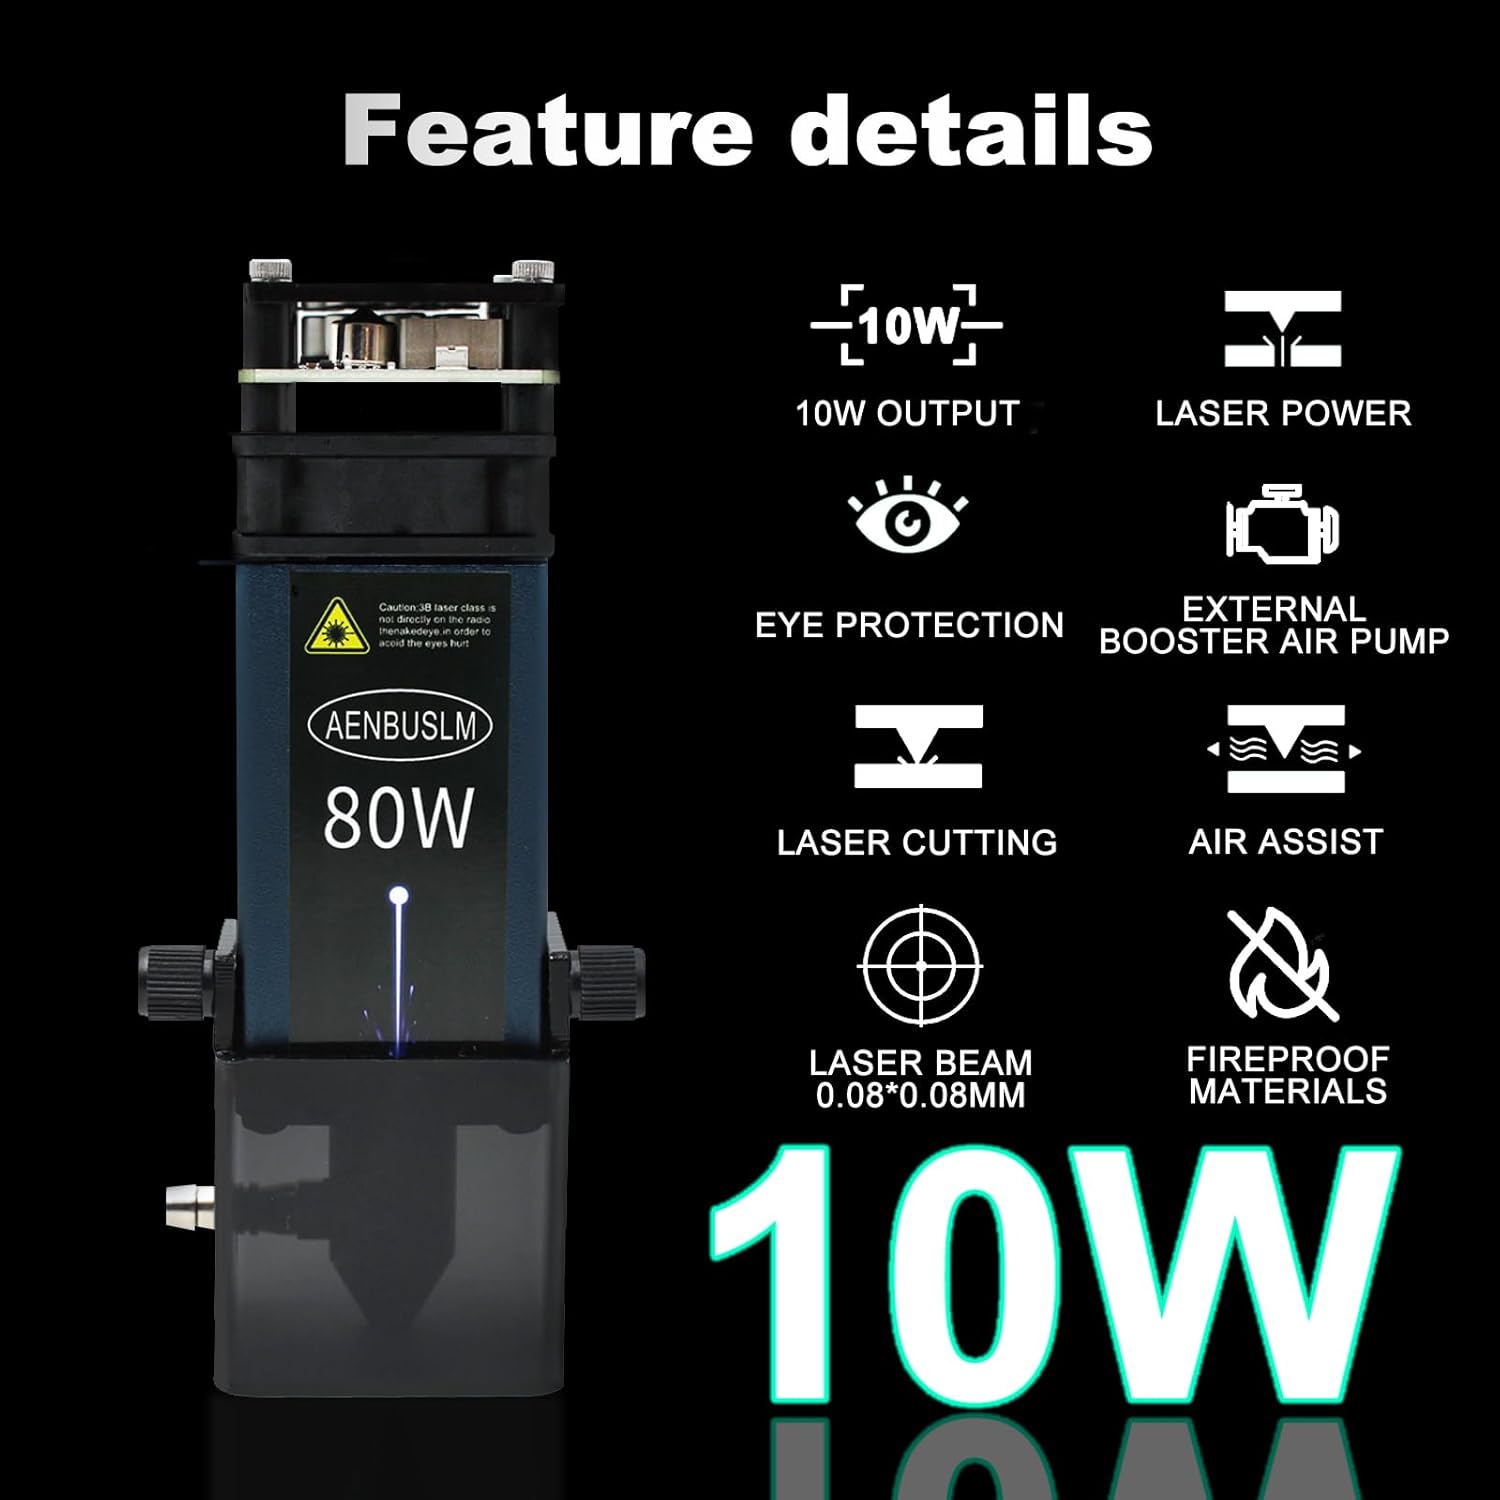
Figure 1: Key features of the AENBUSLM 80W Laser Module.
2. Safety Information
The AENBUSLM 80W Laser Module is a Class 4 laser product. Improper use can result in serious injury, including permanent eye damage, skin burns, and fire. Adhere to all safety precautions.
- Eye Protection: Always wear certified laser safety goggles (OD6+) that specifically block the laser's wavelength during operation. Never look directly into the laser beam or at its reflection. The module includes a magnetic eye protection cover for additional safety, but dedicated goggles are mandatory.
- Ventilation: Operate the laser module in a well-ventilated area or use an appropriate fume extraction system. Laser processing can produce smoke, fumes, and potentially harmful particles.
- Fire Safety: Keep a fire extinguisher nearby. Do not leave the laser module unattended during operation. Ensure the work area is clear of flammable materials.
- Material Compatibility: Do not engrave or cut materials that produce toxic fumes or are highly reflective without proper precautions.
- Children and Pets: Keep children and pets away from the laser module and operating area.
- Power Supply: Use only the specified 12V power supply. Ensure all connections are secure before powering on.

Figure 2: Magnetic Eye Protection Cover for the laser module.
3. Package Contents
Verify that all components are present in your package:
- AENBUSLM 80W Laser Module (10W Output)
- Air Pump
- Air Pump Tube
- External Power Cord
- First to Second Line + External Power Cord
- 3P Line (Signal Cable)
- Air Pump Power Cord
- Lens Replacement Tool
- 1.5mm L Wrench
- Focus Fixing Plate
- Replaceable Protective Lens
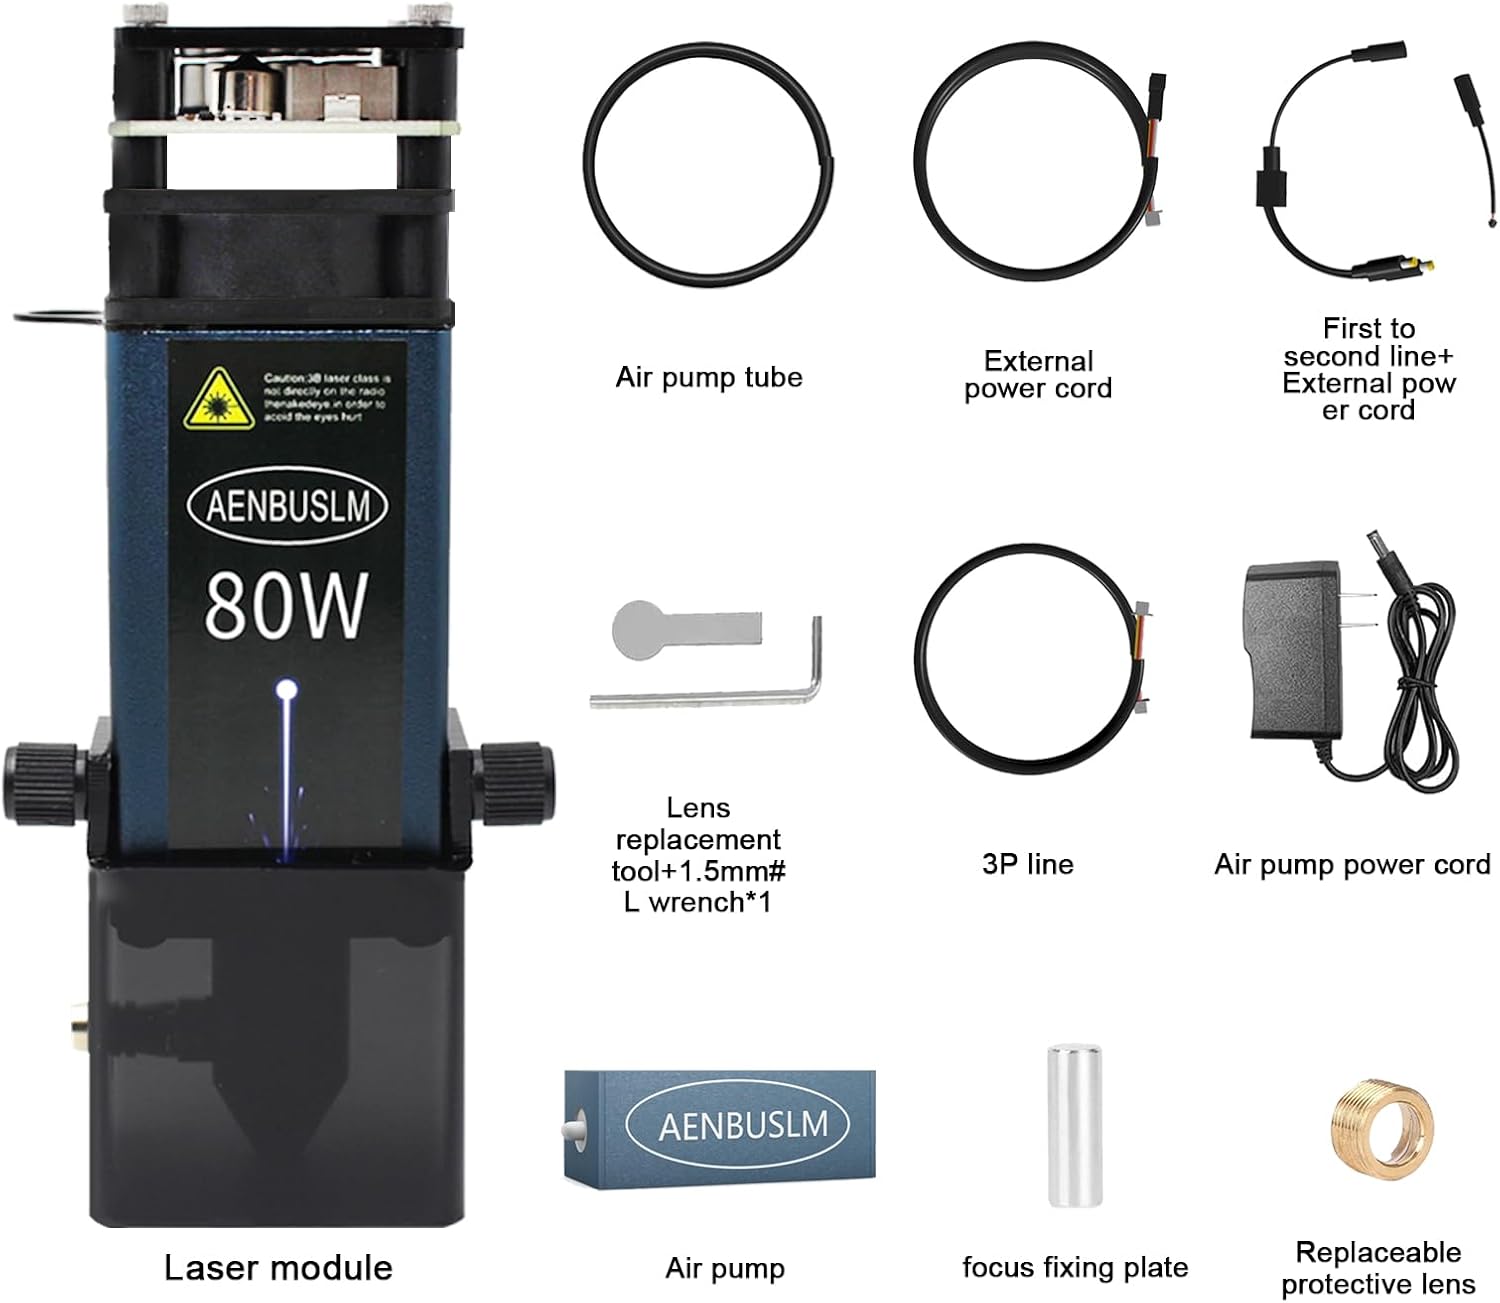
Figure 3: Contents of the AENBUSLM 80W Laser Module package.
4. Setup Instructions
Follow these steps to set up your laser module with a compatible laser engraving machine:
- Mounting the Laser Module: Securely attach the AENBUSLM laser module to your laser engraving machine's gantry according to your machine's instructions. Ensure it is stable and properly aligned.
- Connecting Power and Signal Cables:
- Connect the 3P line (signal cable) from the laser module to the corresponding VCC (DC 12/24V), GND, and PWM (0/5-12V, 0-1kHz) ports on your laser engraving machine's control board. Refer to Figure 4 for typical connection points.
- Connect the external power cord to the laser module's power input.
- Air Assist Connection:
- Connect the air pump tube to the air assist inlet on the laser module.
- Connect the air pump power cord to the air pump and then to a suitable power source.
- Fixed-Focus Adjustment: The module is fixed-focus. Use the provided focus fixing plate to set the correct working distance between the laser module and the material surface. Place the plate on the material, lower the laser module until it touches the plate, then secure the module. Remove the plate before operation.

Figure 4: Cable installation instructions for the laser module.

Figure 5: External Air Assist setup for improved performance.
5. Operating Instructions
Once the module is set up, follow these general steps for operation:
- Prepare Material: Place the material to be engraved or cut on the machine's workbed. Ensure it is flat and securely held.
- Adjust Focus: As this is a fixed-focus module, ensure the working distance was correctly set during setup using the focus fixing plate.
- Software Configuration: Open your laser control software (e.g., LightBurn, LaserGRBL). Load your design and configure the appropriate power, speed, and pass settings for your material.
- Enable Air Assist: For cutting and to minimize smoke and debris during engraving, ensure the air assist pump is powered on and functioning.
- Start Operation: With all safety precautions in place (including wearing laser safety goggles), initiate the laser process from your software. Monitor the operation closely.
Performance Capabilities:
- Engraving: Capable of directly engraving mirror stainless steel without prior blackening. Achieves super-fast engraving speeds of up to 300mm/s on 304 stainless steel with a 45mm focus length.
- Cutting: Demonstrates remarkable cutting ability, capable of cutting through 8mm thick plywood in a single pass at a speed of 1.5mm/s with a 47mm focus length. Can cut 12mm black acrylic in two passes and 12mm basswood plywood in two passes.

Figure 6: Examples of the laser module's cutting capabilities.
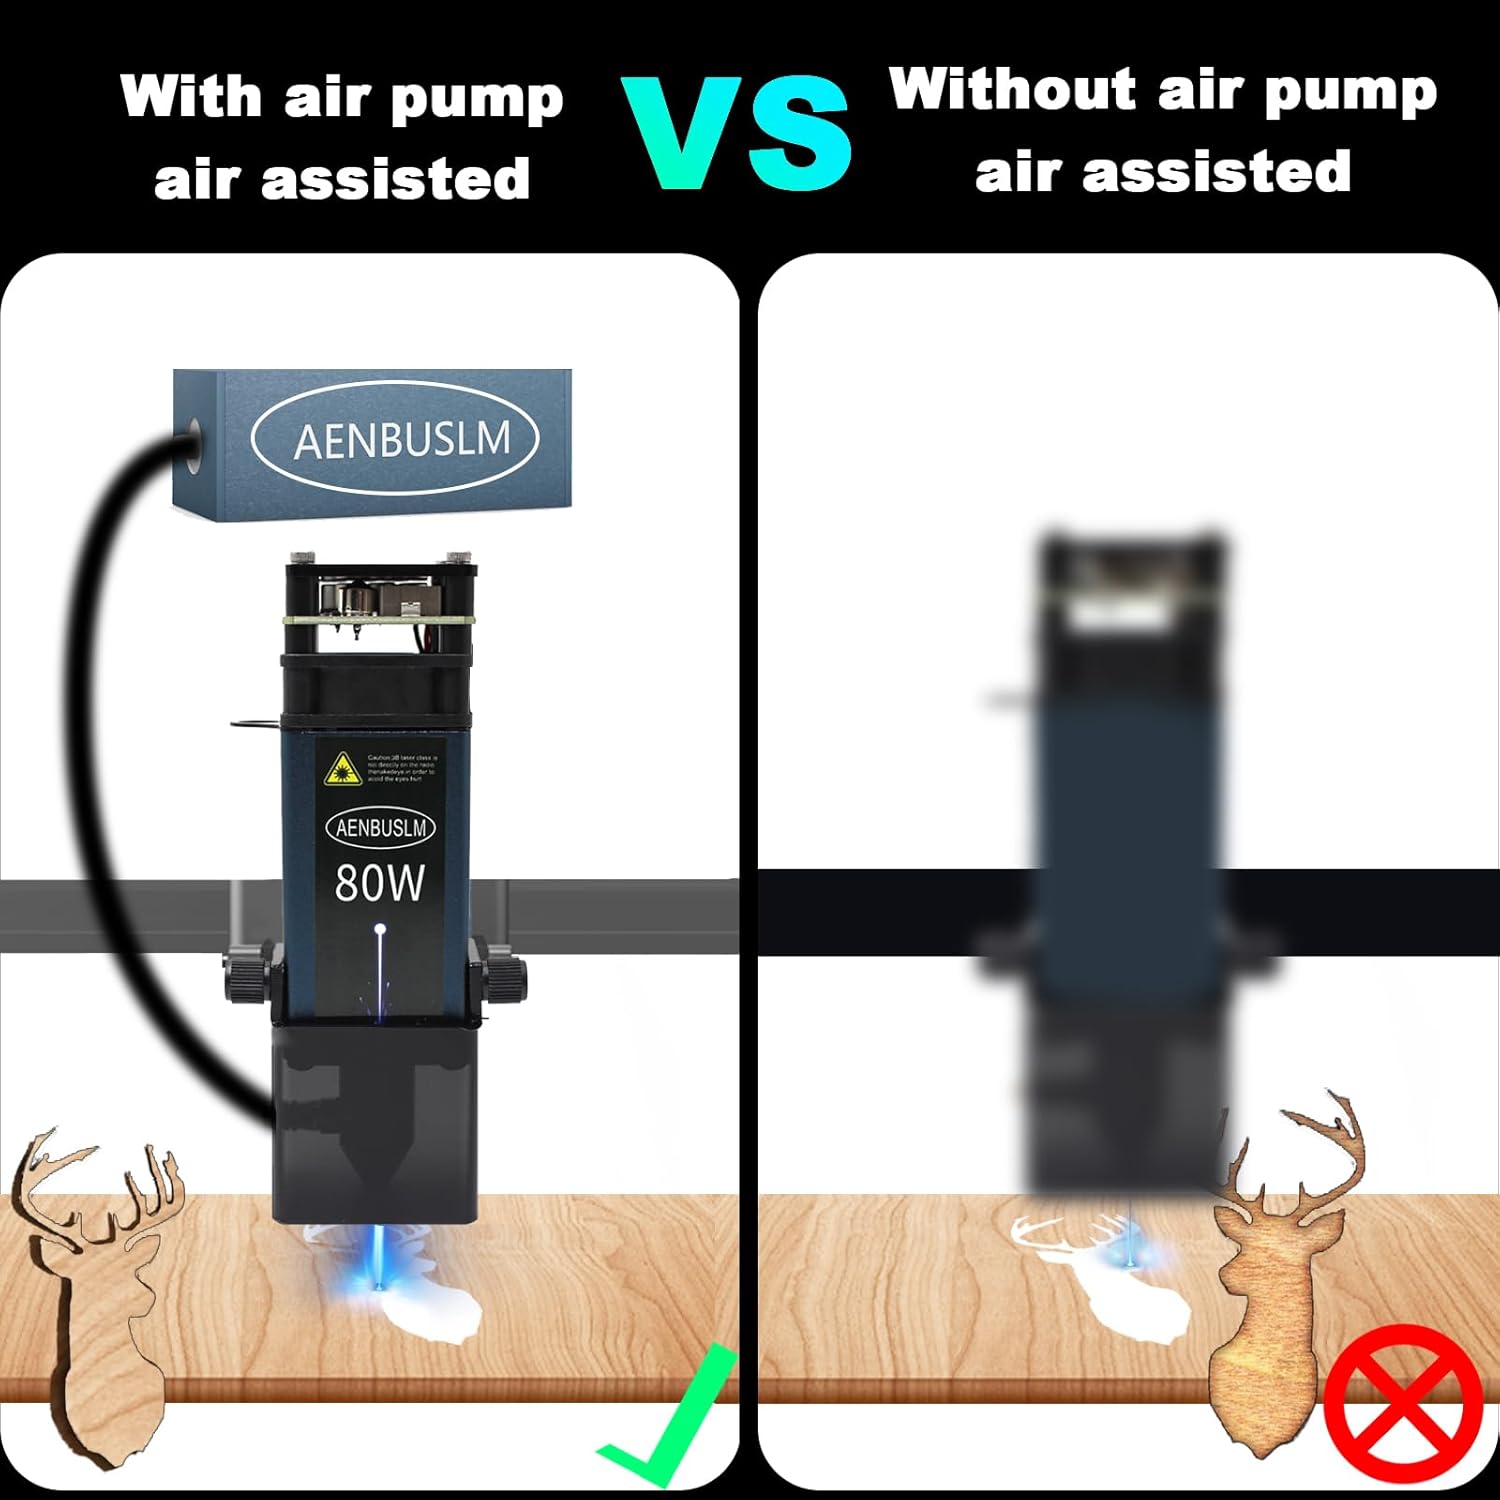
Figure 7: Visual comparison of laser operation with and without air assist.
Video 1: Demonstration of the AENBUSLM 80W Laser Module in operation, showcasing its engraving and cutting capabilities on various materials.
6. Maintenance
Regular maintenance ensures optimal performance and longevity of your laser module:
- Lens Cleaning: Periodically inspect the protective lens for dust or debris. Use a soft, lint-free cloth and lens cleaning solution (specifically designed for optics) to gently clean the lens. Avoid abrasive materials. The module includes a replaceable protective lens for convenience.
- Module Cleaning: Keep the exterior of the laser module clean and free of dust and material residue. Use compressed air to clear any debris from cooling fins.
- Connection Checks: Regularly inspect all power and signal cable connections to ensure they are secure and free from damage.
7. Troubleshooting
If you encounter issues, consider the following common troubleshooting steps:
- No Laser Output:
- Check if the power supply is connected and providing the correct voltage (12V).
- Verify all signal cables (3P line) are securely connected to the control board.
- Ensure the laser control software is correctly configured and sending commands.
- Check for any error indicators on the laser module or control board.
- Poor Engraving/Cutting Quality:
- Confirm the laser focus is correctly set for the material thickness.
- Adjust power and speed settings in your software. Different materials require different parameters.
- Clean the protective lens if it is dirty.
- Ensure the air assist is functioning correctly to clear debris and prevent charring.
- Module Overheating:
- Ensure the cooling fan on the module is operating.
- Verify there is adequate airflow around the module.
- Reduce laser power or increase engraving/cutting speed if operating continuously at high intensity.
8. Specifications
| Feature | Specification |
|---|---|
| Model Number | DLC-JG-3.0 |
| Brand | AENBUSLM |
| Machine Power | 80W |
| Optical Output Power | 10W (10000mW) |
| Laser Class | Class 4 |
| Laser Type | Diode Laser with Built-in FAC |
| Focus Type | Fixed-Focus |
| Laser Spot Size | Double Ultra-Fine Compressed Spot (e.g., 0.08*0.08mm) |
| Input Voltage | 12V |
| Air Assist | Integrated (External Air Pump Included) |
| Product Dimensions | 1.57 x 1.57 x 5.71 inches |
| Item Weight | 1.96 pounds |
9. Warranty and Support
AENBUSLM is committed to providing high-quality after-sales service. If you encounter any problems while using this product, please contact our customer support team. Our professional technicians are available to provide solutions and assistance.
Please refer to your purchase documentation or the official AENBUSLM website for specific warranty terms and contact information.