
1. Introduction
This manual provides detailed instructions for the Zopsc Mini DV Camera Camcorder, model Zopsccunw3hgg8k-11. Please read this manual thoroughly before using the device to ensure proper operation and to maximize its performance and lifespan.

Image 1.1: The Zopsc Mini DV Camera Camcorder, a compact device designed for portable video recording.
Key Features:
- 1080P High Definition Lens: Captures clear videos and images.
- 1.44-inch Color Screen: Provides real-time preview for accurate framing.
- Integrated Flashlight: Enhances visibility in low-light conditions.
- Charging Case: Extends battery life up to one week.
- Automatic Loop Recording: Ensures continuous recording by overwriting old files.
- OTG Connection: Facilitates direct transfer and viewing on Android 8.0 and above smartphones.

Image 1.2: Visual representation of the camera's core features including HD video, long battery life, HD screen, flash, 6 filters, and 512GB memory card support.
2. What's in the Box
Carefully unpack the box and ensure all items are present and in good condition. If any items are missing or damaged, please contact customer support.
- Zopsc Mini DV Camera Camcorder
- Charging Case
- USB Charging Cable
- Wrist Strap

Image 2.1: The camera, charging case, USB cable, and wrist strap included in the product package.
3. Setup
3.1 Charging the Battery
Before first use, fully charge the camera and its charging case. Connect the provided USB cable to the charging case and a power source. The camera can be charged by placing it inside the charging case.
- The camera has a 480mAh battery.
- The charging case extends the total battery life to approximately one week of use.
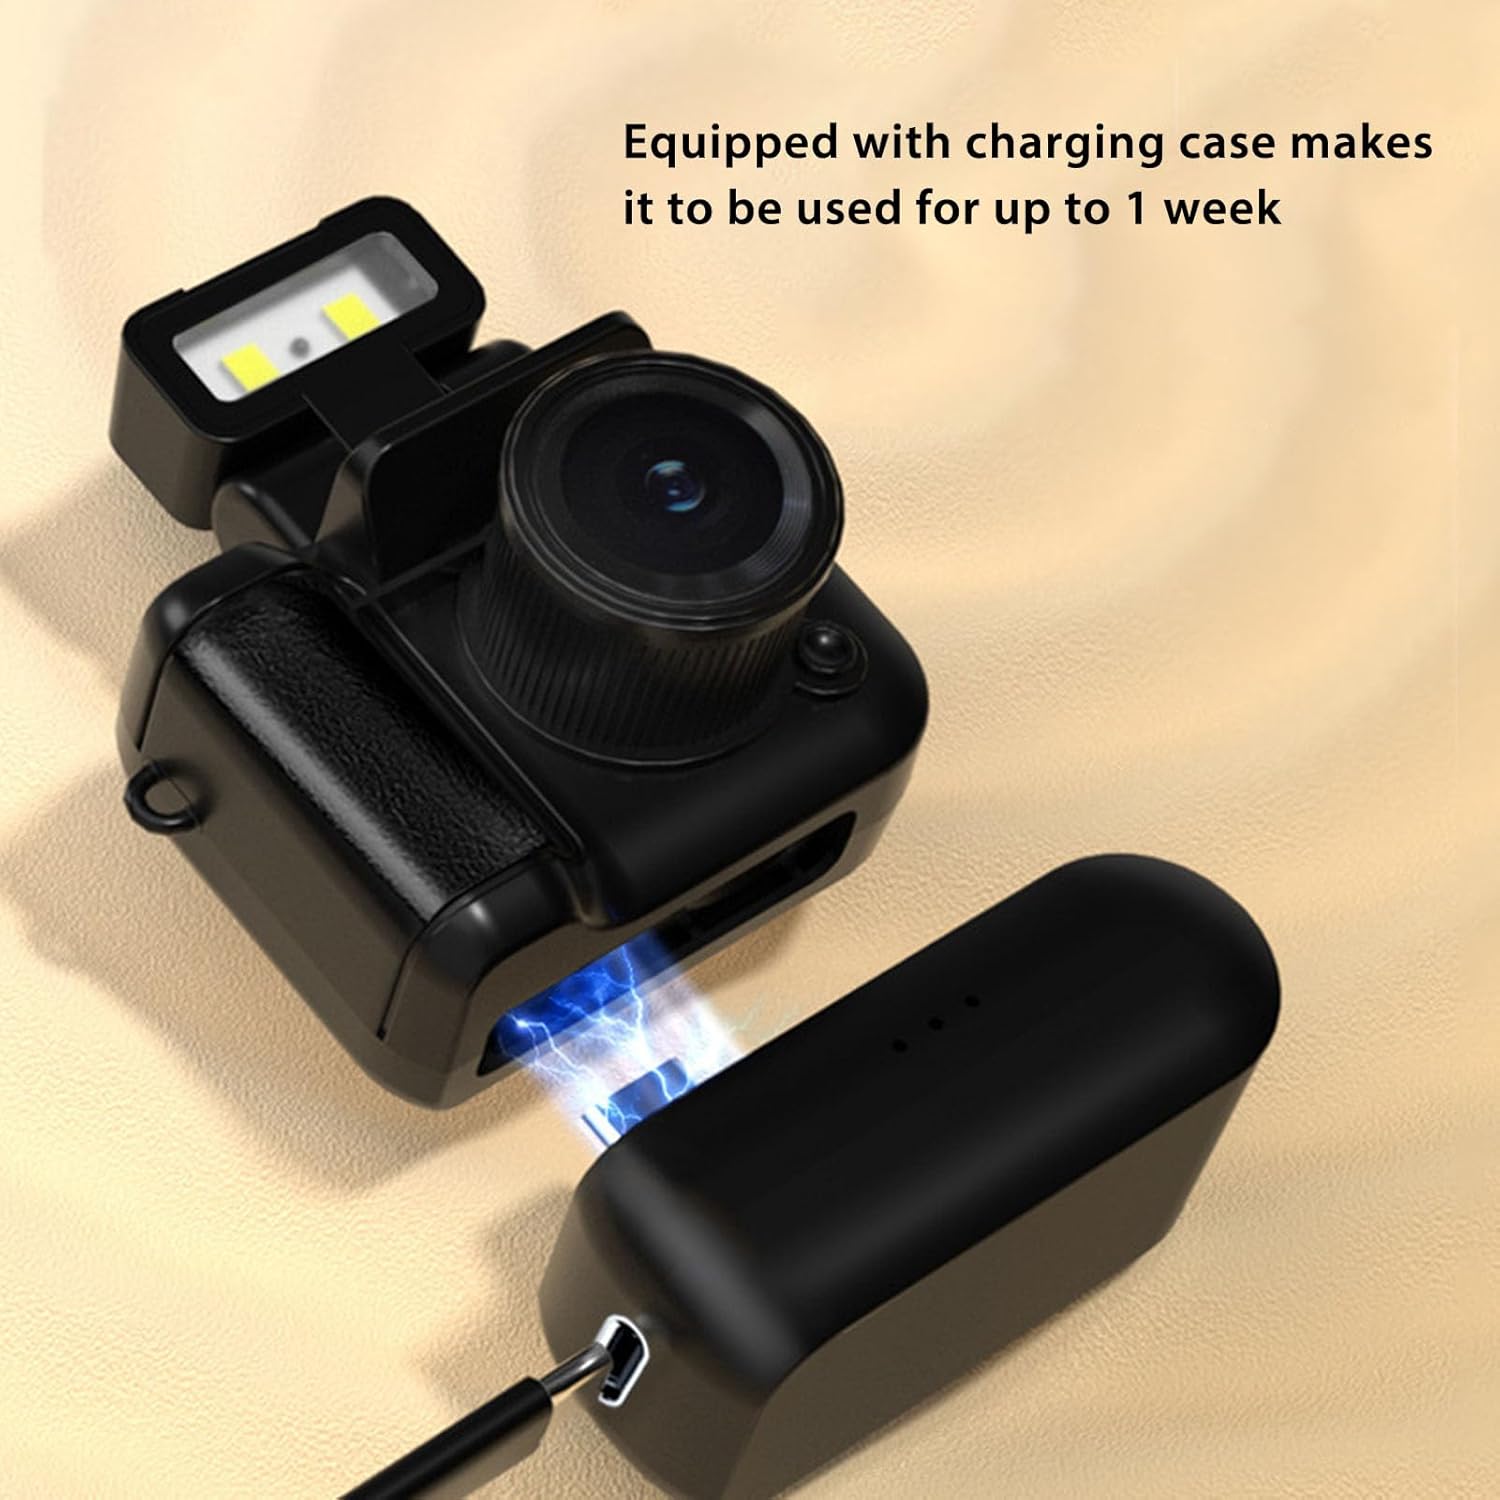
Image 3.1: The camera being charged by its dedicated charging case, which provides extended power.
3.2 Inserting a Memory Card
The camera requires a memory card (up to 512GB supported) to store photos and videos. Locate the memory card slot, typically on the side or bottom of the camera. Insert the memory card with the contacts facing the correct direction until it clicks into place.
3.3 Powering On/Off
To power on the camera, press and hold the power button located on the top of the device. The 1.44-inch screen will illuminate. To power off, press and hold the power button again until the screen turns off.
4. Operating Instructions
4.1 Navigating the Menu
Use the buttons on the side of the camera to navigate through the menu options displayed on the 1.44-inch color screen. Options typically include Photo, Video, and Gallery modes.

Image 4.1: The camera's 1.44-inch display screen showing a real-time preview, aiding in clear photo capture.
4.2 Shooting Modes
- Photo Mode: Select this mode to capture still images. Press the shutter button to take a photo.
- Video Mode: Select this mode to record videos. Press the record button to start and stop recording. The camera supports 1920x1080 resolution.
- Gallery Mode: View your captured photos and videos.

Image 4.2: The camera displaying a 1080P recording interface, suitable for capturing various moments.
4.3 Using the Flashlight
The camera is equipped with a flip-up flashlight. Activate the flashlight in low-light environments to improve photo and video quality. The flash can be reversed for different lighting needs.

Image 4.3: The camera with its integrated flashlight flipped up, designed to illuminate subjects in dark settings.
4.4 Automatic Loop Recording
When the memory card is full, the camera's automatic loop recording feature will overwrite the oldest segmented video files to ensure continuous recording without manual intervention.
4.5 OTG Connection for Data Transfer
The camera supports OTG (On-The-Go) connection for instant transfer and viewing of photos and videos on compatible Android 8.0 and newer smartphones. Connect the camera to your smartphone using an appropriate OTG cable (not included) to access your media files directly.

Image 4.4: Illustrates the OTG instant sharing capability, allowing quick transfer of media to a smartphone.
4.6 Product Overview Video
Video 4.1: A brief overview demonstrating the physical appearance and handling of the Zopsc Mini DV Camera Camcorder.
5. Maintenance
5.1 Cleaning
- Use a soft, dry cloth to clean the camera body.
- For the lens, use a specialized lens cleaning cloth and solution to avoid scratches.
- Do not use harsh chemicals or abrasive materials.
5.2 Storage
- Store the camera in a cool, dry place away from direct sunlight and extreme temperatures.
- Remove the memory card if storing for extended periods.
6. Troubleshooting
6.1 Camera Not Powering On
- Ensure the battery is fully charged.
- Verify that the power button is pressed and held correctly.
6.2 Poor Image/Video Quality
- Check if the lens is clean and free from smudges.
- Ensure adequate lighting; use the built-in flashlight if necessary.
- Confirm the camera is set to 1080P resolution in settings.
6.3 Memory Card Error
- Ensure the memory card is inserted correctly.
- Try formatting the memory card (this will erase all data).
- Test with a different, compatible memory card.
7. Specifications

Image 7.1: An illustrative view of the camera's internal components, highlighting its powerful core processing unit.
| Feature | Detail |
|---|---|
| Brand | Zopsc |
| Model Name | Zopsccunw3hgg8k-11 |
| Video Capture Resolution | 1920x1080 (1080P) |
| Effective Still Resolution | 7776000 Pixels |
| Screen Size | 1.44 Inches (LCD screen) |
| Special Features | Built-In Flash, Automatic Loop Recording |
| Shooting Modes | Photo, Video, Gallery |
| File Format | MP4, JPEG |
| Battery Capacity | 480mAh (Camera) |
| Battery Average Life | Up to 7 days (with charging case) |
| Memory Card Support | Up to 512GB |
| OTG Compatibility | Android 8.0 and systems |
| Water Resistance Level | Not Water Resistant |
| Color | Black |
8. Warranty and Support
Warranty information and specific customer support details are not provided in the product data. Please refer to the product packaging or the seller's website for warranty terms and contact information for support.