
Ecunafix SM1519
Ecunafix Kitchen Stand Mixer SM1519 User Manual
Model: SM1519
1. Important Safety Instructions
Please read all instructions carefully before using your Ecunafix Kitchen Stand Mixer. Retain this manual for future reference.
- Always ensure the mixer is unplugged from the power outlet before assembling, disassembling, cleaning, or when not in use.
- Do not immerse the motor unit, cord, or plug in water or other liquids.
- Close supervision is necessary when the appliance is used by or near children.
- Avoid contact with moving parts. Keep hands, hair, clothing, and utensils away from the bowl and attachments during operation to prevent injury.
- Do not operate any appliance with a damaged cord or plug, or after the appliance malfunctions or has been dropped or damaged in any manner.
- Use only attachments recommended or sold by the manufacturer.
- Do not use the appliance outdoors.
- Place the mixer on a stable, dry, and level surface during operation.
- The mixer is equipped with overheating and overload protection. If the mixer stops due to overload, turn it off, unplug it, reduce the load, and allow it to cool before restarting.
2. Product Overview and Components
Familiarize yourself with the various parts of your Ecunafix Kitchen Stand Mixer.

This image illustrates the main components of the Ecunafix Stand Mixer, including the main unit, 6.5Qt stainless steel bowl with handle, splash guard, whisk, beater, dough hook, egg white separator, and scraper.
- Main Unit: Contains the motor, speed control, and tilt-head mechanism.
- 6.5Qt Stainless Steel Mixing Bowl: Large capacity bowl with a handle for easy handling.
- Splash Guard: Prevents ingredients from splashing out during mixing and features an access hatch for adding ingredients.
- Dough Hook: Used for kneading heavy mixtures like bread dough, pizza dough, and pasta dough.
- Beater (Flat Beater): Ideal for medium-heavy mixtures such as cakes, cookie dough, fudge, and mashed potatoes.
- Whisk (Wire Whip): Designed for light mixtures like whipping cream, egg whites, and cheesecakes.
- Egg White Separator: A tool to easily separate egg yolks from whites.
- Scraper: For scraping down the sides of the bowl during mixing or for cleaning.
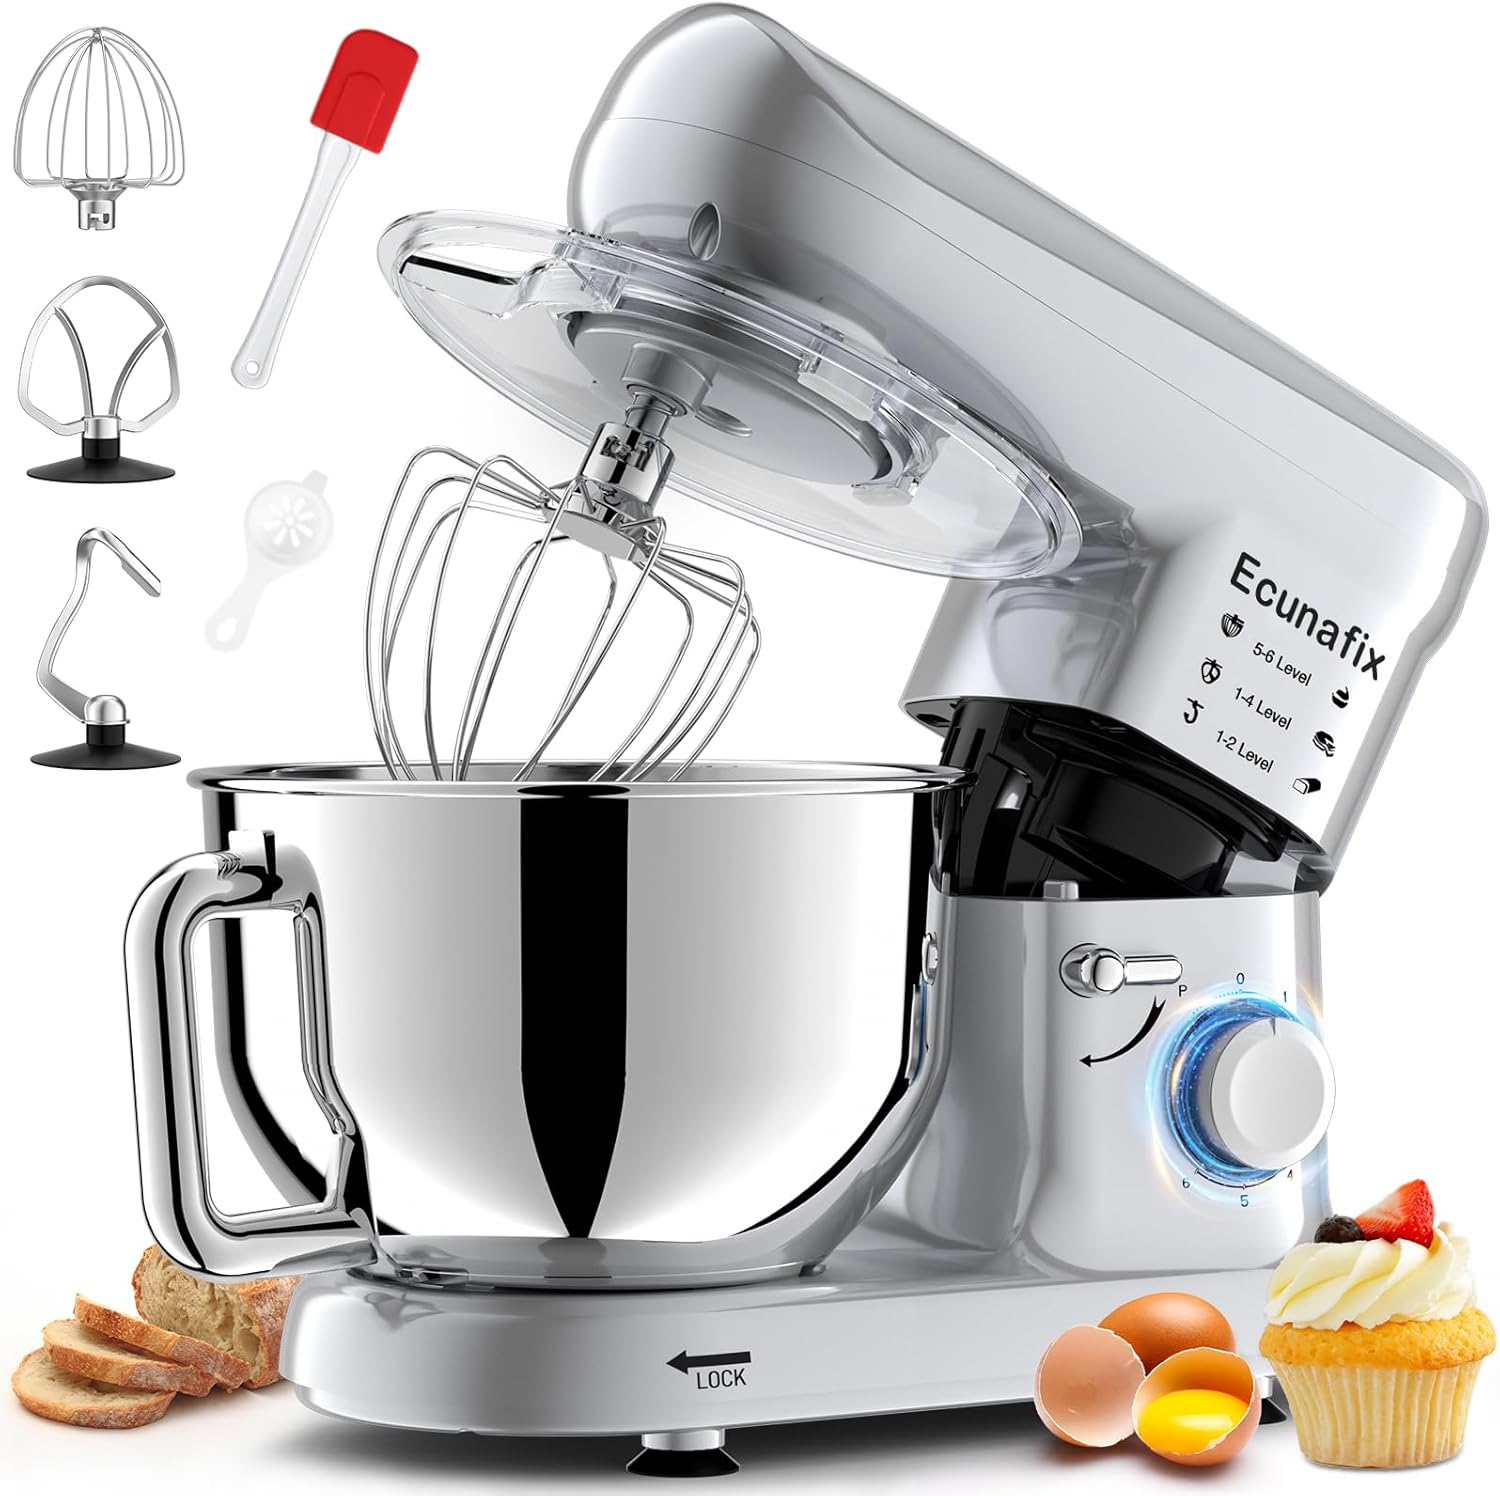
A complete view of the Ecunafix Stand Mixer in silver, showcasing the main unit, mixing bowl, and all included attachments: whisk, beater, dough hook, scraper, and egg white separator.
3. Setup and Assembly
Follow these steps to set up your mixer for first use.
- Placement: Place the mixer on a clean, dry, flat, and stable surface. Ensure the anti-slip feet are securely gripping the countertop.
- Raise the Tilt-Head: Push the tilt-head release lever (located on the side of the mixer) downwards and lift the motor head until it locks into place.
- Attach the Mixing Bowl: Place the 6.5Qt stainless steel bowl onto the base, aligning the tabs on the bowl with the slots on the base. Turn the bowl clockwise until it locks securely into place.
- Install an Attachment: Select the desired attachment (Dough Hook, Beater, or Whisk). Push the attachment upwards onto the attachment shaft and turn it counter-clockwise until it locks into the pin on the shaft.
- Lower the Tilt-Head: Push the tilt-head release lever downwards again and gently lower the motor head until it clicks into its locked position. Ensure it is fully locked before operation.
- Attach the Splash Guard: If desired, place the splash guard over the mixing bowl, ensuring it fits snugly around the attachment shaft.

This image highlights the anti-slip suction cups located on the base of the mixer, designed to ensure stability during operation.

A close-up view of the tilt-head design, showing the mechanism that allows the mixer head to be raised for easy access to the bowl and attachments.
4. Operating Instructions
Your Ecunafix Stand Mixer features 6 speeds plus a Pulse (P) function for versatile mixing.

This image displays the speed control dial with recommended speed settings for each attachment: Dough Hook (1-3), Beater (1-4), and Whisk (5-6/P), along with a description of the Pulse speed.
- Add Ingredients: Place your ingredients into the mixing bowl.
- Select Speed: Turn the speed control dial to the desired setting (0-6).
- Recommended Speed Settings:
- Dough Hook (Speeds 1-3): For kneading heavy mixtures like bread dough, pizza dough, and pasta dough. Typical mixing time: 3-5 minutes.
- Beater (Speeds 1-4): For medium mixtures such as cakes, cookie dough, fudge, and mashed potatoes. Typical mixing time: 3-10 minutes.
- Whisk (Speeds 5-6/P): For light mixtures like whipping cream, egg whites, and cheesecakes. Typical mixing time: 3-10 minutes.
- Pulse Function (P): For short bursts of power, turn the dial to 'P' and hold, then release. This is useful for quick incorporation or final mixing.
- Adding Ingredients During Mixing: Use the access hatch on the splash guard to add ingredients while the mixer is operating.
- Planetary Mixing Action: The mixer features a 360° planetary mixing action, ensuring thorough and even mixing of all ingredients within the bowl.
- To Stop: Turn the speed control dial to '0' and unplug the mixer from the power outlet.

A close-up of the mixer's speed control knob, illustrating the 6 speed settings and the 'P' (Pulse) function for quick bursts of power.

This image demonstrates the versatility of the mixer's attachments, showing whipped cream (whisk), bread dough (dough hook), and a salad (flat beater) as examples of their respective uses.

A hand is shown adding an egg into the mixing bowl through the convenient feeding port on the splash guard, illustrating how to add ingredients during operation without mess.

This diagram illustrates the planetary mixing action of the whisk attachment, showing its rotation around its own axis and simultaneously around the bowl for comprehensive mixing.
5. Cleaning and Maintenance
Proper cleaning and maintenance will ensure the longevity and optimal performance of your mixer.
- Always Unplug: Before cleaning, always ensure the mixer is unplugged from the power outlet.
- Dishwasher Safe Parts: The stainless steel mixing bowl, dough hook, beater, whisk, and splash guard are dishwasher safe. Alternatively, they can be washed by hand with warm, soapy water and rinsed thoroughly.
- Cleaning the Main Unit: Wipe the exterior of the main unit with a soft, damp cloth. Do not use abrasive cleaners or scourers. Never immerse the motor unit in water or any other liquid.
- Heat Dissipation: The mixer is designed with a fast heat dissipation system to prevent overheating during prolonged use. Ensure the ventilation slots are not blocked.
- Storage: Store the mixer and its accessories in a clean, dry place when not in use.

This image shows the mixing bowl and various attachments placed in a dishwasher rack, confirming their dishwasher-safe design for convenient cleaning.

A close-up view of the mixer's side, showing the ventilation vents designed for efficient heat dissipation to maintain optimal performance.
6. Troubleshooting
If you encounter any issues with your mixer, refer to the following common problems and solutions.
| Problem | Possible Cause | Solution |
|---|---|---|
| Mixer does not turn on. | Not plugged in; power outlet malfunction; tilt-head not fully locked. | Ensure the power cord is securely plugged into a working outlet. Check that the tilt-head is fully lowered and locked into place. |
| Attachments do not reach ingredients at the bottom of the bowl. | Mixing bowl not properly seated; attachment not fully installed. | Ensure the mixing bowl is twisted clockwise until it locks securely. Verify that the attachment is pushed up and twisted counter-clockwise onto the shaft until it locks. |
| Excessive noise or vibration during operation. | Mixer not on a stable surface; attachment not properly installed; heavy load. | Place the mixer on a flat, stable surface. Re-install the attachment to ensure it is secure. Reduce the amount of ingredients if the load is too heavy. |
| Mixer stops unexpectedly. | Overload protection activated; overheating. | Turn off the mixer and unplug it. Reduce the amount of ingredients in the bowl. Allow the motor to cool down for at least 15-20 minutes before restarting. |
7. Specifications
Detailed technical specifications for the Ecunafix Kitchen Stand Mixer SM1519.
- Brand: Ecunafix
- Model: SM1519
- Power: 660W High Performance Pure Copper Motor
- Capacity: 6.5 Quarts (6.5 Liters) Stainless Steel Bowl
- Speed Settings: 6 speeds + Pulse (P) function
- Controls: Rotary Knob
- Product Dimensions: Approximately 11"D x 17"W x 15"H
- Item Weight: 12.72 pounds
- Noise Level: 60-72 dB (during operation)
- Special Features: Tilt-head design, 360° planetary mixing action, Anti-slip silicone pads, Overheating and overload protection, ETL certified, LED power indicator.
- UPC: 797422528433
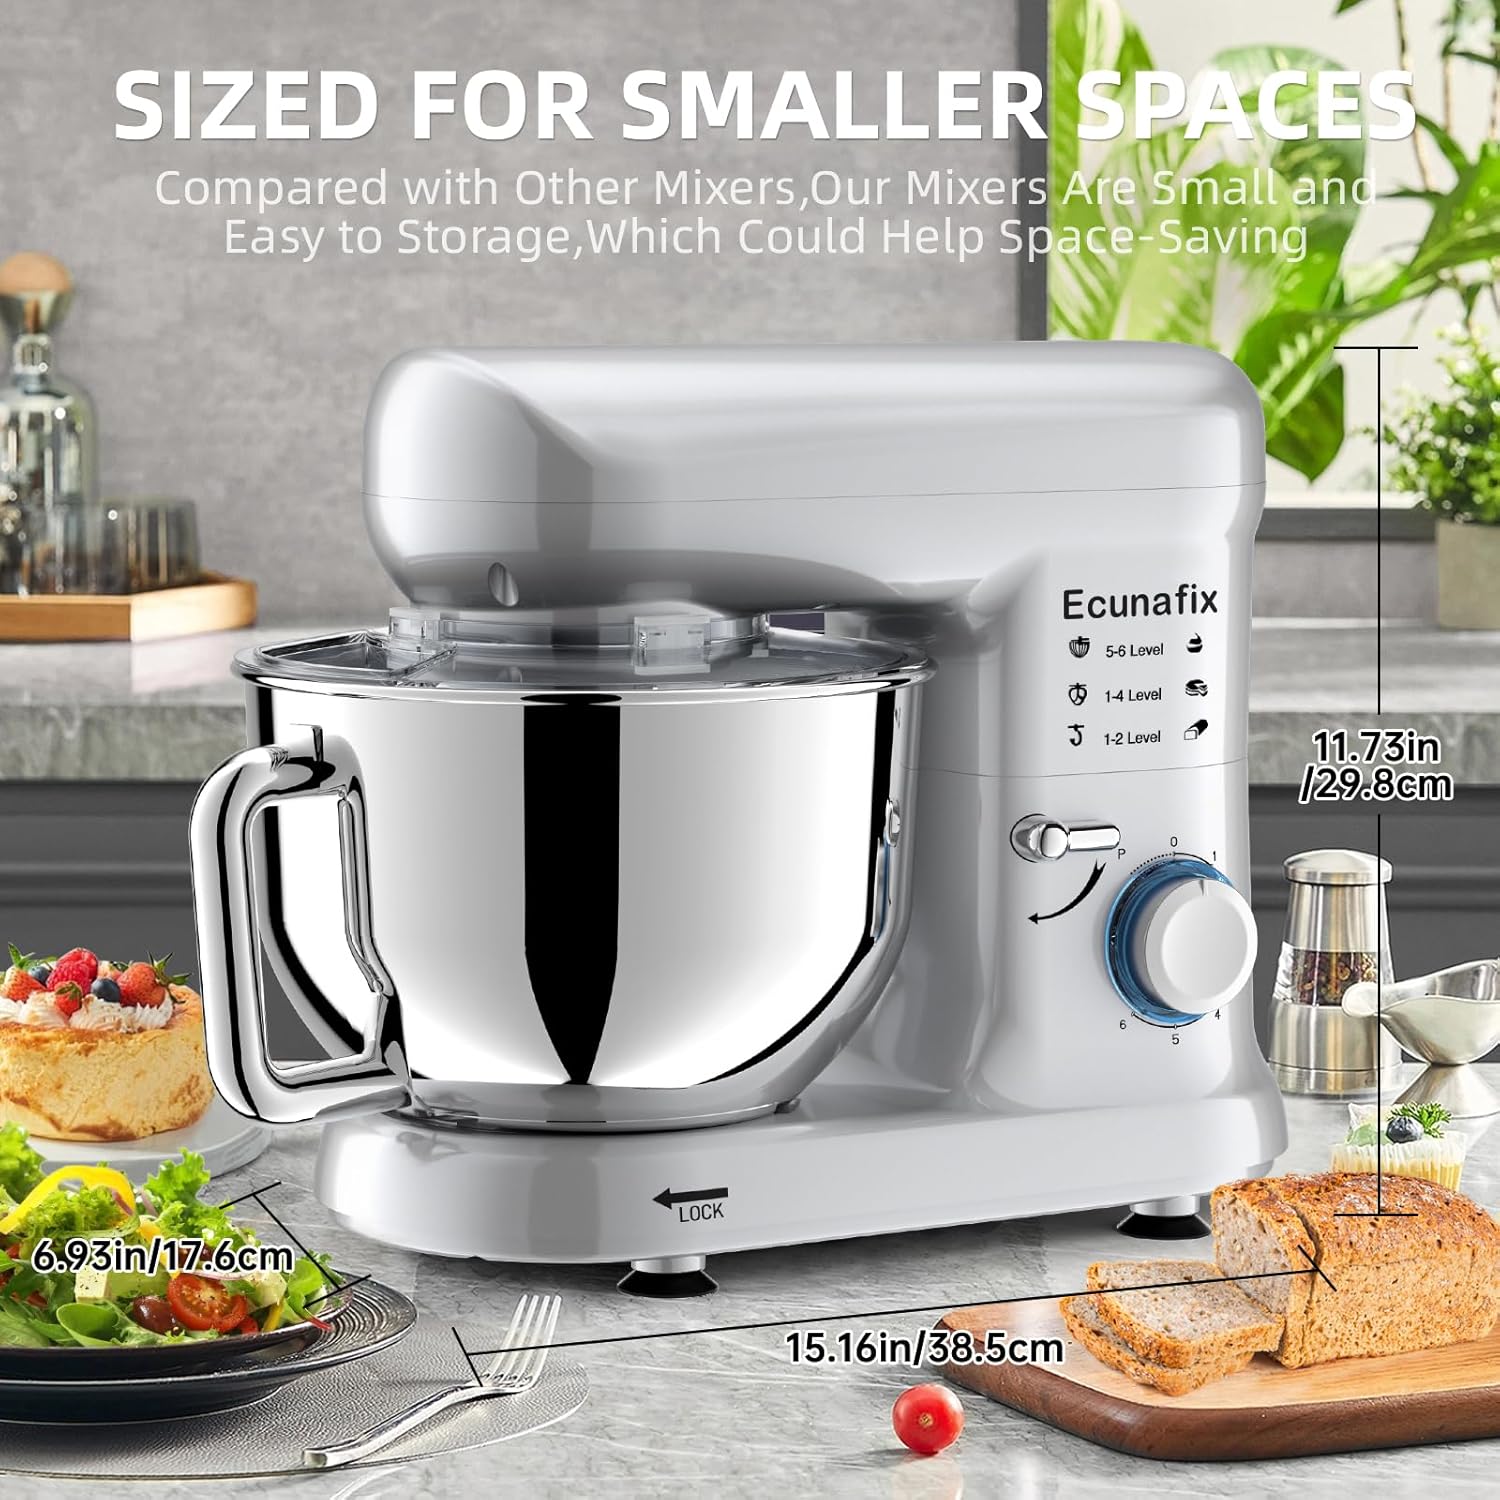
This image provides a visual representation of the Ecunafix Stand Mixer's dimensions, indicating its compact design suitable for various kitchen spaces.

An internal diagram illustrating the powerful 660W pure copper motor, PCB smart chip for intelligent temperature control, durable metal gears, and motor noise reduction box, highlighting the mixer's robust construction.
8. Warranty and Support
Ecunafix is committed to providing reliable products and customer satisfaction.
- Quality Assurance: Your Ecunafix Kitchen Stand Mixer is manufactured with high-quality materials and undergoes rigorous inspection to ensure durability and performance. It is ETL certified and includes overheating and overload protection for safe operation.
- Customer Support: For any questions, concerns, or assistance with your product, please contact Ecunafix customer service. We provide long-term quality assurance and 24/7 online support to address your needs.
- Please refer to the contact information provided with your purchase or visit the official Ecunafix website for support details.
Ask a question about this manual
Ask about setup, troubleshooting, compatibility, parts, safety, or missing instructions. Manuals+ will review the question and use this page’s manual context to help answer it.