
Matbip SW02-blue&red
Matbip Wireless Controller User Manual
Model: SW02-blue&red
1. Introduction
Thank you for purchasing the Matbip Wireless Controller. This controller is designed to enhance your gaming experience on Nintendo Switch, Switch Lite, Switch OLED, and PC. It features advanced functions such as programmable back buttons, adjustable TURBO speed, multi-level HD vibration, and a 6-axis gyro sensor for precise motion control. Please read this manual carefully before use to ensure proper operation and maintenance.
2. Product Overview
Familiarize yourself with the controller's components and buttons.

Figure 2.1: Controller Front and Rear Button Layout
This image displays the front and rear views of the Matbip Wireless Controller, highlighting all buttons and their labels. Key features include the Left and Right Analog Sticks, Direction Pad, ABXY Buttons, L/R/ZL/ZR Buttons, Capture, Menu Selection (-/+), Home Button, TURBO Button, LED Indicators, Type-C Interface, Start Button, and the M1/M2 Programmable Back Buttons.
Button Functions:
- Left Analog Stick: For movement and camera control.
- Direction Pad (D-Pad): For directional input.
- ABXY Buttons: Standard action buttons.
- Right Analog Stick: For camera control or specific in-game actions.
- L/R Buttons: Shoulder buttons.
- ZL/ZR Buttons: Trigger buttons.
- Capture Button: Takes screenshots.
- Menu Selection (-/+): Used for navigating menus.
- Home Button: Returns to the console's home screen and can wake up the console.
- TURBO Button: Activates and adjusts auto-fire function.
- LED Indicators: Show connection status, battery level, and player number.
- Type-C Interface: For charging and wired connection.
- Start Button: Typically used for pausing or starting games.
- M1/M2 Programmable Back Buttons: Customizable buttons for macro functions.
3. Setup and Connection
3.1 Initial Charging
Before first use, fully charge the controller. Connect the included USB-C cable to the controller's Type-C interface and the other end to a USB power source (e.g., console, PC, or USB wall adapter). The LED indicators will show charging status and turn off when fully charged. A full charge takes approximately 3 hours.

Figure 3.1: Controller with Charging Cable
This image shows the Matbip Wireless Controller alongside its USB-C charging cable, illustrating the connection point for power.
3.2 Wireless Connection (Bluetooth)
The controller supports wireless connection to Nintendo Switch, Switch Lite, Switch OLED, and PC (via Bluetooth or wired).
- For Nintendo Switch/Lite/OLED:
- From the HOME Menu, select "Controllers", then "Change Grip/Order".
- On the controller, press and hold the Home button and Y button simultaneously for 3-5 seconds until the LED indicators flash rapidly.
- Once connected, the corresponding player LED(s) on the controller will remain solid.
- To wake up the console from standby, simply press the Home button on the controller.
- For PC (Bluetooth):
- Ensure your PC has Bluetooth enabled.
- Go to Bluetooth & other devices settings on your PC.
- Select "Add Bluetooth or other device" and then "Bluetooth".
- On the controller, press and hold the Home button and X button simultaneously for 3-5 seconds until the LED indicators flash rapidly.
- Select the controller from the list of available devices (it may appear as "Pro Controller" or similar).
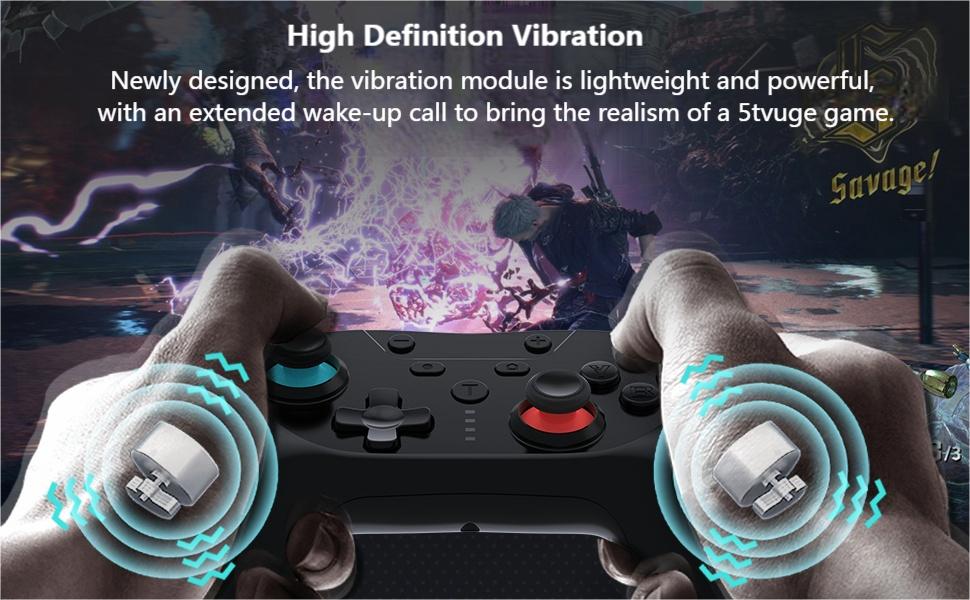
Figure 3.2: Wireless Connection Overview
This diagram illustrates the wireless Bluetooth connection process, showing the controller connecting to a Nintendo Switch, Switch Lite, and Switch OLED, along with the wireless range and working time.
3.3 Wired Connection (PC)
To connect to a PC via wired mode (X-Input), simply connect the controller to your PC using the USB-C cable. The PC should automatically recognize the controller.
4. Operating Instructions
4.1 TURBO Function
The TURBO function allows for continuous rapid firing of a button. It has three adjustable speeds.
- Setting TURBO: Press and hold the TURBO button, then press the desired action button (A/B/X/Y/L/R/ZL/ZR) once to activate TURBO mode for that button.
- Adjusting TURBO Speed: While holding the TURBO button, press the Right Analog Stick Up/Down to cycle through the three speeds: 5 times/sec, 12 times/sec, and 20 times/sec.
- Clearing TURBO: Press and hold the TURBO button, then press the action button again to deactivate TURBO for that specific button. To clear all TURBO settings, press and hold the TURBO button and the Minus (-) button simultaneously.

Figure 4.1: TURBO Function in Action
This image visually represents the TURBO function, showing the 'T' button and bullet icons indicating rapid firing, emphasizing its benefit in shooting games.
4.2 Programmable Back Buttons (M1/M2)
The M1 and M2 back buttons can be programmed to execute single or multiple button actions (macros).
- Entering Programming Mode: Press and hold the M1/M2 button you wish to program, then press the TURBO button. The LED indicators will flash slowly, indicating programming mode.
- Recording Actions: Press the sequence of buttons you want to assign (up to 16 consecutive actions).
- Exiting Programming Mode: Press the M1/M2 button again to save the recording and exit programming mode. The LED indicators will stop flashing.
- Clearing Programming: To clear a specific M1/M2 button's programming, repeat step 1 and then press the M1/M2 button again without pressing any other buttons.

Figure 4.2: M1 and M2 Programming Buttons
This image highlights the M1 and M2 programmable back buttons on the underside of the controller, showing an example of how multiple button presses can be assigned to a single back button.
4.3 Vibration Adjustment
The controller features 4 levels of HD vibration adjustment.
- To adjust vibration intensity, press and hold the TURBO button, then press the Left Analog Stick Up/Down to cycle through the vibration levels (0%, 30%, 70%, 100%).

Figure 4.3: HD Vibration Levels
This image illustrates the four levels of HD vibration adjustment (0%, 30%, 70%, 100%), showing the internal vibration motors within the controller.
4.4 6-Axis Gyro Sensor
The built-in 6-axis gyro sensor allows for motion control in compatible games, detecting tilt and movement for enhanced gameplay.

Figure 4.4: 6-Axis Motion Sensor Capabilities
This image demonstrates the capabilities of the 6-axis motion sensor, showing how it detects swinging motion, differentiates viewing motion, and enables operating direction control in games.
5. Maintenance
- Cleaning: Use a soft, dry cloth to clean the controller. Do not use harsh chemicals or abrasive materials.
- Storage: Store the controller in a cool, dry place away from direct sunlight and extreme temperatures.
- Battery Care: To prolong battery life, avoid fully discharging the controller frequently. Charge it regularly, even if not in use for extended periods.
- Avoid Drops: Protect the controller from drops and impacts, which can damage internal components.
6. Troubleshooting
| Problem | Possible Cause | Solution |
|---|---|---|
| Controller does not connect. | Low battery, incorrect pairing mode, interference. |
|
| Buttons are unresponsive or sticky. | Dirt/debris, physical damage. |
|
| Analog sticks drift. | Calibration issue, wear and tear. |
|
| TURBO/Programming not working. | Incorrect programming steps. |
|
| Short battery life. | Frequent vibration, continuous use, aging battery. |
|
7. Specifications
- Model Number: SW02-blue&red
- Connectivity: Wireless (Bluetooth), Wired (USB-C)
- Compatibility: Nintendo Switch, Switch Lite, Switch OLED, PC (X-Input mode)
- Battery Capacity: 600mAh
- Charging Time: Approximately 3 hours
- Working Time: 16-20 hours (depending on usage)
- Vibration: 4-level HD vibration adjustment
- Motion Sensor: 6-axis Gyro
- Programmable Buttons: 2 back buttons (M1, M2)
- TURBO Function: 3 adjustable speeds (5/12/20 times/sec)
- Weight: Approximately 9.1 ounces (258 grams)
- Dimensions: 6.77 x 4.53 x 2.72 inches (17.2 x 11.5 x 6.9 cm)
8. Warranty and Support
Matbip provides customer support for its products. If you encounter any issues or have questions regarding your controller, please contact us via email. We aim to respond within 24 hours.
For warranty information and further assistance, please refer to the contact details provided with your purchase or visit the official Matbip store on Amazon: Matbip Official Store
Related documentsSW02-blue&red

Ask a question about this manual
Ask about setup, troubleshooting, compatibility, parts, safety, or missing instructions. Manuals+ will review the question and use this page’s manual context to help answer it.