
1. Product Overview
The TIGERSECU 5MP Wide Angle Dome Security Camera is a versatile surveillance solution designed for both indoor and outdoor use. This camera supports four different video formats: HD-TVI, AHD, CVI, and CVBS (960H D1 analog), making it compatible with a wide range of DVR systems. It delivers high-definition video with a 5-megapixel resolution, providing clear and detailed images.
Key features include a 2.8mm wide-angle lens for broad coverage, powerful night vision up to 100 feet (30 meters) with advanced infrared technology, and an IP66 weatherproof casing for durability in various environmental conditions.

Image 1.1: TIGERSECU 5MP Wide Angle Dome Security Camera. This image displays the camera's dome design, integrated infrared LEDs, and the attached power and video cables.
2. What's in the Box
Please check the package contents upon receipt. The following items should be included:
- One (1) TIGERSECU 5MP Wide Angle Dome Security Camera
- Three (3) Mounting Screws
- One (1) Quick Start Guide / Instruction Manual
Note: A DC 12V 1A power supply and coaxial video cables are sold separately and are required for operation.
3. Setup and Installation
3.1 Mounting the Camera
The camera is designed for easy mounting on walls or ceilings. Ensure the mounting surface is stable and can support the camera's weight.
- Choose a suitable location for optimal viewing coverage, considering the camera's 96-degree wide-angle lens.
- Use the provided mounting screws to securely attach the camera to the desired surface.
- Adjust the camera's dome shape to achieve the desired viewing angle.

Image 3.1: A person installing the TIGERSECU dome camera on an exterior wall, demonstrating the mounting process.
3.2 Connecting the Camera
Connect the camera to your DVR system using a coaxial cable and provide power using a 12V DC 1A power supply (both sold separately).
- Connect the BNC video output cable from the camera to an available video input on your DVR.
- Connect the 12V DC power input cable to a compatible power supply.
3.3 Switching Video Modes (4-in-1 OSD Switch)
The camera features an integrated 4-in-1 OSD (On-Screen Display) switch, allowing you to select between HD-TVI, AHD, CVI, and CVBS video formats to match your DVR. The switch is located on the camera's cable.
- Ensure the camera is powered on and connected to your DVR and a monitor.
- Press and hold the OSD switch button for approximately 5 seconds to access the OSD menu.
- Use the directional controls (Up, Down, Left, Right) on the switch to navigate the menu and select the desired video format (CVBS, AHD, TVI, CVI).
- For 720p or D1 analog systems, switch the camera mode to CVBS (944x480 resolution).

Image 3.2: Diagram illustrating the 4-in-1 OSD switch and its functions for selecting CVBS, AHD, TVI, or CVI video modes by holding the button for 5 seconds and using directional inputs.
4. Operating the Camera
4.1 Video Quality and Resolution
The camera provides a 5MP (2560 x 1920 pixels) resolution when connected to a compatible 5MP DVR. It can also output 1280 x 1920 pixels when used with compatible 1080P DVRs, offering clear and detailed surveillance footage.

Image 4.1: A visual comparison demonstrating the difference in detail between 1080p and 5MP high-definition video, highlighting the enhanced clarity of 5MP.
4.2 Wide-Angle Coverage
Equipped with a 2.8mm wide-angle lens, the camera offers a 96-degree horizontal viewing angle. This broad coverage is ideal for monitoring large areas such as garages, parking lots, warehouses, showrooms, hallways, and reception areas.

Image 4.2: The camera mounted on a patio, illustrating its 96-degree wide-angle coverage for a broader and sharper view of the area.
4.3 Night Vision
The camera features powerful night vision capabilities, providing clear images up to 100 feet (30 meters) in low-light conditions. Advanced infrared light technology ensures even light distribution and sharper details during nighttime surveillance.
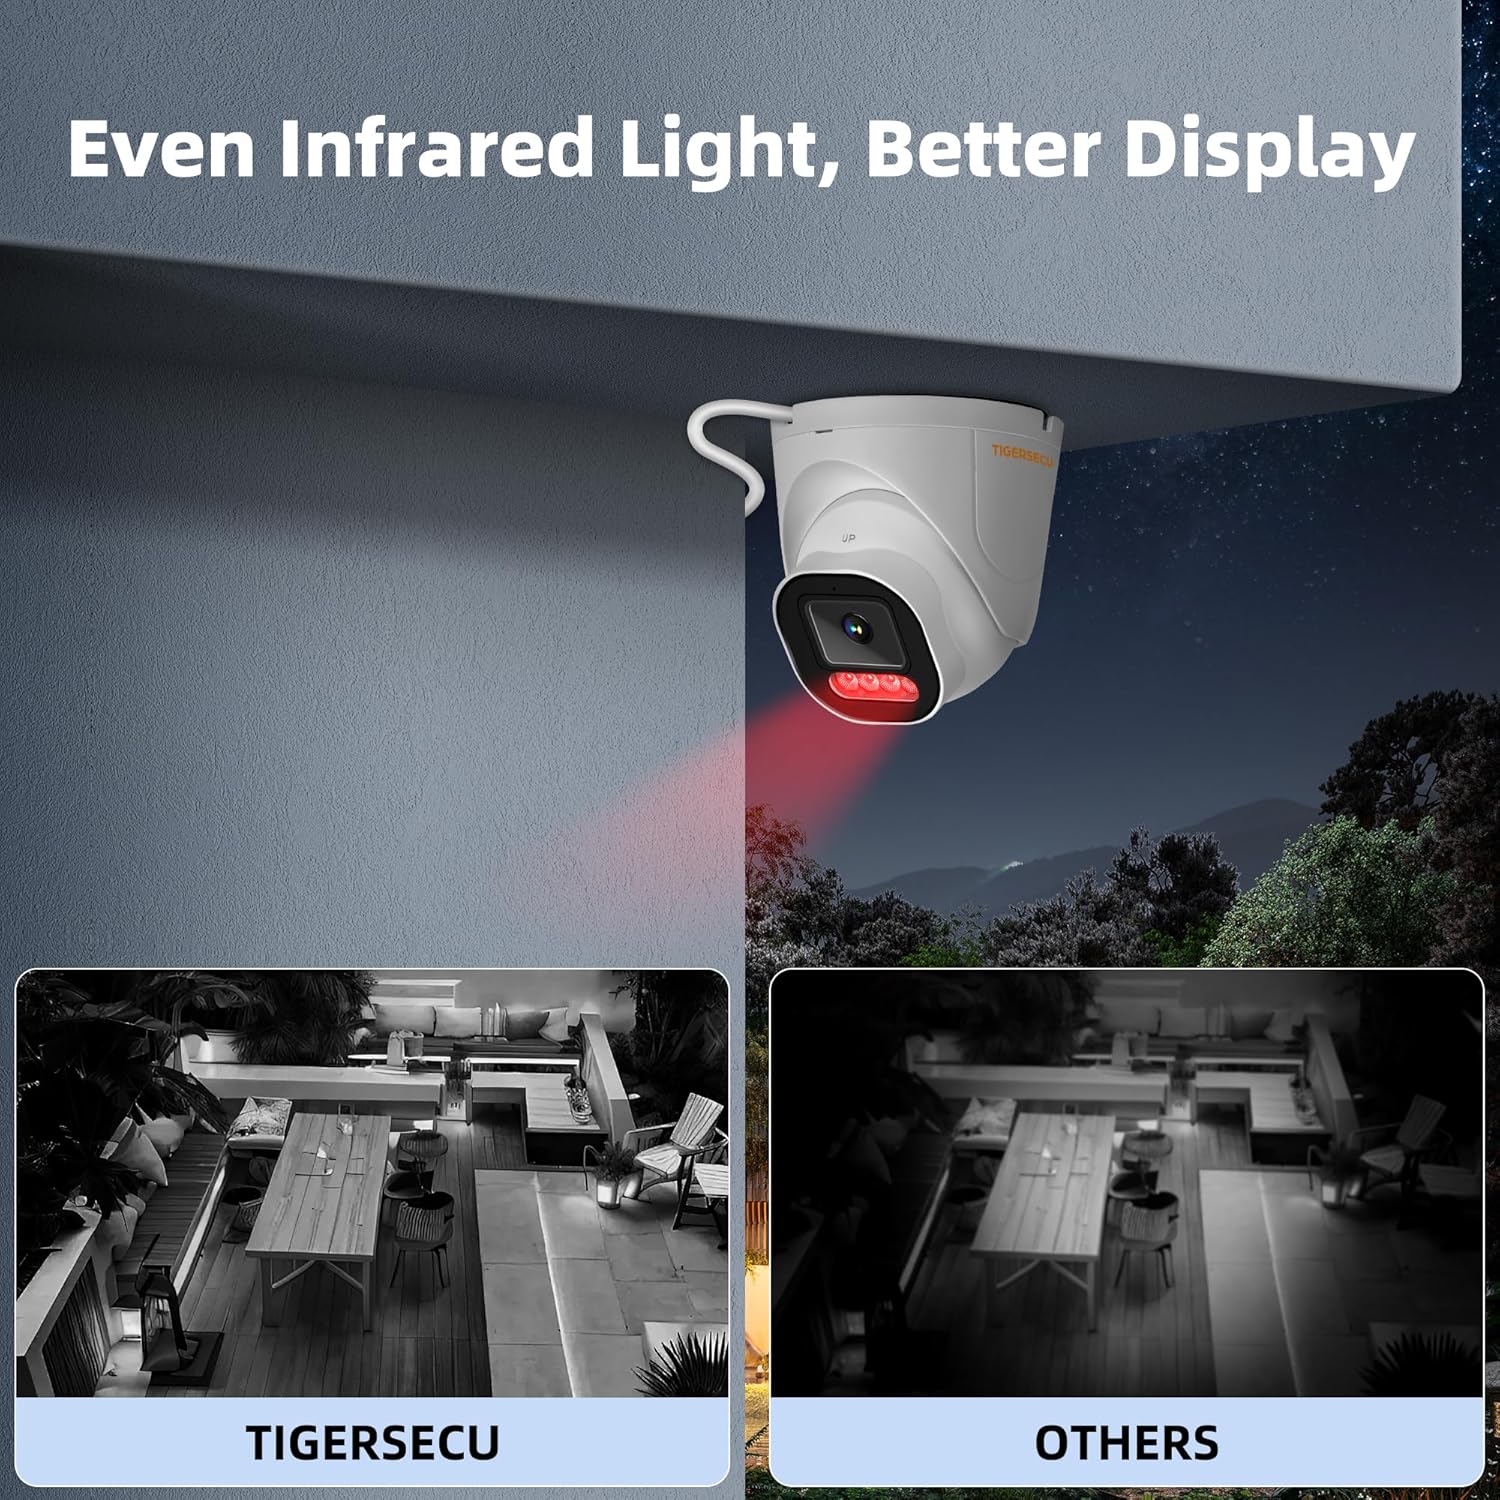
Image 4.3: A comparison showing the improved clarity and even infrared light distribution of TIGERSECU night vision compared to other cameras in a dark outdoor setting.
4.4 Remote Access and Alerts
When connected to a compatible TIGERSECU DVR system, you can access live and recorded footage remotely. Many TIGERSECU DVRs support smart security alerts, including human body detection, which can send notifications via email or app alerts to your mobile device.
Video 4.1: An overview of TIGERSECU DVR Security Camera Systems, demonstrating remote monitoring capabilities, smart alerts, and the convenience of checking in on your property from anywhere.
5. Maintenance
Regular maintenance helps ensure optimal performance and longevity of your security camera.
- Cleaning: Periodically clean the camera lens and housing with a soft, damp cloth. Avoid abrasive cleaners that could scratch the lens.
- Cable Inspection: Check all cable connections (power and video) for any signs of wear, damage, or loose connections. Ensure they are securely fastened.
- Firmware Updates: If your DVR system supports camera firmware updates, refer to your DVR's manual or TIGERSECU support for instructions on how to keep your camera's firmware current.
6. Troubleshooting
If you encounter issues with your TIGERSECU 5MP Dome Security Camera, refer to the following common troubleshooting steps:
- No Image/Black Screen:
- Verify that the camera is receiving power. Check the power adapter and connections.
- Ensure the coaxial video cable is securely connected to both the camera and the DVR.
- Confirm that the camera's video mode (TVI, AHD, CVI, CVBS) matches the input channel settings on your DVR. Use the OSD switch to adjust if necessary.
- Test the camera with a different power supply or video cable if available.
- Poor Image Quality:
- Clean the camera lens to remove any dirt, dust, or smudges.
- Ensure the camera's resolution setting on the DVR matches its capabilities (e.g., 5MP for a 5MP DVR).
- Check the quality of the coaxial cable. A damaged or low-quality cable can degrade video signal.
- Verify that the camera is not pointed directly into strong light sources, which can cause glare.
- Night Vision Issues:
- Ensure there are no obstructions directly in front of the camera that could block the infrared LEDs.
- Check for external light sources that might interfere with the camera's IR sensor, preventing it from switching to night mode.
- Confirm the camera's power supply is adequate, as insufficient power can affect IR performance.
- Mode Switching Problems:
- Ensure you are holding the OSD switch button for the correct duration (approximately 5 seconds) to enter the menu.
- Make sure the directional presses are firm and distinct when navigating the OSD menu.
If these steps do not resolve the issue, please contact TIGERSECU customer support for further assistance.
7. Specifications
| Feature | Detail |
|---|---|
| Model Number | TS-5MP-106WSD01-X5.0M-F4-4IN1 |
| Video Capture Resolution | 5MP (2560p) |
| Effective Still Resolution | 5 MP |
| Video Capture Format | TVI, CVI, AHD, CVBS (4-in-1 Hybrid) |
| Viewing Angle | 96 Degrees |
| Night Vision Range | 100 Feet (30 meters) |
| Light Source Type | Infrared |
| Indoor/Outdoor Usage | Indoor, Outdoor |
| International Protection Rating | IP66 (Waterproof) |
| Power Source | Corded Electric (DC 12V 1A, sold separately) |
| Connectivity Protocol | BNC |
| Controller Type | OSD Switch |
| Mounting Type | Wall Mount |
| Material | Metal, Plastic |
| Color | White |
| Product Dimensions (L x W x H) | 4.02 x 4.02 x 3.86 inches |
| Item Weight | 10.1 ounces (0.63 Pounds) |
| Photo Sensor Technology | CMOS |
| Focus Type | Fixed Focus |
| UPC | 738426954651 |
8. Warranty and Support
8.1 Warranty Information
TIGERSECU products are backed by a 1-Year Guarantee, ensuring quality and reliability. Please retain your proof of purchase for warranty claims.

Image 8.1: A shield graphic indicating a 1-year product guarantee.
8.2 Customer Support
TIGERSECU is a family-owned business committed to providing high-quality, affordable, and easy-to-use security solutions. We offer a US-Based Help Team to assist you with any questions or support needs.

Image 8.2: A shield graphic indicating the availability of a US-based help team.
For further assistance, please visit the official TIGERSECU store or contact our support team through the contact information provided with your product or on the official website.
You can find more information and products at the TIGERSECU Amazon Store.


