
KAI-ROAD KLVD100W0D-RML
KAI-ROAD KLVD100W0D-RML Vanity Desk with Lighted Mirror and Stool User Manual
Model: KLVD100W0D-RML
1. Product Overview
The KAI-ROAD KLVD100W0D-RML Vanity Desk is designed to provide a functional and stylish space for personal grooming or as a compact workspace. It features a built-in lighted mirror with adjustable color modes, a comfortable stool, and an integrated power outlet for convenience.
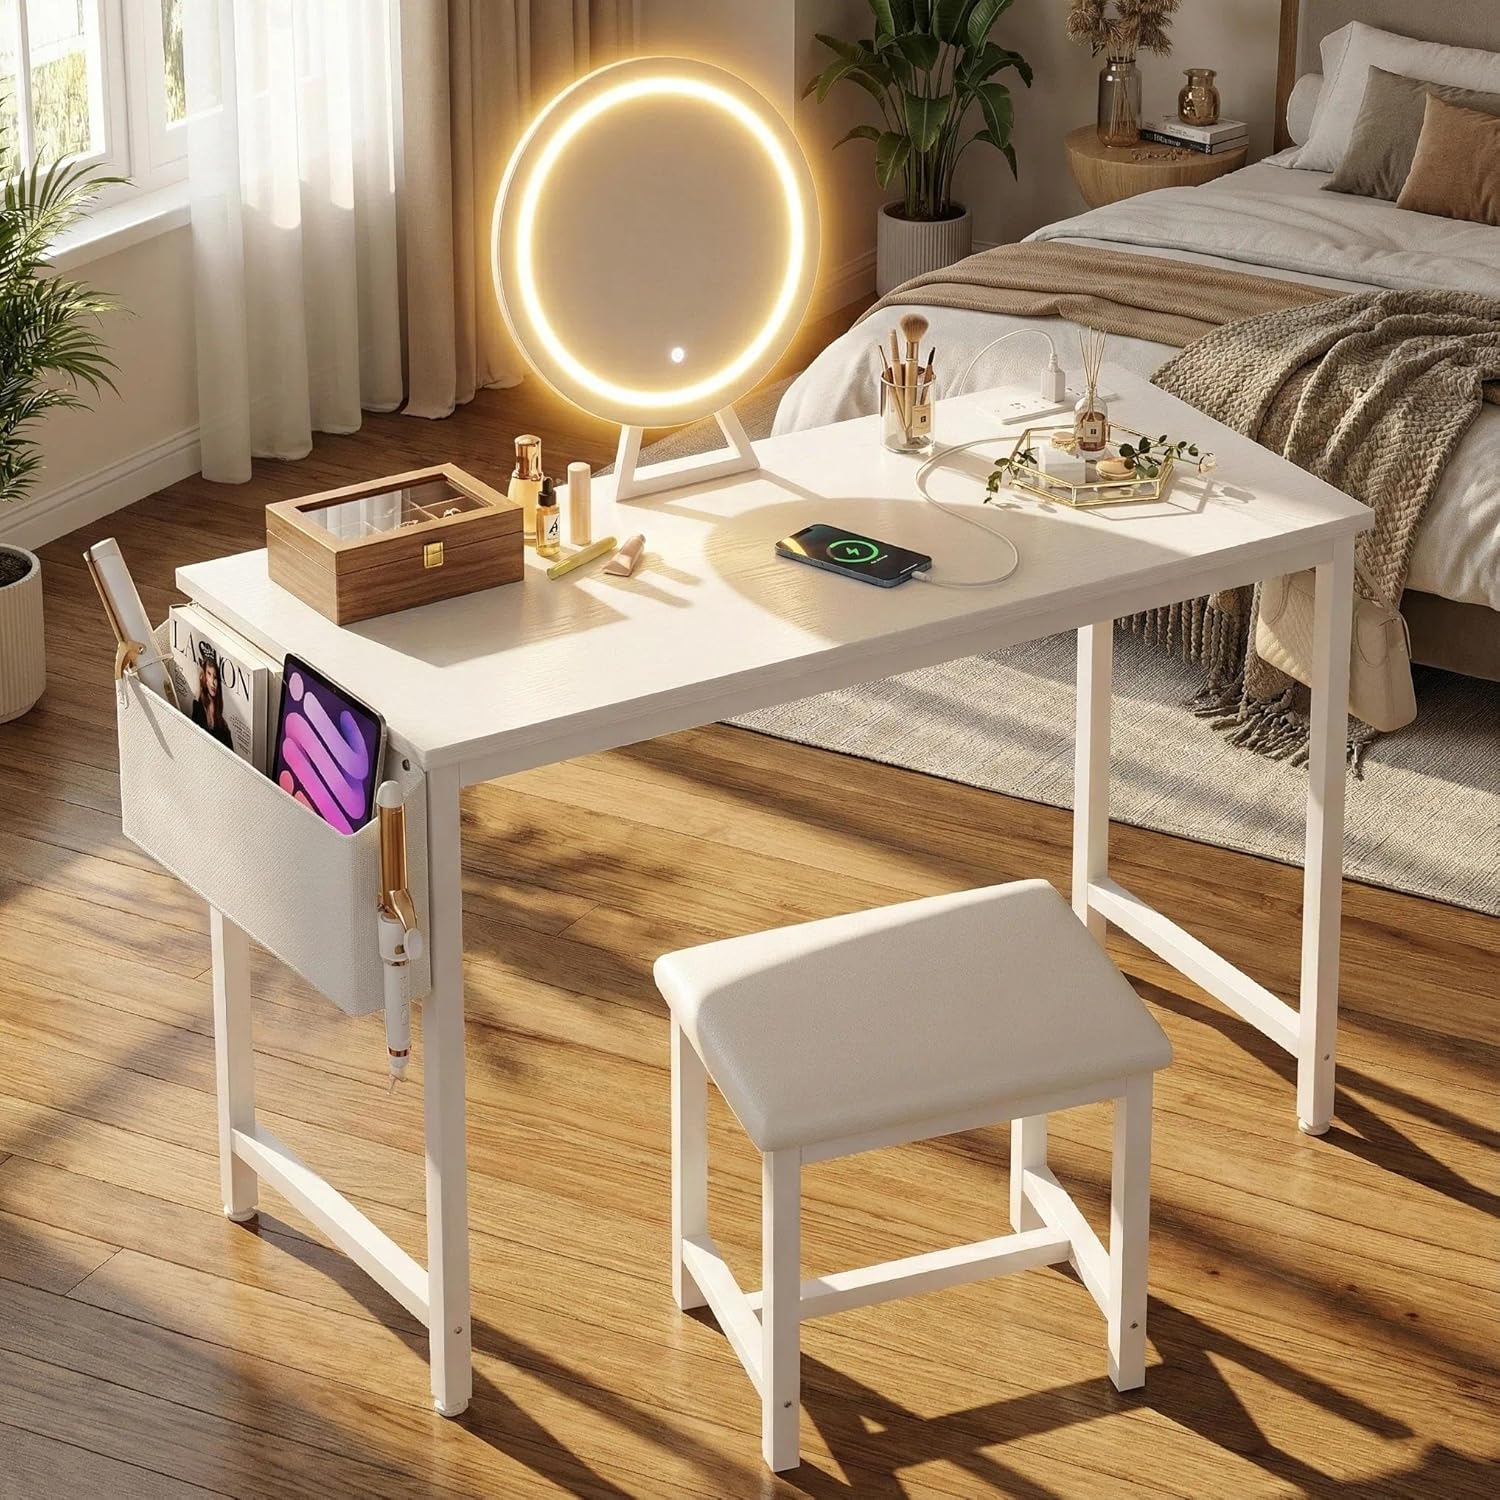
Figure 1: KAI-ROAD Vanity Desk with Lighted Mirror and Stool, showcasing its modern design and integrated features.
Key Features:
- 3-Mode Lighted Mirror: Integrated round mirror with adjustable daylight, warm, and cool lighting modes.
- Comfortable Stool: Thick-sponged PU padded stool for extended use.
- Built-in Charging Station: Includes 2 AC outlets and 2 USB ports for powering devices.
- Smart Storage: Features a large side pocket and two removable hooks for organization.
- Durable Construction: Metal frame with a white finish.
2. Safety Information
Please read and understand all safety instructions before assembly and use. Failure to follow these instructions may result in injury or damage to the product.
- Electrical Safety: Ensure the vanity desk is connected to a grounded outlet. Do not overload the power strip. Keep liquids away from electrical components.
- Stability: Place the vanity desk on a flat, stable surface. Do not climb on or apply excessive weight to the desk or stool.
- Assembly Safety: Follow all assembly steps carefully. Use appropriate tools. Keep small parts away from children.
- Product Care: Wipe with a damp cloth. Avoid harsh chemicals.
3. Package Contents
Verify that all components are present before beginning assembly. If any parts are missing or damaged, contact customer support.
- Vanity Desk Top
- Desk Legs (x4)
- Lighted Mirror
- Stool Seat
- Stool Legs (x4)
- Side Storage Pocket
- Removable Hooks (x2)
- Hardware Pack (screws, bolts, Allen wrench)
- Instruction Manual
4. Setup and Assembly
Assembly is required for this product. It is recommended to have two people for easier assembly. Clear a spacious area and lay out all components before starting.
4.1 Desk Assembly
- Attach the four desk legs to the underside of the vanity desk top using the provided screws and Allen wrench. Ensure all connections are secure.
- Secure the side storage pocket to the designated attachment points on the side of the desk.
- Insert the removable hooks into the pre-drilled holes on the side of the desk.
4.2 Stool Assembly
- Attach the four stool legs to the underside of the stool seat using the provided hardware.
- Ensure all leg connections are tightened for stability.
4.3 Mirror and Power Connection
- Place the lighted mirror on the vanity desk top in the desired position.
- Connect the power cord from the lighted mirror to one of the USB ports or AC outlets on the built-in power strip.
- Plug the main power cord of the vanity desk into a standard wall outlet.

Figure 2: Product dimensions and key components for assembly, including the desk, mirror, and stool.
5. Operating Instructions
5.1 Lighted Mirror Operation
The mirror features touch controls for lighting adjustments.
- Power On/Off: Touch the power icon on the mirror surface to turn the lights on or off.
- Change Color Mode: Briefly touch the mode icon to cycle through the three color modes: daylight (6000K), warm (3000K), and cool (4000K).
- Adjust Brightness: Press and hold the mode icon to continuously adjust the brightness level within the selected color mode. Release when the desired brightness is reached.

Figure 3: Illustration of the 3 color lighting modes (3000K, 4000K, 6000K) and touch controls for brightness adjustment.
5.2 Using the Built-in Power Strip
The vanity desk includes a power strip with 2 standard AC outlets and 2 USB ports.
- Plug electronic devices (e.g., phone chargers, hair tools) into the AC outlets (125V/12A max).
- Connect USB-powered devices to the USB ports (5V/2A max).
- Ensure the total power draw does not exceed the rated capacity of the power strip.

Figure 4: Detail of the integrated power strip for charging and powering devices.
5.3 Utilizing Storage Features
- The large side pocket is suitable for storing magazines, tablets, or larger beauty items.
- The removable hooks can be used to hang bags, headphones, or other accessories.

Figure 5: Removable hook and side storage pocket for organizing items.
6. Maintenance and Care
Regular maintenance will help prolong the life and appearance of your vanity desk.
- Cleaning: Wipe the desk surfaces and mirror with a soft, damp cloth. Avoid abrasive cleaners or solvents that may damage the finish or mirror coating.
- Stool Care: The PU padded stool can be wiped clean with a damp cloth. Avoid prolonged exposure to direct sunlight to prevent material degradation.
- Hardware Check: Periodically check all screws and bolts for tightness, especially on the desk legs and stool. Tighten if necessary to maintain stability.
- Electrical Components: Ensure the power cord and connections are free from damage. Do not attempt to repair electrical components yourself.
7. Troubleshooting
If you encounter issues with your vanity desk, refer to the following troubleshooting guide.
| Problem | Possible Cause | Solution |
|---|---|---|
| Mirror lights do not turn on. |
|
|
| Power outlets/USB ports not working. |
|
|
| Desk or stool feels wobbly. |
|
|
If the problem persists after attempting these solutions, please contact KAI-ROAD customer support.
8. Specifications
| Feature | Detail |
|---|---|
| Model Number | KLVD100W0D-RML |
| Brand | KAI-ROAD |
| Product Dimensions (Desk) | 15.7"D x 40"W x 30.7"H (40 x 101.6 x 78 cm) |
| Item Weight | 26.3 pounds (11.93 kg) |
| Frame Material | Metal |
| Furniture Finish | White |
| Seat Material Type | Faux Leather |
| Seat Height | 17.7 Inches (45 cm) |
| AC Outlet Rating | 125V/12A |
| USB Port Rating | 5V/2A |
| Power Cord Length | 5.9 FT (1.8 meters) |
| Assembly Required | Yes |
9. Warranty and Support
For warranty information or technical support, please contact KAI-ROAD customer service through the retailer where the product was purchased or visit the official KAI-ROAD website.
Please have your model number (KLVD100W0D-RML) and purchase date available when contacting support.
Manufacturer: KAI-ROAD
Ask a question about this manual
Ask about setup, troubleshooting, compatibility, parts, safety, or missing instructions. Manuals+ will review the question and use this page’s manual context to help answer it.