1. Introduction and Overview
This manual provides essential information for the safe and efficient operation of your VEVOR 18 Inch Industrial Wall Mount Fan. This fan is designed for high-velocity air circulation in large indoor spaces such as warehouses, workshops, basements, and commercial areas. It features a robust metal construction, aluminum blades, and a powerful motor to deliver significant airflow.
A set of two wall-mounted fans is included, providing wide-range indoor cooling. The fan offers 3-speed manual control and 360° tilt adjustment for optimal airflow direction.

Image: Two VEVOR 18 Inch Industrial Wall Mount Fans providing wide-range cooling in a large space.
2. Safety Instructions
WARNING: Read all safety warnings and instructions before using this product. Failure to follow the warnings and instructions may result in electric shock, fire, or serious injury.
- Always unplug the fan from the power outlet before cleaning, servicing, or moving.
- Do not operate the fan with a damaged cord or plug. If the cord or plug is damaged, contact qualified service personnel.
- Do not run the power cord under carpeting. Do not cover the cord with throw rugs, runners, or similar coverings. Arrange the cord away from traffic areas where it will not be tripped over.
- Do not insert fingers or any other objects through the grille when the fan is operating.
- Ensure the fan is mounted securely to a solid structure (concrete or metal structures are recommended; not suitable for wooden walls).
- This fan is for indoor use only.
- Keep children and pets away from the fan during operation.
3. Package Contents
Verify that all components are present and in good condition upon unpacking:
- Industrial Wall Fan (2 units)
- User Manual
- Mounting Hardware (bolts, washers, nuts, expansion bolts)
4. Setup and Installation
The VEVOR Industrial Wall Mount Fan is designed for easy installation on solid surfaces. Follow these steps for secure mounting:
- Choose a Suitable Location: Select a concrete or metal structure for mounting. Avoid wooden walls. Ensure the location allows for optimal air circulation and access to a power outlet.
- Mark Drill Holes: Use the mounting bracket as a template to mark the positions for drilling on the wall.
- Drill Holes: Drill pilot holes according to the marked positions. For concrete or masonry, use appropriate masonry drill bits and expansion bolts.
- Install Mounting Bracket: Securely attach the mounting bracket to the wall using the provided hardware. Ensure it is firmly tightened.
- Attach Fan to Bracket: Connect the fan unit to the installed mounting bracket. Use the provided bolts, rubber spacers, washers, and nuts to secure the fan. Ensure all connections are tight.
- Adjust Fan Angle: The fan can be tilted vertically for optimum airflow. Use the side knobs to adjust and lock the fan in your desired position.

Image: Wall-mount fan installation examples in various indoor and outdoor settings.
5. Operating Instructions
Your VEVOR Industrial Wall Mount Fan features a simple pull-string control for speed adjustment.
- Power On/Off: Pull the chain once to turn the fan on to the lowest speed setting. Continue pulling the chain to cycle through the speed settings.
- Speed Control: The fan has three speed settings:
- Low: Gentle air circulation.
- Medium: Refreshing, natural airflow.
- High: Strong cool breeze, rapid cooling (up to 4150 CFM).
- Tilt Adjustment: Manually adjust the fan head vertically to direct airflow precisely where needed. Loosen the side knobs, position the fan, and then tighten the knobs to secure.

Image: Fan speed settings and airflow capabilities.
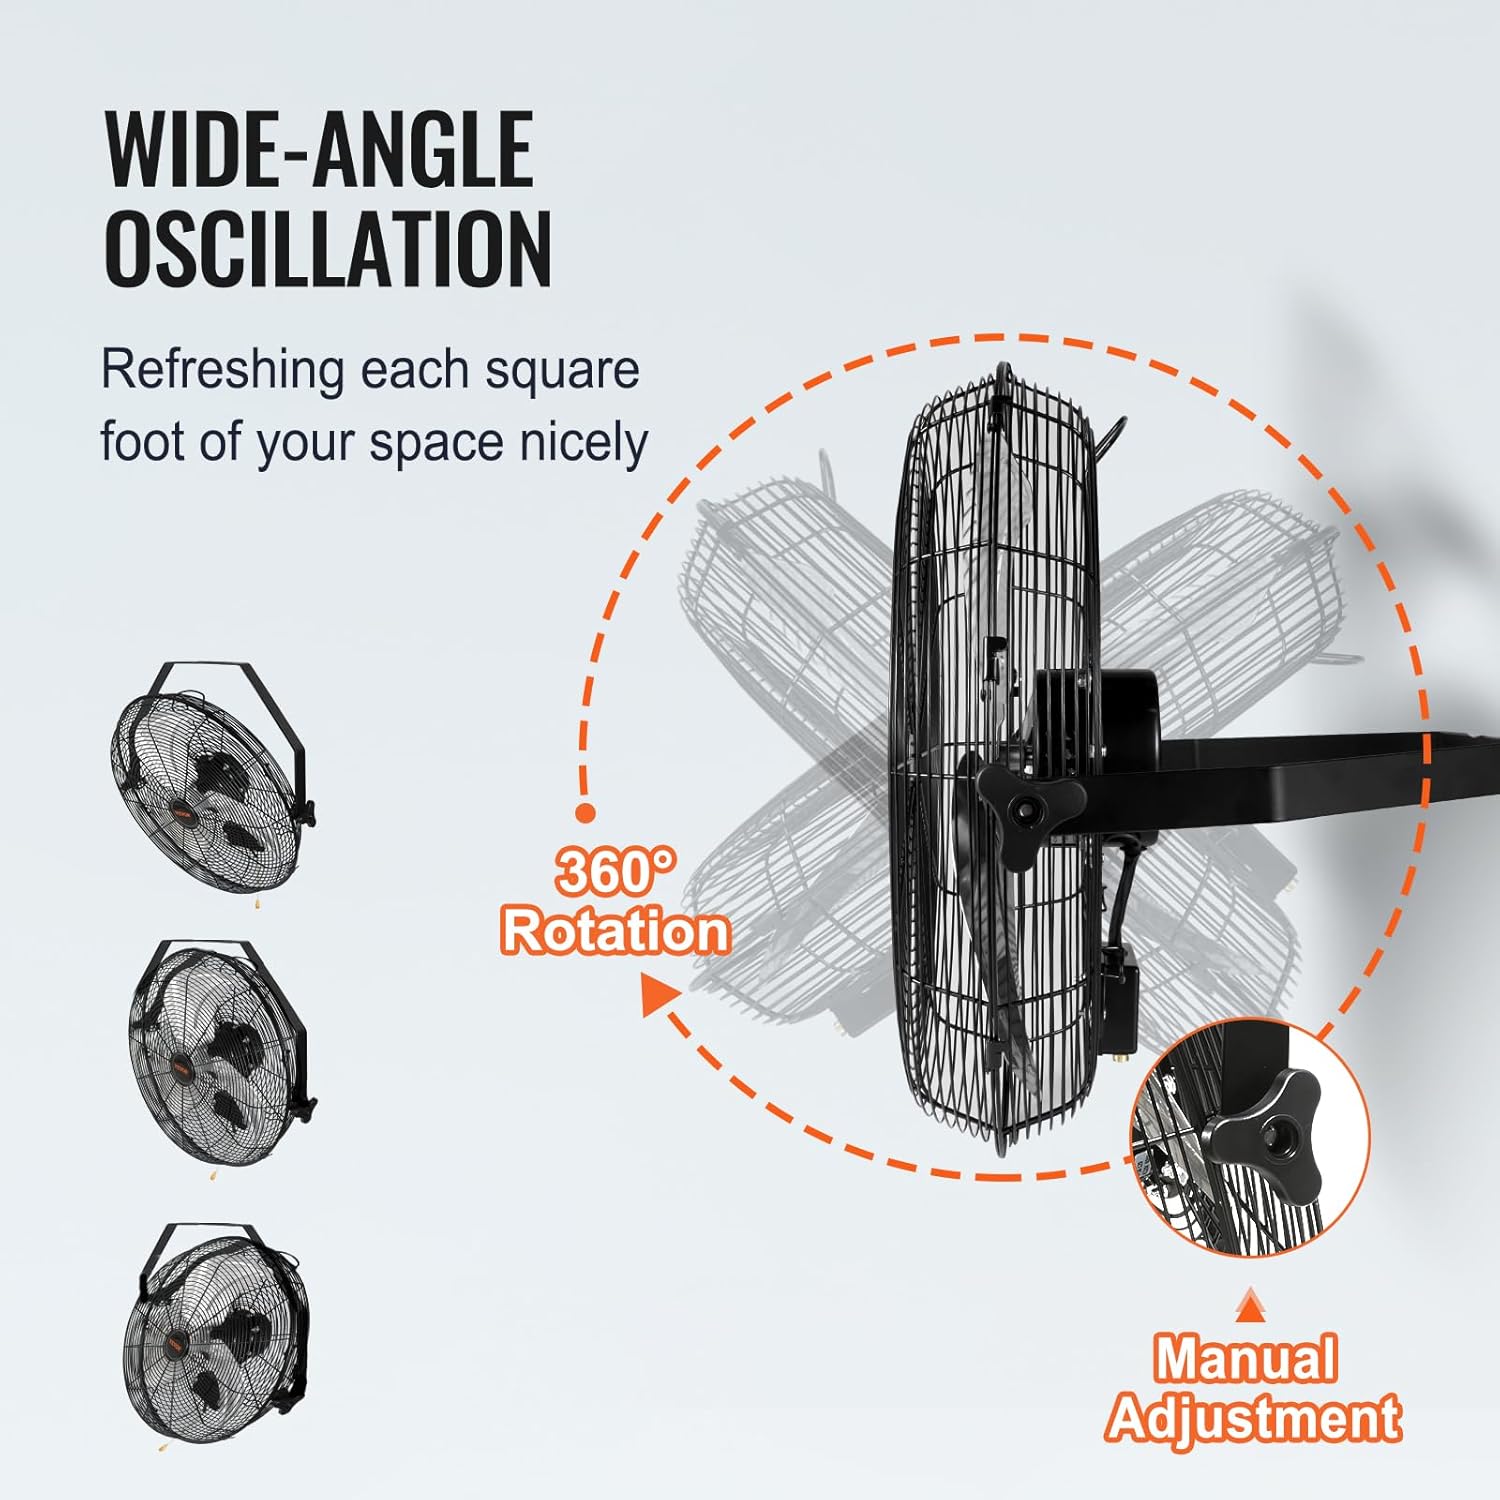
Image: Fan tilt adjustment and rotation capabilities.
6. Maintenance
Regular maintenance ensures the longevity and optimal performance of your fan.
- Cleaning: Disconnect the fan from the power supply before cleaning. Use a soft, damp cloth to wipe down the exterior surfaces. For thorough cleaning, the aluminum blades can be easily disassembled.
- Blade Cleaning: Carefully remove the front grille and fan blades. Wipe the blades with a damp cloth to remove dust and debris. Ensure blades are completely dry before reassembling.
- Storage: If storing the fan for an extended period, clean it thoroughly and store it in a dry, cool place away from direct sunlight and moisture.
7. Troubleshooting
If you encounter issues with your fan, refer to the following common troubleshooting steps:
- Fan Does Not Turn On:
- Ensure the power cord is securely plugged into a working outlet.
- Check the circuit breaker or fuse box.
- Verify the pull-string control is correctly operated to select a speed setting.
- Reduced Airflow:
- Check for any obstructions around the fan grille.
- Clean the fan blades and grille if dust or debris has accumulated.
- Ensure the fan is set to a higher speed setting.
- Unusual Noise:
- Ensure the fan is securely mounted and all screws/bolts are tightened.
- Check for any loose parts or foreign objects within the fan grille.
- Clean the blades and motor housing to remove any debris that might be causing imbalance.
If problems persist after attempting these steps, please contact VEVOR customer support.
8. Specifications
| Feature | Specification |
|---|---|
| Brand | VEVOR |
| Model Name | Wall Mount Fan |
| Model Number | BT-WL18B-N |
| Size | 18 Inch |
| Fan Quantity | 2 |
| Air Flow Capacity | Up to 4150 Cubic Feet Per Minute (CFM) |
| Speed | 1500 RPM |
| Number of Power Levels | 3 |
| Wattage | 90 watts |
| Voltage | 120 Volts |
| Noise Level | 60 Decibels |
| Control Method | Pull-string (Manual) |
| Special Feature | Adjustable Tilt (360°) |
| Material | All Metal Casing, Aluminum Blades |
| Product Dimensions | 22.24"D x 15.94"W x 22.44"H |
| Item Weight | 24.5 pounds |
| Indoor/Outdoor Usage | Indoor |

Image: Detailed product specifications and dimensions.

Image: Internal components highlighting the motor and construction for quiet and powerful operation.
9. Warranty and Support
VEVOR products are built to last and come with a standard warranty. For specific warranty details, product registration, or technical support, please refer to the warranty card included in your package or visit the official VEVOR website.
For any inquiries or assistance, please contact VEVOR customer service.


