
1. Safety Information
Always read and understand all safety warnings and instructions before using this product. Failure to follow these instructions may result in serious injury or property damage.
- Personal Protective Equipment (PPE): Always wear appropriate eye protection (safety glasses), hand protection (heavy-duty gloves), and hearing protection when operating pneumatic tools.
- Work Area: Ensure your work area is clean, well-lit, and free from obstructions. Keep children and bystanders away.
- Air Supply: Use a clean, dry, regulated air supply within the specified pressure range (5-8 bar / 73-116 psi). Do not exceed the maximum operating pressure.
- Tool Condition: Inspect the tool and all accessories for damage or wear before each use. Do not use damaged equipment.
- Secure Connection: Ensure all connections (adapters, air hose, air supply) are secure and leak-free before operation.
- Vehicle Preparation: Ensure the vehicle is stable, the engine is cool, and appropriate safety measures (e.g., disconnecting battery, relieving fuel pressure) are taken before working on injectors.
- Proper Use: Use the tool only for its intended purpose of removing diesel injectors. Do not modify the tool or use it for applications for which it was not designed.
2. Product Overview
The Orion Motor Tech 24-piece pneumatic injector puller kit is designed for the efficient and damage-free removal of seized diesel injectors from various engines. The kit utilizes pneumatic vibration to loosen stubborn injectors, reducing the risk of damage to surrounding components.
2.1. Kit Contents
The kit includes the following components:
- 1 x Pneumatic Hammer
- 1 x Air Intake Hose
- 19 x Adapters (various sizes)
- 1 x 1/4" Pneumatic Connector (EU Standard)
- 1 x 1/4" Pneumatic Connector (US Standard)
- 1 x Pair of Gloves

Figure 1: Complete 24-piece pneumatic injector puller kit contents.
2.2. Key Features
- Efficient Pneumatic Hammer: Delivers powerful vibrations to loosen seized injectors without damaging surrounding parts.
- Wide Adapter Compatibility: Includes 19 adapters to fit a broad range of diesel injectors.
- Durable Construction: Crafted from robust AISI 1045 steel with a black oxide finish for extended lifespan.
- User-Friendly Design: Clear size markings on adapters and organized storage case for quick identification.

Figure 2: The 19 included adapters for various injector sizes.

Figure 3: The pneumatic hammer, highlighting its dimensions and working pressure.
3. Setup
Before beginning, ensure the engine is cool and all necessary safety precautions are in place.
- Identify Correct Adapter: Select the appropriate adapter from the 19 provided that matches the diesel injector you intend to remove. The adapters are clearly marked with their sizes.
- Attach Adapter to Injector: Securely thread the chosen adapter onto the top of the injector. Ensure a snug fit to prevent slippage during operation.
- Connect Pneumatic Hammer: Attach the pneumatic hammer to the adapter.
- Connect Air Hose: Connect one end of the air intake hose to the pneumatic hammer. Attach the appropriate EU or US pneumatic connector to the other end of the air hose.
- Connect to Air Supply: Connect the air hose to a regulated air compressor capable of providing 5-8 bar (73-116 psi) of pressure. Ensure the air supply is clean and dry.
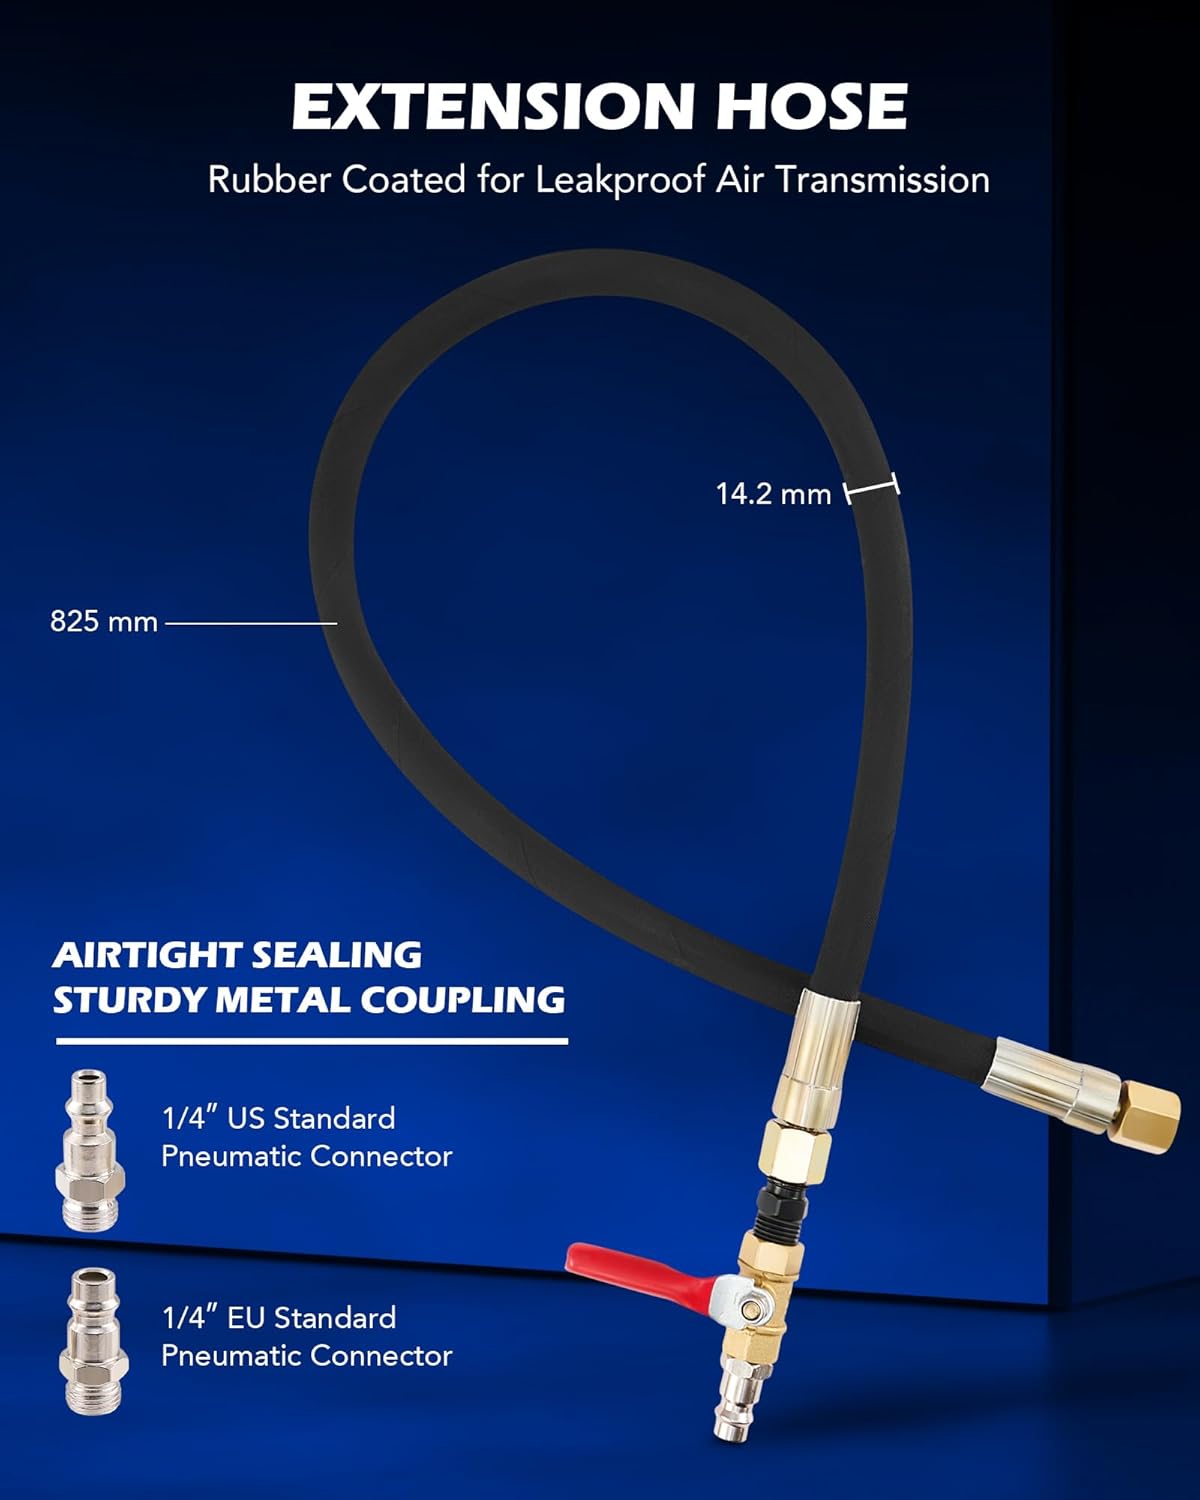
Figure 4: The air extension hose with both EU and US standard connectors.
4. Operating Instructions
Once the tool is properly set up and connected to the air supply, proceed with the injector removal:
- Activate Air Supply: Slowly open the valve on the air hose to allow compressed air to flow into the pneumatic hammer.
- Apply Vibration: The pneumatic hammer will begin to vibrate, transmitting force directly to the seized injector. Maintain a firm grip on the tool.
- Monitor Injector: Observe the injector as it vibrates. The vibrations will gradually loosen the injector from its seating. This process is typically quick, often taking only a few seconds.
- Remove Injector: Once the injector is sufficiently loosened, it can be carefully pulled out of its bore. Avoid excessive force to prevent damage.
- Deactivate Air Supply: Close the air supply valve and disconnect the air hose from the tool.
Important: The pneumatic operation is designed to be more secure and controllable than manual methods, minimizing abrasion on surrounding parts. Avoid using excessive air pressure beyond the recommended range.

Figure 5: Advantages of pneumatic operation over manual methods.
4.1. Instructional Videos
For a visual guide on the operation of pneumatic injector pullers, please refer to the following videos:
Video 1: Demonstration of a fuel injector removal and seal installation tool for VW Audi engines, showcasing the pneumatic pulling action.
Video 2: Overview and demonstration of a 24-piece air-powered injector puller kit, illustrating the setup and use of the pneumatic tool.
Video 3: General demonstration of a pneumatic injector puller set for diesel engines, showing the tool in action for effective injector removal.
5. Maintenance
Proper maintenance ensures the longevity and optimal performance of your injector puller set.
- Cleaning: After each use, clean all components, especially adapters and the pneumatic hammer, to remove any fuel, oil, or debris. Use a clean cloth and appropriate cleaning agents.
- Lubrication: Periodically apply a small amount of pneumatic tool oil to the air inlet of the pneumatic hammer to maintain internal components.
- Inspection: Regularly inspect all parts for signs of wear, corrosion, or damage. Pay close attention to threads on adapters and the integrity of the air hose.
- Storage: Store the kit in its original durable case in a dry, clean environment, away from direct sunlight and extreme temperatures. Ensure all components are dry before storage.
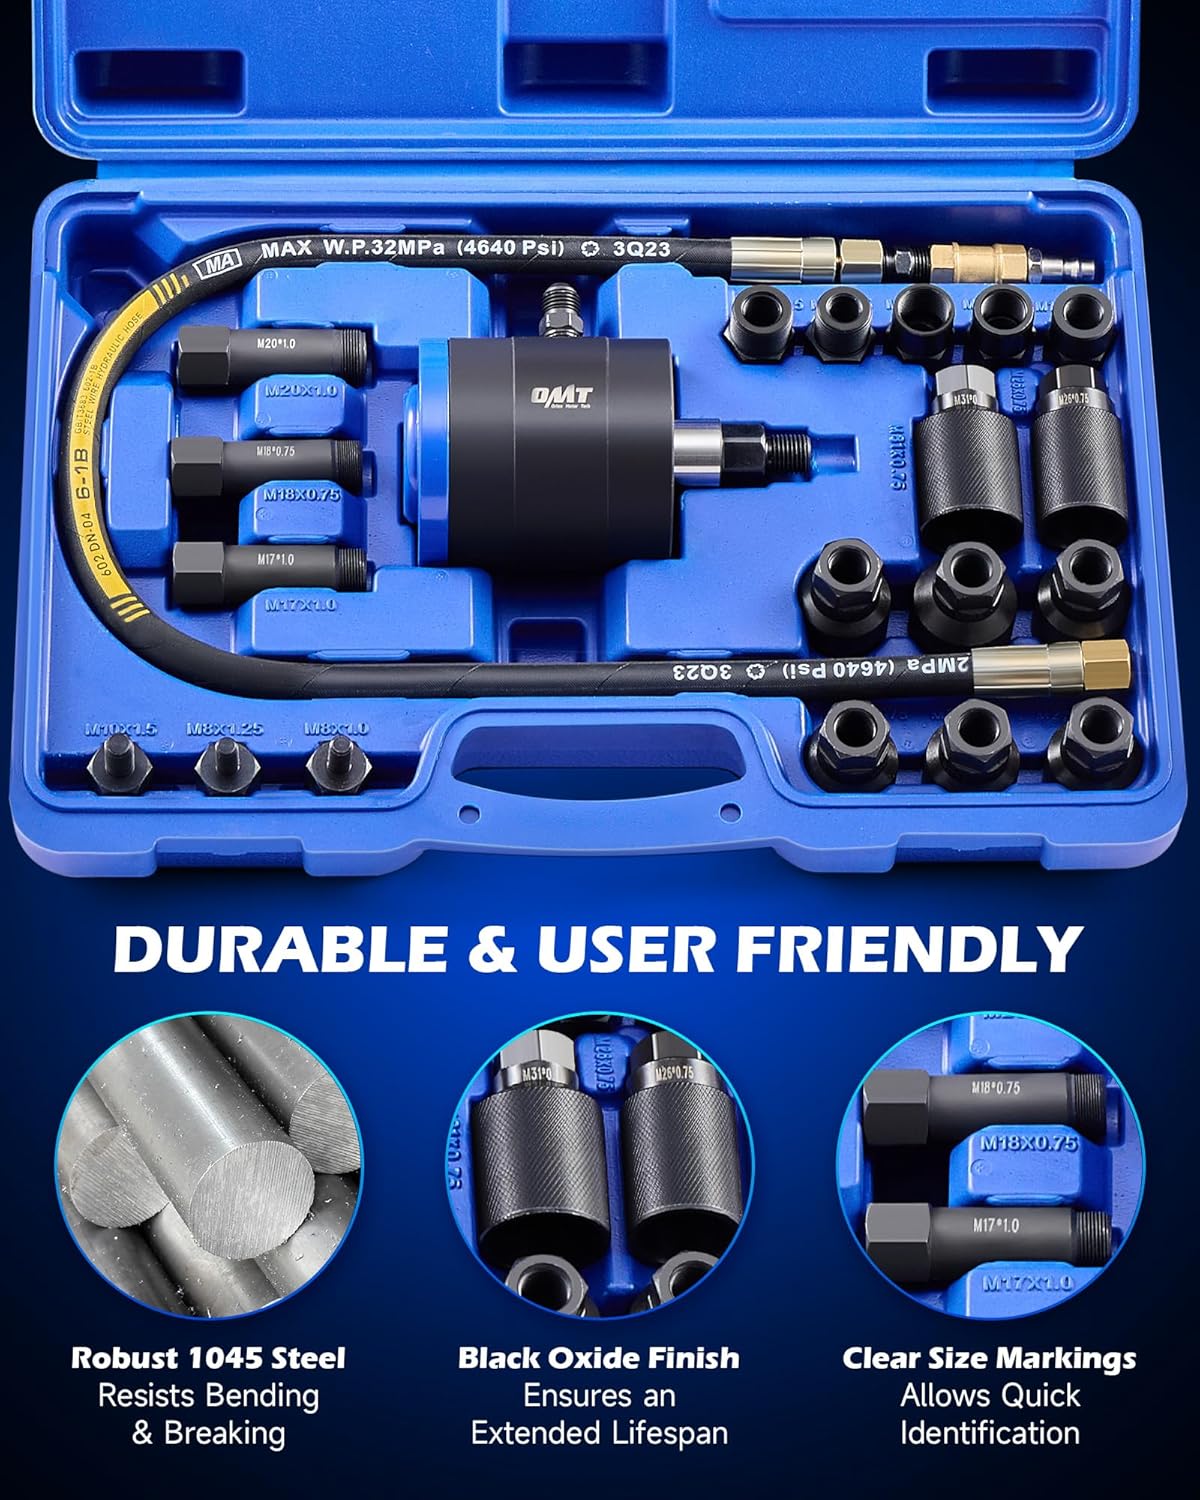
Figure 6: Durable and user-friendly design for easy maintenance and organization.
6. Troubleshooting
If you encounter issues during operation, refer to the following common problems and solutions:
| Problem | Possible Cause | Solution |
|---|---|---|
| Pneumatic hammer not operating or weak vibration. | Low air pressure; Air leak in connections; Clogged air inlet; Tool requires lubrication. | Check air compressor pressure (ensure 5-8 bar); Inspect all connections for leaks and tighten; Clean air inlet; Apply pneumatic tool oil. |
| Injector not loosening. | Incorrect adapter size; Injector excessively seized; Insufficient vibration time. | Ensure correct adapter is used and securely attached; Increase vibration time slightly; If extremely seized, consider applying penetrating oil beforehand. |
| Air leaking from connections. | Loose connections; Damaged O-rings or seals. | Tighten all connections; Inspect and replace any damaged O-rings or seals. |
7. Specifications
| Feature | Detail |
|---|---|
| Product Name | Pneumatic Injector Puller Set |
| Model Number | PUL-FI21-00 |
| Brand | Orion Motor Tech |
| Kit Pieces | 24 (including 19 adapters) |
| Working Pressure | 5-8 Bar (73-116 psi) |
| Material | AISI 1045 Steel with Black Oxide Finish |
| Product Dimensions | 38 x 27.5 x 11 cm |
| Item Weight | 6.63 kg |
| Adapter Sizes Included | M20x1.0, M18x0.75, M17x1.0, M8x1.25, M8x1.0, M10x1.5, M14x1.5, M16x1.5, M18x1.5, M22x1.5, M12x1.5, M31x0.75, M26x0.75, M27x0.75, M29x1.0, M25x0.5, M27x1.0, M25x1.0 |
8. Warranty & Support
Orion Motor Tech products are manufactured to high-quality standards. For warranty information, technical support, or replacement parts, please contact Orion Motor Tech customer service through their official website or the retailer where the product was purchased.
Please retain your proof of purchase for any warranty claims.