
Revolution R180 Connect
Revolution R180 Connect Smart Toaster User Manual
Model: R180 Connect (R180C-01)
1. Introduction
This manual provides essential information for the safe and efficient operation of your Revolution R180 Connect Smart Toaster. Please read all instructions carefully before use and retain this manual for future reference.

Image 1.1: The Revolution R180 Connect Smart Toaster, featuring a touchscreen display and two toasting slots.
2. Important Safety Information
When using electrical appliances, basic safety precautions should always be followed, including the following:
- Read all instructions.
- Do not touch hot surfaces. Use handles or knobs.
- To protect against electrical shock, do not immerse cord, plugs, or toaster in water or other liquid.
- Close supervision is necessary when any appliance is used by or near children.
- Unplug from outlet when not in use and before cleaning. Allow to cool before putting on or taking off parts.
- Do not operate any appliance with a damaged cord or plug or after the appliance malfunctions or has been damaged in any manner. Contact customer service for examination, repair, or adjustment.
- The use of accessory attachments not recommended by the appliance manufacturer may cause injuries.
- Do not use outdoors.
- Do not let cord hang over edge of table or counter, or touch hot surfaces.
- Do not place on or near a hot gas or electric burner, or in a heated oven.
- Extreme caution must be used when moving an appliance containing hot oil or other hot liquids.
- Do not use appliance for other than intended use.
- Oversize foods, metal foil packages, or utensils must not be inserted in a toaster as they may involve a risk of fire or electric shock.
- A fire may occur if toasters are covered or touching flammable material, including curtains, draperies, walls, and the like, when in operation.
- Do not attempt to dislodge food when toaster is plugged in.
- Do not operate unattended.
- The Toastie Press accessory (sold separately) is designed for use with this toaster. Ensure proper installation and removal as per its instructions.
3. Package Contents
Verify that all items are present and in good condition upon unpacking:
- Revolution R180 Connect Smart Toaster
- Removable Crumb Tray
- User Manual (this document)
Note: The Toastie Press and Warming Rack are sold separately and are not included in the standard package.
4. Setup
4.1 Initial Placement
- Place the toaster on a stable, flat, heat-resistant surface.
- Ensure adequate clearance (at least 6 inches) from walls, cabinets, and other objects to allow for proper ventilation.
- Do not place the toaster directly under cabinets or near flammable materials.
4.2 Power Connection
- Unwind the power cord completely.
- Plug the toaster into a standard 120V AC electrical outlet.
- The touchscreen will illuminate, indicating the toaster is powered on.
4.3 Wi-Fi Connectivity (Optional)
The R180 Connect features Wi-Fi connectivity for automatic clock setting, weather display, and over-the-air updates.
- On the touchscreen, navigate to the settings menu (gear icon).
- Select "Wi-Fi Setup" and follow the on-screen prompts to connect to your home network.
- Once connected, the toaster will automatically set the time and display local weather information.
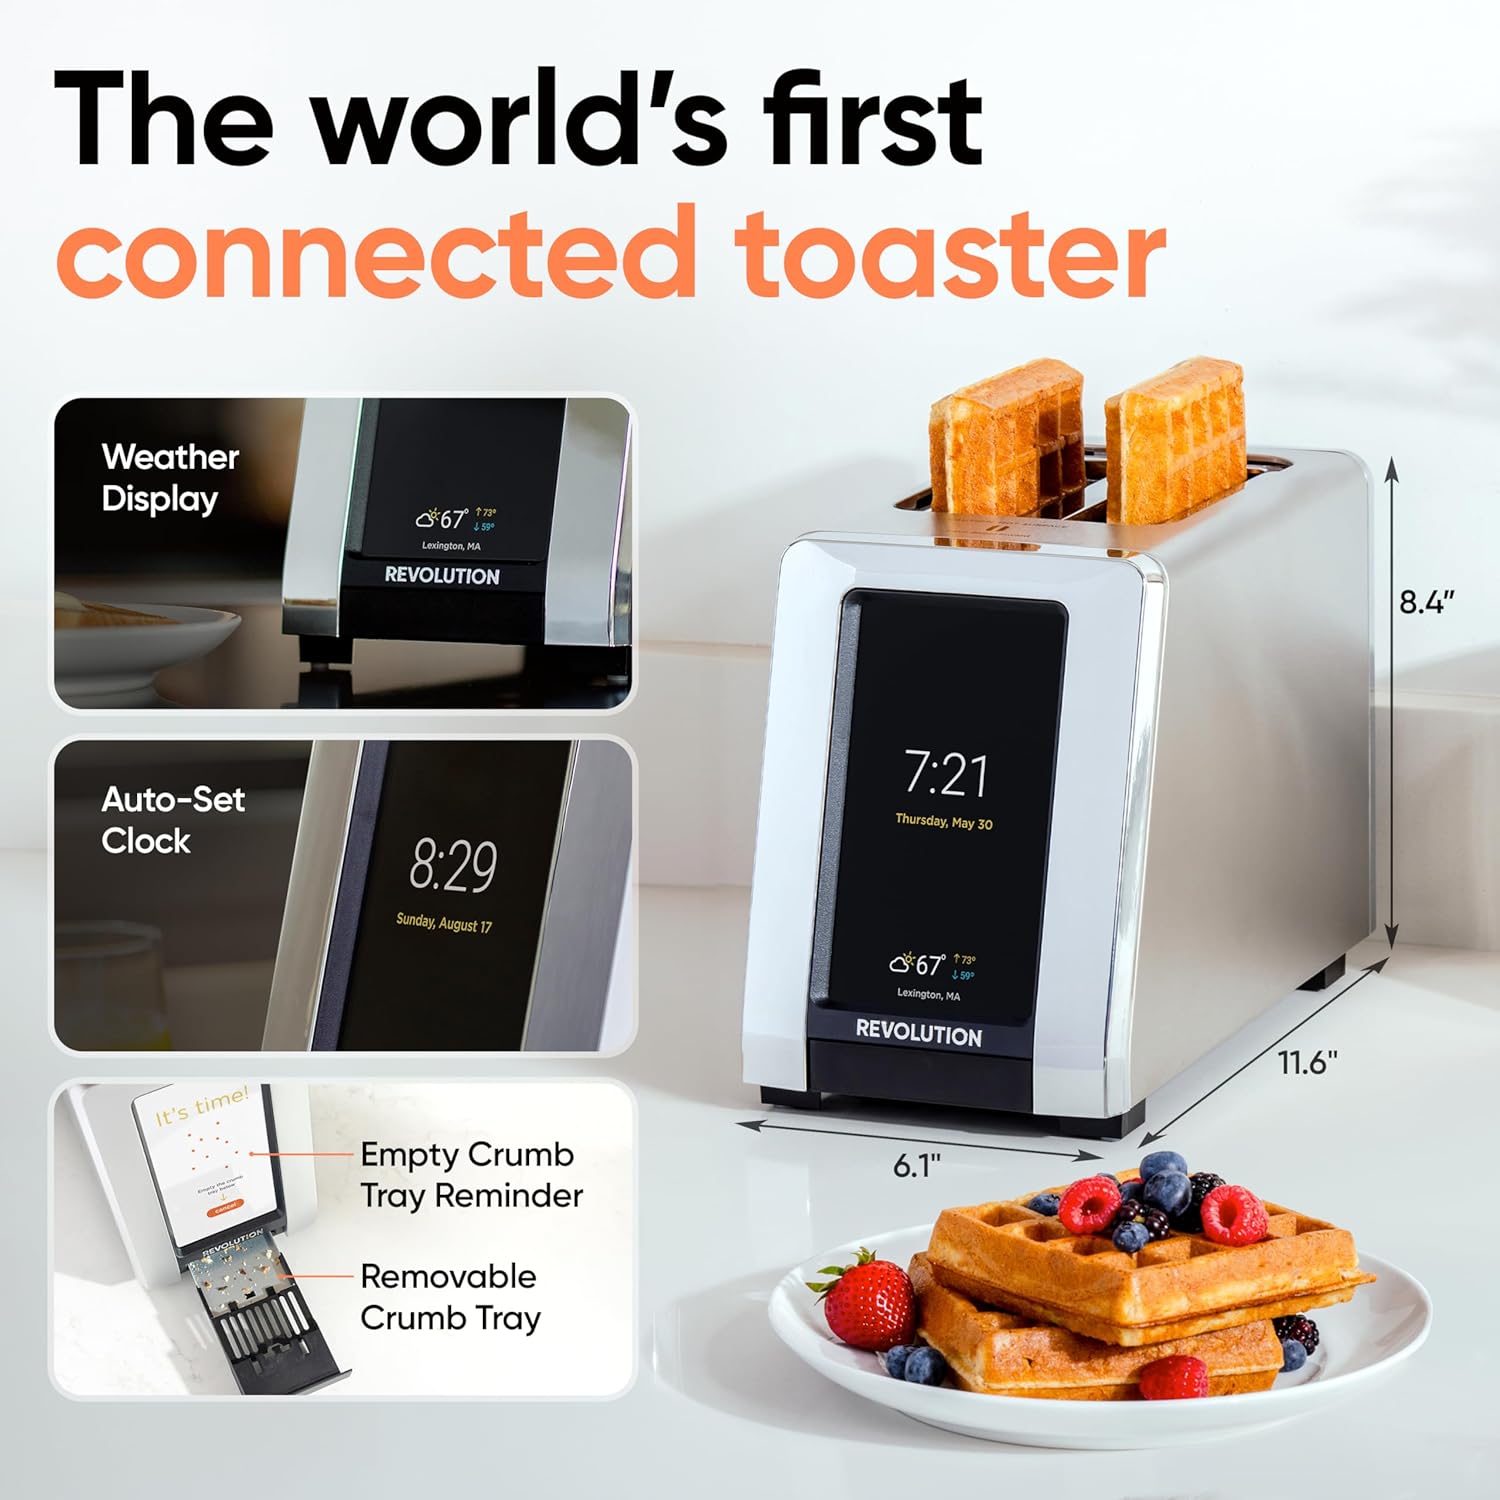
Image 4.1: The R180 Connect displaying weather and time, highlighting its smart features and dimensions.
5. Operating Instructions
5.1 Basic Toasting
The R180 Connect simplifies toasting with a 3-tap process:
- Select Bread Type: On the touchscreen, choose the icon corresponding to your food item (e.g., bread, bagel, waffle).
- Choose State: Select whether the item is Fresh, Frozen, or for Reheat.
- Adjust Browning Level: Use the slider or tap the desired browning level (1-7). The toaster remembers your last setting.
- Start Toasting: Tap the Start button. The toaster will automatically lower the food and begin the toasting cycle.

Image 5.1: The toaster's touchscreen interface, demonstrating the selection of bread type and browning preferences.
5.2 InstaGLO Technology
The InstaGLO 2.0 heating technology rapidly reaches full heat in approximately 2 seconds. This process sears the outside of the food, locking in moisture and flavor, resulting in a crispy exterior and soft interior.

Image 5.2: Visual comparison illustrating the faster and tastier results achieved with InstaGLO technology.
5.3 Using the Toastie Press (Sold Separately)
The Revolution Toastie Press allows you to prepare grilled cheese, paninis, and quesadillas directly in your toaster without butter or oil. Refer to the Toastie Press instruction manual for detailed usage.
- Insert the Toastie Press into the toaster slots.
- Place your sandwich or food item inside the press.
- On the toaster's touchscreen, select "Toastie Mode" and choose your desired browning level.
- Tap Start.
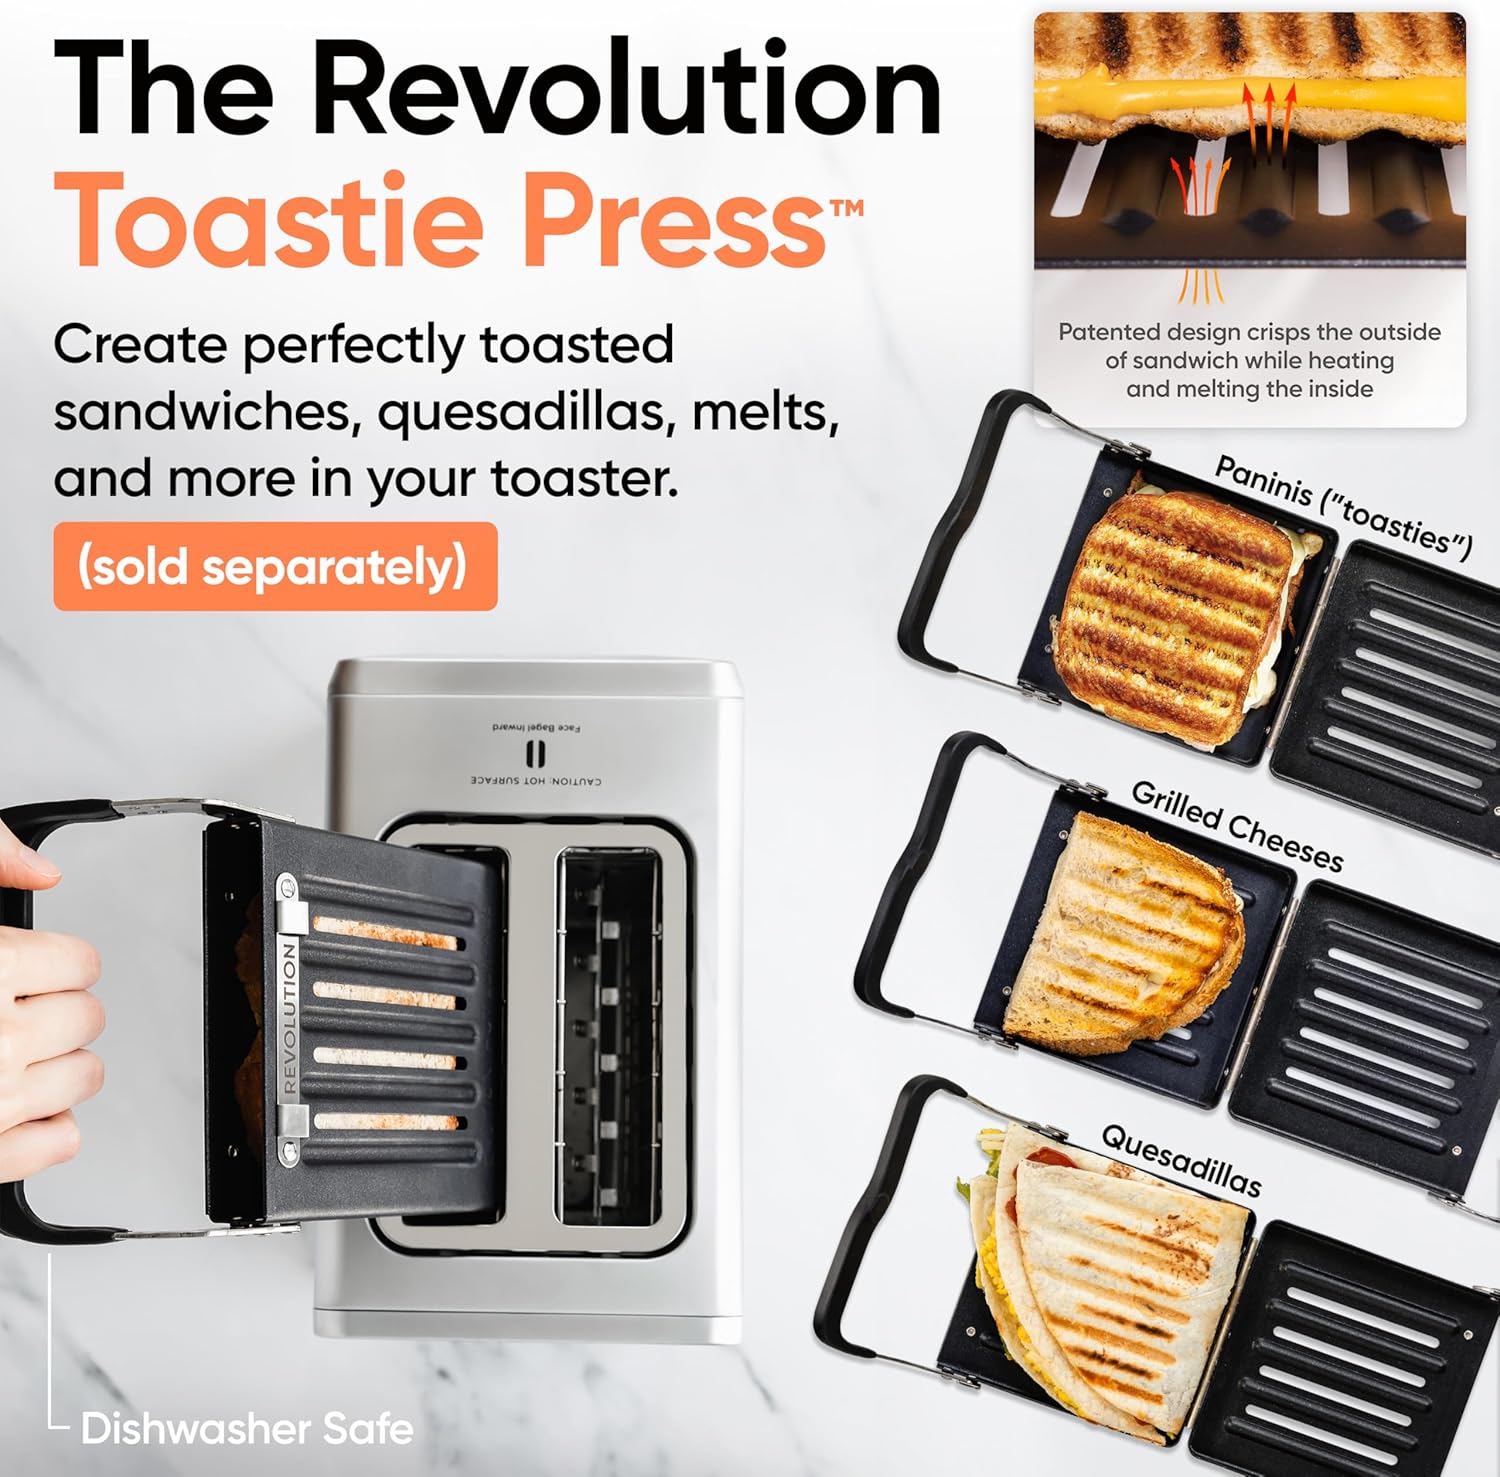
Image 5.3: The Revolution Toastie Press, an optional accessory for making toasted sandwiches.
6. Maintenance and Cleaning
6.1 Crumb Tray Cleaning
The toaster will periodically remind you to clean the crumb tray. Regular cleaning prevents crumb buildup and reduces fire risk.
- Unplug the toaster from the power outlet and allow it to cool completely.
- Locate the removable crumb tray at the bottom front of the toaster.
- Pull the tray out to remove it.
- Discard crumbs and wipe the tray clean with a damp cloth.
- Ensure the tray is completely dry before reinserting it into the toaster.
Image 6.1: The removable crumb tray, shown being accessed for cleaning.
6.2 Exterior Cleaning
- Ensure the toaster is unplugged and cool.
- Wipe the exterior surfaces with a soft, damp cloth. Do not use abrasive cleaners or scouring pads.
- For stainless steel models, use a stainless steel cleaner if necessary, following the product's instructions.
- Do not spray cleaning solutions directly onto the toaster.
7. Troubleshooting
| Problem | Possible Cause | Solution |
|---|---|---|
| Toaster does not power on. | Not plugged in; power outlet malfunction. | Ensure the toaster is securely plugged into a working outlet. Test the outlet with another appliance. |
| Food is not toasting evenly. | Incorrect bread type or browning level selected; crumb tray full. | Verify the correct bread type and browning level are selected. Clean the crumb tray. |
| Wi-Fi connection fails. | Incorrect password; out of range; network issue. | Re-enter Wi-Fi password carefully. Move toaster closer to router. Restart router. |
| Toaster emits smoke. | Food lodged inside; crumb tray full; foreign object. | Immediately unplug the toaster. Allow to cool. Carefully remove any lodged food or foreign objects. Clean crumb tray. If smoke persists, discontinue use and contact customer support. |
8. Specifications
- Model: R180 Connect (R180C-01)
- Brand: Revolution
- Number of Slices: 2
- Wattage: 1500 watts
- Voltage: 120 Volts (AC)
- Material: Stainless Steel
- Product Dimensions: 11.65"D x 6.13"W x 8.4"H
- Item Weight: 7.17 pounds
- Special Feature: Touchscreen, Wi-Fi Connectivity, InstaGLO Technology
- UPC: 810034150882
9. Warranty and Support
For warranty information, product registration, or technical support, please visit the official Revolution Cooking website or contact their customer service department.
Revolution Cooking, LLC
Visit the Revolution Store on Amazon
Note: Specific warranty terms may vary by region and purchase date. Please refer to the documentation provided with your purchase for precise details.
Related documentsR180 Connect


Ask a question about this manual
Ask about setup, troubleshooting, compatibility, parts, safety, or missing instructions. Manuals+ will review the question and use this page’s manual context to help answer it.