
Introduction
This manual provides instructions for the installation, operation, and maintenance of your YOVDA LT-A13 Triple Camera Dash Cam. Please read this manual thoroughly before use to ensure proper functionality and safety.
Package Contents
- 1 x Dash Camera
- 1 x Inside Camera
- 1 x Rear Camera
- 1 x Bracket
- 1 x Double Sided Sticker
- 2 x Screws
- 1 x Instruction Manual (This manual)
Product Features
- Three-Channel Recording: Simultaneous recording from front, interior, and rear cameras for comprehensive coverage.
- 1080P High Definition: Records clear video and audio.
- IR Night Vision: Enhanced visibility in low-light conditions for interior and exterior.
- Wide-Angle Lenses: 170° front, 120° interior, and wide-angle rear camera.
- Loop Recording: Automatically overwrites oldest footage when storage is full.
- G-Sensor (Gravity Sensor): Detects collisions and locks important video files.
- 24-Hour Parking Guard: Automatically records when impact is detected while parked (requires optional hardwire kit).
- 5.08 cm IPS Screen: For real-time viewing and playback.
- Wi-Fi Connectivity: For app control.
Product Overview
Familiarize yourself with the components and controls of your dash cam.

Image: Front, side, and top views of the YOVDA LT-A13 dash cam with labels for the inside camera, power button, up/down buttons, confirm button, menu/camera/playback button, reset button, microphone, front camera, TF card slot, power interface, and holder interface.
Main Unit Controls and Ports
- Power Button: Turns the device on/off.
- Up/Down Buttons: Navigate menus and adjust settings.
- Confirm Button (OK): Confirms selections.
- Menu/Camera/Playback Button: Accesses menu, switches camera modes, or enters playback.
- Reset Button: Resets the device (use a pin).
- TF Card Slot: Insert microSD card (up to 32GB recommended).
- Power Interface: Connects to car charger.
- Microphone: Records audio.
- Front Camera: Main forward-facing camera.
- Inside Camera: Interior-facing camera.
Setup
Installing the Main Dash Cam Unit
- Clean the windshield area where the dash cam will be mounted.
- Attach the suction cup bracket to the main dash cam unit.
- Securely mount the dash cam on the windshield, ensuring a clear view for the front camera and easy access to controls.
- Route the power cable neatly along the windshield and dashboard to the car's power outlet (cigarette lighter).

Image: The YOVDA LT-A13 dash cam mounted on a windshield via a suction cup bracket, showing its compact size and orientation. Dimensions are indicated as 10.5cm (4.13 inches) width and 4.3cm (1.69 inches) height.
Installing the Rear Camera
- Identify a suitable location on the rear windshield or license plate area for the rear camera.
- Use the provided screws or double-sided sticker to securely attach the rear camera.
- Route the rear camera cable to the main dash cam unit, ensuring it does not interfere with vehicle operations.
- Connect the rear camera cable to the designated port on the main dash cam.
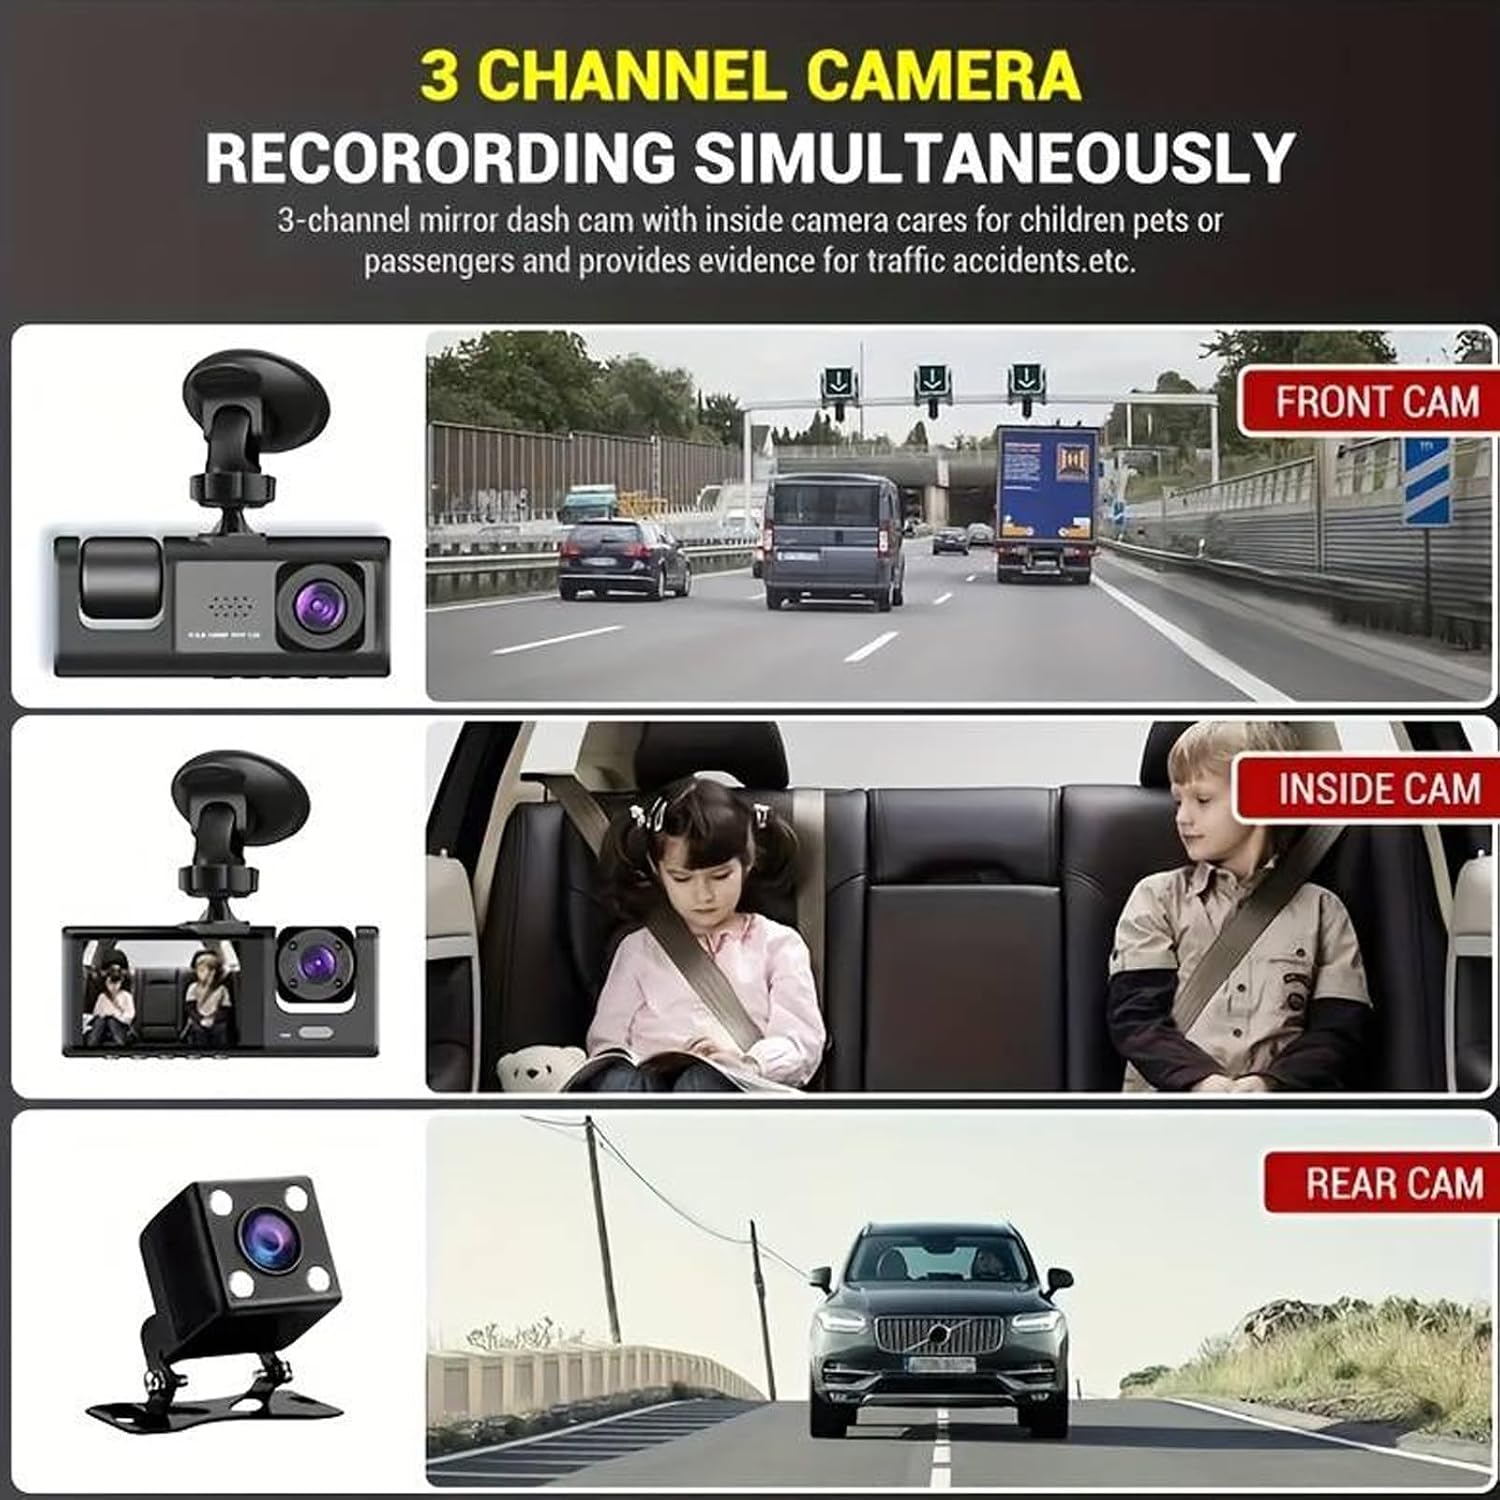
Image: A composite image demonstrating the three-channel recording capability. The top panel shows the view from the front camera on a highway, the middle panel shows the view from the inside camera capturing children in the back seat, and the bottom panel shows the view from the rear camera capturing the road behind a car.
Inserting the MicroSD Card
- Ensure the dash cam is powered off.
- Insert a Class 10 or higher microSD card (up to 32GB) into the TF card slot until it clicks into place.
- Format the microSD card via the dash cam's menu settings before first use.
Operating Instructions
Powering On/Off
The dash cam will automatically power on and begin recording when connected to the car's power and the engine starts. It will power off automatically when the engine is turned off. You can also manually power it on/off using the Power button.
Recording Modes
The dash cam supports simultaneous recording from the front, interior, and rear cameras. You can switch between different display modes (e.g., Picture-in-Picture, full screen front, full screen interior, full screen rear) using the menu settings.

Image: A split-screen view from the dash cam, showing the interior view with two passengers, the rear view of a road at night, and the front view of a scenic road. The image highlights "WDR & IR NIGHT VISION" capabilities.
Loop Recording
When the memory card is full, the dash cam will automatically overwrite the oldest unprotected video files with new recordings. This ensures continuous recording without manual intervention.

Image: An illustration depicting the seamless loop recording feature. It shows a film strip with various driving scenes, indicating that older footage is overwritten by newer footage when the SD card reaches its maximum storage capacity (up to 32GB). Icons for "Loop Recording" and "Support 32GB" are also present.
G-Sensor (Emergency Recording)
The built-in G-sensor detects sudden impacts or collisions. When triggered, it automatically locks the current video segment to prevent it from being overwritten by loop recording. These files are stored in a separate folder.
Parking Guard (Optional)
With an optional ACC hardwire kit (not included), the dash cam can monitor your vehicle for impacts even when parked. If an impact is detected, it will automatically power on and record a short video.
Night Vision
The dash cam features IR night vision for the interior camera and enhanced low-light performance for the front and rear cameras, ensuring clear recordings in dark conditions.
Maintenance
- Cleaning: Use a soft, dry cloth to clean the camera lenses and screen. Do not use abrasive cleaners.
- MicroSD Card: Regularly format the microSD card (e.g., once a month) to maintain optimal performance and prevent data corruption. Replace the card if it shows signs of wear or error.
- Temperature: Avoid exposing the dash cam to extreme temperatures for prolonged periods.
Troubleshooting
- Dash cam does not power on.
Check if the power cable is securely connected to both the dash cam and the car's power outlet.
Ensure the car's power outlet is functioning.
The internal battery might be depleted; connect to power and try again.
- Recording stops unexpectedly.
The microSD card might be full. Format the card or replace it.
The microSD card might be faulty or too slow. Use a Class 10 or higher card.
Check for loose power connections.
- Video footage is blurry.
Clean the camera lenses with a soft cloth.
Ensure the protective film has been removed from the lenses.
Check if the dash cam is securely mounted and not vibrating excessively.
- G-sensor is too sensitive/not sensitive enough.
Adjust the G-sensor sensitivity setting in the dash cam's menu.
Specifications
| Feature | Specification |
|---|---|
| Model | LT-A13 |
| Video Capture Resolution | 1080p |
| Channels | 3 (Front, Interior, Rear) |
| Screen Size | 5.08 cm (2 inches) IPS |
| Connectivity | Wi-Fi |
| Storage | MicroSD Card (Max 32GB, Class 10+) |
| Battery | Lithium battery (200mAH) |
| Voltage | 12 to 24V |
| Mounting Type | Windshield Mount |
| Item Weight | 6.9 ounces |
Warranty and Support
For warranty information or technical support, please refer to the contact details provided with your purchase or visit the official YOVDA website. Keep your purchase receipt as proof of purchase.