
1. Introduction
The Ashfly Mini Pocket Handheld Microscope Model 355 is an educational science kit designed to introduce children to the microscopic world. Featuring a 2-inch IPS screen, 1080P high-definition autofocus imaging, and up to 200x magnification, this device allows for real-time observation of tiny details. Its portable and durable design makes it suitable for both indoor and outdoor exploration.

Image: The Ashfly Mini Pocket Handheld Microscope, showcasing its display and connectivity to a laptop for larger viewing.
2. Safety Information
- Warning: DO NOT point the illuminated lens directly at your eyes or the eyes of others.
- Keep the device away from water and excessive moisture.
- Avoid dropping the device from significant heights to prevent damage.
- Ensure proper adult supervision for young children during use.
3. Package Contents
Verify that all items are present in the package:
- Ashfly Mini Pocket Handheld Microscope (Model 355)
- USB Charging Cable
- Hanging Ropes / Lanyard
- User Manual
4. Product Overview
The microscope features a user-friendly design with intuitive controls.
- Display Screen: 2-inch IPS screen for clear, real-time viewing.
- Digital Lens: 1080P high-definition autofocus lens with up to 200x magnification (up to 500x with 4x digital zoom).
- Physical Magnifying Glass: Located on the opposite side for quick, lower-magnification viewing.
- LED Lights: 8 adjustable LED lights for optimal illumination in various lighting conditions.
- Control Buttons: Power, zoom in/out, capture photo/video, and menu navigation.
- Ports: USB port for charging and PC connection, MicroSD card slot (supports up to 64GB).
- Durable Design: Lightweight plastic body with a protective silicone/rubber cover.
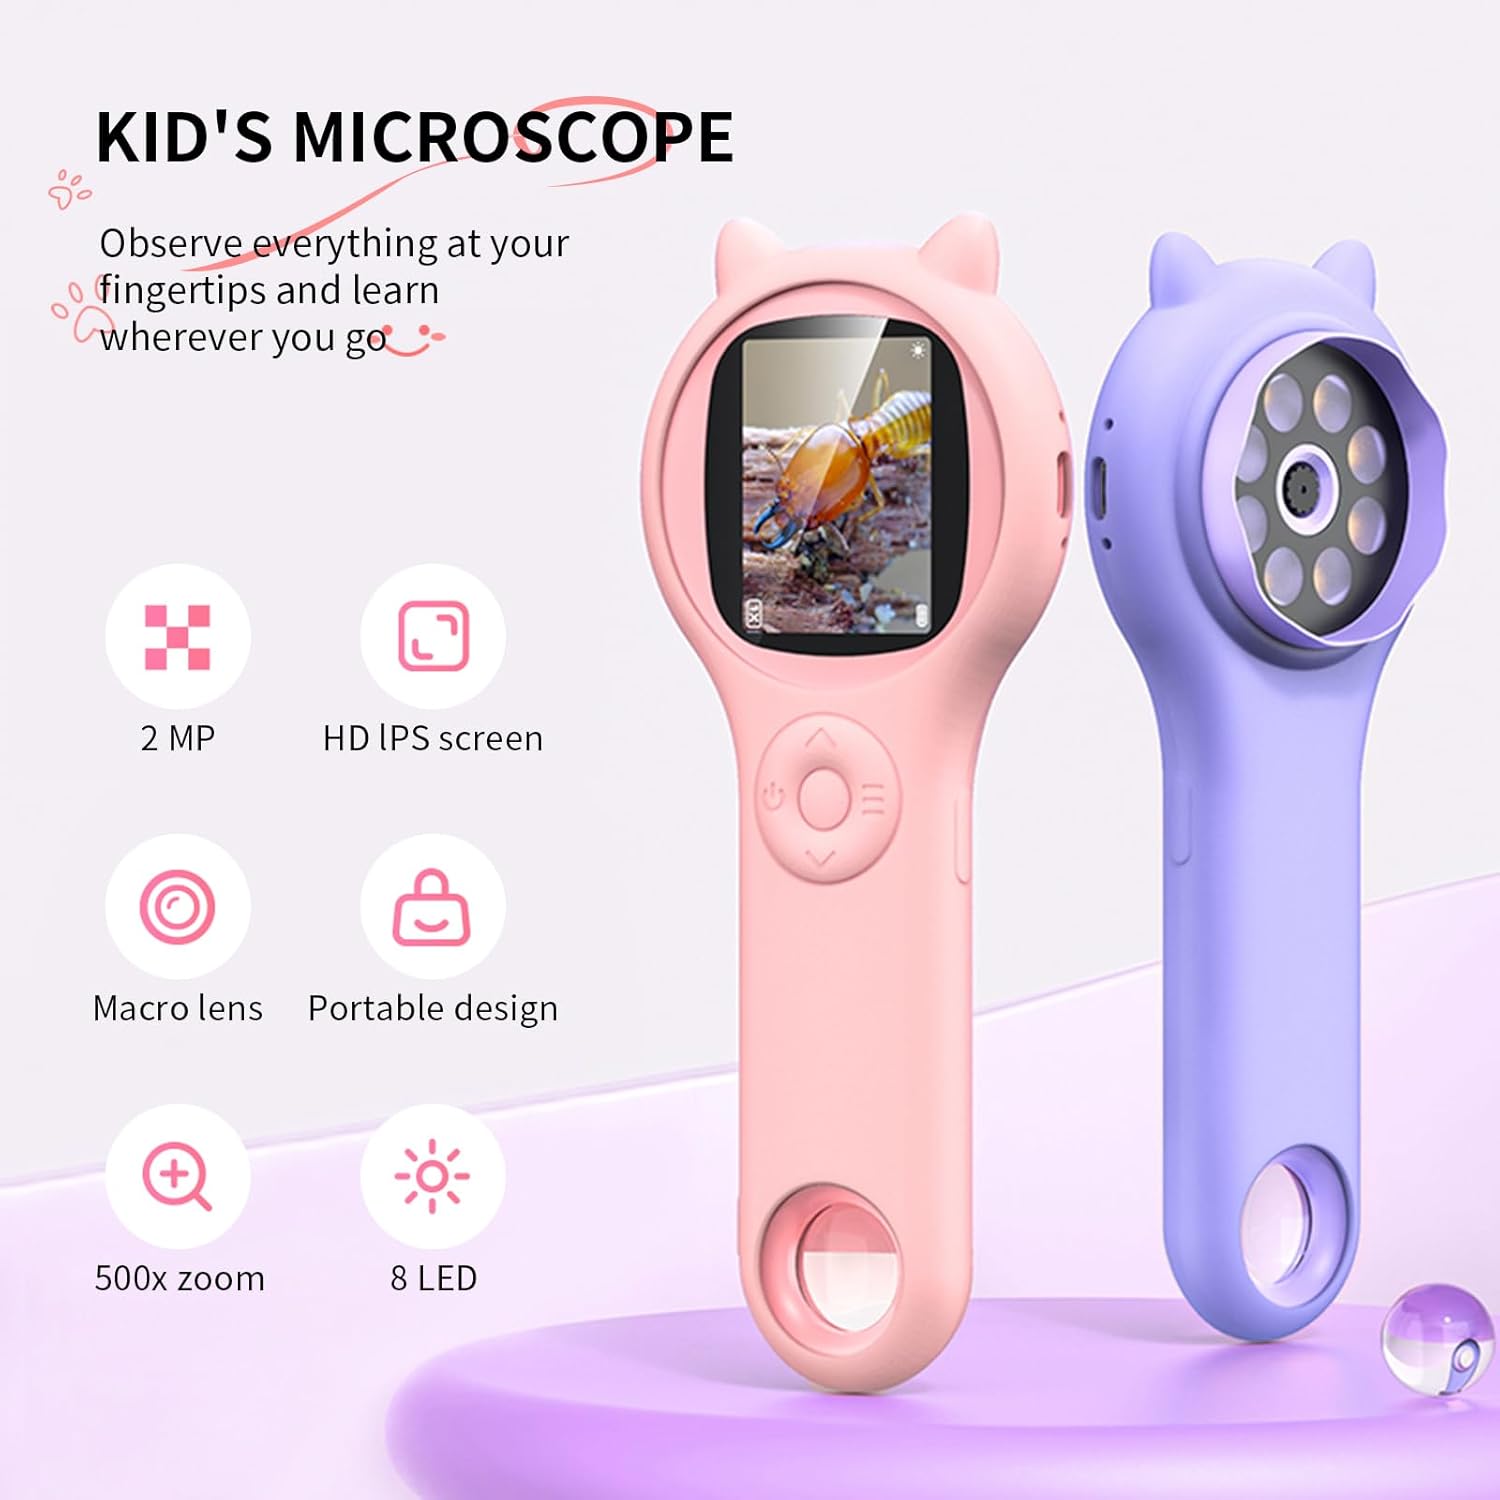
Image: Key features of the Ashfly Mini Pocket Handheld Microscope, including its screen, lens, and lighting.
5. Setup
5.1 Charging the Device
Before first use, fully charge the microscope. Connect the provided USB charging cable to the device's USB port and plug the other end into a compatible USB power adapter or computer. The charging indicator light will show the charging status. A full charge provides approximately 2 hours of continuous use.
5.2 Inserting a Memory Card (Optional)
The microscope has built-in storage for up to 200 photos. For extended storage of photos and videos, insert a MicroSD card (up to 64GB, not included) into the designated slot. Ensure the card is inserted correctly until it clicks into place.
5.3 Attaching the Lanyard
Attach the provided hanging rope/lanyard to the designated loop on the microscope. This helps prevent accidental drops and makes the device easier to carry during outdoor activities.
6. Operating Instructions
6.1 Power On/Off
- To power on, press and hold the Power button until the screen illuminates.
- To power off, press and hold the Power button again until the screen turns off.
6.2 Using the Digital Microscope
- Point the digital lens (the end with LED lights) directly at the object you wish to observe.
- The microscope features autofocus, providing clear images automatically.
- Use the zoom buttons (+/-) to adjust the digital magnification up to 4x.
- Adjust the brightness of the 8 LED lights using the dedicated light button to enhance visibility.

Image: A child observing a plant with the microscope, demonstrating its ease of use for young explorers.
6.3 Using the Physical Magnifying Glass
For quick, lower-magnification viewing, use the physical magnifying glass located on the opposite end of the digital lens. Simply hold it over the object to magnify.
6.4 Capturing Photos and Videos
- While observing, press the Capture button to take a photo.
- To record a video, press and hold the Capture button. Press again to stop recording.
- Captured media is saved to the internal memory or the inserted MicroSD card.
6.5 Viewing Saved Media
Navigate to the Album or Gallery section on the device's menu to view saved photos and videos.
6.6 Connecting to a PC/Laptop
Connect the microscope to a PC or laptop using the USB cable for real-time observation on a larger screen or to transfer captured media. Supported systems include Windows XP, Vista/7/8/10/11, and Mac OS x 11.0 or higher.

Image: The microscope connected to a laptop, enabling real-time display and transfer of observations.
Video: Official Ashfly demonstration of the Kid's Hand-Held Microscope in use, showcasing its display and functionality.
7. Maintenance
- Cleaning: Wipe the device with a soft, damp cloth. Avoid using harsh chemicals or abrasive materials.
- Storage: Store the microscope in a cool, dry place away from direct sunlight when not in use.
8. Troubleshooting
- Device not turning on: Ensure the device is fully charged.
- Charging issues: Check that the USB cable is securely connected to both the device and the power source. Ensure the silicone cover is not obstructing the charging port.
- Unclear image: Ensure the digital lens is very close to the object. Adjust the zoom and LED lights for optimal clarity.
- Cannot save photos/videos: Check if a MicroSD card is inserted correctly and has sufficient storage space.
9. Specifications
| Feature | Detail |
|---|---|
| Model Number | 355 |
| Product Dimensions | 7 x 2 x 3 inches |
| Item Weight | 0.035 ounces (1 Grams) |
| Display Screen | 2-inch IPS HD Screen |
| Magnification | Up to 200x (optical), 500x with 4x digital zoom |
| Camera Resolution | 1080P |
| Light Source Type | 8 LED Lights |
| Battery | 1 Lithium Ion battery (included) |
| Battery Life | Up to 2 hours per charge |
| Storage | Built-in for 200 photos, supports up to 64GB MicroSD card |
| Connectivity | USB to PC/Laptop |
| Material | Plastic |
10. Warranty and Support
For warranty information or technical support, please contact Ashfly customer service through the retailer where the product was purchased or visit the official Ashfly website.