
RYOBI PCL201K1
RYOBI ONE+ 18V Cordless 3/8 in. Drill/Driver Kit User Manual
Model: PCL201K1 | Brand: RYOBI
1. Introduction
This manual provides essential information for the safe and effective operation, maintenance, and troubleshooting of your RYOBI ONE+ 18V Cordless 3/8 in. Drill/Driver Kit. Please read this manual thoroughly before using the tool to ensure proper handling and to prevent injury or damage.
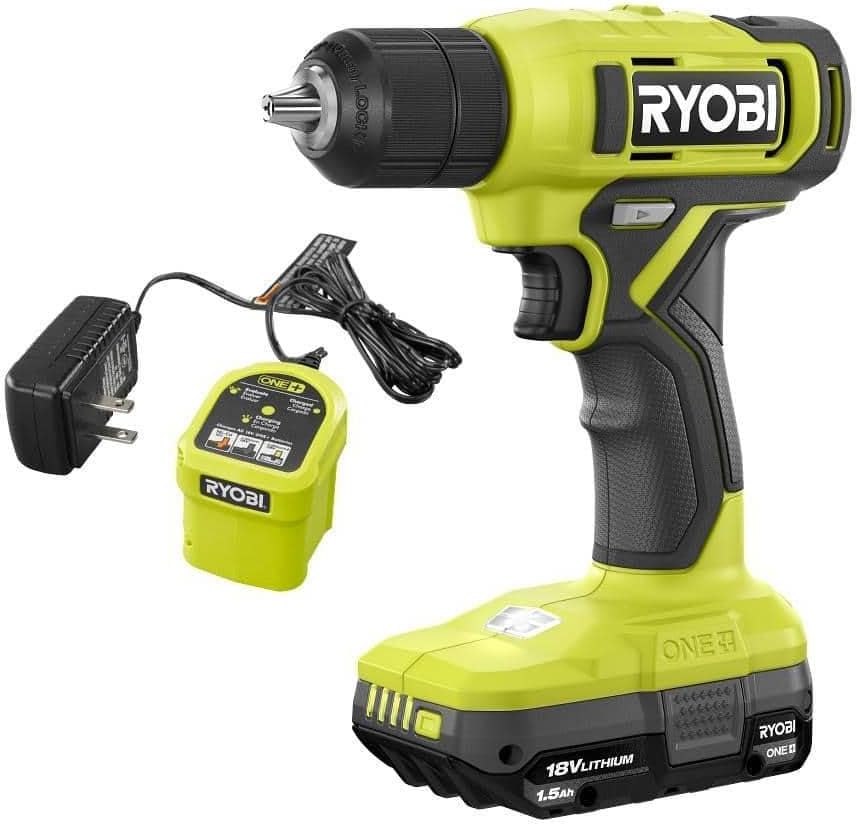
Image: The RYOBI ONE+ 18V Cordless 3/8 inch Drill/Driver Kit, showing the drill, 1.5 Ah battery, and charger.
2. Important Safety Information
Always follow basic safety precautions when using electric tools to reduce the risk of fire, electric shock, and personal injury.
General Power Tool Safety
- Work Area Safety: Keep your work area clean and well-lit. Cluttered or dark areas invite accidents. Do not operate power tools in explosive atmospheres, such as in the presence of flammable liquids, gases, or dust.
- Electrical Safety: Avoid body contact with grounded surfaces such as pipes, radiators, ranges, and refrigerators. There is an increased risk of electric shock if your body is grounded.
- Personal Safety: Always wear eye protection. Use safety glasses or goggles. Wear hearing protection when operating for extended periods. Dress properly; do not wear loose clothing or jewelry. Keep hair, clothing, and gloves away from moving parts.
- Tool Use and Care: Do not force the power tool. Use the correct power tool for your application. Disconnect the plug from the power source and/or remove the battery pack from the power tool before making any adjustments, changing accessories, or storing power tools.
Battery and Charger Safety
- Only use the charger specified by the manufacturer. A charger that is suitable for one type of battery pack may create a risk of fire when used with another battery pack.
- Use power tools only with specifically designated battery packs. Use of any other battery packs may create a risk of injury and fire.
- When battery pack is not in use, keep it away from other metal objects like paper clips, coins, keys, nails, screws, or other small metal objects that can make a connection from one terminal to another.
- Under abusive conditions, liquid may be ejected from the battery; avoid contact. If contact accidentally occurs, flush with water. If liquid contacts eyes, additionally seek medical help.
3. Components Included
Your RYOBI ONE+ 18V Cordless 3/8 in. Drill/Driver Kit typically includes the following items:
- RYOBI ONE+ 18V Cordless 3/8 in. Drill/Driver
- 1.5 Ah Lithium-Ion Battery
- Battery Charger
- Operator's Manual (this document)
4. Setup and Assembly
4.1 Charging the Battery
- Connect the charger to a standard household power outlet (120V AC, 60Hz).
- Slide the 1.5 Ah battery pack onto the charger until it clicks into place.
- The charger's indicator light will show the charging status. Refer to the charger's specific instructions for light patterns (e.g., solid red for charging, solid green for fully charged).
- Once fully charged, remove the battery from the charger.
4.2 Installing the Battery
- Align the battery pack with the battery port on the bottom of the drill handle.
- Slide the battery pack firmly into the drill until it locks securely into place. Ensure it is fully seated to prevent it from falling out during operation.
- To remove the battery, press the release latches on the sides of the battery pack and pull it out.
4.3 Installing Drill Bits/Accessories
- Ensure the drill is off and the forward/reverse selector is in the center (locked) position.
- Twist the chuck counter-clockwise to open the jaws.
- Insert the desired drill bit or accessory into the chuck, ensuring it is centered.
- Twist the chuck clockwise to tighten the jaws securely around the bit. Hand-tighten firmly.
- To remove, twist the chuck counter-clockwise and pull the bit out.
5. Operating Instructions
5.1 Powering On/Off and Speed Control
- To turn the drill on, squeeze the trigger switch. The drill speed increases as you squeeze the trigger further.
- To turn the drill off, release the trigger switch.
5.2 Forward/Reverse Selector
- The forward/reverse selector is located above the trigger.
- Push the selector to the left for forward rotation (for drilling and driving screws).
- Push the selector to the right for reverse rotation (for removing screws or backing out bits).
- When the selector is in the center position, the trigger is locked, preventing accidental startup. Always place the selector in the center position when not in use or when changing bits.
5.3 Torque/Clutch Adjustment
- The torque adjustment collar is located behind the chuck. It has numbered settings and a drill icon.
- Rotate the collar to select the desired torque setting. Lower numbers are for driving small screws or working with soft materials, preventing overtightening or stripping. Higher numbers are for driving larger screws or working with harder materials.
- Select the drill icon setting for drilling applications, which provides maximum torque without clutch activation.
5.4 Drilling and Driving Techniques
- Drilling: Apply steady, even pressure. Do not force the drill. Allow the drill to do the work. For larger holes, start with a smaller pilot hole.
- Driving Screws: Use the appropriate bit for the screw head. Start with a low torque setting and increase as needed to prevent stripping the screw head or damaging the workpiece.
- Always secure your workpiece to prevent movement during operation.
6. Maintenance
Regular maintenance ensures the longevity and optimal performance of your drill/driver.
- Cleaning: Keep the tool's air vents clean and free of debris to prevent overheating. Use a clean, dry cloth to wipe down the exterior. Do not use harsh chemicals or abrasive cleaners.
- Chuck Maintenance: Periodically clean the chuck jaws to ensure proper gripping of bits.
- Battery Care: Store batteries in a cool, dry place away from direct sunlight and extreme temperatures. Do not store fully discharged batteries for extended periods.
- Storage: Store the drill/driver, battery, and charger in a secure, dry location out of reach of children.
7. Troubleshooting
If you encounter issues with your RYOBI ONE+ Drill/Driver, refer to the following common problems and solutions:
| Problem | Possible Cause | Solution |
|---|---|---|
| Drill does not turn on. | Battery not charged or not properly installed. Forward/reverse selector in locked position. | Charge battery fully. Ensure battery is securely clicked into place. Move forward/reverse selector to forward or reverse position. |
| Battery not charging. | Charger not plugged in. Battery not properly seated on charger. Faulty battery or charger. | Check power outlet connection. Re-seat battery on charger. If problem persists, contact RYOBI customer service. |
| Drill bit slips in chuck. | Chuck not tightened sufficiently. Bit shank is dirty or damaged. | Ensure chuck is hand-tightened firmly. Clean or replace the drill bit. |
| Motor runs but chuck does not spin. | Clutch set to a very low torque setting for the application. | Increase the torque setting on the adjustment collar or set to the drill icon. |
8. Specifications
| Feature | Specification |
|---|---|
| Brand | RYOBI |
| Model Number | PCL201K1 |
| Power Source | Battery Powered |
| Voltage | 18 Volts |
| Amperage | 1.5 Amps |
| Maximum Chuck Size | 0.38 Inches (3/8 in.) |
| Included Components | 1.5 Ah Battery, Charger, Drill Attachment |
| Item Weight | 1.59 Kilograms (3.5 pounds) |
| Battery Cell Type | Lithium Ion |
| UPC | 033287225422 |
9. Warranty and Support
For warranty information, technical support, or service inquiries, please refer to the official RYOBI website or contact their customer service directly. Keep your purchase receipt as proof of purchase for warranty claims.
Official RYOBI Website: www.ryobitools.com
Related documentsPCL201K1


Ask a question about this manual
Ask about setup, troubleshooting, compatibility, parts, safety, or missing instructions. Manuals+ will review the question and use this page’s manual context to help answer it.