
Scheppach MR225-61
Scheppach MR225-61 Ride-on Lawn Mower User Manual
Model: MR225-61 | Brand: Scheppach
1. Important Safety Instructions
Always read and understand all safety warnings and instructions before operating the machine. Failure to follow the warnings and instructions may result in serious injury.
- Keep children and bystanders away from the operating area.
- Wear appropriate personal protective equipment (PPE), including eye protection, hearing protection, and sturdy footwear.
- Never operate the mower on excessively steep slopes.
- Turn off the engine and remove the spark plug cap before performing any maintenance or clearing blockages.
- Do not operate the mower in wet grass or adverse weather conditions.
2. Product Overview
The Scheppach MR225-61 is a powerful petrol ride-on lawn mower designed for efficient lawn care on large areas.
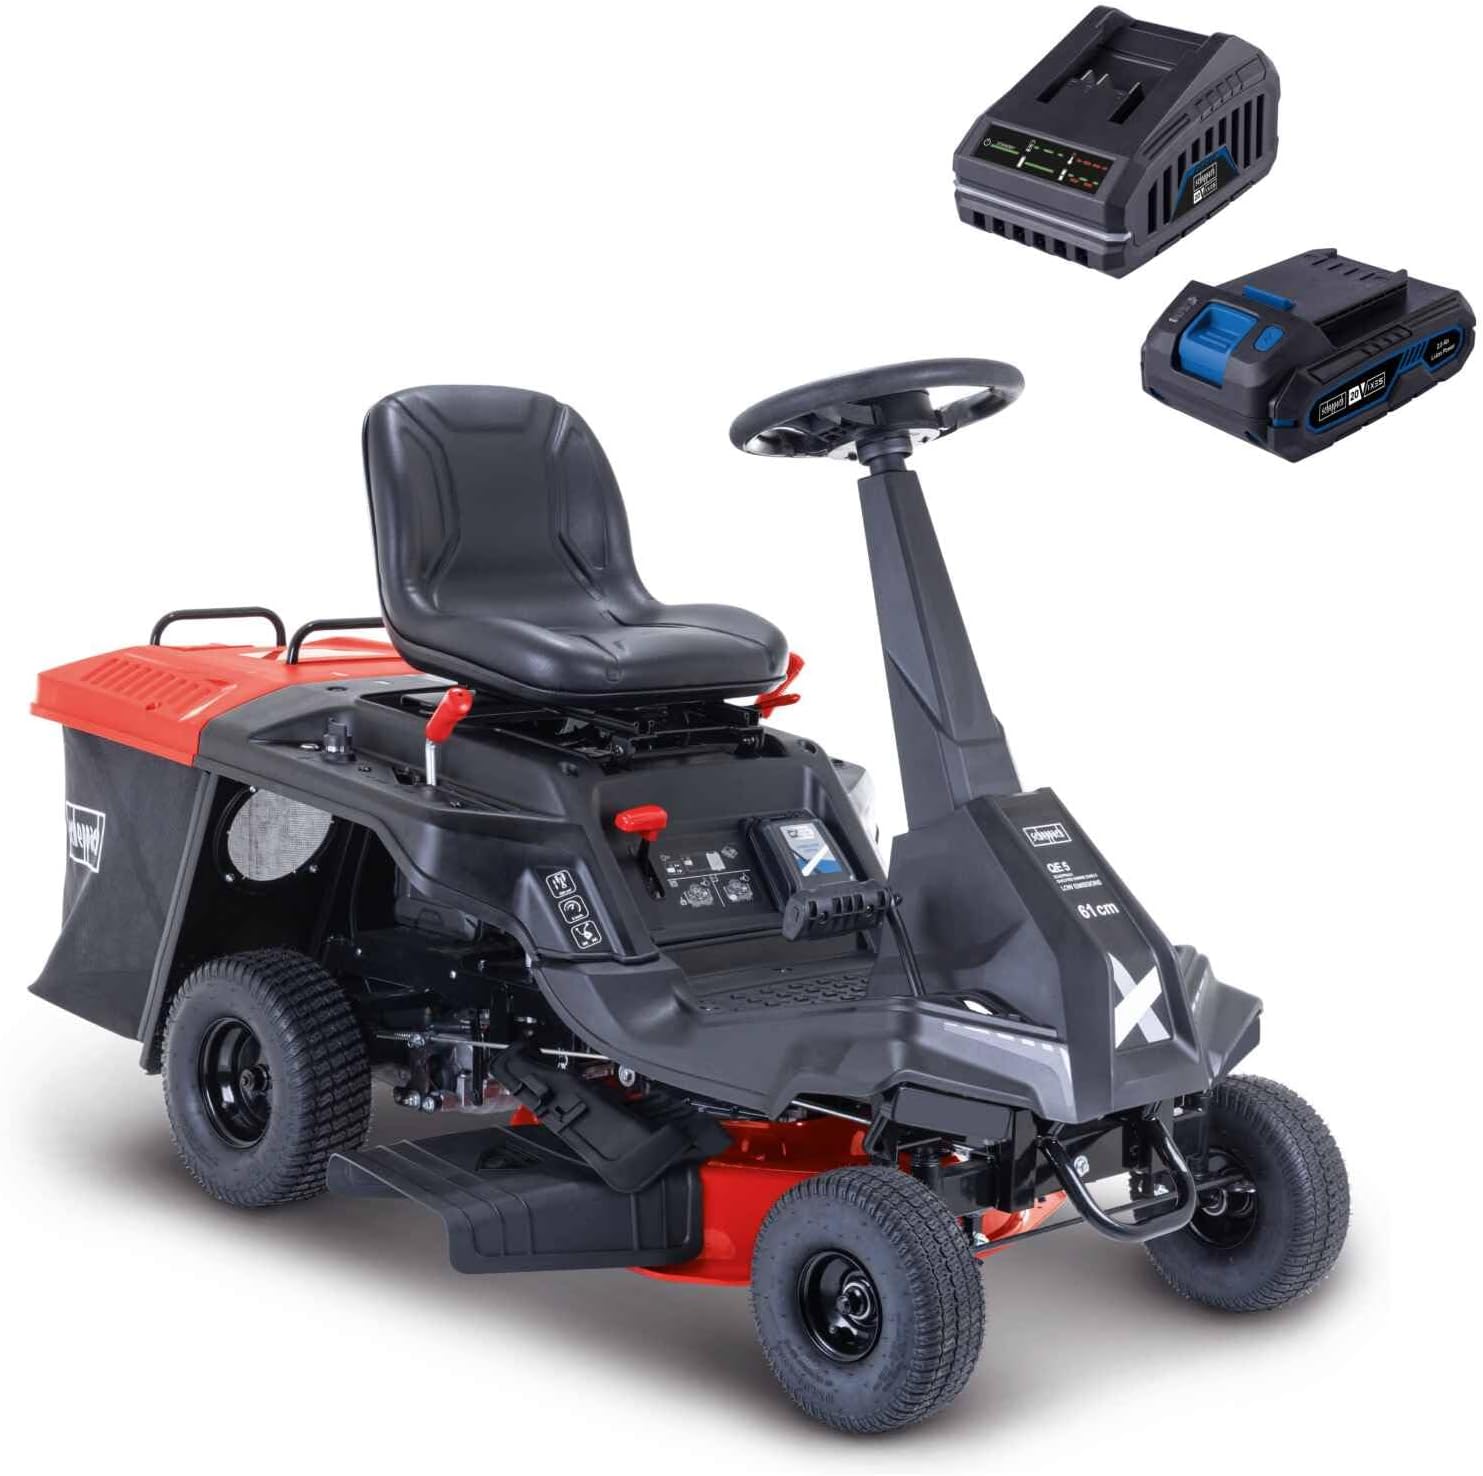
Figure 2.1: Scheppach MR225-61 Ride-on Lawn Mower with its main components. This image shows the overall design of the mower, including the seat, steering wheel, engine cover, and collection bag at the rear.
Key Features:
- Cutting Width: Extra large 61 cm for efficient mowing.
- Engine: Powerful 4.4 kW / 6.0 HP 4-stroke petrol engine.
- Area Coverage: Suitable for lawn areas up to 2600 m².
- Cutting Height: Central adjustment in 5 steps from 35 – 75 mm.
- Starting System: Hybrid start system (electric start or pull starter).
- Gears: 4 forward gears (1.5 / 2.0 / 4.0 / 6.0 km/h) and 1 reverse gear (2.4 km/h).
- Collection Box: Large 150 L capacity.
- Mowing Deck: Manually engageable/disengageable, made of robust steel, with water connection for easy cleaning.
- Wheels: Large air-filled wheels for good traction.
3. Setup and Assembly
Before first use, some assembly is required. Ensure all components are present and undamaged.
3.1 Unpacking
Carefully remove the mower and all accessories from the packaging. Retain packaging for future storage or transport if needed.
3.2 Handlebar and Seat Installation
- Attach the steering wheel column to the main body, securing it with the provided bolts.
- Mount the seat onto its designated frame, ensuring it clicks securely into place.
3.3 Fuel and Oil Filling
Before starting, fill the fuel tank with unleaded petrol and check the engine oil level. Refer to the engine manual for specific fuel and oil requirements.
3.4 Battery Connection (for Electric Start)
Connect the battery terminals, ensuring correct polarity. The electric start system requires a charged battery.

Figure 3.1: Overview of key controls including the electric start, collection box, and cutting height adjustment levers. This image highlights the user interface for operating the mower.
4. Operating Instructions
4.1 Starting the Engine
- Ensure the mower is on a level surface.
- Engage the parking brake.
- Set the throttle to the "Choke" position (for cold starts) or "Fast" position (for warm starts).
- Electric Start: Turn the ignition key to the "Start" position until the engine starts.
- Pull Start: Pull the starter cord firmly until the engine starts.
- Once started, gradually move the throttle to the "Fast" position.
4.2 Adjusting Cutting Height
The cutting height can be centrally adjusted in 5 steps from 35 mm to 75 mm.
- Locate the cutting height adjustment lever.
- Move the lever to select the desired cutting height.
4.3 Engaging the Mowing Deck
The mowing deck can be manually engaged and disengaged.
- To engage, move the blade engagement lever to the "ON" position.
- To disengage, move the lever to the "OFF" position.
4.4 Driving the Mower
The mower features 4 forward gears and 1 reverse gear.

Figure 4.1: Close-up of the gear selector, showing positions for forward gears (1-4), neutral (N), and reverse (R). This image illustrates how to select the desired speed and direction.
- Select the desired gear using the gear selector lever.
- Release the parking brake.
- Slowly depress the accelerator pedal to begin moving.
- Forward speeds: 1.5 km/h, 2.0 km/h, 4.0 km/h, 6.0 km/h.
- Reverse speed: 2.4 km/h.
4.5 Collection Box Operation
The 150 L collection box efficiently gathers grass clippings.

Figure 4.2: The large 150 L collection box at the rear of the mower, designed for easy removal and emptying of grass clippings. This image demonstrates the capacity and accessibility of the collection system.
- Monitor the fill level of the collection box.
- When full, disengage the mowing deck and stop the engine.
- Remove the collection box and empty its contents.
- Reattach the collection box securely before resuming operation.

Figure 4.3: Visual representation of the mower's application modes: Mowing, Side Discharge, and Grass Catching. This image clarifies the different ways the mower can be used for lawn maintenance.
5. Maintenance
Regular maintenance ensures optimal performance and extends the lifespan of your Scheppach MR225-61 ride-on mower. Always turn off the engine and remove the spark plug cap before performing any maintenance.
5.1 Cleaning the Mowing Deck
The mowing deck features a water connection for easy cleaning.
- Connect a garden hose to the water connection on the mowing deck.
- Start the engine and engage the blades for a short period (approx. 30 seconds) to allow water to clean the underside of the deck.
- Disengage blades, turn off engine, and disconnect hose.
- For thorough cleaning, manually remove any remaining grass clippings.
5.2 Engine Maintenance
- Oil Change: Refer to the engine manual for recommended oil change intervals and procedures.
- Air Filter: Regularly inspect and clean or replace the air filter. A dirty air filter can reduce engine performance.
- Spark Plug: Check and clean the spark plug periodically. Replace if worn or fouled.
5.3 Blade Sharpening and Replacement
Dull blades reduce cutting efficiency and can damage the lawn. Sharpen or replace blades as needed.
- Always wear heavy-duty gloves when handling blades.
- Ensure the engine is off and the spark plug cap is removed.
- Remove the blade following the instructions in the full service manual.
- Sharpen the blade using a file or grinder, maintaining the original angle. Ensure the blade is balanced after sharpening.
- Replace severely damaged or bent blades with genuine Scheppach replacement parts.
5.4 Tire Pressure
Maintain correct tire pressure for optimal traction and stability. Refer to the tire sidewall for recommended pressure.
6. Troubleshooting
This section provides solutions to common operational issues. For problems not listed here, contact Scheppach customer support.
| Problem | Possible Cause | Solution |
|---|---|---|
| Engine does not start | No fuel; Spark plug faulty; Battery low (electric start); Choke not set correctly. | Check fuel level; Clean/replace spark plug; Charge battery; Adjust choke. |
| Mower cuts unevenly | Dull or bent blade; Incorrect cutting height setting; Uneven tire pressure. | Sharpen/replace blade; Adjust cutting height; Check and adjust tire pressure. |
| Excessive vibration | Unbalanced or damaged blade; Loose components. | Inspect and balance/replace blade; Tighten all fasteners. |
| Engine loses power | Dirty air filter; Clogged fuel filter; Incorrect engine oil level. | Clean/replace air filter; Replace fuel filter; Check/adjust oil level. |
7. Specifications
| Feature | Specification |
|---|---|
| Model Number | MR225-61 |
| Engine Type | 4-stroke Petrol Engine |
| Engine Power | 4.4 kW / 6.0 HP |
| Displacement | 224 cm³ |
| Cutting Width | 61 cm |
| Cutting Height Adjustment | 5 steps (35 - 75 mm) |
| Collection Box Volume | 150 L |
| Forward Gears | 4 (1.5 / 2.0 / 4.0 / 6.0 km/h) |
| Reverse Gear | 1 (2.4 km/h) |
| Recommended Lawn Area | Up to 2600 m² |
| Weight | 143.5 kg |
| Dimensions (L x W x H) | 182 x 74 x 109 cm |

Figure 7.1: Visual summary of key specifications including recommended lawn area, collection box volume, cutting height and width, and maximum slope. This image provides a quick reference for the mower's capabilities.

Figure 7.2: Diagram illustrating the engine displacement and power, along with the maximum width of the mower. This image provides technical details about the engine and overall size.
8. Warranty and Support
Scheppach provides a manufacturer's warranty for this product. Please refer to the warranty card included with your purchase for specific terms and conditions.
8.1 Customer Support
For technical assistance, spare parts, or warranty claims, please contact Scheppach customer service. Have your model number (MR225-61) and purchase date ready when contacting support.
You can find contact information on the official Scheppach website or in the documentation provided with your product.
For more information, visit the official Scheppach Store on Amazon.
Related documentsMR225-61


Ask a question about this manual
Ask about setup, troubleshooting, compatibility, parts, safety, or missing instructions. Manuals+ will review the question and use this page’s manual context to help answer it.