
ONEVAN sku005170
ONEVAN 20V Cordless Hammer Drill Instruction Manual
Model: sku005170
1. Introduction
Thank you for choosing the ONEVAN 20V Cordless Hammer Drill. This powerful and versatile tool is designed for various drilling and screwdriving tasks in wood, metal, plastic, and masonry. Featuring a high-efficiency brushless motor, 20+3 torque settings, and a 3-in-1 function, it provides reliable performance for both DIY enthusiasts and professionals.
Please read this instruction manual carefully before operating the tool to ensure safe and efficient use. Keep this manual for future reference.

Figure 1.1: ONEVAN 20V Cordless Hammer Drill Kit
This image displays the complete ONEVAN 20V Cordless Hammer Drill kit, including the drill unit, two 3.0Ah Lithium-ion batteries, a fast charger, and various drill bits and accessories. The drill features a robust design with a comfortable grip, ready for a wide range of applications.

Figure 1.2: High-Efficiency Brushless Motor
The drill is equipped with an upgraded brushless motor, providing 680W of power and an ultra-high torque of 140Nm. This advanced motor technology ensures 25% energy saving, 25% lower noise levels, and an extended lifespan of up to 20,000 hours, offering superior performance and durability.
2. Important Safety Instructions
Always follow basic safety precautions when using electric tools to reduce the risk of fire, electric shock, and personal injury.
2.1 Work Area Safety
- Keep your work area clean and well-lit. Cluttered or dark areas invite accidents.
- Do not operate power tools in explosive atmospheres, such as in the presence of flammable liquids, gases, or dust.
- Keep children and bystanders away while operating a power tool. Distractions can cause you to lose control.
2.2 Electrical Safety
- Avoid body contact with earthed or grounded surfaces such as pipes, radiators, ranges, and refrigerators.
- Do not expose power tools to rain or wet conditions. Water entering a power tool will increase the risk of electric shock.
2.3 Personal Safety
- Always wear eye protection. Use safety glasses, goggles, or a face shield.
- Wear appropriate personal protective equipment (PPE) such as dust masks, non-skid safety shoes, hard hats, or hearing protection.
- Dress properly. Do not wear loose clothing or jewelry. Keep your hair and clothing away from moving parts.
- Stay alert, watch what you are doing, and use common sense when operating a power tool.
2.4 Tool Use and Care
- Do not force the power tool. Use the correct power tool for your application.
- Disconnect the battery pack from the power tool before making any adjustments, changing accessories, or storing power tools.
- Store idle power tools out of the reach of children and do not allow persons unfamiliar with the power tool or these instructions to operate the power tool.
- Maintain power tools and accessories. Check for misalignment or binding of moving parts, breakage of parts, and any other condition that may affect the power tool's operation.
2.5 Battery Tool Use and Care
- Recharge only with the charger specified by the manufacturer.
- Use power tools only with specifically designated battery packs.
- When battery pack is not in use, keep it away from other metal objects that can make a connection from one terminal to another.
- Under abusive conditions, liquid may be ejected from the battery; avoid contact. If contact accidentally occurs, flush with water. If liquid contacts eyes, additionally seek medical help.
3. Product Components
Familiarize yourself with the various parts of your ONEVAN Cordless Hammer Drill for proper operation and maintenance.

Figure 3.1: Parts Description
This diagram illustrates the main components of the ONEVAN Cordless Hammer Drill. Key parts include the 13mm Keyless Chuck, 20+3 Torque/Clutch settings, Mode Selector, Two-Speed Gearbox, Variable Speed Switch, Forward/Reverse Button, LED Light, Power Display, Non-Slip Handle, and the 3.0Ah Li-ion Battery. An auxiliary handle is also included for improved control.
Key Components:
- 13mm Keyless Chuck: For quick and easy bit changes.
- 20+3 Clutch/Torque Adjustment Ring: Allows precise torque control for various applications.
- Mode Selector: Switches between Screwdriver, Drill, and Hammer Drill modes.
- Two-Speed Gearbox: Provides high and low-speed settings for different tasks.
- Variable Speed Switch: Controls the drilling speed based on pressure applied.
- Forward/Reverse Button: Changes the rotation direction for drilling and screwdriving.
- LED Light: Illuminates the work area for better visibility.
- Power Display: Indicates the remaining battery charge.
- Non-Slip Handle: Ergonomically designed for comfortable and secure grip.
- 3.0Ah Li-ion Battery: Provides cordless power to the tool.
- Auxiliary Handle: Attaches to the drill for enhanced stability and control during heavy-duty tasks.
4. Setup and Assembly
4.1 Charging the Battery
The battery pack is not fully charged at the time of purchase. It is recommended to fully charge the battery before first use.
- Connect the charger to a standard power outlet.
- Slide the battery pack onto the charger until it clicks into place.
- The charging indicator lights on the charger will show the charging status. A full charge typically takes approximately 1-2 hours.
- Once fully charged, remove the battery pack from the charger.

Figure 4.1: Battery and Power Display
This image shows the 3.0Ah Lithium-ion batteries and the power display on the drill, which indicates the battery charge level. The kit includes two batteries for extended operation and a fast charger for quick recharging.
4.2 Installing/Removing the Battery Pack
- To Install: Align the battery pack with the base of the drill handle and slide it in until it clicks securely into place.
- To Remove: Press the battery release buttons on the sides of the battery pack and slide the battery out of the handle.
4.3 Installing the Auxiliary Handle
- Unscrew the auxiliary handle counter-clockwise to loosen its grip.
- Slide the handle onto the front of the drill, positioning it for comfortable and secure grip.
- Tighten the handle by screwing it clockwise until it is firmly secured.
4.4 Installing/Removing Drill Bits
- To Install: Rotate the chuck collar counter-clockwise to open the chuck jaws. Insert the drill bit fully into the chuck. Rotate the chuck collar clockwise to tighten the jaws firmly around the bit.
- To Remove: Rotate the chuck collar counter-clockwise to loosen the jaws and pull the drill bit out.
5. Operating Instructions
5.1 Powering On/Off and Variable Speed Control
- To turn the drill ON, press the variable speed trigger switch. The speed increases as you press the trigger further.
- To turn the drill OFF, release the trigger switch.
5.2 Forward/Reverse Operation
- The forward/reverse button is located above the trigger.
- Push the button to the left for forward rotation (for drilling and tightening screws).
- Push the button to the right for reverse rotation (for loosening screws).
- When the button is in the center position, the trigger is locked, preventing accidental starting.
5.3 Torque Settings (Clutch)
The torque adjustment ring allows you to select from 20 torque settings plus 3 functional modes (Drill, Hammer Drill, Screwdriver). This prevents over-tightening screws and damaging materials.
- Rotate the torque adjustment ring to the desired setting.
- Lower numbers (1-5) are for smaller screws and softer materials (e.g., plastic, soft wood).
- Higher numbers (6-20) are for larger screws and harder materials (e.g., hard wood, brick).
- The drill symbol is for general drilling without clutch action.
- The hammer symbol is for hammer drilling into masonry.

Figure 5.1: Torque Adjustment Ring
This image highlights the torque adjustment ring, which offers 20 precise torque settings and 3 functional modes. It provides guidance on recommended torque levels for various materials, such as 1-5 for plastic (20Nm), 6-10 for wood (50Nm), 11-15 for brick (90Nm), and 15-20 for steel (140Nm).
5.4 Mode Selection (3-in-1 Function)
The drill offers three primary modes:
- Screwdriver Mode: Use with torque settings for driving and removing screws.
- Drill Mode: For drilling holes in wood, metal, and plastic. The clutch is disengaged for maximum power.
- Hammer Drill Mode: For drilling into masonry and concrete, combining rotation with a hammering action.

Figure 5.2: 3-in-1 Multifunctional Control
This image details the drill's control panel, showcasing its 3-in-1 functionality. It features 20 gear settings for precise torque, 3 distinct modes (Screwdriver, Hammer, Drill) for versatile applications, and a 2-speed control (0-500 RPM and 0-2100 RPM) to adapt to different tasks.
5.5 Two-Speed Gearbox
The drill has a two-speed gearbox for optimal performance in different applications.
- Speed 1 (0-550 RPM): Low speed, high torque. Ideal for screwdriving, drilling large holes, or working with softer materials.
- Speed 2 (0-2100 RPM): High speed, lower torque. Ideal for fast drilling in wood, metal, and for hammer drilling.
To change speeds, slide the gear selector switch located on top of the drill.

Figure 5.3: Two-Speed Control
This illustration demonstrates the drill's two-speed control. The lower speed (0-500 RPM) is suitable for tightening/loosening screws and drilling in plastic or wood, while the higher speed (0-2100 RPM) is designed for powerful drilling and hammer drilling applications.
5.6 Application Examples
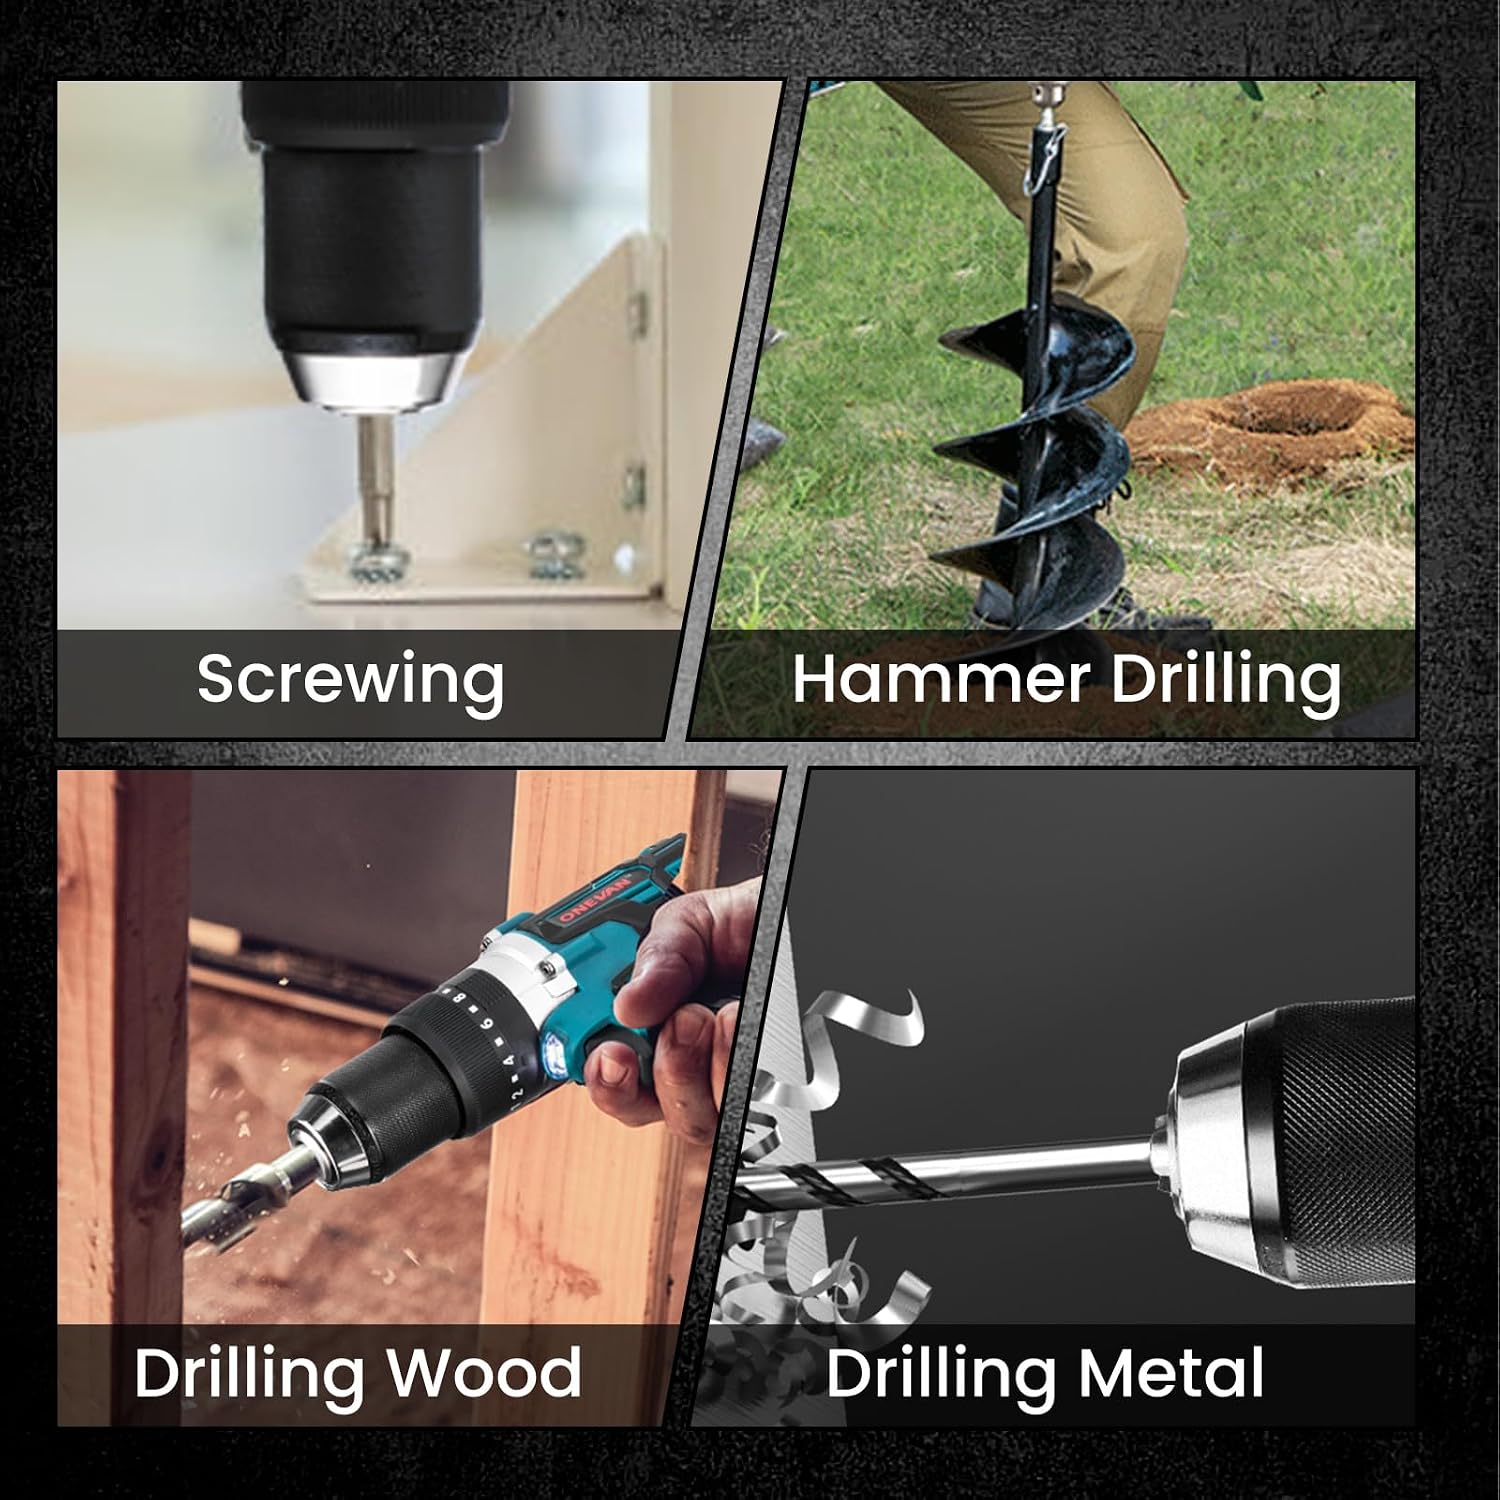
Figure 5.4: Versatile Applications
The ONEVAN Cordless Hammer Drill is suitable for a variety of tasks, including precise screwdriving, robust hammer drilling into masonry, clean drilling into wood, and efficient drilling into metal surfaces.
6. Maintenance
Regular maintenance ensures the longevity and optimal performance of your drill.
6.1 Cleaning
- Always disconnect the battery pack before cleaning.
- Use a soft, damp cloth to wipe down the exterior of the tool. Do not use harsh chemicals or abrasive cleaners.
- Keep the ventilation openings clear of dust and debris to prevent overheating. Use compressed air if necessary.
- Clean the chuck jaws regularly to ensure proper grip on bits.
6.2 Battery Care
- Store batteries in a cool, dry place away from direct sunlight and extreme temperatures.
- Do not store batteries in a discharged state for extended periods. Recharge them periodically if not in use.
- Avoid dropping or physically damaging the battery packs.
6.3 Storage
- Store the drill and accessories in their original case or a suitable storage container.
- Ensure the tool is clean and dry before storing.
- Store out of reach of children and in a secure location.
7. Troubleshooting
This section addresses common issues you might encounter with your ONEVAN Cordless Hammer Drill.
| Problem | Possible Cause | Solution |
|---|---|---|
| Drill does not start. | Battery not charged or not properly installed. Forward/reverse button in locked position. | Ensure battery is fully charged and securely installed. Push forward/reverse button to either forward or reverse position. |
| Low power or slow speed. | Battery charge is low. Incorrect speed setting for the task. | Recharge the battery. Switch to a higher speed setting (Speed 2) for faster drilling, or lower speed (Speed 1) for higher torque. |
| Drill bit slips in chuck. | Chuck not tightened sufficiently. Bit shank is dirty or damaged. | Ensure the chuck is tightened firmly around the bit. Clean the bit shank or replace the bit if damaged. |
| Overheating during use. | Continuous heavy-duty use. Blocked ventilation openings. | Allow the drill to cool down. Clear any debris from the ventilation openings. Avoid excessive pressure on the tool. |
| Hammer function not working. | Mode selector not set to hammer drill. | Ensure the mode selector is set to the hammer drill symbol. |
8. Technical Specifications
Detailed specifications for the ONEVAN 20V Cordless Hammer Drill.
| Feature | Specification |
|---|---|
| Model Number | sku005170 |
| Brand | ONEVAN |
| Voltage | 20 Volts |
| Power | 680 Watts |
| Max Torque | 140 Newton-meters (Nm) |
| No-Load Speed (Low) | 0-550 RPM |
| No-Load Speed (High) | 0-2100 RPM |
| Chuck Capacity | 1.5 - 13 mm (1/16 - 1/2 inch) |
| Torque Settings | 20+3 (20 torque, 3 function modes) |
| Battery Type | Lithium-ion |
| Battery Capacity | 3.0 Ah (per unit) |
| Motor Type | Brushless |
| Product Dimensions (L x W x H) | 36 x 26 x 11 cm |
| Weight | 3.78 kg |
| Included Components | Drill, 2x 3.0Ah Batteries, Charger |
9. Warranty Information
Specific warranty details for the ONEVAN 20V Cordless Hammer Drill are typically provided with the product packaging or can be found on the manufacturer's official website. Please refer to the warranty card included in your product box or visit the ONEVAN website for the most up-to-date warranty terms and conditions.
10. Customer Support
For technical assistance, spare parts, or any questions regarding your ONEVAN 20V Cordless Hammer Drill, please contact ONEVAN customer support. Contact information can usually be found on the product packaging, the manufacturer's website, or through your point of purchase.
When contacting support, please have your product model number (sku005170) and purchase date ready to expedite the process.
Related documentssku005170

Ask a question about this manual
Ask about setup, troubleshooting, compatibility, parts, safety, or missing instructions. Manuals+ will review the question and use this page’s manual context to help answer it.