
1. Introduction
Thank you for purchasing the G-KENI Portable Multi-Band Radio Model 2400. This device is designed to provide versatile audio entertainment and information, featuring FM, AM, and Shortwave (SW1/SW2) radio reception, as well as multimedia playback from USB drives, SD cards, and TF cards. It offers flexible power options and a convenient headphone jack for private listening. Please read this manual thoroughly before use to ensure proper operation and to maximize your listening experience.
2. Safety Information
- Do not expose the unit to rain or moisture to prevent fire or electric shock.
- Avoid placing the unit in direct sunlight, near heat sources, or in environments with high humidity or dust.
- Use only the specified power sources (AC adapter or 4x AA batteries).
- Do not attempt to open or repair the unit yourself. Refer all servicing to qualified personnel.
- Keep batteries out of reach of children. If swallowed, seek medical attention immediately.
- Dispose of used batteries according to local regulations.
3. Package Contents
- G-KENI Portable Multi-Band Radio Model 2400
- AC Power Adapter
- Instruction Manual
4. Product Overview
The image below illustrates the main components and controls of your G-KENI Portable Multi-Band Radio.

Figure 1: Front view of the G-KENI Portable Multi-Band Radio Model 2400, showing the speaker grille, tuning dial, band selector, and telescopic antenna.
Key Components:
- Telescopic Antenna: For FM and Shortwave reception.
- Tuning Dial: To select radio frequencies.
- Band Selector Switch: To switch between FM, AM, SW1, SW2, and media playback modes (USB/SD/TF).
- Volume Control: Adjusts audio output level.
- Speaker: Integrated audio output.
- USB Port: For USB flash drive playback.
- SD/TF Card Slot: For SD or TF card playback.
- Headphone Jack (3.5mm): For private listening.
- AC Power Input: For connecting the AC adapter.
- Battery Compartment: For 4x AA batteries.
- Carry Handle: For easy portability.
5. Setup
5.1 Power Supply
Your radio can be powered by two methods: AC power or dry cell batteries.
AC Power (Household Plug-in)
To use AC power, connect the included AC adapter to the AC power input port on the radio and then plug it into a standard wall outlet. This method is suitable for indoor use.

Figure 2: The radio connected to an AC power outlet using the provided adapter.
Battery Power (Outdoor Use)
For portable use, the radio requires 4x AA 1.5V dry cell batteries (not included). Open the battery compartment cover on the back of the unit and insert the batteries, ensuring correct polarity (+/-). Battery operation is ideal for outdoor activities or during power outages.
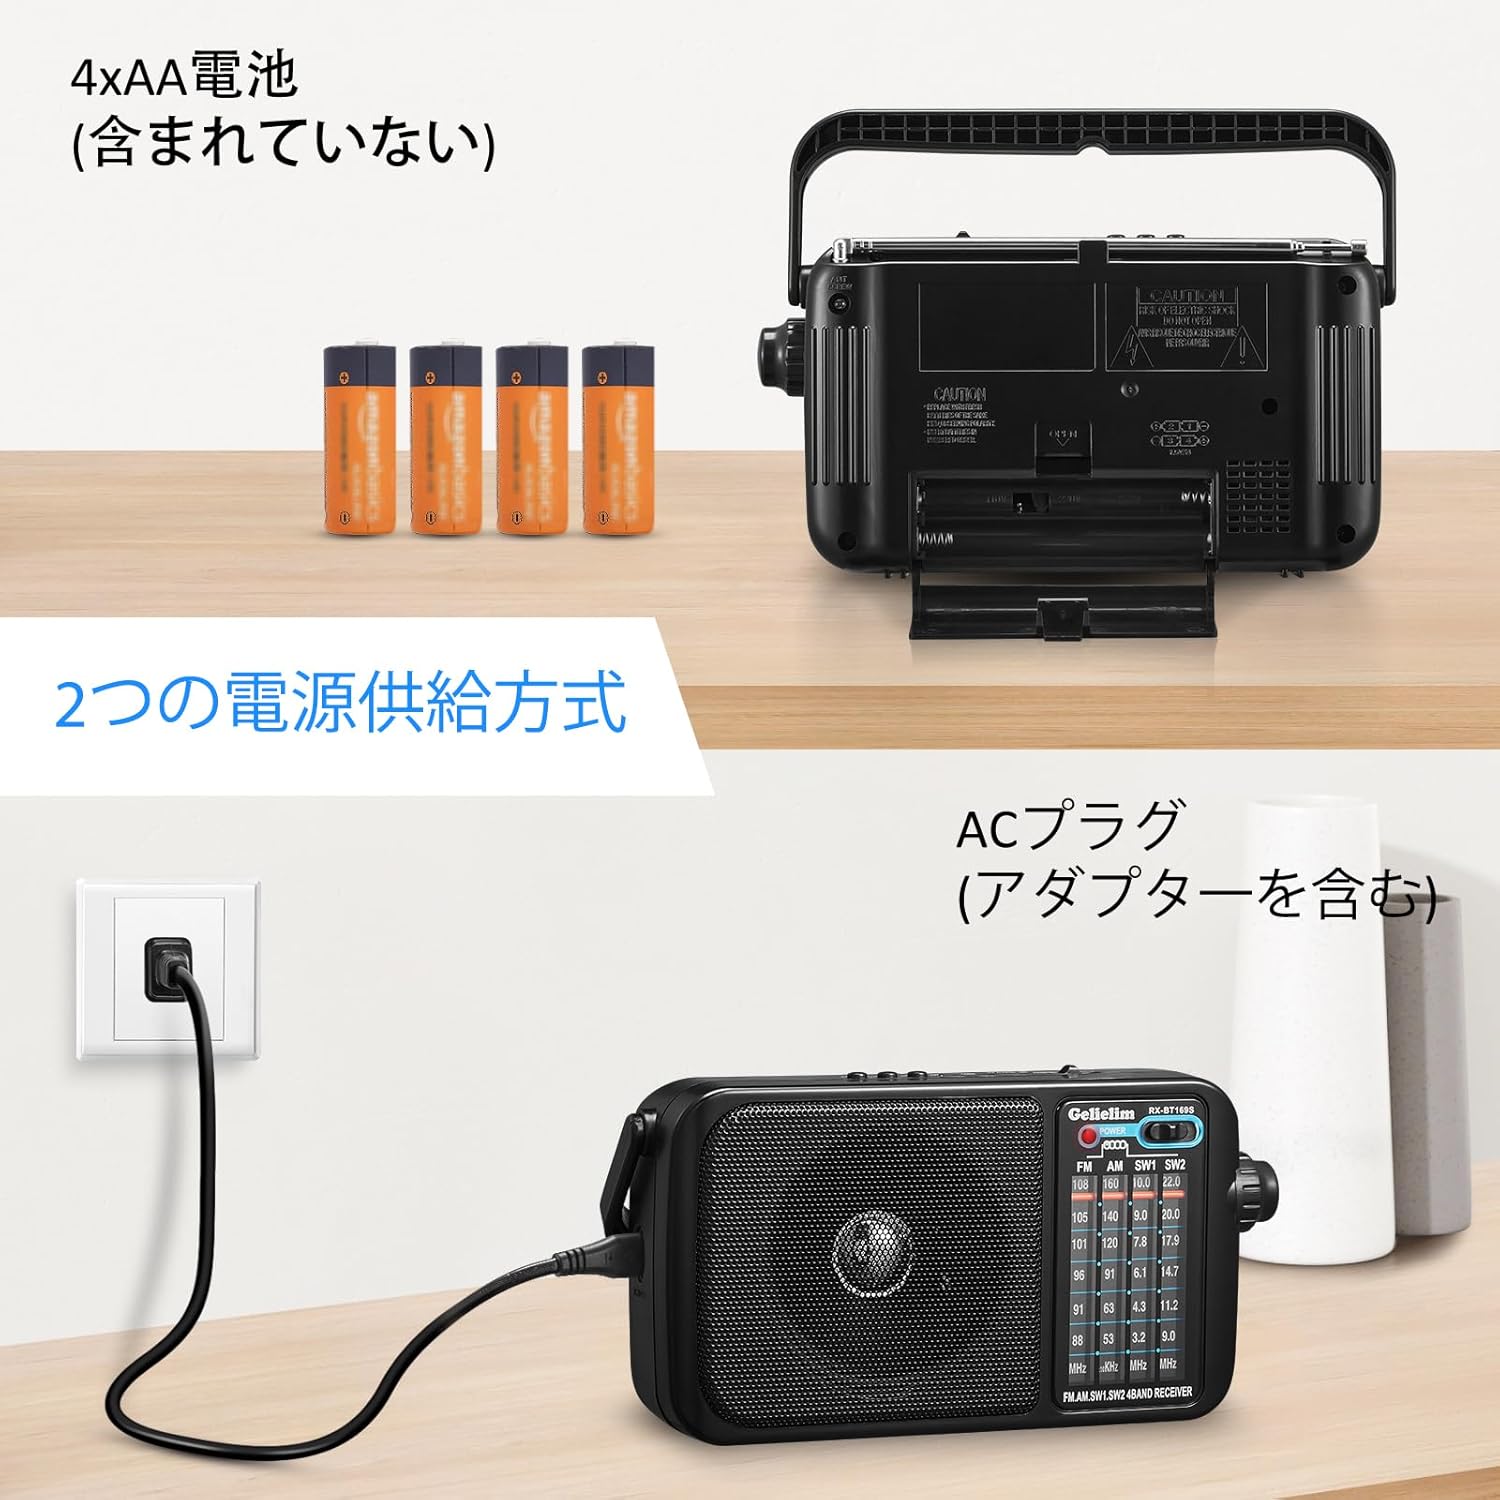
Figure 3: The battery compartment of the radio, showing the insertion of four AA batteries.
5.2 Antenna
- FM/SW: Extend the telescopic antenna fully and adjust its angle for optimal reception.
- AM: The radio uses a built-in ferrite bar antenna for AM reception. Rotate the entire unit for the best signal.
- External Antenna Terminal: For enhanced FM/Shortwave reception, an external antenna can be connected to the designated terminal.
6. Operating Instructions
6.1 Radio Reception
- Turn the Volume Control knob clockwise to power on the unit and set a low volume.
- Slide the Band Selector Switch to your desired band: FM, AM, SW1, or SW2.
- For FM/SW, extend and adjust the telescopic antenna. For AM, rotate the unit for best signal.
- Rotate the Tuning Dial to scan for radio stations. The frequency scale will indicate the current tuning.
- Adjust the Volume Control to your preferred listening level.
6.2 Media Playback (USB/SD/TF Card)
- Insert a USB flash drive into the USB port or an SD/TF card into the corresponding slot. Ensure the card is inserted correctly.
- Slide the Band Selector Switch to the 'USB/SD/TF' position. The unit will automatically detect and begin playing audio files (e.g., MP3 format).
- Use the playback controls (if available, typically 'Next/Previous Track' buttons) to navigate through your audio files.
- Adjust the Volume Control to your preferred listening level.
6.3 Headphone Use
To enjoy private listening, plug any standard 3.5mm stereo headphones into the headphone jack located on the side of the unit. The internal speaker will automatically mute when headphones are connected.

Figure 4: A user enjoying audio from the radio using headphones.
7. Maintenance
- Clean the unit with a soft, dry cloth. Do not use abrasive cleaners or solvents.
- If the unit will not be used for an extended period, remove the batteries to prevent leakage.
- Keep the antenna clean and free from damage.
8. Troubleshooting
| Problem | Possible Cause | Solution |
|---|---|---|
| No power | Batteries are dead or incorrectly inserted; AC adapter not connected properly. | Replace batteries, check polarity; ensure AC adapter is securely connected. |
| Poor radio reception | Antenna not extended/adjusted; weak signal area; interference. | Extend and adjust the telescopic antenna (FM/SW); rotate the unit (AM); try moving to a different location; connect an external antenna. |
| No sound from speaker | Volume too low; headphones connected; unit muted. | Increase volume; disconnect headphones; check if any mute function is active. |
| USB/SD/TF card not playing | Card/drive not inserted correctly; unsupported file format; corrupted files. | Reinsert card/drive; ensure files are in a supported format (e.g., MP3); try a different card/drive. |
9. Specifications

Figure 5: The radio displaying its approximate dimensions.
| Feature | Description |
|---|---|
| Model Number | 2400 |
| Tuner Type | AM, FM, SW (Shortwave) |
| FM Frequency Range | 76 - 108 MHz |
| AM Frequency Range | 530 - 1600 kHz |
| SW1 Frequency Range | 3.2 - 10.0 MHz |
| SW2 Frequency Range | 9.0 - 22.0 MHz |
| Media Playback | USB, SD Card, TF Card |
| Max Audio Output | 1.5W |
| Headphone Jack | 3.5mm stereo |
| Power Source | AC Power (DC 6V via adapter) / 4x AA 1.5V Dry Cell Batteries (not included) |
| Display Type | LED |
| Material | Acrylonitrile Butadiene Styrene (ABS) |
| Dimensions (W x H x D) | Approx. 21 cm x 6.5 cm x 12 cm |
| Weight | Approx. 727g (without batteries) |
| Included Components | Instruction Manual, AC Adapter |
10. Warranty and Support
This G-KENI product comes with a 1-year quality warranty from the date of purchase. We provide reliable after-sales service and support. If you encounter any issues during use, please do not hesitate to contact us. Our customer support team will respond to your inquiries within 24 hours. In the event of a manufacturing defect within the warranty period, we will provide a free replacement unit.
For support, please refer to the contact information provided in your purchase documentation or on the official G-KENI website.