
1. Introduction
This instruction manual provides essential information for the safe and efficient installation, operation, and maintenance of the QXNASU Solenoid Valve, designed to be compatible with ASCO NUMATICS L22BA452BG00061. Please read this manual thoroughly before attempting to install or operate the valve.
2. Safety Information
WARNING: Failure to follow these safety instructions could result in personal injury, property damage, or equipment malfunction.
- Always disconnect power to the solenoid valve and depressurize pneumatic lines before performing any installation, maintenance, or troubleshooting.
- Ensure the operating pressure and temperature of your system are within the specified limits of this valve.
- Use appropriate personal protective equipment (PPE) such as safety glasses and gloves during installation and maintenance.
- Installation and maintenance should only be performed by qualified personnel familiar with pneumatic systems and electrical safety procedures.
- Do not modify the valve in any way. Unauthorized modifications can void the warranty and create safety hazards.
3. Product Overview
The QXNASU Solenoid Valve is a high-quality replacement component designed for precise flow control in pneumatic systems. It features a robust construction suitable for industrial applications.
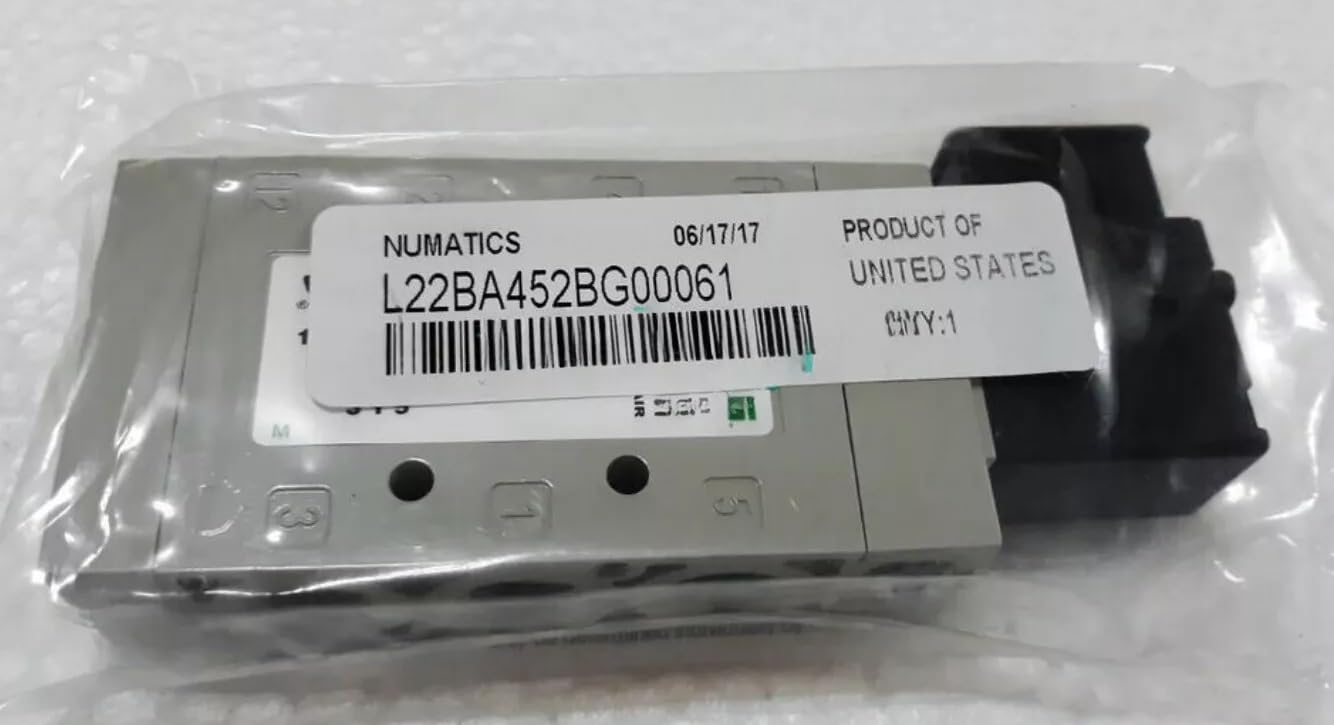
Figure 1: QXNASU Solenoid Valve (Representative Image)
This image shows a general view of the QXNASU Solenoid Valve, highlighting its compact design and port configuration. Note the electrical connection point for the solenoid coil.
Key Features:
- Type: Flow Control Solenoid Valve
- Port Configuration: 5 Port - 4 Way
- Position: 2 Position
- Actuation: Solenoid - Air Pilot/Spring Return
- Voltage: 24 VDC
- Port Size: 1/4" G Port
- Maximum Pressure: 150 PSI
- Temperature Range: -10°F to 115°F (-23°C to 46°C)
4. Setup and Installation
Follow these steps for proper installation of the solenoid valve:
- Preparation: Ensure the pneumatic system is depressurized and all power sources are disconnected. Clear the installation area of any debris.
- Mounting: Securely mount the solenoid valve to a stable surface using appropriate fasteners. Ensure the valve is oriented correctly according to your system's flow requirements.
- Pneumatic Connections: Connect the pneumatic lines to the 1/4" G ports. Typically, these include an inlet port, two outlet ports (A and B), and two exhaust ports (R and P). Use thread sealant on all threaded connections to prevent leaks.
- Electrical Connections: Connect the 24 VDC power supply to the solenoid coil terminals. Ensure correct polarity if specified. Use appropriate wire gauges and ensure connections are secure and insulated.
- Verification: Once all connections are made, slowly re-pressurize the pneumatic system and apply power. Check for any air leaks at the connections and verify proper valve operation.
5. Operating Instructions
The QXNASU Solenoid Valve operates by electrical signal to control pneumatic flow.
- Default Position (De-energized): When no 24 VDC power is applied to the solenoid coil, the valve remains in its spring-return (default) position. Airflow will be directed according to this position.
- Actuated Position (Energized): Apply 24 VDC power to the solenoid coil. The solenoid will energize, shifting the valve's internal mechanism. This changes the direction of airflow through the ports.
- De-actuation: Remove the 24 VDC power from the solenoid coil. The spring-return mechanism will automatically return the valve to its default position.
Ensure that the control system providing the 24 VDC signal is properly configured for the desired pneumatic sequence.
6. Maintenance
Regular maintenance helps ensure the longevity and reliable operation of your solenoid valve.
- Inspection: Periodically inspect the valve for any signs of external damage, corrosion, or air leaks.
- Cleanliness: Keep the valve and surrounding area clean and free from dust, dirt, and moisture.
- Connections: Check pneumatic and electrical connections for tightness and integrity. Loose connections can lead to leaks or intermittent operation.
- Internal Components: The valve is generally not designed for user-level internal servicing. If internal issues are suspected, consider replacement or professional repair.
7. Troubleshooting
Refer to the following table for common issues and their potential solutions:
| Problem | Possible Cause | Solution |
|---|---|---|
| Valve does not actuate when power is applied. |
|
|
| Valve does not return to default position. |
|
|
| Air leaks from valve or connections. |
|
|
| Sluggish or inconsistent operation. |
|
|
8. Specifications
| Parameter | Value |
|---|---|
| Model Compatibility | ASCO NUMATICS L22BA452BG00061 |
| Brand | QXNASU |
| Valve Type | Flow Control Solenoid Valve |
| Port Size | 1/4" G Port |
| Port Configuration | 5 Port - 4 Way |
| Positions | 2 Position |
| Operation | Pneumatic |
| Voltage | 24 VDC |
| Actuation | Solenoid - Air Pilot/Spring Return |
| Maximum Pressure | 150 PSI |
| Operating Temperature | -10°F to 115°F (-23°C to 46°C) |
| UPC | 639394141909 |
9. Warranty and Support
For specific warranty information or technical support, please refer to the product packaging or contact QXNASU customer service. Keep your purchase receipt for warranty claims.