Product Overview
The ID-COOLING FROZN A400 ARGB is a high-performance air CPU cooler designed for efficient heat dissipation and aesthetic appeal. It features advanced cooling technology and vibrant ARGB lighting to enhance your PC build.
- Better Heat Dissipation: Equipped with 4 heat pipes and a 92mm PWM fan for excellent CPU cooling.
- Aesthetic Appeal: Premium ARGB CPU air cooler designed to blend seamlessly into PC cases, especially those with dark interiors.
- ARGB Lighting: Vibrant lighting effects provided by ARGB lighting on the top cover and fan.
- RAM Compatibility: Single tower design ensures perfect compatibility with RAM modules.
- 4 Heat Pipes: Four Φ6mm copper heat pipes efficiently absorb and transfer heat from the CPU to the heatsink.
- PWM Functional: The 92mm PWM fan offers low-noise operation and automatic speed control for ultra-quiet and extreme cooling performance. Max. Air Flow: 45.8CFM; Noise Level: 25.8dB(A) Max.
- Hassle-free Installation: Designed for straightforward installation on both Intel and AMD sockets.
- Compatibility: Supports Intel LGA1851/1700/1200/1150/1151/1155/1156; AMD AM5/AM4.

Figure 1: ID-COOLING FROZN A400 ARGB CPU Cooler with vibrant ARGB lighting.
What's in the Box
The ID-COOLING FROZN A400 ARGB package includes the following components:
- Heatsink
- Cooling Fan (92x92x25mm PWM Fan)
- Mounting Hardware (for Intel LGA1851/1700/1200/115X and AMD AM5/AM4)
- Thermal Grease
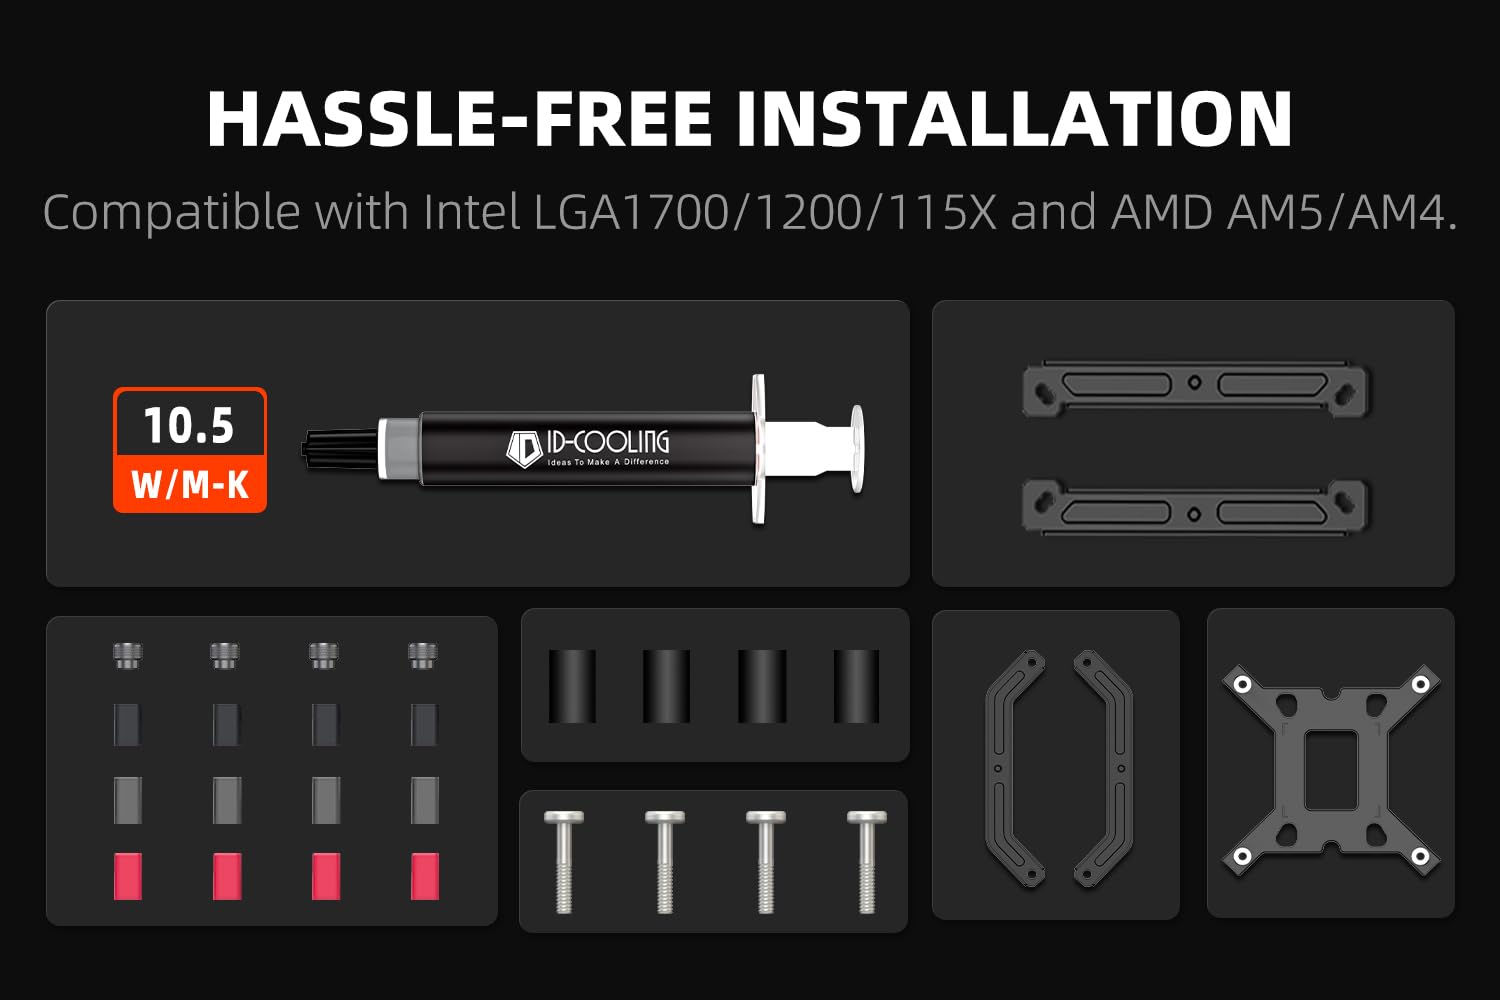
Figure 2: Included mounting hardware, thermal paste, heatsink, and fan.
Specifications
| Feature | Detail |
|---|---|
| Product Dimensions | 3.66 x 3.07 x 4.84 inches |
| Weight | 1.76 Pounds |
| Heatpipes | 4 x Φ6mm Copper Heatpipes |
| Fan Size | 92x92x25mm |
| Fan Speed | Up to 2200 RPM |
| Air Flow Capacity | 45.8 CFM (Max) |
| Noise Level | 25.8 dB(A) (Max) |
| Power Connector | 4-Pin PWM |
| Voltage | 12 Volts |
| Cooling Method | Air |
| TDP | 180W |
| Compatibility | Intel LGA1851/1700/1200/1150/1151/1155/1156; AMD AM5/AM4 |
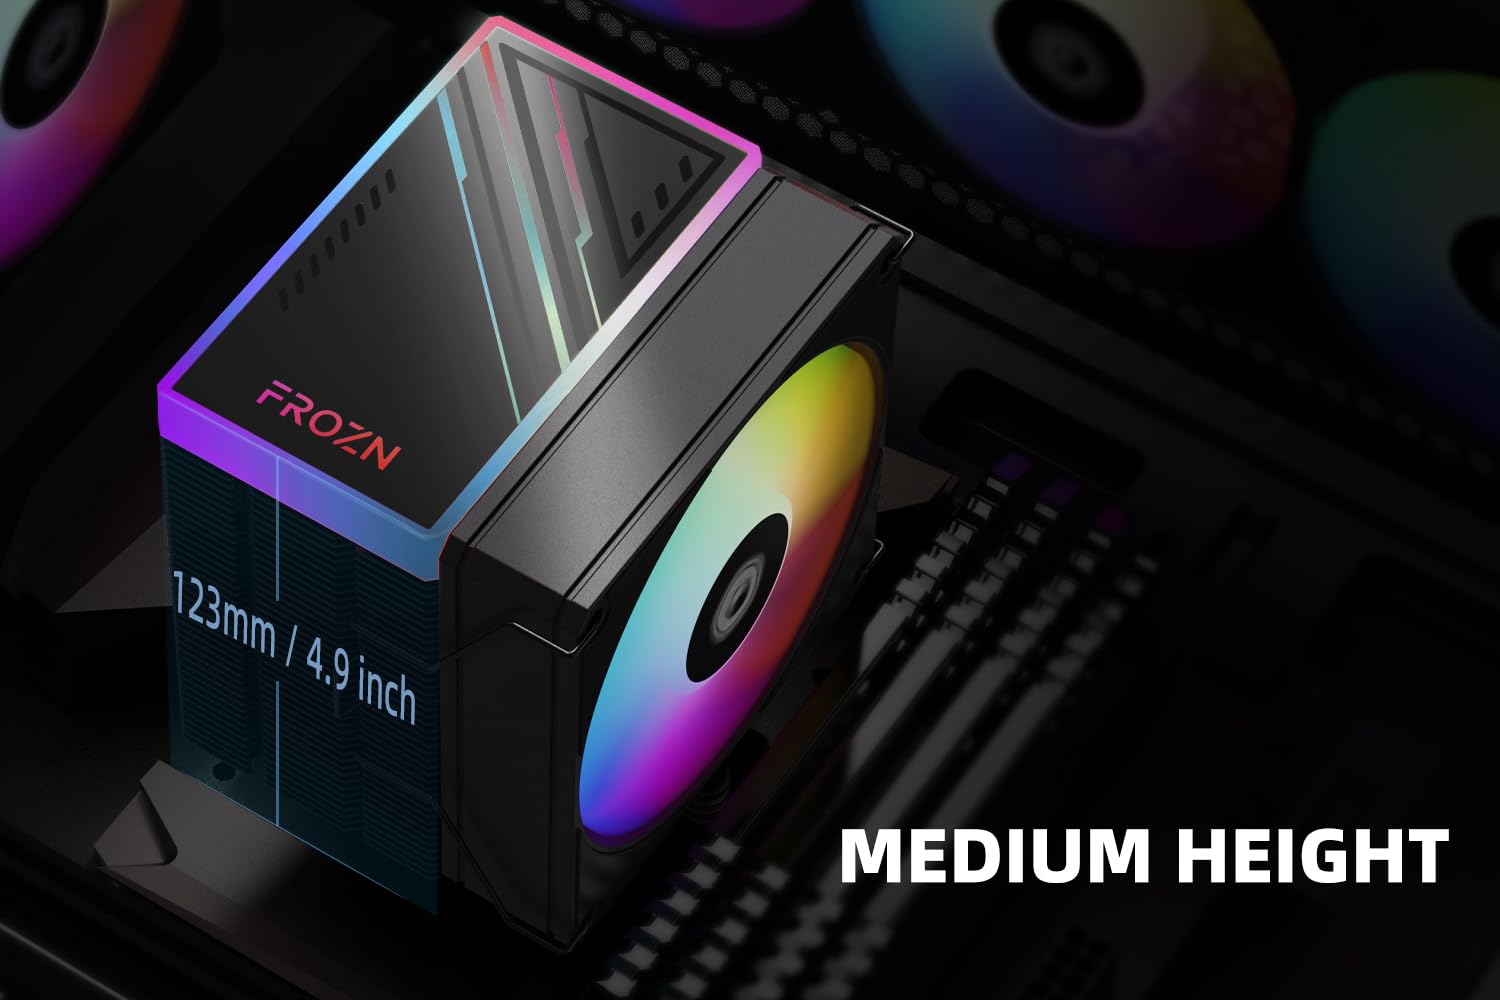
Figure 3: The compact 123mm height of the cooler ensures compatibility with most tower cases.
Setup and Installation
This section provides detailed instructions for installing your ID-COOLING FROZN A400 ARGB CPU Cooler. Please follow the steps carefully for proper installation.
General Installation Video Guide
Video 1: Official installation guide for FROZN Single Tower Series CPU Coolers. This video demonstrates the step-by-step process for mounting the cooler on various CPU sockets.
Installation for Intel LGA1700 Sockets
- Prepare the Backplate: Move the screws of the Intel Backplate to the outside position. Install the backplate on the back of the motherboard.
Figure 4: Position the Intel backplate correctly on the motherboard.
- Install Standoffs and Brackets: Install the rubber spacers, then the black LGA 1700 standoffs. Place the Intel brackets over the standoffs and secure them with the tightening nuts.
- Apply Thermal Paste: Clean the CPU surface thoroughly. Apply a small amount of thermal paste to the center of the CPU's integrated heat spreader (IHS).

Figure 5: Apply thermal paste to the CPU surface before mounting the heatsink.
- Install the Heatsink: Remove the protective sticker from the heatsink's base. Carefully align the heatsink with the CPU and the mounting screws, then gently lower it into place. Tighten the screws in a diagonal pattern until secure.

Figure 6: The heatsink features 4 direct-contact heat pipes for efficient heat transfer.
- Attach the Fan: Use the provided fan clips to secure the 92mm PWM fan to the heatsink. Ensure the fan is oriented correctly for optimal airflow (usually blowing towards the rear of the case). Connect the 4-PIN fan cable to the CPU_FAN header on your motherboard.

Figure 7: The high-efficient fan provides strong airflow and low-noise operation.
Installation for Intel LGA1200/115X Sockets
- Prepare the Backplate: Move the screws of the Intel Backplate to the inside position. Install the backplate on the back of the motherboard.
- Install Standoffs and Brackets: Install the rubber spacers, then the grey LGA 1200 standoffs. Place the Intel brackets over the standoffs and secure them with the tightening nuts.
- Apply Thermal Paste: Clean the CPU surface thoroughly. Apply a small amount of thermal paste to the center of the CPU's integrated heat spreader (IHS).
- Install the Heatsink: Remove the protective sticker from the heatsink's base. Carefully align the heatsink with the CPU and the mounting screws, then gently lower it into place. Tighten the screws in a diagonal pattern until secure.
- Attach the Fan: Use the provided fan clips to secure the 92mm PWM fan to the heatsink. Ensure the fan is oriented correctly for optimal airflow. Connect the 4-PIN fan cable to the CPU_FAN header on your motherboard.
Installation for AMD AM4/AM5 Sockets
Note: The original backplate of the motherboard is needed for AMD installations!
- Remove Plastic Retention: Remove the plastic retention module from the motherboard, but keep the stock backplate.
- Install Standoffs and Brackets: Put the AMD red standoffs onto the backplate. Then, place the AMD brackets over the standoffs and tighten them with the provided tightening screws.
- Apply Thermal Paste: Clean the CPU surface thoroughly. Apply a small amount of thermal paste to the center of the CPU's integrated heat spreader (IHS).
- Install the Heatsink: Remove the protective sticker from the heatsink's base. Carefully align the heatsink with the CPU and the mounting screws, then gently lower it into place. Tighten the screws in a diagonal pattern until secure.
- Attach the Fan: Use the provided fan clips to secure the 92mm PWM fan to the heatsink. Ensure the fan is oriented correctly for optimal airflow. Connect the 4-PIN fan cable to the CPU_FAN header on your motherboard.

Figure 8: The FROZN A400 ARGB cooler installed within a PC case, showcasing its ARGB lighting.
Operating Instructions
Once installed, the ID-COOLING FROZN A400 ARGB CPU Cooler operates automatically. The 92mm PWM fan will adjust its speed based on the CPU temperature, ensuring optimal cooling performance while minimizing noise.
- Automatic Fan Control: The PWM (Pulse Width Modulation) function allows the motherboard to precisely control the fan speed according to the CPU's thermal load. This ensures efficient cooling when needed and quiet operation during lighter tasks.
- ARGB Lighting Control: The ARGB lighting can typically be controlled via your motherboard's ARGB software (e.g., ASUS Aura Sync, MSI Mystic Light Sync, GIGABYTE RGB Fusion, ASRock Polychrome Sync) or a dedicated ARGB controller (not included). Refer to your motherboard manual for specific instructions on ARGB header connection and software usage.
Maintenance
Regular maintenance helps ensure the longevity and optimal performance of your CPU cooler.
- Dust Cleaning: Periodically clean dust from the heatsink fins and fan blades using compressed air or a soft brush. Ensure the fan is not spinning rapidly during cleaning to prevent damage to the bearings.
- Thermal Paste Reapplication: It is recommended to reapply thermal paste every 2-3 years, or if the cooler is removed and reinstalled. This ensures efficient heat transfer between the CPU and the heatsink.
- Fan Inspection: Check the fan for any signs of wear, unusual noises, or reduced performance. Replace the fan if necessary.
Troubleshooting
If you encounter issues with your ID-COOLING FROZN A400 ARGB CPU Cooler, refer to the following common problems and solutions:
| Problem | Possible Cause | Solution |
|---|---|---|
| CPU Overheating | Improper heatsink mounting, insufficient thermal paste, excessive dust buildup, poor case airflow. | Re-seat the cooler ensuring even pressure. Reapply thermal paste. Clean heatsink and fan. Improve case ventilation. |
| Fan Not Spinning / Noisy Fan | Fan cable disconnected, fan obstructed, fan bearing issue. | Check fan cable connection to CPU_FAN header. Clear any obstructions. If noise persists, consider replacing the fan. |
| ARGB Lighting Not Working | ARGB cable disconnected, incompatible motherboard header, software issue. | Ensure ARGB cable is securely connected to a 3-pin 5V ARGB header (not 4-pin 12V RGB). Check motherboard's ARGB software settings. |
| Cooler Does Not Fit | Incorrect mounting hardware used, case clearance issues. | Verify correct mounting hardware for your CPU socket. Check case specifications for CPU cooler height clearance (123mm). |
Warranty and Support
ID-COOLING products come with a standard manufacturer's warranty. For specific warranty terms, technical support, or service inquiries, please visit the official ID-COOLING website or contact their customer support directly.
Official Website: www.idcooling.com
For further assistance, you may also refer to the product page on Amazon: ID-COOLING FROZN A400 ARGB on Amazon


