Introduction
This manual provides detailed instructions for the setup, operation, and maintenance of your DreamSky Large Digital Clock Model DS182. Please read thoroughly to ensure proper use and longevity of your device.
What's in the Box
- Digital Clock
- Power Adapter
- User Manual
Product Overview
The DreamSky Large Digital Clock features a clear, easy-to-read display showing time, date, day of the week, and indoor temperature. It includes an auto-dimmer, adjustable alarm volume, battery backup, and a USB charging port.

Image: The DreamSky Large Digital Clock with its main display showing current time, day of the week, date, and indoor temperature.
Setup
Power Connection
Connect the provided power adapter to the clock and plug it into a standard electrical outlet. The clock requires adapter power to remain continuously lit. If powered by batteries only, the display light will turn off automatically after 10 seconds to conserve power.

Image: The clock connected to a power adapter, illustrating its continuous display when plugged in and various brightness levels.
Battery Backup
For battery backup, insert 3 AAA batteries (not included) into the battery compartment. The backup battery ensures that time settings are retained during a power outage, but the display will not remain continuously lit without adapter power.

Image: The rear view of the clock, highlighting the battery compartment for backup power (batteries not supplied).
Automatic Daylight Saving Time (DST)
The clock features an automatic DST adjustment. When enabled, the clock will automatically adjust for daylight saving time changes, eliminating the need for manual adjustments twice a year.

Image: A visual representation of the clock's automatic Daylight Saving Time feature, showing time adjustments for summer and winter.
Operating Instructions
Setting the Time
Refer to the buttons on the back of the clock. Press and hold the 'TIME SET' button for 2 seconds to enter time setting mode. Use the 'UP' and 'DOWN' buttons to adjust the hours and minutes. Press 'TIME SET' again to confirm each setting.
Video: A demonstration of how to set the current time on the DreamSky Digital Clock using the rear control buttons.
Setting the Alarm
Press and hold the 'ALARM SET' button for 2 seconds to enter alarm setting mode. Use the 'UP' and 'DOWN' buttons to set your desired alarm time. Press 'ALARM SET' again to confirm. You can adjust the alarm volume using the dedicated volume control buttons.
Video: A step-by-step guide on how to set and activate the alarm function on the DreamSky Digital Clock.
Adjusting Display Brightness
The clock features 4 levels of dimmable brightness. Press the 'LIGHT' button on the top or the 'DIMMER' button on the back to cycle through the brightness levels. An auto-dimmer function is also available, which automatically dims the display at 9:01 p.m. and brightens it at 7:00 a.m.

Image: The clock demonstrating its auto-dimmer feature and the four adjustable brightness levels for optimal viewing day and night.
USB Charging Port
An integrated USB charging port allows you to charge your smart devices. This feature is only available when the clock is powered by the adapter, not when running on battery backup.
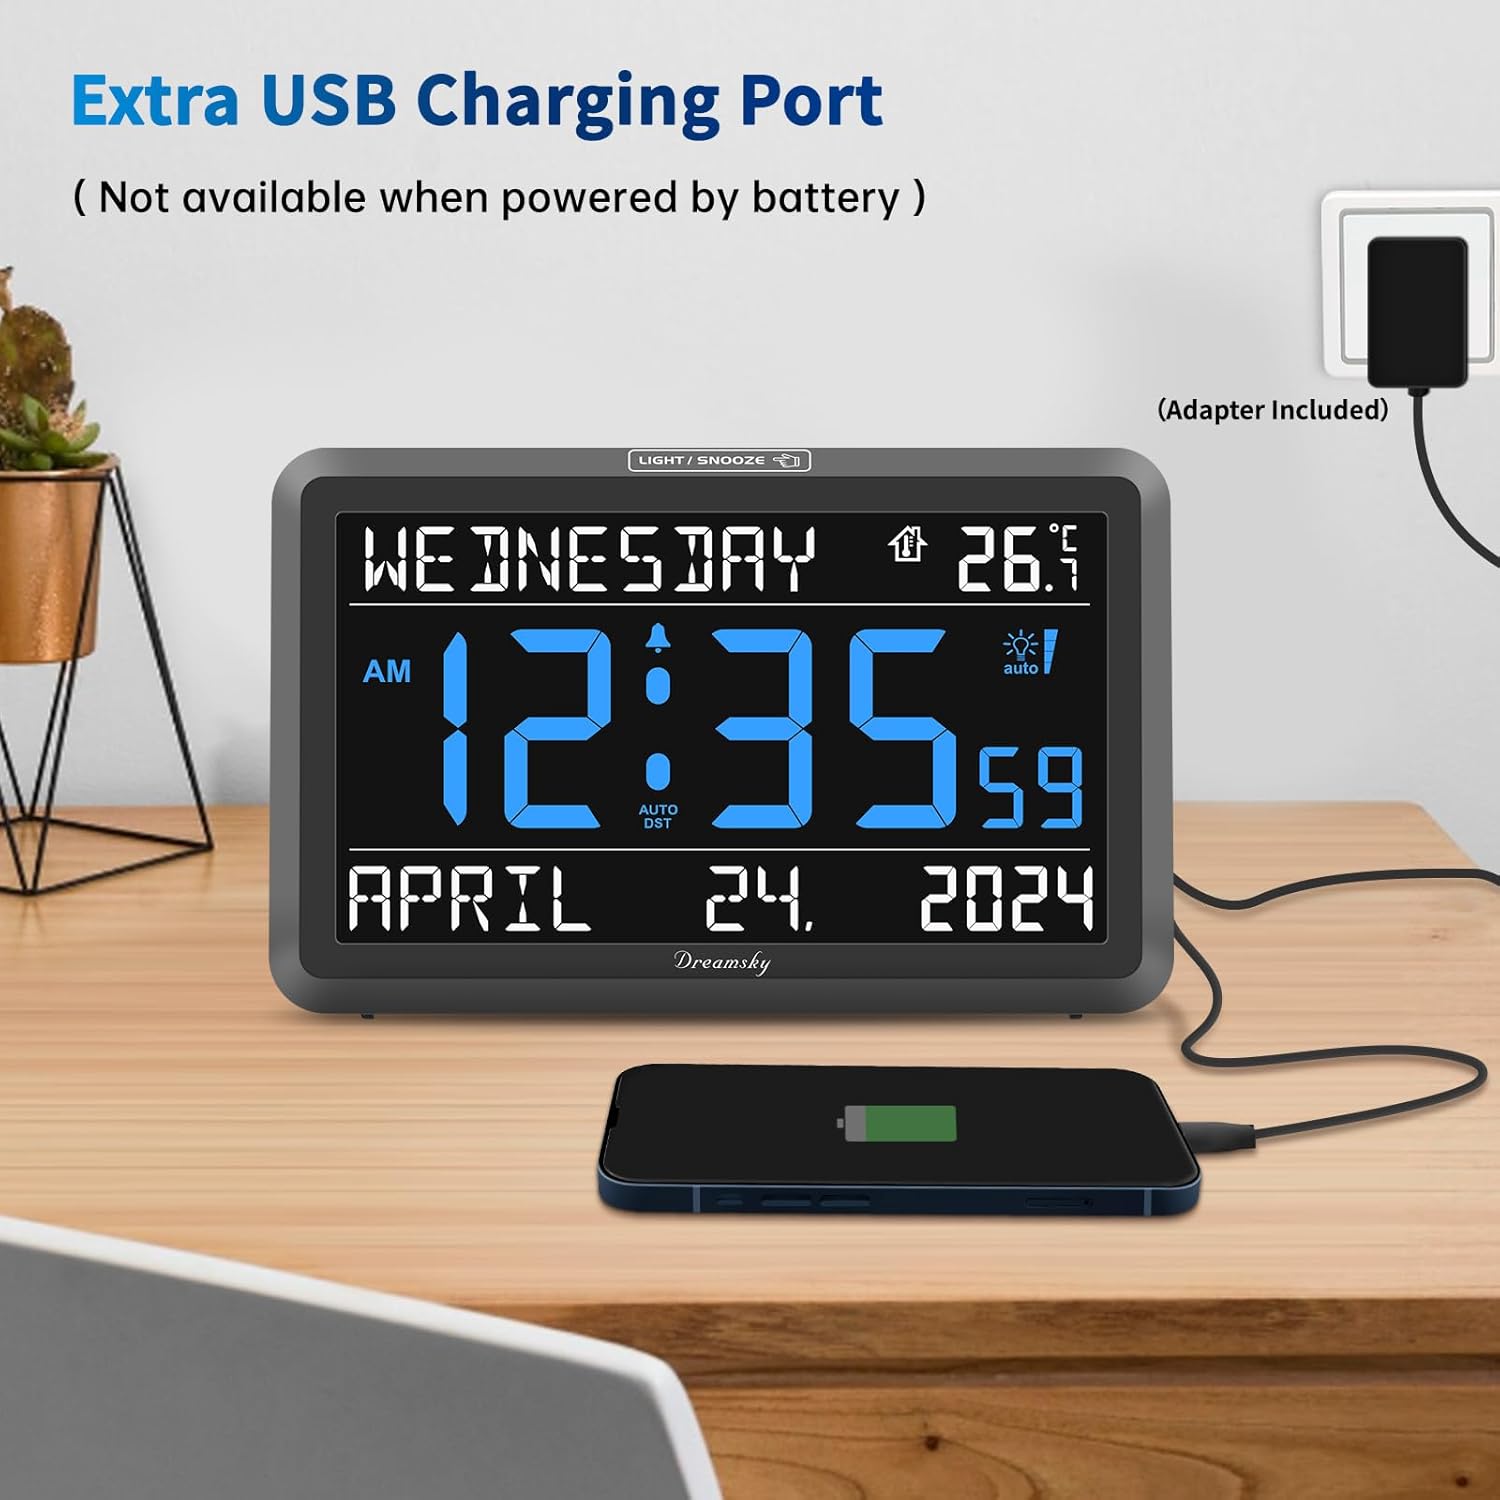
Image: The clock with a smartphone connected to its USB charging port, illustrating its device charging capability.
Maintenance
To clean the clock, gently wipe the display and casing with a soft, dry cloth. Avoid using abrasive cleaners or solvents, as these may damage the surface. Ensure the clock is unplugged before cleaning.
Troubleshooting
- Display is blank: Ensure the power adapter is securely plugged in. If using battery backup, the display will only light up for 10 seconds when the snooze/light button is pressed.
- Alarm not sounding: Verify the alarm is set and activated. Check the alarm volume level.
- Time is incorrect: Manually reset the time using the 'TIME SET' button. Ensure Auto DST is correctly configured for your region.
Specifications
| Brand | DreamSky |
| Model Number | DS182 |
| Display Type | Digital |
| Product Dimensions | 7.9"W x 4.9"H x 1.2"D |
| Power Source | Corded Electric and Battery Backup |
| Special Features | Large numbers, Volume control, Dimmable brightness, Auto dimmer, USB charging port, Auto DST |
Warranty and Support
The DreamSky Large Digital Clock comes with a 1-year replacement warranty. For support or warranty claims, please contact DreamSky Direct.
Additional details: Verified by Transparency - Each item has a unique code that we verify before shipping.


