
Generico NVR4108-8P-4KS3
User Manual: Dahua NVR4108-8P-4KS3
8-Channel 4K 12MP PoE Network Video Recorder
1. Introduction
This manual provides detailed instructions for the installation, operation, and maintenance of the Dahua NVR4108-8P-4KS3 Network Video Recorder. Please read this manual thoroughly before using the product to ensure proper and safe operation.
2. Product Overview
The Dahua NVR4108-8P-4KS3 is an advanced 8-channel Network Video Recorder designed for surveillance systems. It supports up to 12MP resolution and 4K Ultra-HD video output, featuring 8 Power over Ethernet (PoE) ports for direct camera connection and power supply. This NVR is compatible with ONVIF standards and supports Smart H.265+ video compression for efficient storage.

Figure 2.1: Front view of the Dahua NVR4108-8P-4KS3 NVR unit.
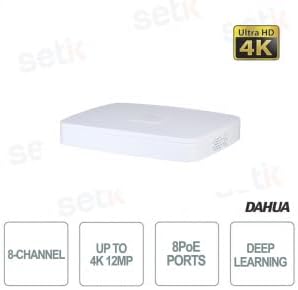
Figure 2.2: Key features of the Dahua NVR4108-8P-4KS3, highlighting 8-channel, up to 4K 12MP, 8 PoE ports, and Deep Learning capabilities.
3. Key Features
- 8-Channel Video Input: Supports up to 8 IP camera inputs.
- 4K Ultra-HD Resolution: Capable of recording and displaying video up to 12MP resolution.
- 8 PoE Ports: Integrated Power over Ethernet ports (IEEE802.3at/af) for direct camera power and data transmission.
- High Bandwidth: 160Mbps incoming bandwidth for smooth recording of multiple high-resolution streams.
- Smart H.265+ Compression: Advanced video compression technology to reduce storage space and bandwidth requirements.
- Video Outputs: HDMI output up to 4K resolution and VGA output.
- Storage: Supports 1 SATA Hard Disk Drive up to 20TB capacity.
- Audio/Video Inputs: RCA audio input/output, 2 USB ports.
- Compatibility: ONVIF compliant, compatible with Android and iOS mobile applications.
- Video Analytics: Supports various intelligent video analysis functions.
4. What's in the Box
Upon opening the package, verify that all components are present and undamaged:
- Dahua NVR4108-8P-4KS3 Network Video Recorder Unit
- Power Adapter
Note: Hard Disk Drive (HDD) is typically sold separately and not included in the standard package.
5. Setup Guide
5.1. Physical Connections
Before powering on the NVR, ensure all necessary cables are connected securely.

Figure 5.1: Rear panel of the NVR, showing PoE ports, network port, video outputs (VGA, HDMI), audio ports, and USB ports.
- Install Hard Disk Drive (HDD): If an HDD is not pre-installed, open the NVR casing, connect the SATA data and power cables to the HDD, and secure it in the designated bay. Refer to the specific HDD installation guide if needed.
- Connect IP Cameras: Connect your PoE-enabled IP cameras directly to the 8 PoE ports on the rear panel of the NVR using Ethernet cables. For non-PoE cameras, connect them to a PoE switch or provide separate power, then connect the switch to the NVR's network port.
- Connect to Network: Connect the NVR's network port to your local area network (LAN) router or switch using an Ethernet cable. This is essential for remote access and network camera communication.
- Connect Display: Connect a monitor to the NVR's HDMI or VGA output port.
- Connect Mouse/Keyboard: Connect a USB mouse to one of the NVR's USB ports for navigation.
- Connect Power: Connect the provided power adapter to the NVR's power input and then to a power outlet. The NVR will power on automatically.
5.2. Initial Configuration
Upon first boot, the NVR will guide you through an initial setup wizard.
- Set Password: Create a strong password for the admin user.
- Network Settings: Configure network settings (DHCP or Static IP). Ensure the NVR is accessible on your network.
- Date and Time: Set the correct date, time, and time zone.
- HDD Initialization: If an HDD is installed, the system will prompt you to initialize (format) it. This is necessary for recording.
- Camera Search and Add: The NVR will automatically search for connected IP cameras. Add them to the system. Ensure cameras are powered and properly connected.
6. Operating the NVR
6.1. Live View
After setup, the NVR will display the live view of connected cameras. You can switch between single-camera view, multi-camera grid view, and customize display layouts.
6.2. Recording Management
- Recording Schedule: Configure continuous, motion-detection, or alarm-triggered recording schedules for each camera.
- Manual Recording: Start or stop recording manually from the live view interface.
6.3. Playback
Access recorded footage through the playback menu. You can search by date, time, event type, and camera channel. Use the timeline to navigate through recordings.
6.4. Remote Access
To access the NVR remotely via mobile app (Android/iOS) or web browser:
- Enable P2P/Cloud Service: In the NVR's network settings, enable the P2P or cloud service. Note down the device's QR code or serial number.
- Download App: Download the official Dahua mobile application (e.g., DMSS) from your device's app store.
- Add Device: Open the app, select "Add Device," and scan the QR code or manually enter the serial number. Follow the prompts to add the NVR.
- Web Browser Access: For web browser access, enter the NVR's IP address into your browser. You may need to configure port forwarding on your router if accessing from outside your local network.
7. Maintenance
- Regular Cleaning: Keep the NVR unit clean and free from dust to ensure proper ventilation. Use a soft, dry cloth.
- Firmware Updates: Periodically check the official Dahua website for firmware updates. Updating firmware can improve performance, add features, and fix bugs. Follow update instructions carefully.
- HDD Health Check: Regularly check the health status of the installed Hard Disk Drive through the NVR's system settings to prevent data loss.
- Backup Configuration: It is recommended to back up the NVR's configuration settings periodically.
- Power Cycle: If the NVR experiences minor issues, a simple power cycle (turning off and on) can often resolve them.
8. Troubleshooting
| Problem | Possible Cause | Solution |
|---|---|---|
| No video output on monitor. | Loose HDMI/VGA cable; Incorrect display resolution; NVR not powered on. | Check cable connections; Try a different monitor or cable; Ensure NVR is powered on and indicator lights are active. |
| Cameras not showing up. | Camera not powered; Network issue; Incorrect IP address/protocol; Camera not added to NVR. | Check camera power and PoE connection; Verify network connectivity; Ensure camera IP is in the same subnet as NVR; Manually add camera if auto-discovery fails. |
| No recording. | HDD not installed/initialized; Recording schedule not set; HDD full. | Install and initialize HDD; Configure recording schedule; Check HDD status and free space. |
| Cannot access NVR remotely. | P2P/Cloud service disabled; Incorrect network settings; Firewall blocking ports; Router port forwarding not configured. | Enable P2P/Cloud service; Verify NVR network settings; Check router firewall; Configure port forwarding if not using P2P. |
9. Technical Specifications
| Feature | Specification |
|---|---|
| Model | NVR4108-8P-4KS3 |
| Brand | Dahua (Generic) |
| Channels | 8 IP Channels |
| Max Resolution | Up to 12MP (4K Ultra-HD) |
| PoE Ports | 8 ports (IEEE802.3at/af) |
| Incoming Bandwidth | 160Mbps |
| Video Compression | Smart H.265+, H.265, Smart H.264+, H.264 |
| Video Output | 1 HDMI (up to 4K), 1 VGA |
| Audio Input/Output | 1 RCA In / 1 RCA Out |
| USB Ports | 2 (USB 2.0) |
| HDD Support | 1 SATA port, up to 20TB capacity |
| Dimensions (L x W x H) | 20 x 20 x 4 cm |
| Weight | 970 grams |
| Connectivity | Ethernet (RJ-45) |
10. Warranty and Support
This product is manufactured by Dahua. For specific warranty information, please refer to the warranty card included with your product or contact your point of purchase. For technical support, firmware updates, and additional resources, please visit the official Dahua website or contact their customer support.
Software updates are guaranteed up to an unknown date. It is recommended to regularly check for the latest firmware versions to ensure optimal performance and security.
Ask a question about this manual
Ask about setup, troubleshooting, compatibility, parts, safety, or missing instructions. Manuals+ will review the question and use this page’s manual context to help answer it.