
1. Introduction
The Kaffelogic Nano7 is a compact, electric coffee roaster designed for both home coffee enthusiasts and professional sample roasting. This manual provides essential information for the safe and effective operation, maintenance, and troubleshooting of your Nano7 roaster, specifically the 110v model with the Boost Kit add-on.
The Nano7 offers customizable roasting capabilities, allowing users to roast coffee with pre-loaded recipes or create personalized roast profiles. Its plug-and-play functionality ensures ease of use right out of the box.
2. Safety Information
Please read all safety instructions carefully before operating the Kaffelogic Nano7. Failure to follow these instructions may result in injury or damage to the appliance.
- Electrical Safety: Ensure the roaster is connected to a grounded 110v power outlet. Do not operate with a damaged power cord or plug. Keep the appliance away from water or other liquids.
- Hot Surfaces: The roaster and its components become very hot during and after operation. Always allow the unit to cool completely before handling or cleaning. Use caution to avoid burns.
- Ventilation: Operate the roaster in a well-ventilated area. Coffee roasting produces smoke and odors.
- Chaff: The chaff collector must be properly installed before operation. Empty the chaff collector regularly to prevent fire hazards.
- Children and Pets: Keep the appliance out of reach of children and pets.
- Intended Use: Use the Kaffelogic Nano7 only for roasting green coffee beans. Do not attempt to roast other materials.
3. Package Contents
Verify that all components are present in the package:
- Kaffelogic Nano7 Roaster Body
- Roasting Chamber
- Chaff Collector
- Bean Scoop
- USB Cable
- Boost Kit (if purchased with this configuration)
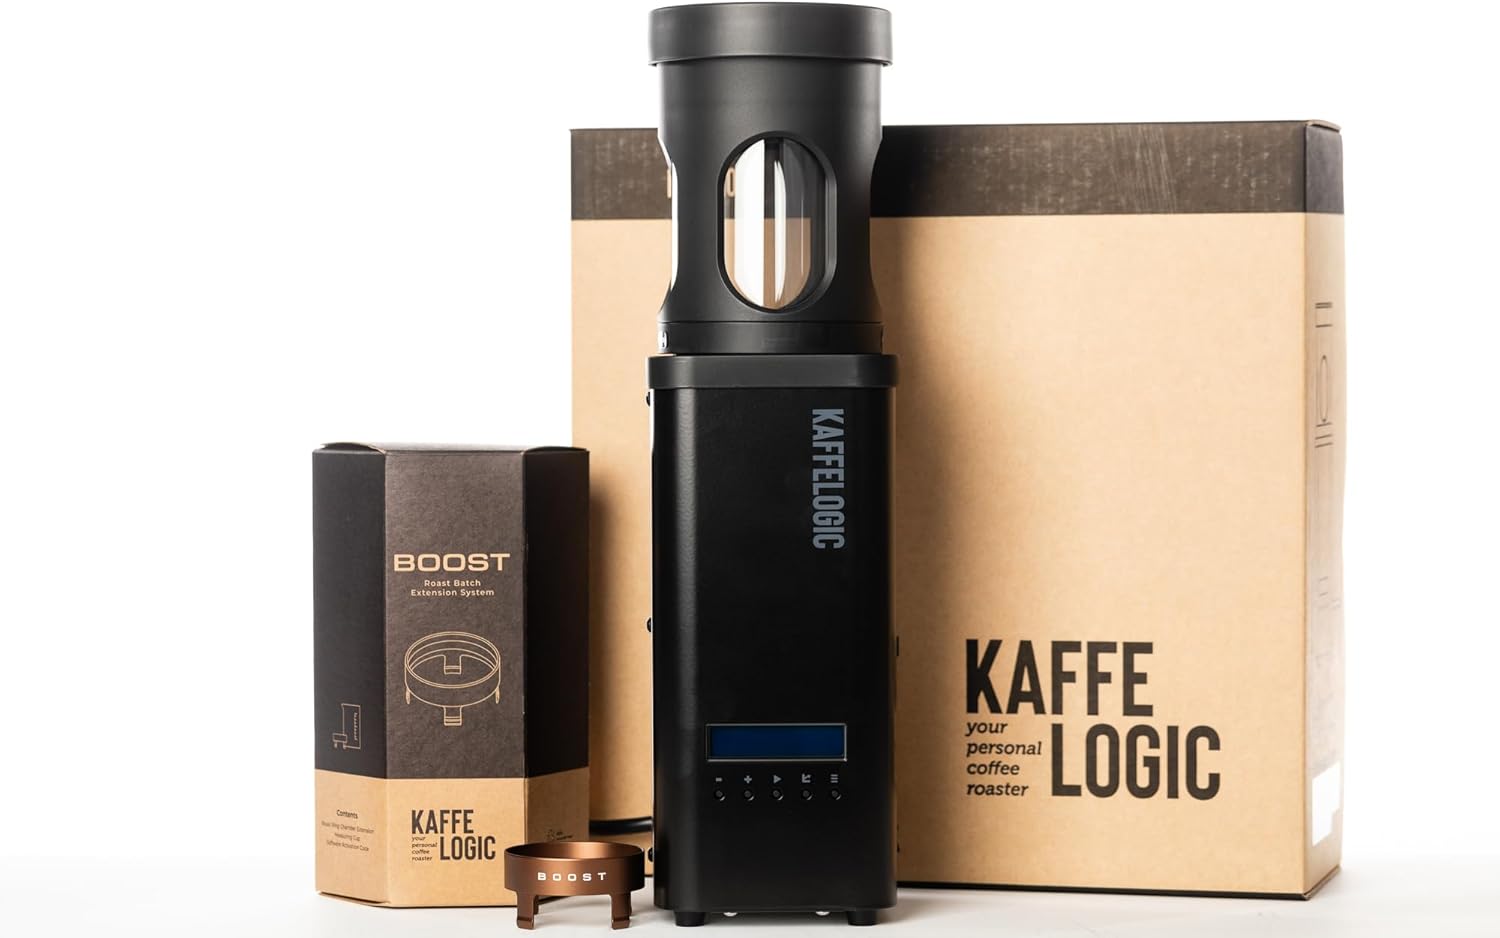
Image: The Kaffelogic Nano7 roaster, Boost Kit, and original packaging.
4. Setup
4.1 Unpacking and Placement
Carefully remove all components from the packaging. Place the Kaffelogic Nano7 on a stable, heat-resistant countertop. Ensure there is adequate clearance around the unit for proper ventilation, especially above the chaff collector, as hot air and smoke will be expelled during roasting.
4.2 Component Assembly
- Place the Roasting Chamber onto the Roaster Body, ensuring it is seated correctly.
- Place the Chaff Collector on top of the Roasting Chamber.
- If using the Boost Kit, ensure it is properly integrated according to its specific instructions. The Boost Kit allows for a wider range of batch sizes.

Image: The Kaffelogic Nano7 Home Coffee Roaster fully assembled and ready for use.
4.3 Power Connection
Connect the power cord to the roaster and then plug it into a standard 110v electrical outlet. The Nano7 is designed for plug-and-play functionality, requiring minimal setup before its first use.
5. Operating Instructions
5.1 Loading Green Coffee Beans
Use the provided bean scoop to add green coffee beans into the roasting chamber. The Nano7 supports flexible batch sizes. For optimal results, the recommended batch size is 80-100g of roasted coffee (equivalent to 100-120g of green coffee). With the Boost Kit add-on, the roaster can handle batch sizes from 50g up to 200g of green coffee.

Image: A hand pouring green coffee beans into the top opening of the Kaffelogic Nano7 roaster.

Image: The Kaffelogic Nano7 roaster positioned on a kitchen counter next to a bag of green coffee beans, ready for roasting.
5.2 Selecting a Roast Profile
The Nano7 comes with pre-loaded roast recipes. You can select a profile directly from the unit's interface. For advanced users, the Kaffelogic Studio software allows you to customize, save, and share your own preferred roast profiles, adjusting parameters such as temperature and airflow. The system utilizes PID temperature control with a unique look-ahead and gain scheduling system for precise roasting.

Image: The Kaffelogic Nano7 roaster sits beside a laptop screen showing detailed roast profile curves and settings in the Kaffelogic Studio software.
5.3 Starting the Roast
Once beans are loaded and a profile is selected, press the start button to begin the roasting process. The roaster will automatically follow the chosen profile. Monitor the roasting process through the viewing window on the roasting chamber.

Image: A close-up view of the Kaffelogic Nano7's roasting chamber, showing the 'BOOST' branding and coffee beans inside.
5.4 Cooling and Unloading
After the roast cycle is complete, the roaster will enter a cooling phase. Once cooled, carefully remove the roasted beans. The Nano7 allows for easy unloading of roasted coffee.

Image: A hand tilting the Kaffelogic Nano7 roaster to pour freshly roasted coffee beans into a white cupping tray.
6. Maintenance
6.1 Chaff Collection and Cleaning
The Kaffelogic Nano7 features an easy-to-empty chaff collection chamber. After each roast, or as needed, remove the chaff collector and dispose of the accumulated chaff. Regular emptying prevents buildup and maintains optimal performance.

Image: A hand lifting the chaff collection chamber from the top of the Kaffelogic Nano7 roaster, revealing collected chaff inside.
Cleaning the Roaster:
- Ensure the roaster is unplugged and completely cool before cleaning.
- Wipe the exterior of the unit with a damp cloth. Do not use abrasive cleaners or immerse the unit in water.
- The Kaffelogic Nano7 is not dishwasher safe.
- Periodically clean the roasting chamber and any removable parts with a soft brush or cloth to remove coffee oils and residue.
7. Troubleshooting
This section addresses common issues you might encounter with your Kaffelogic Nano7.
- Roaster Not Turning On: Check if the power cord is securely plugged into both the roaster and a working 110v electrical outlet. Ensure no circuit breakers have tripped.
- Uneven Roast: Ensure the recommended batch size is used. Overloading or underloading can affect airflow and roast consistency. Verify that the chaff collector is not overly full, which can restrict airflow.
- Excessive Smoke: Some smoke is normal during roasting. However, excessive smoke may indicate a very dark roast, or a buildup of residue in the roasting chamber or chaff collector. Clean the unit thoroughly. Ensure adequate ventilation.
- Error Codes: If an error code appears on the display, consult the Kaffelogic Studio software documentation or the official Kaffelogic support website for specific code meanings and solutions.
- Beans Not Agitating: Ensure the roasting chamber is correctly seated and not obstructed. Check that the batch size is within the recommended range for proper bean movement.
If you experience persistent issues not covered here, please contact Kaffelogic customer support.
8. Specifications
| Feature | Detail |
|---|---|
| Brand | Kaffelogic |
| Model Name | Kaffelogic Nano7 |
| Item Model Number | Nano 110v + Boost Kit Add-on |
| Color | Black |
| Product Dimensions | 4.9"D x 4.9"W x 16.9"H |
| Item Weight | 14 pounds |
| Power Source | Electric |
| Operation Mode | Fully Automatic |
| Capacity | 120 Grams (green coffee, standard); 50-200g (green coffee, with Boost Kit) |
| Coffee Input Type | Green Coffee Beans |
| Special Feature | Variable temperature and fan speed control, PID control with Kaffelogic look-ahead and gain scheduling system, fully user programmable |
| Included Components | Bean Scoop, Chaff Collector, Roaster Body, Roasting Chamber, USB Cable |
| Is Dishwasher Safe | No |
| Manufacture Year | 2023 |
| Date First Available | May 14, 2024 |
9. Warranty and Support
9.1 Warranty Information
The Kaffelogic Nano7 Home Coffee Roaster is backed by a 2-year warranty from the date of purchase. This warranty covers manufacturing defects and malfunctions under normal use. Please retain your proof of purchase for warranty claims.
9.2 Customer Support
For technical assistance, warranty claims, or any questions regarding your Kaffelogic Nano7, please contact Kaffelogic customer support. Refer to the official Kaffelogic website or your purchase documentation for contact details.


