
1. Introduction
The LewanSoul miniArm is an open-source robotic arm designed for STEM education, compatible with Arduino UNO programming. This kit provides a platform for learning robotics, engineering, and coding through hands-on assembly and programming. This manual provides essential information for the assembly, operation, and maintenance of your miniArm.
2. Safety Information
- Adult Supervision: This product is recommended for users 17 years and up. Younger users should have adult supervision during assembly and operation.
- Power Source: Use only the specified power source and batteries. Incorrect power can damage the device.
- Moving Parts: Keep fingers and loose clothing away from moving parts of the robotic arm to prevent injury.
- Component Handling: Handle electronic components with care to avoid static discharge or physical damage.
- Choking Hazard: Small parts are included and may pose a choking hazard for young children.
3. Package Contents
The miniArm Standard Kit includes the following components:
- miniArm Robotic Arm (basic modules)
- Glowing Ultrasonic Sensor
- Touch Sensor
- Acceleration Sensor
- ESP32Cam Module
- Type-C Data Cable
- 4PIN Wire
- 2 Lithium Ion Batteries (included)
4. Product Overview
The LewanSoul miniArm is composed of several key components that enable its functionality and expandability.

Figure 4.1: miniArm Product Structure. This diagram illustrates the main mechanical and electronic components of the robotic arm, including various servos, the gripper, and the control boards.

Figure 4.2: miniArm Instruction Diagram. This image details the UNO 6-channel knob expansion board and its connection to the Arduino UNO, highlighting various ports and controls for operation and expansion.
Key Components:
- Arduino UNO: The core microcontroller for programming and control.
- UNO 6-channel Knob Expansion Board: Provides interfaces for servos, sensors, and manual control via knobs.
- High-Precision Digital Servos (LDX-218, LD-1501MG, LFD-01M): Enable precise movement of the arm's joints and gripper.
- Mechanical Gripper: For grasping and manipulating objects.
- Bluetooth Module: Facilitates wireless control via a mobile application.
- Expansion Ports: Multiple ports for integrating additional sensors like ESP32 Cam, accelerometer, touch sensor, and ultrasonic sensor.
5. Assembly
The miniArm is a building kit that requires careful assembly. Follow the detailed assembly guide provided separately with your kit. General steps include:
- Unpack Components: Carefully unbox all parts and verify against the package contents list.
- Base Assembly: Construct the base structure, including the large bottom plate and battery box.
- Servo Installation: Mount the various servos onto the acrylic arm segments according to the instructions. Ensure correct orientation and secure fastening.
- Arm Linkage: Connect the arm segments using the provided hardware to form the robotic arm structure.
- Gripper Attachment: Assemble and attach the mechanical gripper to the end of the arm.
- Electronics Integration: Mount the Arduino UNO and the 6-channel knob expansion board onto the base. Connect all servo wires, sensor wires, and power cables as indicated in the guide.
- Battery Installation: Insert the Lithium Ion batteries into the battery box and connect them to the power system.
Note: Ensure all screws are tightened appropriately, but do not overtighten to avoid damaging components. Pay close attention to wiring diagrams to prevent incorrect connections.
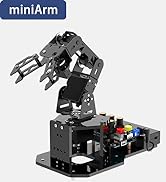
Figure 5.1: Hands-on assembly of the miniArm, demonstrating the building process.
6. Operating Instructions
The miniArm offers versatile control options:

Figure 6.1: Control methods for the miniArm, including Arduino Programming and APP Control.
6.1. Arduino Programming
- The miniArm is built on the Atmega328 platform, making it compatible with Arduino IDE.
- Access the open-source programs and learning tutorials provided by LewanSoul for initial setup and basic control.
- Connect the Arduino UNO to your computer using the Type-C data cable.
- Upload example sketches to control individual servos, arm movements, or implement complex sequences.
- Refer to the official documentation for detailed programming guides and secondary development examples.
6.2. App Control
- Download the dedicated miniArm control application from your device's app store.
- Ensure the Bluetooth module is correctly installed and powered on.
- Pair your mobile device (smartphone or tablet) with the miniArm via Bluetooth.
- Use the app interface for real-time control of the robotic arm's movements.
- The app also supports offline action editing, allowing you to program and save sequences of movements.
6.3. Knob Controller
- The 6-channel knob expansion board allows for direct, real-time manual control of the arm's joints.
- Each knob (S1-S6) corresponds to a specific servo or axis of movement.
- Rotate the knobs to precisely adjust the position of each joint.
- This method is useful for fine-tuning movements or for users who prefer tactile control.
7. Advanced Features and Functional Gameplay
The miniArm, especially with its sensor expansion capabilities, supports various advanced functionalities.

Figure 7.1: Functional Gameplay examples including Sonic Ranging, Pose Control, Sonic Ball Grabbing, and Touch Grabbing.
7.1. Sensor Integration and Control
- Sonic Ranging: Utilize the Glowing Ultrasonic Sensor to detect distances to objects, enabling the arm to interact with its environment based on proximity.
- Pose Control: Integrate an accelerometer or other sensors to allow for intuitive control where the arm mimics the movement or orientation of a human hand or controller.
- Sonic Ball Grabbing: Combine ultrasonic sensing with gripper control to automatically detect and grasp objects.
- Touch Grabbing: Implement the Touch Sensor to enable the gripper to detect contact with an object and initiate a grasping action.

Figure 7.2: Vision Recognition and Tracking capabilities using the ESP32Cam module.
7.2. Vision Recognition and Tracking (with ESP32Cam Module)
- Color Recognition: Program the ESP32Cam to identify and differentiate objects based on their color.
- Face Recognition: Develop applications for the arm to detect and track human faces.
- APP Vision Image Return: Stream video feedback from the ESP32Cam to the control application, allowing for visual monitoring and advanced object manipulation.
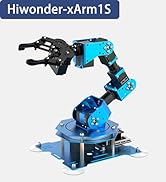
Figure 7.3: The miniArm equipped with a camera module for vision-based tasks.
7.3. Unlimited Expansion
The miniArm's open-source nature and multiple expansion ports encourage users to integrate additional sensors and modules, unlocking further possibilities for projects and learning.
Figure 7.4: The miniArm designed for unlimited expansion and customization.
8. Maintenance
- Cleaning: Regularly clean the robotic arm with a soft, dry cloth. Avoid using liquids or harsh chemicals.
- Joint Inspection: Periodically check all joints and connections for looseness. Tighten any loose screws.
- Wiring: Ensure all wires are securely connected and not pinched or frayed.
- Battery Care: When not in use for extended periods, remove the batteries to prevent leakage. Recharge batteries as needed.
- Storage: Store the miniArm in a dry, dust-free environment away from extreme temperatures.
9. Troubleshooting
| Problem | Possible Cause | Solution |
|---|---|---|
| Arm does not power on. | Low or dead batteries; incorrect power connection. | Check battery charge and connections. Ensure power switch is ON. |
| Servos not moving. | Incorrect wiring; servo not receiving power or signal; damaged servo. | Verify servo connections to the expansion board. Check power supply. Test with a different servo if available. |
| App control not connecting. | Bluetooth module not powered; incorrect pairing; app issues. | Ensure Bluetooth module is on. Re-pair device. Restart app and miniArm. |
| Arm movements are erratic. | Loose connections; interference; programming error. | Check all physical connections. Review your code for logic errors. Ensure a stable environment. |
10. Specifications
- Product Dimensions: 5 x 13 x 8 inches
- Item Weight: 2 pounds
- Manufacturer Recommended Age: 17 years and up
- Batteries: 2 Lithium Ion batteries (included)
- Control Platform: Arduino UNO (Atmega328)
- Connectivity: Bluetooth, USB (for Arduino programming)

Figure 10.1: Detailed dimensions of the miniArm robotic arm.
11. Warranty and Support
LewanSoul products are designed for quality and performance. For warranty information, technical support, or assistance with your miniArm, please refer to the official LewanSoul website or contact their customer service directly. Keep your purchase receipt as proof of purchase.


