1. Product Overview
The Viqua QL-150 kit provides genuine replacement components for your Viqua VH150 Ultraviolet (UV) Water Treatment System. This kit includes a UV lamp and a quartz sleeve, essential for maintaining the system's effectiveness in water purification. Regular replacement of these components ensures continuous and reliable UV disinfection.

Image 1: The Viqua QL-150 UV replacement lamp and quartz sleeve, packaged together.
2. Safety Information
WARNING: Ultraviolet (UV) light can cause severe eye and skin damage. Never look directly at an illuminated UV lamp. Always disconnect power to the UV system before servicing or replacing components. Allow the lamp to cool down before handling. Handle the quartz sleeve and UV lamp with care, as they are fragile.
- Always wear appropriate personal protective equipment (PPE), including gloves and eye protection, when handling UV lamps and sleeves.
- Ensure the system is depressurized and drained before opening the UV chamber.
- Keep replacement parts out of reach of children.
- Dispose of old UV lamps according to local regulations for hazardous waste, as they may contain mercury.
3. Package Contents
The Viqua QL-150 kit includes the following genuine Viqua components:
- 1 x Viqua UV Lamp
- 1 x Viqua Quartz Sleeve
- 2 x O-rings
4. Installation and Replacement
This section outlines the steps for replacing the UV lamp and quartz sleeve in your Viqua VH150 system. Refer to your VH150 system's primary manual for detailed instructions on system shutdown and startup procedures.
4.1. Preparing for Replacement
- Disconnect the main power supply to the Viqua VH150 UV system.
- Close the water inlet and outlet valves to the UV system to prevent water flow.
- Depressurize the system by opening a nearby faucet or bleed valve.
- Allow the UV lamp to cool for at least 10 minutes before handling.
4.2. Replacing the UV Lamp
- Carefully remove the lamp connector from the end of the UV lamp.
- Unscrew the retaining nut or cap that secures the lamp in place.
- Gently pull the old UV lamp straight out of the quartz sleeve. Avoid bending or twisting.
- Insert the new Viqua UV lamp into the quartz sleeve, ensuring it slides in smoothly until fully seated. Avoid touching the glass portion of the lamp with bare hands; use gloves or a clean cloth.
- Reconnect the lamp connector, ensuring a secure fit.
- Re-secure the retaining nut or cap.
4.3. Replacing the Quartz Sleeve (Every 2 Years or as Needed)
The quartz sleeve should be replaced every two years or if it shows signs of damage or significant mineral buildup that cannot be cleaned.
- Follow steps 1-3 from "4.2. Replacing the UV Lamp" to remove the lamp.
- Carefully unscrew the gland nut(s) that hold the quartz sleeve in place.
- Gently slide the old quartz sleeve out of the UV chamber. Be prepared for residual water.
- Clean the inside of the UV chamber if necessary.
- Install the new O-rings onto the ends of the new quartz sleeve.
- Carefully slide the new quartz sleeve into the UV chamber.
- Tighten the gland nut(s) by hand until snug, then use a wrench for an additional quarter turn. Do not overtighten.
- Proceed with "4.2. Replacing the UV Lamp" to install the new UV lamp.
4.4. Post-Installation
- Slowly open the water inlet valve, allowing the UV chamber to fill. Check for leaks.
- Once the system is full and leak-free, slowly open the water outlet valve.
- Reconnect the main power supply to the Viqua VH150 UV system.
- Verify that the system's indicator light confirms proper operation of the new UV lamp.
5. Maintenance Schedule
- UV Lamp Replacement: Annually (every 12 months). The UV lamp's intensity diminishes over time, even if it appears to be working.
- Quartz Sleeve Replacement: Every two years, or sooner if damaged, cracked, or if mineral buildup cannot be removed by cleaning.
- Quartz Sleeve Cleaning: Periodically (e.g., every 6-12 months) inspect and clean the quartz sleeve to remove any mineral deposits that could block UV light transmission. Use a soft cloth and a mild acid solution (e.g., vinegar) if needed, then rinse thoroughly.
6. Product Specifications
| Feature | Detail |
|---|---|
| Model Name | Lamp and sleeve kit (QL-150) |
| Compatible System | Viqua VH150 Ultraviolet System |
| Light Type | Ultraviolet |
| Wattage | 20 Watt-hours |
| Bulb Shape Size | T (Tubular) |
| Bulb Base | Prong |
| Material | Glass, Quartz |
| Product Dimensions | 3"W x 25"H (approximate, for lamp/sleeve) |
| Item Weight | 1.6 Pounds |
| Included Components | UV Lamp, Quartz Sleeve, O-rings |
7. Importance of Genuine Parts
Using genuine Viqua replacement parts is crucial for the optimal performance and safety of your UV water treatment system. Non-genuine parts may not meet the precise specifications required for effective UV disinfection, potentially leading to:
- Reduced UV light dosage, compromising water purification.
- Increased risk of system damage due to improper fit or material quality.
- Voiding of your system's warranty.
- Potential for overheating or leaching of harmful substances.

Image 2: Illustration highlighting the benefits of genuine Viqua UV lamps (High Efficacy, 100% Dosage, Maintain System Lifespan) compared to generic alternatives (Heat Damage Risk, System Damage Risk, Inconsistent UV Light Dose).

Image 3: Visual representation of potential issues arising from using poor quality UV lamps, including system damage, incorrect UV light dose, voided warranty, melting from overheating, and leaching toxins.
8. UV Disinfection Principle
Ultraviolet (UV) light disinfection works by exposing water to a specific wavelength of UV light (UV-C). This light penetrates the cell walls of microorganisms such as bacteria, viruses, and protozoa, disrupting their DNA and rendering them unable to reproduce or cause infection. This physical process effectively inactivates a wide range of pathogens without adding chemicals to the water.
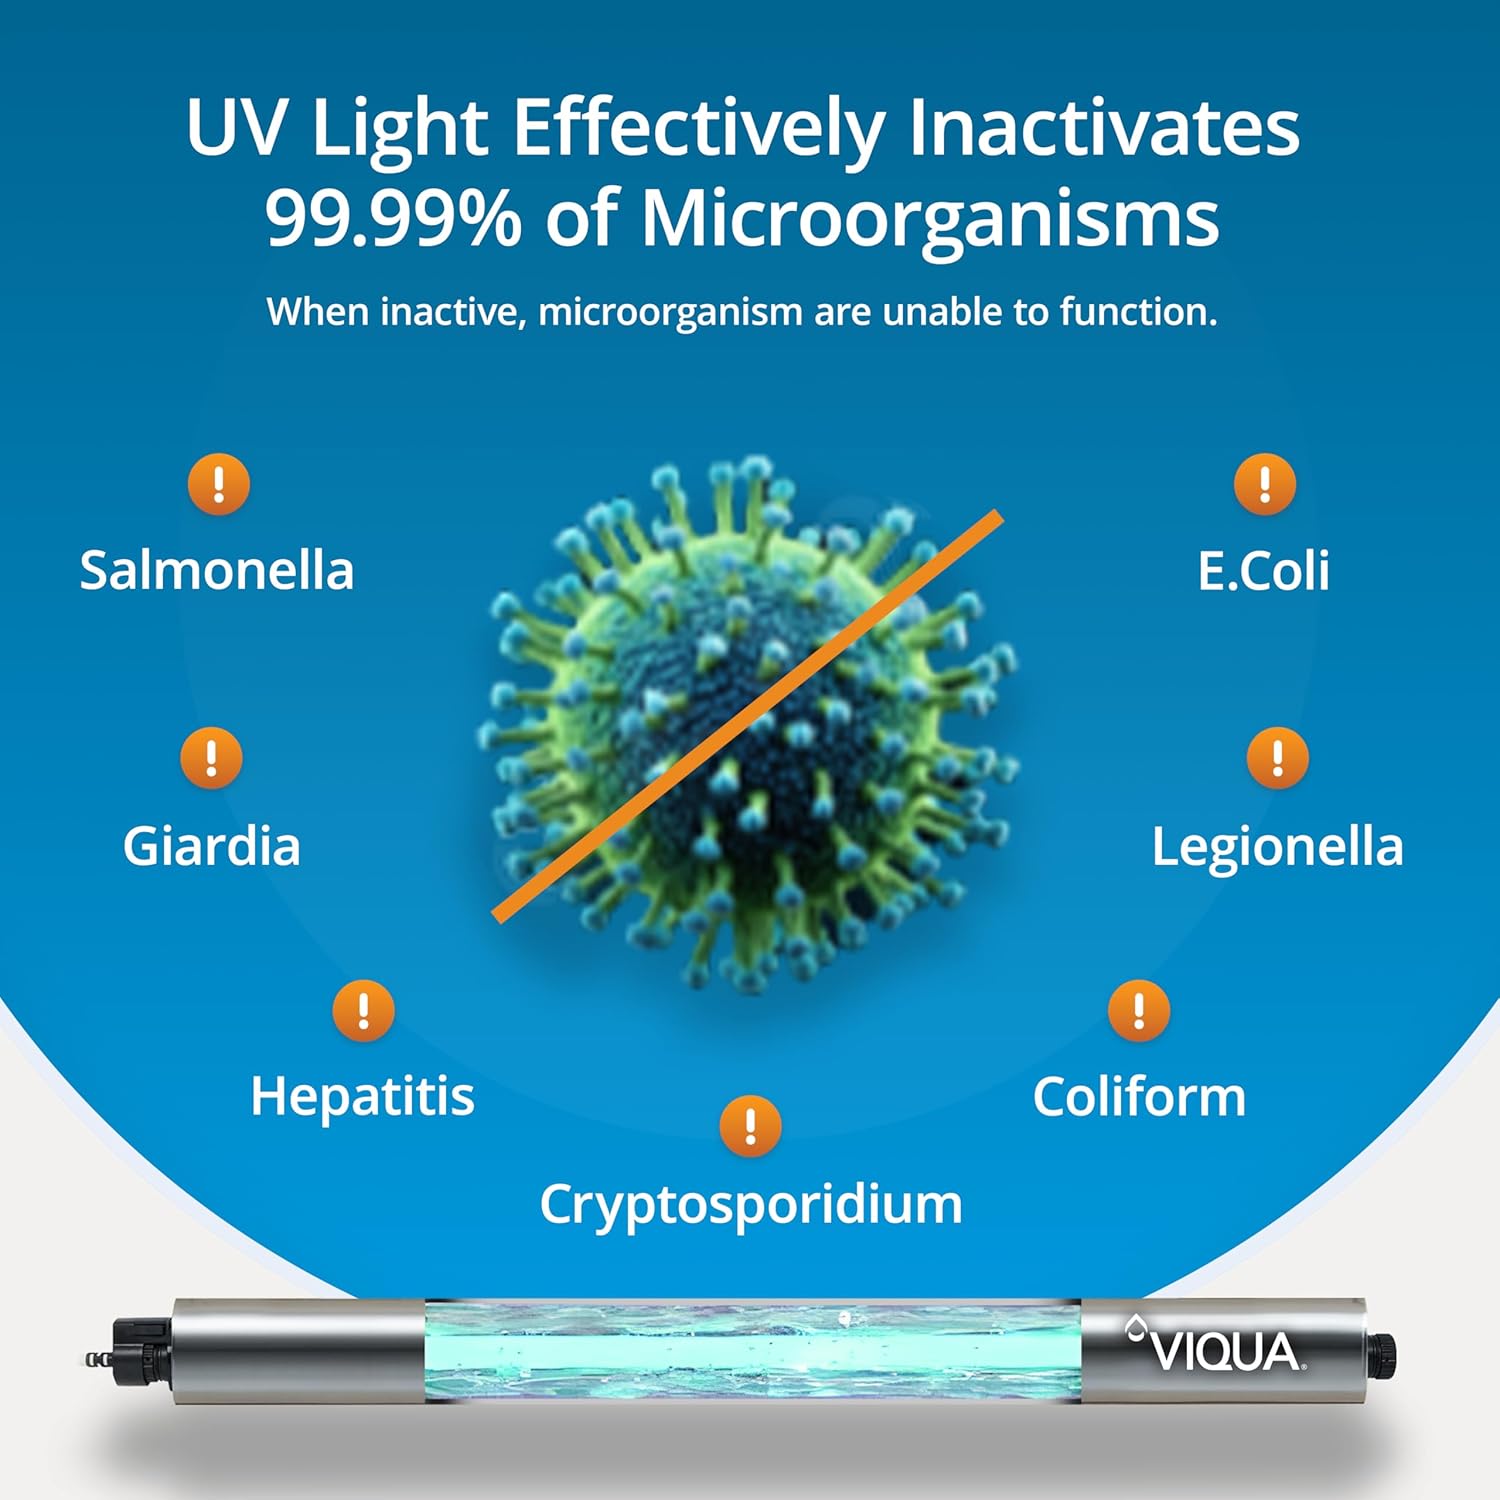
Image 4: Diagram illustrating how UV light effectively inactivates 99.99% of microorganisms, including Salmonella, E. Coli, Giardia, Legionella, Hepatitis, Coliform, and Cryptosporidium, by preventing them from functioning.

Image 5: Visual comparison showing water before and after UV treatment, indicating the removal of microorganisms. Note: Before and After images are for illustrative purposes only.
9. Troubleshooting
If your Viqua VH150 system is not operating correctly after replacing the lamp and sleeve, consider the following:
- No Lamp Indicator Light:
- Ensure the power supply is connected and active.
- Check that the lamp connector is securely attached to the UV lamp.
- Verify the UV lamp is fully seated within the quartz sleeve.
- Confirm the new lamp is not defective (rare, but possible).
- Water Leakage:
- Ensure gland nuts are tightened correctly (hand-tight plus a quarter turn with a wrench). Do not overtighten.
- Verify O-rings are properly seated and not pinched or damaged.
- Check for cracks in the quartz sleeve (replace if found).
- Reduced Water Flow:
- This kit does not directly affect water flow. If flow is reduced, check other system components like pre-filters.
For further assistance, consult your Viqua VH150 system manual or contact Viqua customer support.
10. Warranty and Support
Genuine Viqua replacement parts are covered by Viqua's standard warranty. For specific warranty details, please refer to the documentation provided with your original Viqua VH150 system or visit the official Viqua website. For technical support, replacement part inquiries, or warranty claims, please contact Viqua customer service through their official channels.
Viqua Official Website: www.viqua.com


