
1. Introduction
This manual provides essential information for the assembly, safe use, and maintenance of your IDIMEX MIKKA Shoe Cabinet. Designed with a clean, Scandinavian-inspired aesthetic, this shoe cabinet offers a practical and stylish solution for organizing your footwear. Please read these instructions thoroughly before proceeding with assembly or use to ensure proper function and longevity of your product.

Figure 1: Front view of the IDIMEX MIKKA Shoe Cabinet in white/oak, with all four flaps closed.
2. Safety Information
Important: Failure to follow these safety guidelines may result in injury or damage to the product.
- Ensure the shoe cabinet is not overloaded. Overloading can cause instability and lead to tipping.
- The shoe cabinet must be fully and securely assembled according to the provided assembly instructions before use.
- If possible, secure the cabinet to a wall using appropriate hardware (not included) to prevent accidental tipping, especially in households with children or pets.
- Keep small parts and assembly hardware out of reach of children during assembly.
3. Package Contents
Before beginning assembly, verify that all components are present and undamaged. The package typically includes:
- Shoe cabinet panels (sides, top, bottom, back)
- 4 Flaps with integrated shelves
- Leather handles
- Assembly hardware (screws, dowels, etc.)
- Assembly manual
Note: Decorative items shown in product images are not included.
4. Assembly Instructions
The IDIMEX MIKKA Shoe Cabinet is delivered in separate parts for self-assembly. Detailed, step-by-step instructions are provided in the included assembly manual. Please follow these instructions carefully.
4.1 Recommended Tools (Not Included)
- Screwdriver (Phillips head)
- Hammer (for dowels)
- Power drill (optional, for faster screw insertion, use low torque settings)
4.2 Assembly Steps
- Unpack all components and lay them out on a clean, soft surface to prevent scratches.
- Identify each part using the diagrams in the assembly manual.
- Follow the numerical sequence of steps in the assembly manual to connect the panels, install the flaps, and attach the handles.
- Ensure all screws are tightened securely, but do not overtighten to avoid damaging the wood.
- Attach the legs to the base of the cabinet.
- Once assembled, place the cabinet in its desired location. Consider securing it to a wall for added stability.

Figure 2: Dimensions of the assembled IDIMEX MIKKA Shoe Cabinet.
5. Usage Instructions
The IDIMEX MIKKA Shoe Cabinet is designed for efficient shoe storage and organization.
5.1 Storing Shoes
- Each of the four flaps contains two shelves, providing a total of eight storage compartments.
- The cabinet can accommodate up to 24 pairs of shoes, depending on their size and style. It is suitable for shoes up to a maximum size of 43 (EU).
- To access the shelves, gently pull the leather handle on each flap. The flap will tilt forward, revealing the two internal shelves.
- Place shoes neatly on the shelves. For optimal capacity, alternate the direction of shoes (toe-in, toe-out).
- Close the flap by pushing it back into the cabinet until it is flush with the front.
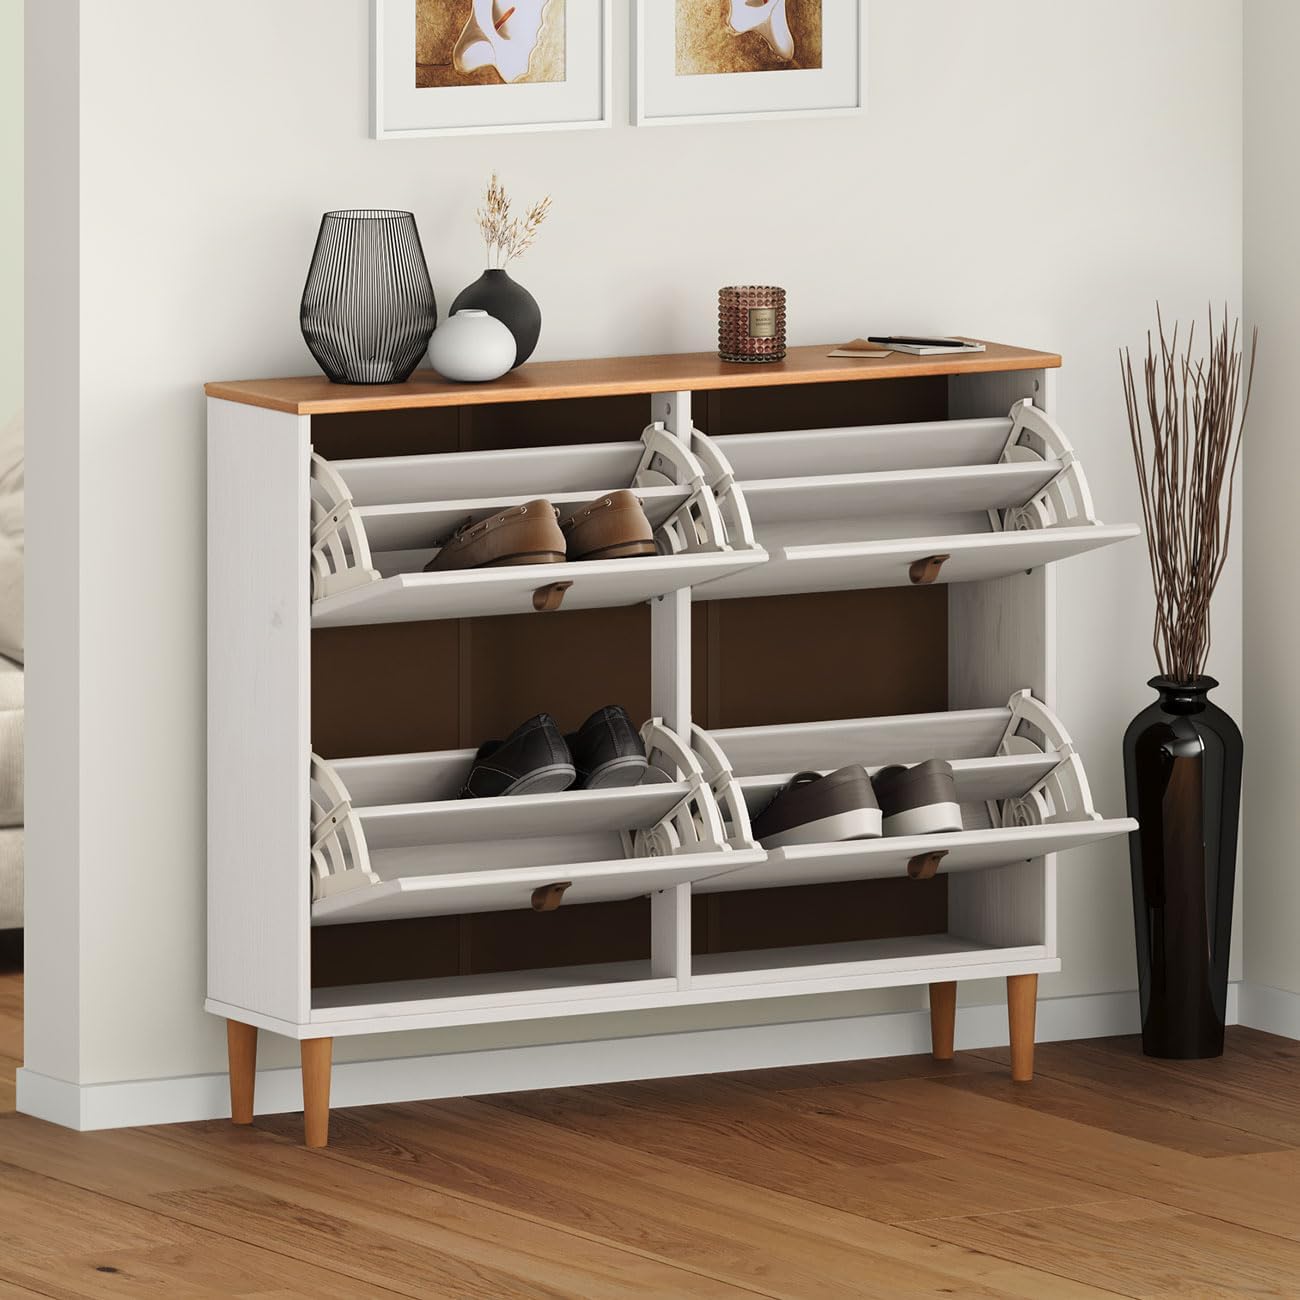
Figure 3: The shoe cabinet with flaps open, demonstrating shoe storage.
5.2 Top Surface Use
The sturdy top surface of the cabinet can be used to place decorative items, keys, or other small belongings, adding functionality to your entryway or room.

Figure 4: Detail of the cabinet's top surface and a leather handle.
6. Maintenance and Care
To ensure the longevity and appearance of your IDIMEX MIKKA Shoe Cabinet, follow these care instructions:
- Cleaning: Wipe the surfaces with a soft, slightly damp cloth. Avoid using harsh chemicals, abrasive cleaners, or excessive moisture, as these can damage the white glazed pine wood finish.
- Spills: Immediately wipe up any spills to prevent staining or water damage.
- Sunlight: Avoid prolonged exposure to direct sunlight, which can cause fading or discoloration of the wood.
- Humidity: Maintain a stable room temperature and humidity level to prevent wood warping or cracking.
- Handles: The leather handles can be cleaned with a dry cloth. Avoid wetting them.
7. Troubleshooting
If you encounter any issues with your shoe cabinet, consider the following:
- Instability: Ensure all assembly hardware is securely tightened. If the cabinet feels wobbly, re-check the assembly steps. Consider anchoring the cabinet to a wall.
- Flaps not closing properly: Check for any obstructions inside the compartments. Ensure shoes are not overfilling the shelves. Verify that the flap mechanisms were installed correctly during assembly.
- Damaged parts: If any parts were damaged upon arrival or during assembly, do not attempt to force them. Contact customer support for replacement parts.
8. Specifications
| Model Name | MIKKA |
| Model Number | 84043 |
| Dimensions (W x H x D) | 107 cm x 92 cm x 25 cm (approx. 42.1 x 36.2 x 9.8 inches) |
| Material | Solid Pine Wood, Leather Handles |
| Color | White / Oak |
| Number of Flaps | 4 |
| Number of Shelves | 8 (2 per flap) |
| Shoe Capacity | Up to 24 pairs (max. EU size 43) |
| Assembly Required | Yes |
| Mounting Type | Floor Mount (Freestanding) |

Figure 5: The IDIMEX MIKKA Shoe Cabinet, showcasing its design and capacity.
9. Warranty and Support
For warranty information, replacement parts, or further assistance, please refer to the contact details provided with your purchase or visit the official IDIMEX website. Keep your proof of purchase for any warranty claims.