1. Introduction
Thank you for choosing the SuperATV Vented Full Rear Windshield for your Polaris Ranger Full-Size 570. This product is designed to enhance your riding experience by providing protection from the elements and controlling airflow within the cab. Please read this manual thoroughly before installation and use to ensure proper fitment, safe operation, and longevity of your windshield.
2. Safety Information
- Always wear appropriate safety gear, including eye protection, during installation.
- Ensure the vehicle is parked on a level surface with the engine off and parking brake engaged before beginning installation.
- Do not overtighten hardware, as this may damage components.
- Regularly inspect the windshield and mounting hardware for any signs of wear or damage. Replace components as necessary.
- This windshield is made from durable polycarbonate, but extreme impacts can still cause damage.
3. Package Contents
Verify that all components are present before beginning installation. The package should include:
- 1x SuperATV Vented Full Rear Windshield (pre-assembled)
- All necessary mounting hardware (clamps, seals, bolts, etc.)
- Installation instructions (this manual)
If any parts are missing or damaged, please contact SuperATV customer support immediately.
4. Setup (Installation)
The SuperATV Vented Full Rear Windshield is designed for a straightforward installation. While it comes pre-assembled with hardware, some steps require careful attention. It is recommended to have a second person assist with the installation.
4.1 Compatibility Notes
- Not compatible with the formed Pro-fit cage. This windshield is designed to work only with the round tube cage.
- Can be used with most soft or hard tops.
4.2 Installation Steps
- Prepare the Vehicle: Park your Polaris Ranger on a flat, stable surface. Turn off the engine and engage the parking brake.
- Position the Windshield: Carefully lift the rear windshield and align it with the rear roll cage of your vehicle.
- Secure the Seals: The windshield features a flexible PVC plastic trim with an attached EPDM rubber bulb seal. Ensure this seal sits tightly against the vehicle's body to prevent water intrusion. Internal metal clips and strong gripping 'tongues' are designed to provide a secure, rattle-free fit.

Figure 1: Detail of the No Leak Seal, showing its components for a tight, waterproof fit.
- Attach Clamps: Utilize the provided lock-tight, high-strength ABS clamps. These clamps are designed to resist impact damage and stay secure. They feature tough rip-stop Velcro straps for a tight, no-rattle fit and a rubberized strap coating to prevent slippage.

Figure 2: Detail of the mounting clamps, illustrating the Velcro straps and ABS construction.
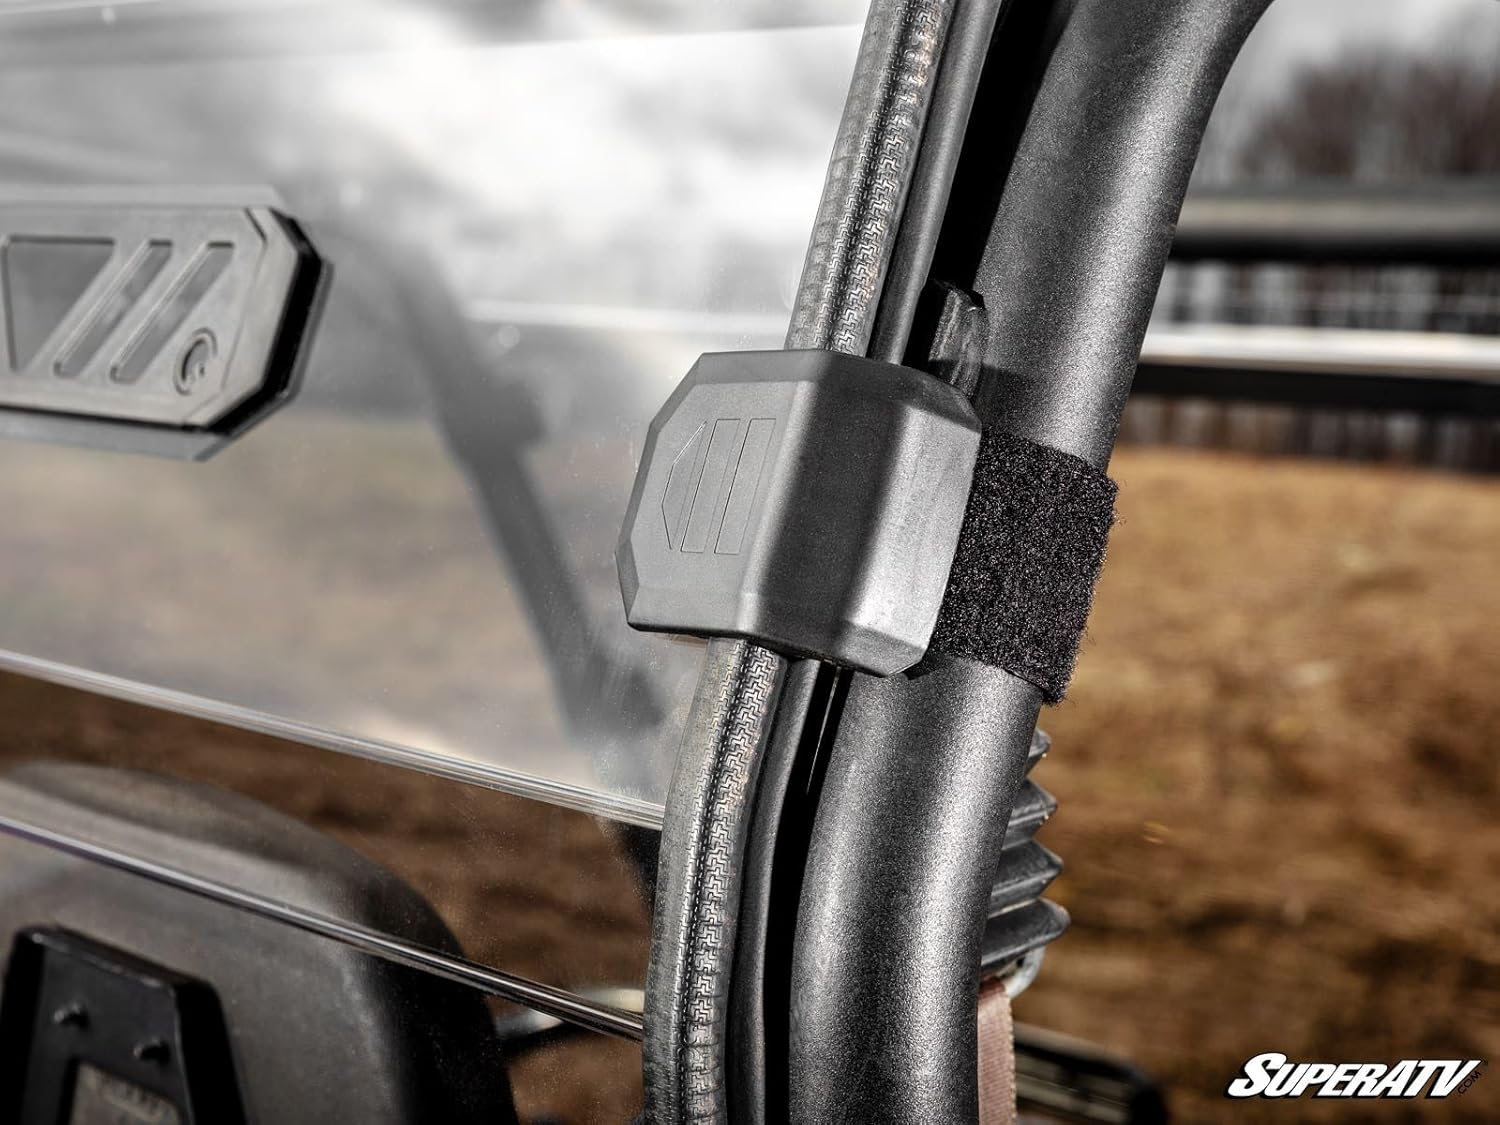
Figure 3: Clamp attached to the roll bar, demonstrating secure fitment.
- Tighten Hardware: Gradually tighten all clamps and hardware. Avoid overtightening. Ensure the windshield is securely mounted and does not rattle.
- Final Check: Once installed, gently push and pull on the windshield to confirm it is stable and all connections are secure.
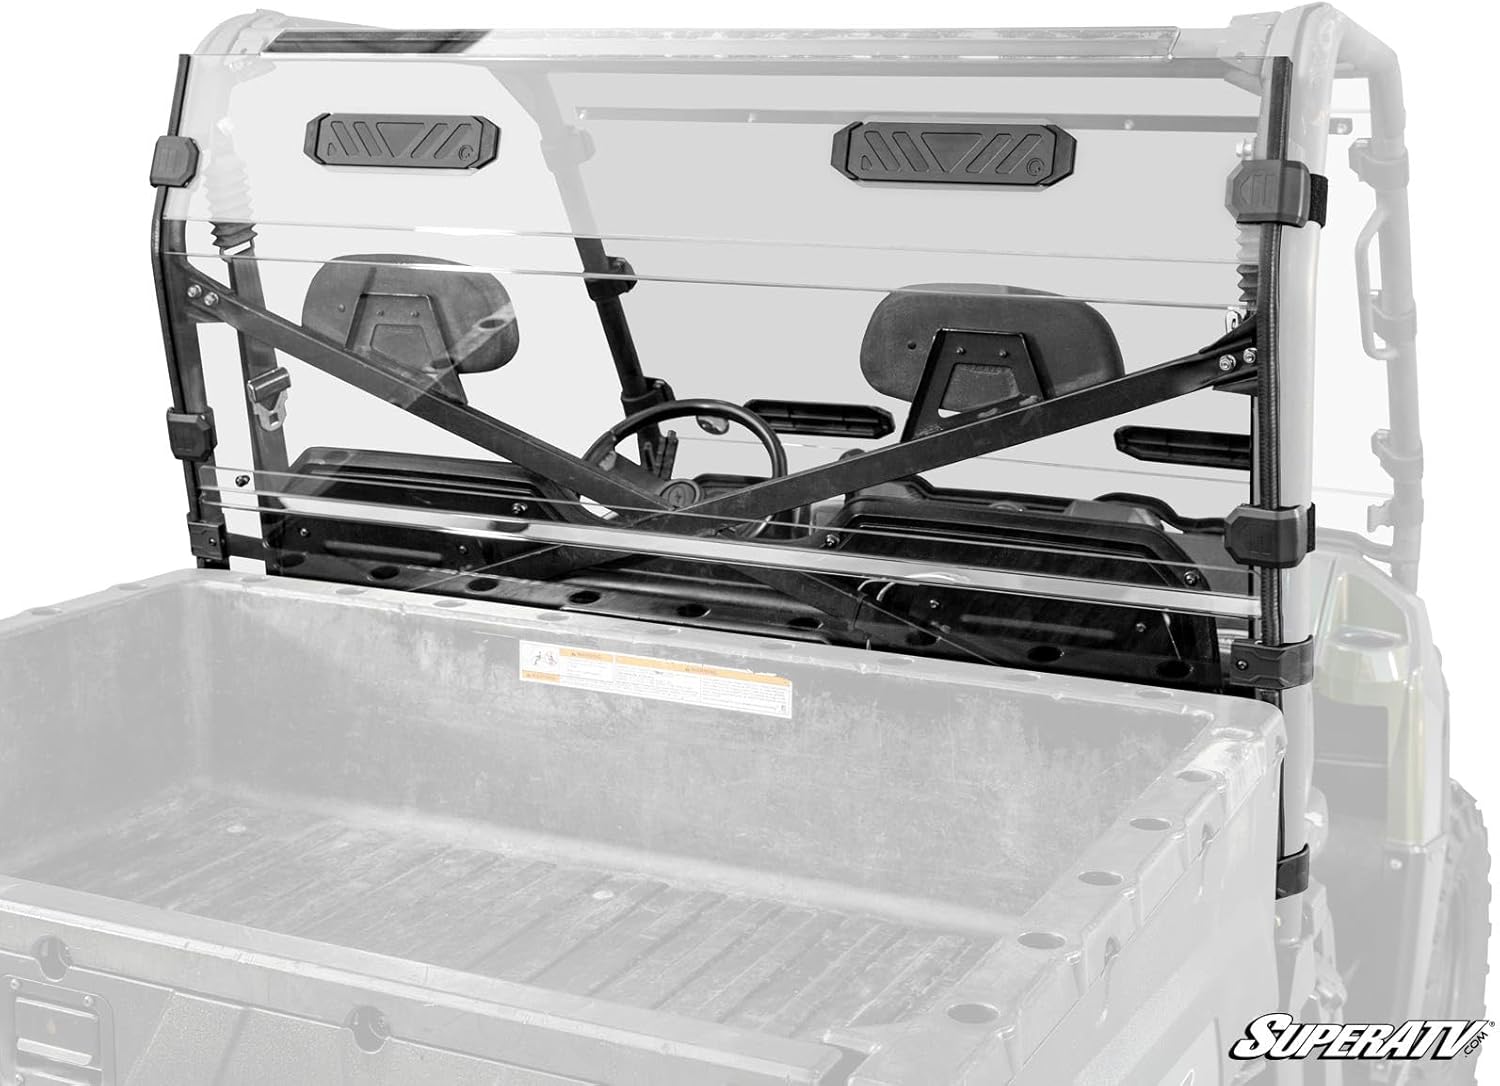
Figure 4: SuperATV Vented Full Rear Windshield installed on a Polaris Ranger, rear view.

Figure 5: Rear view of the Polaris Ranger with the windshield fully installed.
5. Operating the Vents
The SuperATV Vented Full Rear Windshield features integrated BreezeRite vents, allowing you to control airflow within your vehicle's cab.
5.1 Vent Positions
The BreezeRite vents can be adjusted to three distinct positions:
- Open: For maximum airflow, ideal for warmer conditions or when increased ventilation is desired.
- Half-Open: Provides moderate airflow, balancing ventilation with protection from dust or light rain.
- Closed: Blocks airflow completely, offering maximum protection from cold, dust, rain, or debris. This position also helps eliminate the suction effect often experienced with only a front windshield, which can draw in dust and leaves.

Figure 6: Interior view showing the BreezeRite vents on the rear windshield.

Figure 7: Close-up of a BreezeRite vent.

Figure 8: Detail of the BreezeRite vent mechanism.
6. Maintenance
Proper maintenance will extend the life and clarity of your polycarbonate windshield.
- Cleaning: Use a soft cloth or sponge and a mild soap solution (e.g., dish soap and water) to clean the windshield. Avoid abrasive cleaners, brushes, or harsh chemicals (like ammonia-based cleaners) as these can scratch or damage the polycarbonate.
- Rinsing: Rinse thoroughly with clean water to remove all soap residue.
- Drying: Air dry or use a clean, soft microfiber cloth to gently blot dry. Do not wipe vigorously when dry, as this can cause scratches.
- Inspection: Periodically check all mounting hardware for tightness. If any components appear loose or damaged, re-tighten or replace them as needed.
7. Troubleshooting
- Rattling Noise: If you experience rattling, check all mounting clamps and hardware. Ensure they are securely tightened. The rubber bulb seal and gripping tongues are designed to prevent rattling, so verify their proper seating.
- Loose Fit: If the windshield feels loose, re-check the tightness of all clamps. Ensure the Velcro straps are pulled taut and the rubberized coating on the clamps is making full contact with the roll bar.
- Water Leakage: Inspect the rubber bulb seal around the edges of the windshield. Ensure it is properly seated and making full contact with the vehicle's body. If a seal is damaged or missing, contact SuperATV for a replacement.
- Difficulty Installing: Installation can be a tight fit and may require patience. Ensure the windshield is correctly aligned with the roll cage. If specific components like the bottom snap-on roll bar devices are popping out, ensure they are fully engaged or consider additional securing methods if necessary, as noted by some users.
8. Specifications
| Product Dimensions | 154.94 x 60.96 x 17.78 cm |
| Item Weight | 15.9 kg |
| Material | Polycarbonate (PC) |
| Item Thickness | 6.35 Millimeters (1/4") |
| Orientation | Rear |
| Color | Clear |
| Manufacturer Part Number | RWS-P-RAN900-V-75#AC |
| UPC | 197975064998 |
9. Warranty Information
Specific warranty details for SuperATV products are typically provided at the point of purchase or on the manufacturer's official website. Please refer to the SuperATV website or your purchase documentation for comprehensive warranty terms and conditions.
10. Support
For technical assistance, missing parts, or any questions regarding your SuperATV Vented Full Rear Windshield, please contact SuperATV customer support directly. Contact information can typically be found on the SuperATV official website (www.superatv.com).


