
1. Introduction
This manual provides essential instructions for the safe operation, assembly, maintenance, and troubleshooting of your MZK 13-inch 12-Amp 2-in-1 Electric Dethatcher and Scarifier, Model SG2402. This tool is designed to remove thatch and scarify your lawn, promoting healthier grass growth. Please read this manual thoroughly before first use and retain it for future reference.
2. Important Safety Instructions
Always follow basic safety precautions to reduce the risk of fire, electric shock, and personal injury when using this product.
- Read All Instructions: Familiarize yourself with the controls and proper use of the equipment.
- Personal Protective Equipment: Always wear safety glasses or goggles, hearing protection, and sturdy footwear. Long pants are recommended.
- Electrical Safety: Ensure the power cord is in good condition and avoid cutting or damaging it. Use a grounded outlet and an appropriate extension cord for outdoor use. Keep the cord clear of the working area.
- Clear Work Area: Before starting, clear the area of any objects that could be thrown by the blades, such as rocks, sticks, or toys.
- Keep Bystanders Away: Do not allow children or pets near the operating machine.
- Unplug When Not in Use: Always disconnect the power supply before cleaning, adjusting, or servicing the unit.

Image: Close-up of the power cord connection, designed for secure and waterproof protection to maintain plug connection during operation.
3. Product Components
The MZK 2-in-1 Electric Dethatcher and Scarifier includes the following main components:
- Main Motor Unit
- Upper Handle Assembly
- Lower Handle Assembly
- Dethatcher Rotor (with spring tines)
- Scarifier Rotor (with rigid blades)
- 8-Gallon Collection Bag
- Power Cord with Secure Connection
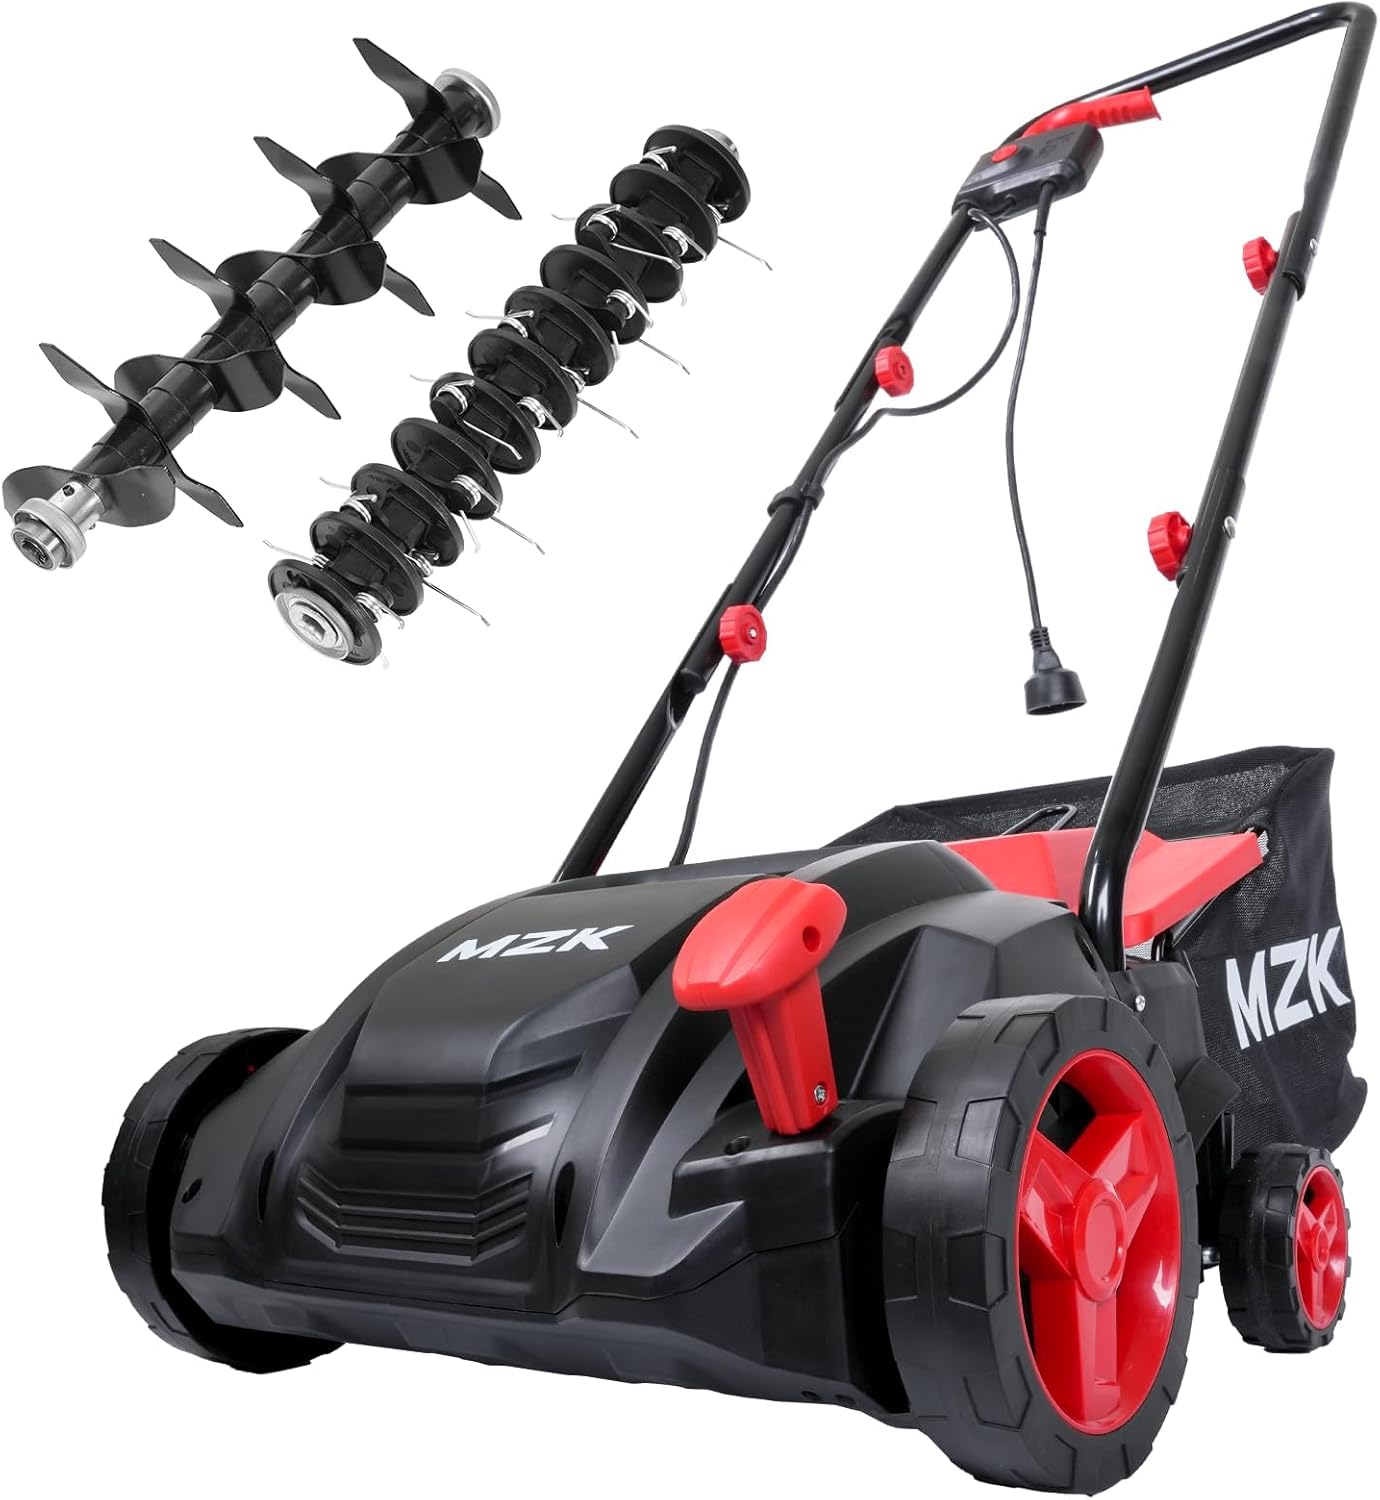
Image: The MZK 2-in-1 Electric Dethatcher and Scarifier, showcasing the main unit along with the interchangeable dethatcher and scarifier rotors.
4. Setup and Assembly
Follow these steps to assemble your dethatcher/scarifier:
- Handle Assembly: Attach the lower handle to the main unit, then connect the upper handle to the lower handle using the provided knobs and bolts. Ensure all connections are secure.
- Rotor Installation: The unit comes with two interchangeable rotors: a dethatcher rotor with spring tines and a scarifier rotor with rigid blades. Choose the appropriate rotor for your task. To install, ensure the machine is unplugged. Open the cover, align the rotor with the shaft, and secure it according to the instructions in the manual.
- Collection Bag Attachment: Hook the 8-gallon collection bag onto the designated brackets at the rear of the unit. Ensure it is securely fastened to prevent debris from escaping.

Image: A user installing one of the interchangeable rotors into the machine's housing.

Image: The MZK dethatcher/scarifier with the 8-gallon collection bag attached, ready for use.
5. Operating Instructions
5.1 Starting the Machine
The MZK dethatcher/scarifier features a two-step easy start mechanism for safety:
- Press and hold the safety button.
- Squeeze the bail switch lever towards the handle. Release the safety button once the motor starts.
To stop the machine, release the bail switch lever.

Image: Illustration of the two-step easy start process on the handle for safe operation.
5.2 Depth Adjustment
The unit offers four levels of digging depth adjustment to suit various lawn conditions and seasons. The adjustment lever is located on the side of the main unit.
- Level 0: 0.16 inches (highest setting, for light dethatching or transport)
- Level 1: -0.16 inches
- Level 2: -0.31 inches
- Level 3: -0.47 inches (lowest setting, for aggressive dethatching or scarifying)
Select a higher setting for lighter work or new lawns, and a lower setting for dense thatch or scarifying. Always test on a small area first.

Image: Visual guide to the 4-position depth adjustment, illustrating different settings for varying lawn conditions.
5.3 Dethatching vs. Scarifying
The 2-in-1 design allows you to switch between dethatching and scarifying modes by changing the rotor.
- Dethatching: Uses the spring tines to gently rake and remove loose thatch from the surface of the lawn. This is typically done in spring or early fall.
- Scarifying: Uses the rigid blades to cut into the soil, removing dense thatch and aerating the lawn. This is a more aggressive process, usually performed once a year on heavily thatched lawns.

Image: A visual comparison of the dethatching rotor (top) and the scarifying rotor (bottom), highlighting their distinct blade types for different lawn care tasks.
5.4 Operation Tips
- Cord Management: Always be aware of the power cord's position to avoid cutting it. Work away from the power outlet.
- Working Pattern: For best results, work in straight, overlapping lines across your lawn. Avoid stopping in one place for too long.
- Empty Collection Bag: Regularly check and empty the 8-gallon collection bag to maintain optimal performance and prevent clogging.
6. Maintenance and Storage
6.1 Cleaning
After each use, ensure the unit is unplugged and clean the housing, rotors, and collection bag. Remove any grass clippings or debris from the blades and air vents. Do not use water directly on the motor unit.
6.2 Blade Inspection and Replacement
Regularly inspect the dethatcher tines and scarifier blades for wear or damage. Worn or damaged blades can reduce performance and potentially cause injury. Replace them as needed, following the instructions in the full product manual.
6.3 Storage
Store the dethatcher/scarifier in a dry, secure location, out of reach of children. The handles are designed to fold for convenient storage, reducing the overall footprint of the unit.

Image: The MZK dethatcher/scarifier demonstrating its folding handles for convenient and space-saving storage.
7. Troubleshooting
If you encounter issues with your MZK dethatcher/scarifier, refer to the following common problems and solutions:
| Problem | Possible Cause | Solution |
|---|---|---|
| Machine does not start | No power, safety button not pressed, bail switch not engaged. | Check power connection, ensure safety button is pressed before engaging bail switch. |
| Poor dethatching/scarifying performance | Incorrect depth setting, worn blades/tines, clogged collection bag. | Adjust depth, inspect and replace blades/tines, empty collection bag. |
| Excessive vibration | Damaged or unbalanced rotor. | Stop machine immediately, unplug, inspect rotor for damage. Contact support if necessary. |
For issues not listed here, please contact MZK customer support.
8. Technical Specifications
| Specification | Detail |
|---|---|
| Brand | MZK |
| Model Number | SG2402 |
| Power Source | AC Corded Electric |
| Motor | 12 Amp |
| Cutting Width | 13 Inches |
| Operation Mode | Manual Push |
| Product Dimensions | 10"D x 13"W x 26"H |
| Adjustable Cutting Height | 4-Position (-0.47 to 0.16 Inches) |
| Item Weight | 25.4 pounds |
| Collection Bag Capacity | 8 Gallons |
9. Warranty and Support
MZK is committed to providing quality products and customer satisfaction. If you have any questions, concerns, or require assistance with your MZK 13-inch 12-Amp 2-in-1 Electric Dethatcher and Scarifier, please contact MZK customer support. Refer to your product packaging or the MZK official website for specific warranty details and contact information.
You can visit the official MZK store for more information: MZK Store on Amazon