
Bofypoo DC308
Bofypoo DC308 Autofocus 4K Digital Camera User Manual
Model: DC308
Introduction
This manual provides comprehensive instructions for the operation and maintenance of your Bofypoo DC308 Autofocus 4K Digital Camera. Please read this manual thoroughly before using the camera to ensure proper handling and optimal performance. Keep this manual for future reference.
Safety Information
- Do not expose the camera to water or moisture. This camera is not water resistant.
- Avoid direct sunlight or high temperatures, which can damage internal components.
- Use only specified batteries and charging accessories.
- Keep out of reach of children.
- Do not attempt to disassemble or repair the camera yourself. Refer to qualified service personnel.
- Clean the lens and screen with a soft, lint-free cloth.
What's in the Box
Verify that all items are present upon unboxing:
- Bofypoo DC308 Camera Body
- Lithium Ion Battery
- USB Type-C Cable
- User Manual (this document)
- Other standard accessories (e.g., wrist strap, lens cap if applicable)
Product Overview
Familiarize yourself with the main components of your DC308 camera.
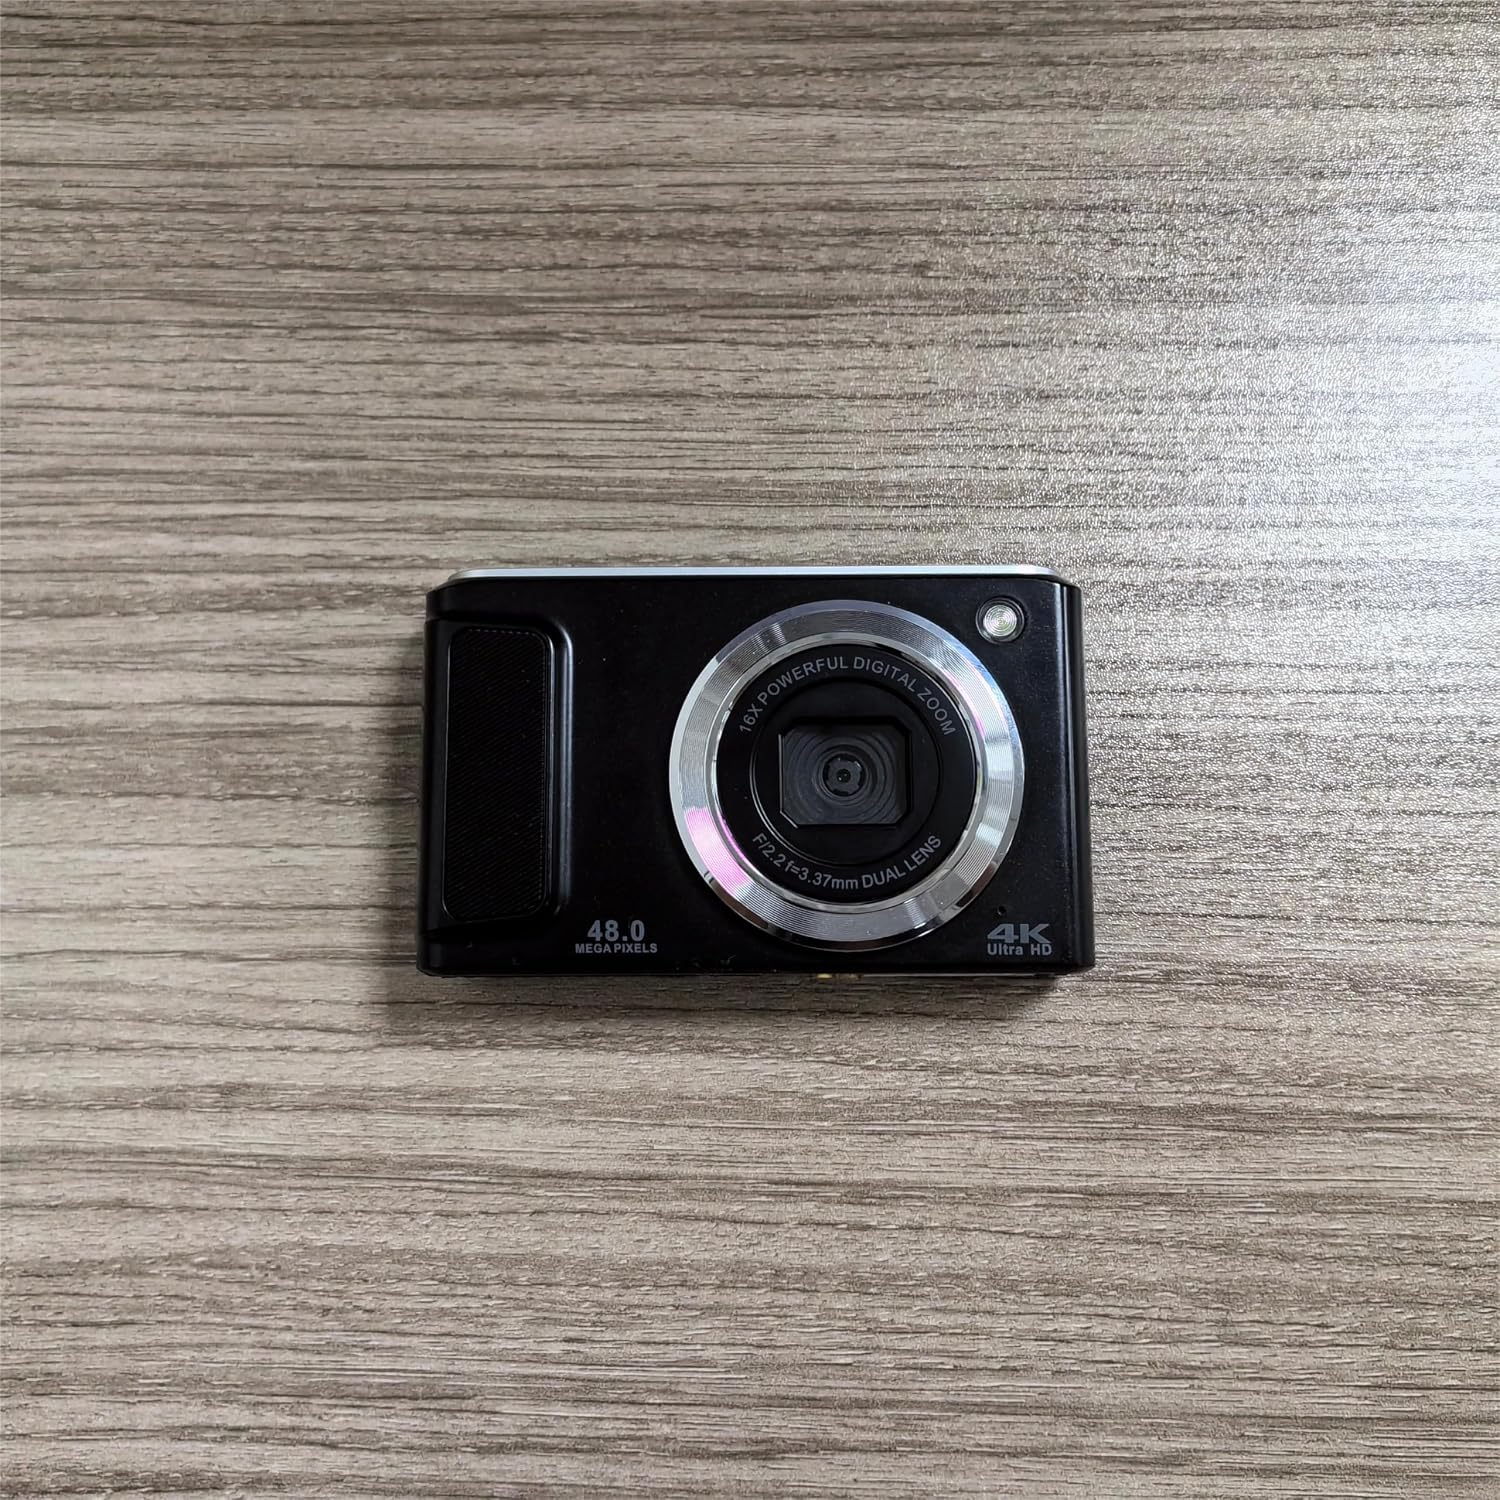
Figure 1: Front view of the Bofypoo DC308 Autofocus 4K Digital Camera. The camera is black with a prominent silver ring around the lens. Markings visible include "48.0 MEGA PIXELS", "16X POWERFUL DIGITAL ZOOM", "F/2.2 f=3.37mm DUAL LENS", and "4K Ultra HD".
Key Components:
- Lens: Captures images and video. Features F/2.2 aperture and 3.37mm focal length.
- Flash: Provides illumination in low-light conditions (Note: Product specifications indicate "no flash" for camera flash, but a small light is visible near the lens in the image, which might be an AF assist lamp or indicator).
- Display Screen: 2.8-inch color screen for viewing menus, photos, and videos.
- Power Button: Turns the camera on/off.
- Shutter Button: Press to take photos.
- Zoom Lever: Controls the 16x digital zoom.
- Mode Dial/Button: Selects shooting modes (e.g., Photo, Video, Playback).
- Navigation Buttons: For menu navigation and setting adjustments.
- USB Type-C Port: For charging and data transfer.
- Battery Compartment: Houses the Lithium Ion battery.
- Memory Card Slot: For inserting an SD card (not included).
Setup
1. Battery Installation and Charging
- Open the battery compartment cover located at the bottom of the camera.
- Insert the provided Lithium Ion battery, ensuring the correct orientation as indicated inside the compartment.
- Close the battery compartment cover securely.
- Connect the camera to a power source using the supplied USB Type-C cable. The charging indicator light will illuminate.
- Charge the battery fully before first use (approximately 2-3 hours). The indicator light will change or turn off when charging is complete.
2. Memory Card Installation
The camera requires an SD card (not included) to store photos and videos.
- Locate the memory card slot, usually near the battery compartment.
- Insert a compatible SD card (up to 128GB recommended) with the metal contacts facing the correct direction, until it clicks into place.
- To remove, gently push the card in until it springs out.
3. Initial Power On and Date/Time Setting
- Press and hold the Power button to turn on the camera.
- Upon first power-on, you may be prompted to set the date and time. Use the navigation buttons to adjust the values and confirm.
Operating the Camera
1. Taking Photos (Still Mode)
- Turn on the camera. Ensure it is in Photo mode (usually indicated by an icon on the screen).
- Frame your shot using the display screen.
- The camera features Auto Focus. Half-press the shutter button to allow the camera to focus on your subject. A focus indicator will appear on the screen.
- Fully press the shutter button to capture the 48-megapixel image.
- Use the zoom lever to adjust the 16x digital zoom as needed.
2. Recording Videos (Video Mode)
- Switch the camera to Video mode.
- Frame your video. The camera supports 4K (2160p) video resolution.
- Press the shutter button (or dedicated record button if present) to start recording. A recording indicator will appear.
- Press the button again to stop recording.
3. Playback Mode
- Switch the camera to Playback mode.
- Use the navigation buttons to browse through your captured photos and videos.
- Press the OK/Enter button to view a video or zoom into a photo.
4. Connecting to a Computer/Smartphone
You can transfer photos and videos to a computer or compatible smartphone using the USB Type-C cable.
- Ensure the camera is turned on.
- Connect one end of the USB Type-C cable to the camera's port and the other end to your computer or smartphone.
- The camera should appear as a removable disk or media device on your computer/smartphone.
- Access the camera's storage to copy files.
5. Wi-Fi Connectivity
The camera supports Wi-Fi for wireless transfer or remote control (specific app details not provided, refer to camera screen for QR code or app name).
- Navigate to the Wi-Fi settings in the camera's menu.
- Enable Wi-Fi. The camera may display an SSID and password, or a QR code.
- On your smartphone or tablet, connect to the camera's Wi-Fi network.
- Open the dedicated camera app (if applicable) to transfer files or control the camera remotely.
Maintenance
1. Cleaning the Camera
- Lens: Use a soft, lint-free microfiber cloth specifically designed for camera lenses. Gently wipe in a circular motion. For stubborn smudges, use a small amount of lens cleaning solution on the cloth, not directly on the lens.
- Body: Wipe the camera body with a soft, dry cloth. Do not use strong detergents or solvents.
- Screen: Use a soft, dry cloth. Avoid pressing too hard.
2. Battery Care
- Charge the battery fully before extended storage.
- Store batteries in a cool, dry place.
- Do not expose batteries to extreme temperatures.
- If the camera will not be used for a long period, remove the battery.
3. Storage
When not in use, store the camera in a dry, dust-free environment, preferably in a camera bag or case to protect it from impacts and scratches.
Troubleshooting
| Problem | Possible Cause | Solution |
|---|---|---|
| Camera does not turn on. | Battery is depleted or not inserted correctly. | Charge the battery fully. Reinsert the battery correctly. |
| Cannot take photos/videos. | Memory card is full, not inserted, or corrupted. | Insert a memory card. Delete unnecessary files. Format the card (this will erase all data). |
| Images are blurry. | Lens is dirty. Camera is not focusing. Insufficient light. | Clean the lens. Ensure the camera has time to autofocus (half-press shutter). Use adequate lighting. |
| Camera freezes or becomes unresponsive. | Software glitch. | Remove the battery for a few seconds, then reinsert and restart. |
| Cannot connect to computer. | Incorrect cable or port. Driver issue. | Ensure correct USB Type-C cable is used. Try a different USB port on the computer. Restart both devices. |
Specifications
| Feature | Detail |
|---|---|
| Brand | Bofypoo |
| Model Name | DC308 |
| Effective Still Resolution | 48 MP |
| Video Resolution | 2160p (4K) |
| Zoom Type | Digital Zoom (16x Powerful Digital Zoom) |
| Focus Type | Auto Focus (Contrast Detection) |
| Display Size | 2.8 Inches |
| Connectivity Technology | Type C, Wi-Fi |
| Photo Sensor Size | 1/2.7-inch |
| Photo Sensor Technology | CMOS |
| Supported File Format | RAW, JPEG, MP4 (Video) |
| Exposure Control Type | Automatic |
| Battery Type | Lithium Ion |
| Water Resistance Level | Not Water Resistant |
| Frame Rate | 24, 30, 60 FPS (for video) |
| Mount Type | Tripod, Monopod |
| UPC | 755560814580 |
Warranty and Support
Your Bofypoo DC308 camera comes with a standard manufacturer's warranty. Please refer to the warranty card included in your packaging for specific terms and conditions, including warranty period and coverage details.
For technical support, troubleshooting assistance beyond this manual, or warranty claims, please contact Bofypoo customer service through the contact information provided on the product packaging or the official Bofypoo website.
Ask a question about this manual
Ask about setup, troubleshooting, compatibility, parts, safety, or missing instructions. Manuals+ will review the question and use this page’s manual context to help answer it.