
Ohniyou 72" Ceiling Fan with Light and Remote
Instruction Manual
1. Introduction
Thank you for choosing the Ohniyou 72" Ceiling Fan. This large indoor/outdoor ceiling fan is designed to provide powerful and quiet air circulation with its 8-blade design and energy-efficient DC motor. Featuring an integrated LED light with adjustable color temperatures and convenient remote control, this fan offers year-round comfort and smart functionality for various spaces.
Please read this manual thoroughly before installation and operation to ensure proper use and safety. Keep this manual for future reference.
2. Key Features
- Large Coverage & Dual-Finish Blades: 72-inch fan with 8 dual-finish wood blades (classic black and farmhouse oak) for expansive air circulation in medium to large indoor or covered outdoor spaces.
- Quiet & Energy-Efficient DC Motor: Operates at less than 30 dB with 6 adjustable speeds. Reversible motor for summer and winter use, offering enhanced stability and energy efficiency compared to traditional AC motors.
- Convenient & Smart Controls: Includes a remote control with a wall bracket. Features a memory function for last selected speed and light color, and seamless operation with wall switches.
- Adjustable LED Light: Integrated energy-efficient LED light with 3 color temperatures (3000K warm, 4500K natural, 6000K cool) and a 1/2/4-hour timer function.
- Hassle-Free Installation: Comes with 8" and 20" downrods for various ceiling heights. Compatible with concrete and wood ceilings, and sloped ceilings up to 15°.

Figure 2.1: Overview of Ohniyou 72-inch ceiling fan features.

Figure 2.2: The fan operates quietly at less than 30dB, ensuring a peaceful environment.
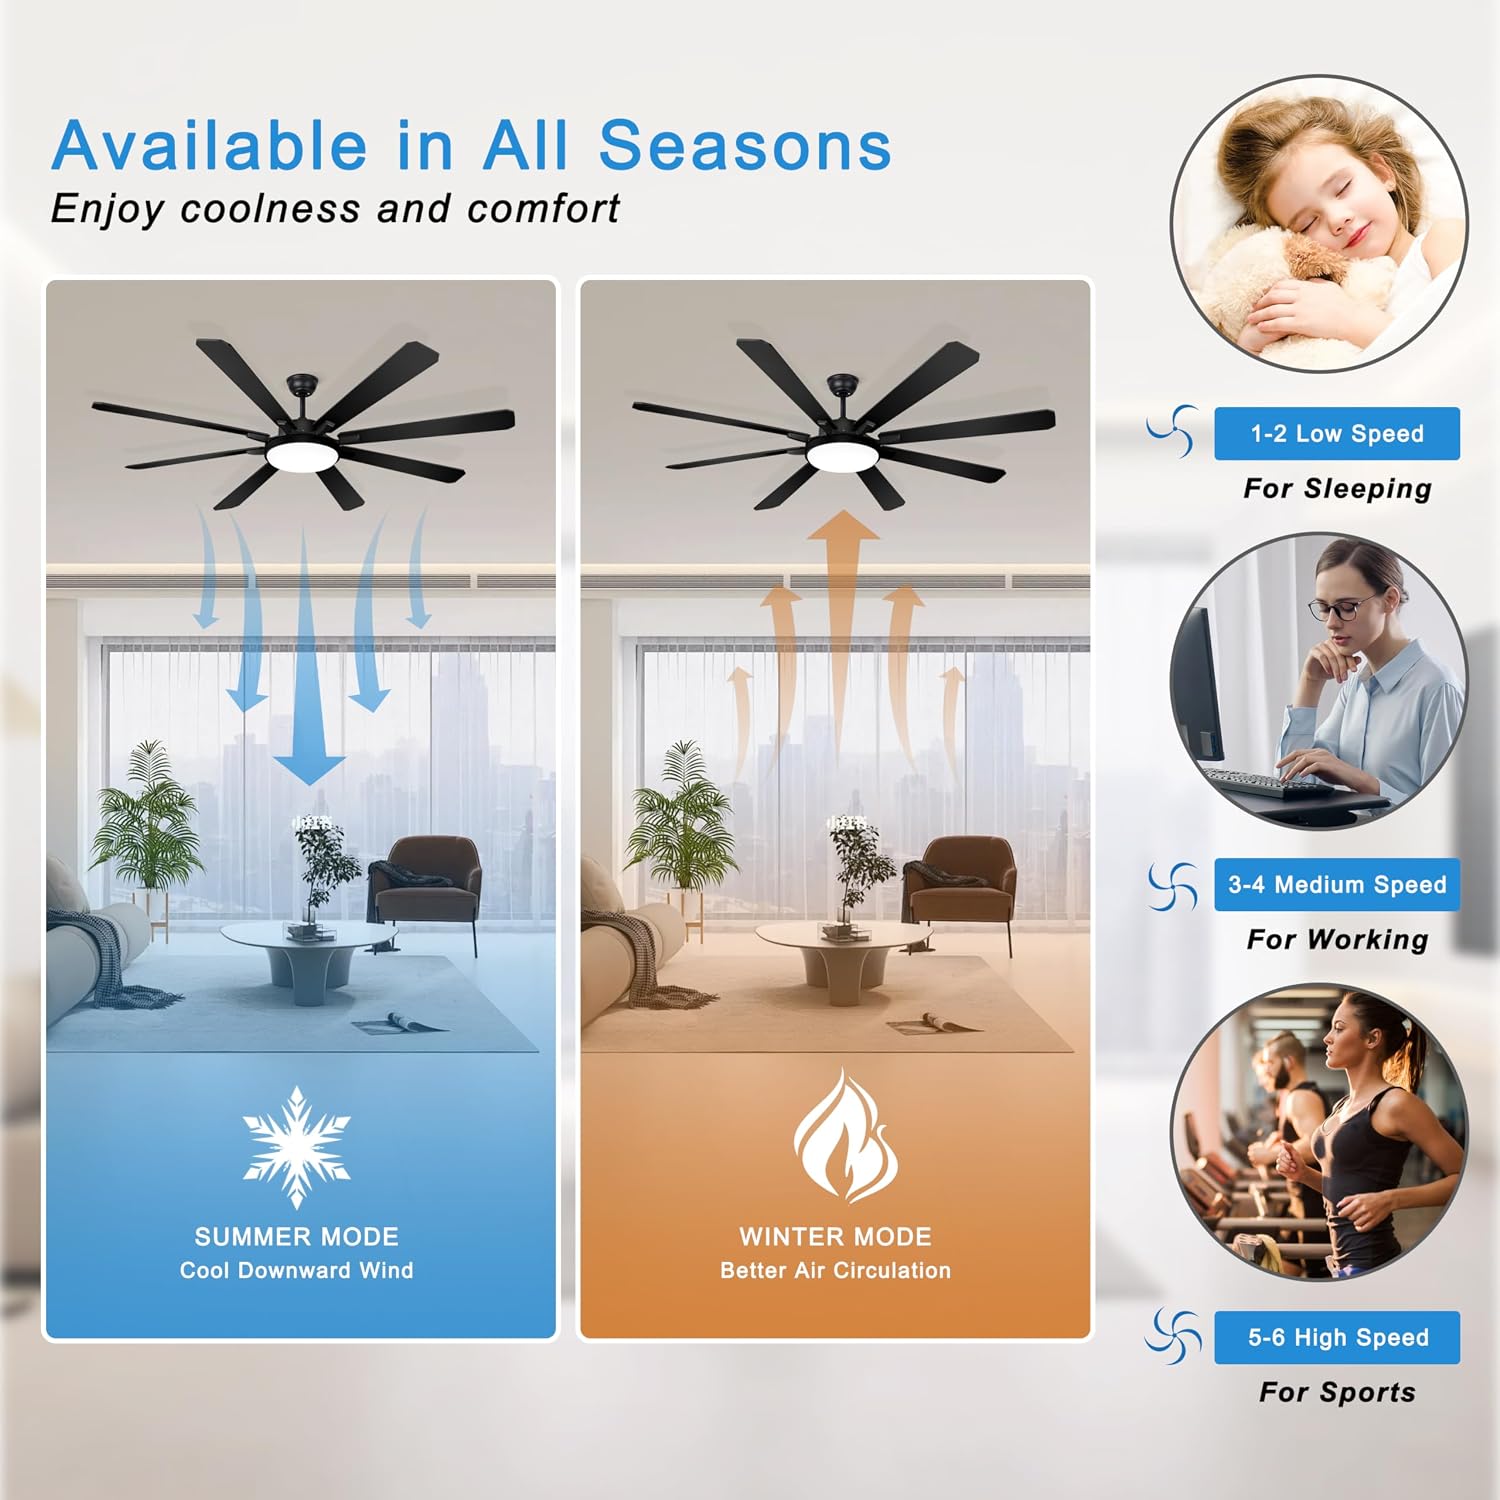
Figure 2.3: Fan modes for all seasons and recommended speed settings.
3. Package Contents
Please check the package contents carefully to ensure all parts are present and undamaged. If any parts are missing or damaged, please contact customer support.
- Ceiling Fan Motor Housing with Integrated LED Light
- Fan Blades (8 pieces, dual-finish)
- Remote Control
- Wall Bracket for Remote Control
- Downrods (8-inch and 20-inch)
- Mounting Hardware Kit (screws, washers, wire nuts, etc.)
- Instruction Manual

Figure 3.1: Key components included in the package.
4. Safety Information
To reduce the risk of fire, electric shock, or personal injury, please follow these important safety instructions:
- Always turn off power at the main circuit breaker before installation or servicing.
- All electrical connections must be in accordance with local codes, ordinances, and the National Electrical Code. If you are unfamiliar with proper electrical wiring, seek the services of a qualified electrician.
- The mounting structure must be capable of supporting the weight of the fan (approximately 6.35 kg).
- Ensure there is adequate clearance between the fan blades and any obstacles, including walls and furniture. A minimum clearance of 7 feet from the floor to the bottom of the fan blades is recommended.
- Do not operate the fan with damaged wiring or if the fan is visibly damaged.
- Do not insert objects into the path of the fan blades while the fan is operating.
- This fan is suitable for damp locations (covered outdoor areas) but should not be exposed directly to water.
5. Installation and Setup
Follow these steps for proper installation of your Ohniyou ceiling fan. It is recommended to have two people for installation.
- Prepare the Mounting Location: Ensure the electrical box is securely mounted to the building structure and can support the fan's weight. Turn off power at the circuit breaker.
- Assemble the Downrod: Choose either the 8-inch or 20-inch downrod based on your ceiling height. Feed the fan wires through the downrod.
- Attach Fan Blades: Securely attach the 8 fan blades to the motor housing. Ensure they are firmly fastened.
- Mount the Fan: Lift the fan assembly and attach it to the mounting bracket previously installed on the ceiling electrical box. Make sure all connections are secure.
- Wire Connections: Connect the electrical wires according to the wiring diagram provided in the separate wiring guide (if applicable) or standard electrical practices (Live to Live, Neutral to Neutral, Ground to Ground).
- Install LED Light: Connect the LED light assembly to the fan motor housing and secure it.
- Final Checks: Double-check all connections and ensure the fan is securely mounted before restoring power.
This fan can be mounted on sloped ceilings up to 15 degrees. Ensure the mounting bracket is compatible with sloped ceiling installation.

Figure 5.1: Downrod options and sloped ceiling compatibility.
6. Operation
Your Ohniyou ceiling fan is operated using the included remote control. It also works seamlessly with a standard wall switch.
6.1 Remote Control Functions

Figure 6.1: Remote control layout and functions.
- Power ON/OFF: Press the 'Fan OFF' button to turn the fan off. Press any speed button to turn it on.
- Fan Speed: Select from 6 speeds using the dedicated speed buttons (1-6).
- Light ON/OFF: Press the 'LIGHT ON/OFF' button to toggle the light.
- Light Color Temperature: Cycle through 3000K (Warm Light), 4500K (Natural White), and 6000K (Cool White) by pressing the light color button.
- Timer Function: Set the fan to turn off automatically after 1, 2, or 4 hours using the '1H', '2H', '4H' buttons.
- Wind Direction (Reversible Motor): Use the 'Wind Reverse' button to change the direction of the fan blades.
- Summer Mode: Downward airflow creates a cooling effect.
- Winter Mode: Upward airflow circulates warm air trapped near the ceiling. - Natural Wind: Activates a mode that simulates natural breezes by varying fan speed.
- Memory Function: The fan remembers your last selected speed and light color settings even after a power outage or when turned off by a wall switch.

Figure 6.2: Utilizing the fan's timing function for convenience.

Figure 6.3: Adjusting the LED light color temperature to suit your mood or activity.
7. Maintenance
Regular maintenance will help prolong the life and performance of your ceiling fan.
- Cleaning: To clean the fan, wipe with a soft, damp cloth. Do not use abrasive cleaners or solvents, as they may damage the finish. Ensure the fan is completely dry before operating.
- Blade Cleaning: Dust the fan blades regularly to prevent dust buildup, which can affect performance and balance.
- Tighten Fasteners: Periodically check all screws and fasteners on the fan and mounting hardware to ensure they are tight. Loose connections can cause noise or wobble.
- LED Light: The integrated LED light is designed for long-lasting use and typically does not require replacement.
Always turn off power at the circuit breaker before performing any cleaning or maintenance.
8. Troubleshooting
If you experience issues with your fan, refer to the following troubleshooting guide:
| Problem | Possible Cause | Solution |
|---|---|---|
| Fan does not start | No power to the fan; Loose wire connections; Remote control battery low/dead. | Check circuit breaker; Ensure all wire connections are secure; Replace remote control batteries. |
| Fan makes excessive noise | Loose screws on fan blades or mounting; Fan not properly balanced; Motor issue. | Tighten all screws; Check blade balance (balancing kit may be needed); Contact customer support if motor noise persists. |
| Fan wobbles | Loose mounting bracket; Unbalanced blades; Downrod not seated correctly. | Ensure mounting bracket is secure; Check and balance blades; Verify downrod is properly installed. |
| Light does not work | Loose wire connection to light kit; LED driver issue; Light switch off. | Check light kit wiring; Ensure light switch is on; Contact customer support if LED light fails. |
| Remote control not working | Low/dead batteries; Remote not paired; Obstruction between remote and receiver. | Replace batteries; Refer to pairing instructions (if applicable); Ensure clear line of sight. |
9. Specifications
| Attribute | Value |
|---|---|
| Brand | Ohniyou |
| Model Number | GLX094 |
| Colour | Black |
| Product Dimensions | 182.88 x 182.88 x 71.12 cm (72 x 72 x 28 inches) |
| Item Weight | 6.35 kg (14 lbs) |
| Power/Wattage | 55 watts |
| Voltage | 110 Volts |
| Material | Metal, Wood |
| Noise Level | 30 dB |
| Auto shut-off | Yes (Timer Function) |
| Mounting Type | Ceiling Mount |
| Controller Type | Remote Control |
| Date First Available | Feb. 25 2025 |
10. Warranty and Support
For warranty information or technical support, please contact Ohniyou customer service. Keep your purchase receipt as proof of purchase.
- Brand: Ohniyou
- Model: GLX094
- ASIN: B0D3JY43M7
For the most up-to-date support information, please visit the official Ohniyou website or contact their customer service directly.