Introduction
This manual provides detailed instructions for the safe and effective use of your Orion Motor Tech 31pc Master Coolant Pressure Tester Kit. This comprehensive kit is designed for identifying leaks in automotive cooling systems and for efficient vacuum refilling of radiators, ensuring optimal performance and longevity of your vehicle's cooling system.

Figure 1: The Orion Motor Tech 31pc Master Coolant Pressure Tester Kit, showcasing the full set of tools and adapters within its durable blue carrying case, along with detailed views of the pressure and vacuum gauges.
Safety Information
Always observe the following safety precautions when using the coolant pressure tester kit:
- Wear appropriate personal protective equipment (PPE), including safety glasses and gloves, to protect against splashes of hot coolant.
- Ensure the engine is cool before performing any tests on the cooling system. Hot coolant and pressurized systems can cause severe burns.
- Do not exceed the recommended pressure for your vehicle's cooling system, typically indicated on the radiator cap. Over-pressurizing can damage components.
- Keep the work area well-ventilated.
- Keep children and pets away from the work area.
- Dispose of old coolant responsibly according to local regulations.
Package Contents
Your Orion Motor Tech Coolant Pressure Tester Kit includes the following components:
- 22 x Radiator Adapters
- 1 x Universal Adapter
- 1 x Manual Vacuum Pump
- 1 x Vacuum Purge & Refill Tool
- 1 x Probe Thermometer
- 1 x Filling Hose
- 1 x Exhaust Hose
- 17 x O-Rings
- 1 x European Air Intake Joint
- 1 x American Air Intake Joint
- 1 x Wrench
- 1 x Instructions (this manual)

Figure 2: A visual representation of all components included in the 31-piece kit, neatly arranged to show the various adapters, tools, and accessories.
Setup
Before beginning any testing or refilling procedures, ensure all components are clean and free from debris. Identify the correct adapter for your vehicle's radiator or expansion tank. The adapters are color-coded and have molded size markings for easy identification.
- Adapter Selection: Refer to the compatibility chart (if provided separately or in the detailed product description) or test fit the adapters to find the one that creates a secure seal on your vehicle's radiator neck or expansion tank.
- Tool Assembly: For pressure testing, connect the selected adapter to the manual vacuum pump. For vacuum refilling, connect the selected adapter to the vacuum purge & refill tool. Ensure all connections are tight to prevent air leaks.
- O-Rings: Periodically inspect O-rings for wear or damage. Replace them as needed using the included spare O-rings to maintain a tight seal.
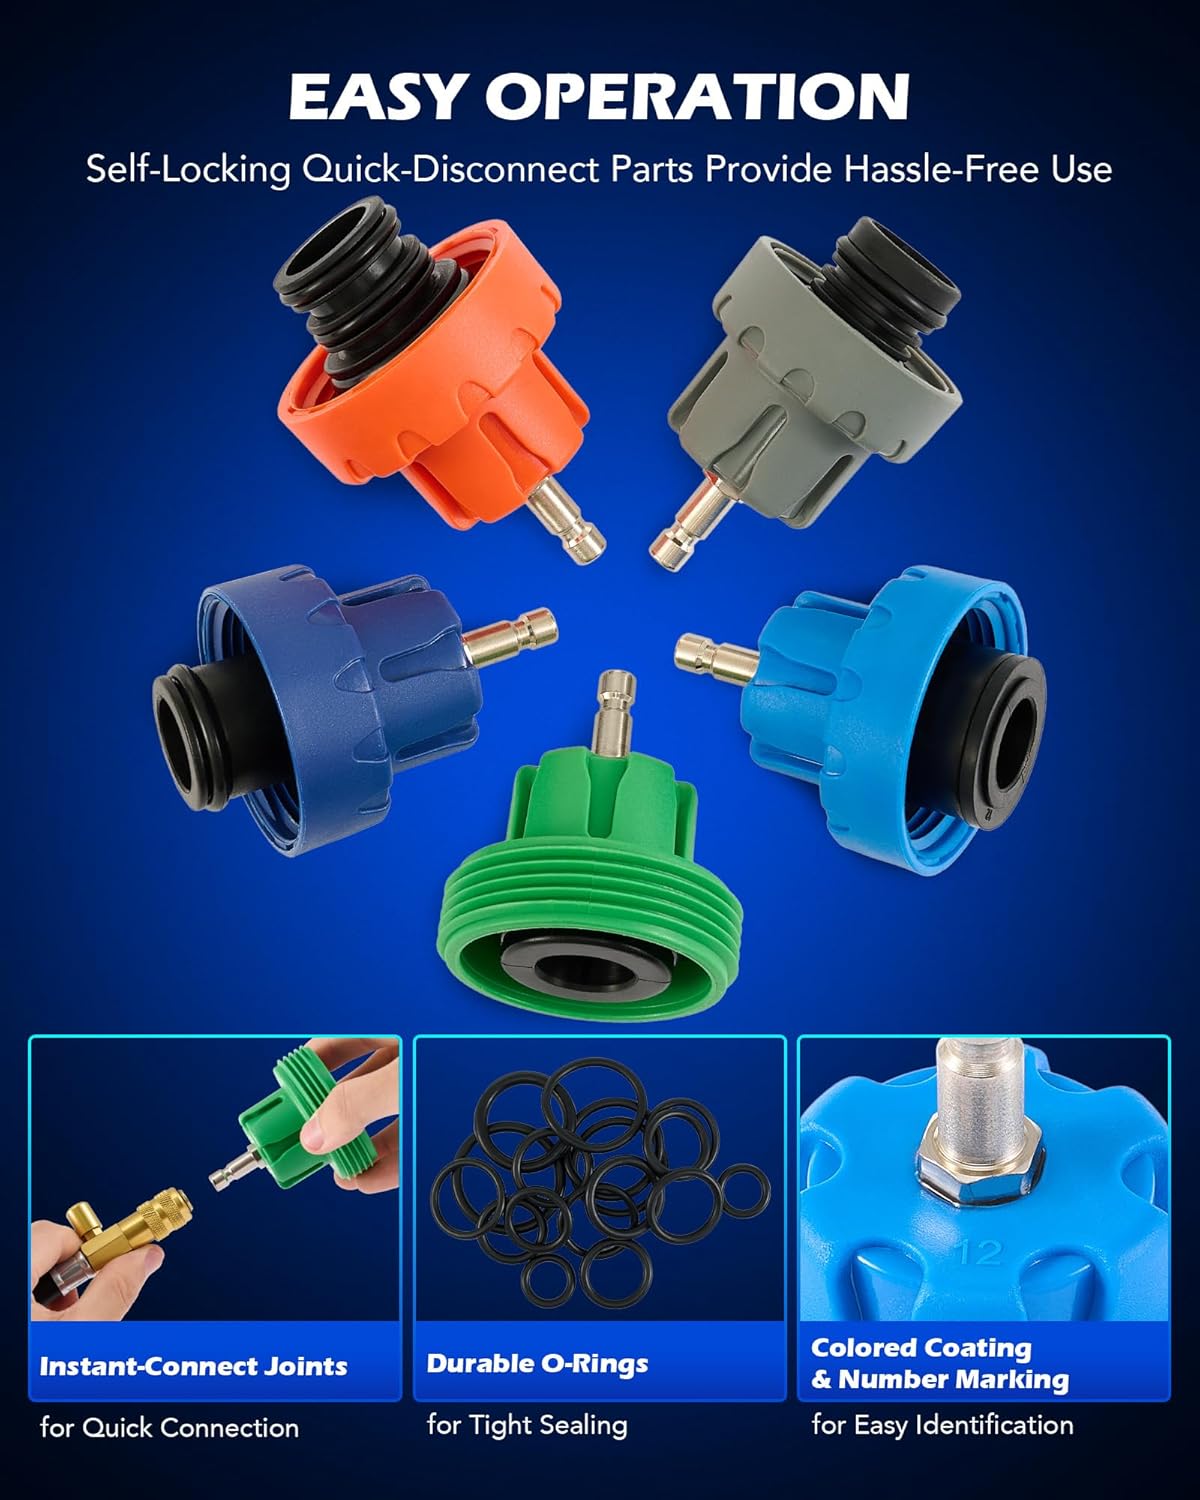
Figure 3: Details of the adapters, showing the instant-connect joints for quick hose attachment, durable O-rings for tight sealing, and the colored coating with number markings for easy identification.
Operating Instructions
1. Coolant Pressure Testing (Leak Detection)
- Ensure the engine is cool and the cooling system is depressurized. Carefully remove the radiator cap.
- Select the appropriate adapter and securely attach it to the radiator neck or expansion tank.
- Connect the manual vacuum pump to the adapter.
- Pump the handle of the manual vacuum pump to build pressure in the cooling system. Monitor the pressure gauge. Do not exceed the maximum pressure specified by your vehicle manufacturer (usually marked on the radiator cap, typically 15-20 psi).
- Once the desired pressure is reached, stop pumping and observe the gauge for any pressure drop. A rapid drop indicates a significant leak, while a slow drop suggests a minor leak.
- Visually inspect all cooling system components (hoses, radiator, heater core, water pump, connections) for signs of coolant leakage. Use the probe thermometer to check coolant temperature if needed.
- After testing, slowly release the pressure by pressing the pressure release valve on the pump before detaching the adapter.
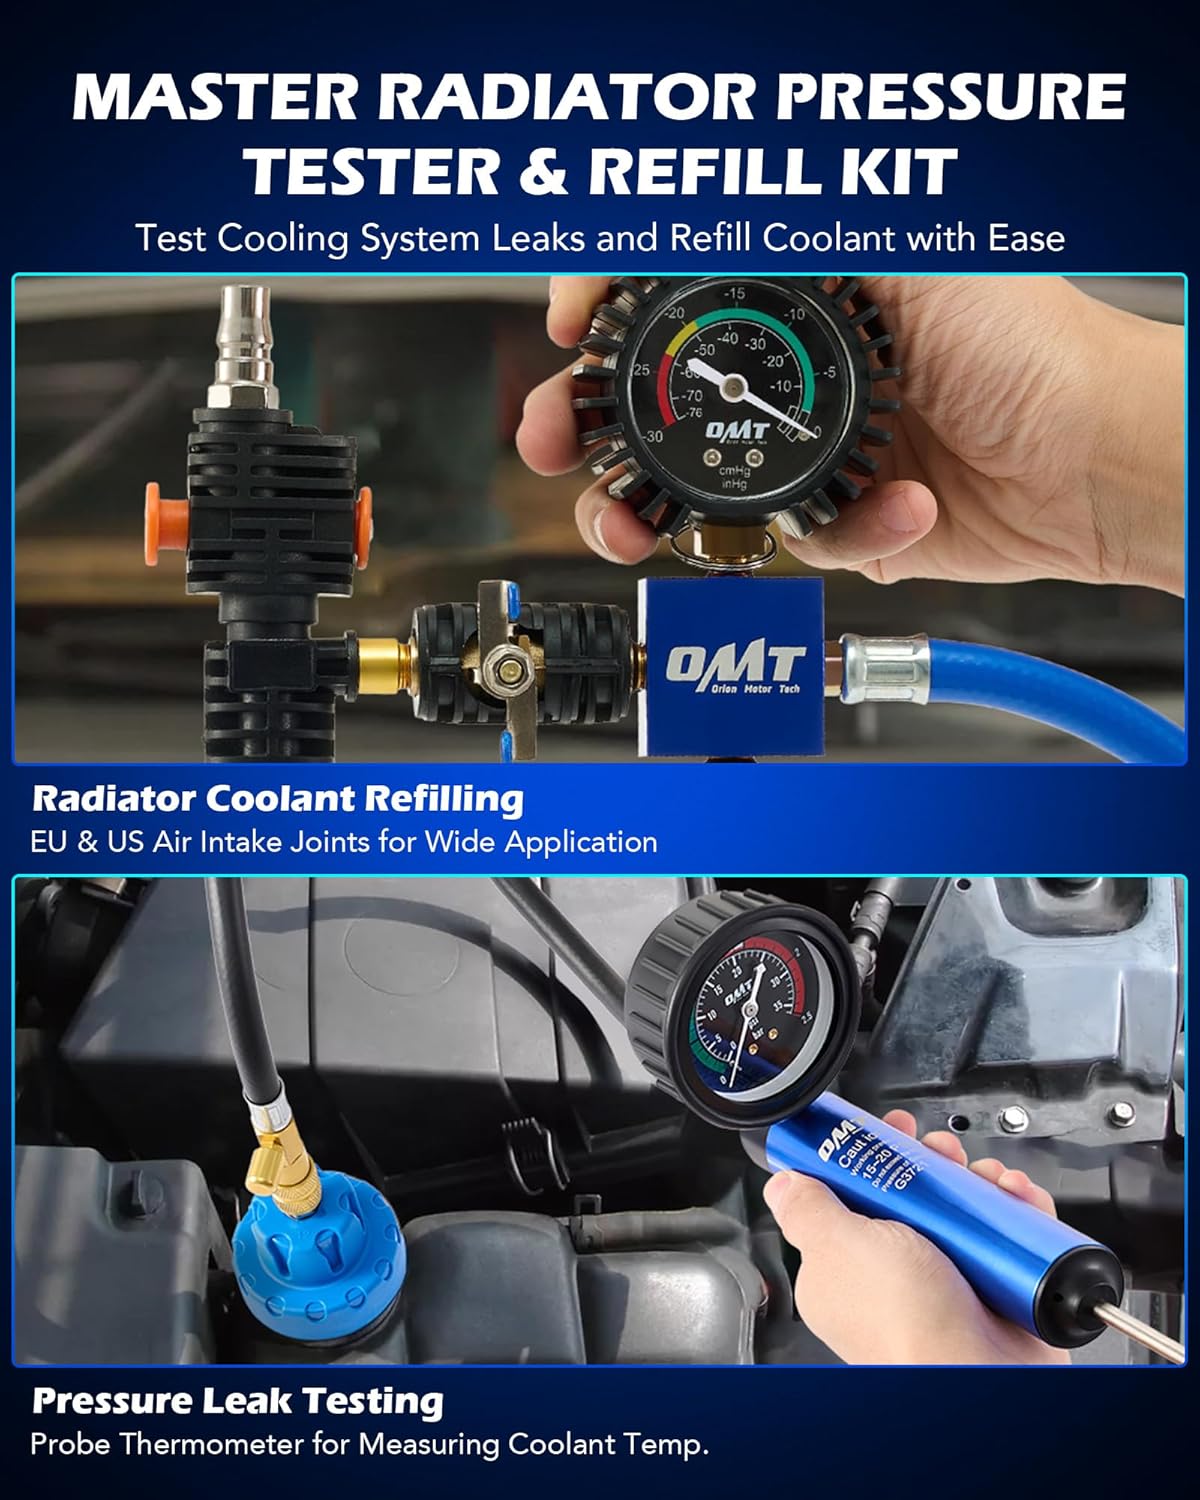
Figure 4: Demonstrates both the pressure leak testing setup with the manual pump connected to the radiator and the vacuum coolant refilling process using the vacuum purge and refill tool.
2. Coolant Vacuum Refill
This procedure helps to eliminate air pockets in the cooling system during refilling.
- Ensure the cooling system is completely drained and depressurized.
- Select the appropriate adapter and securely attach it to the radiator neck or expansion tank.
- Connect the vacuum purge & refill tool to the adapter. Connect an air compressor (not included) to the air intake joint on the tool.
- Open the valve on the vacuum tool to allow the air compressor to create a vacuum in the cooling system. The vacuum gauge should indicate a stable vacuum (e.g., -25 to -30 inHg).
- Close the valve to hold the vacuum. Disconnect the air compressor. Observe the vacuum gauge for a few minutes to ensure the system holds vacuum, indicating no leaks. If the vacuum drops, there is a leak that needs to be addressed before refilling.
- Place the filling hose into a container of new, pre-mixed coolant. Ensure the end of the hose is submerged.
- Slowly open the valve on the vacuum tool to allow the vacuum to draw coolant into the system. The coolant will fill the system without introducing air pockets.
- Once the vacuum gauge reads zero and the system is full, close the valve and remove the tool. Top off the coolant level as needed according to your vehicle's specifications.
Maintenance
- Cleaning: After each use, wipe down all tools and adapters with a clean cloth to remove any coolant residue.
- Storage: Store the kit in its original custom molded carrying case in a clean, dry place away from direct sunlight and extreme temperatures. This helps protect the components and keeps them organized.
- O-Ring Inspection: Regularly inspect the O-rings on the adapters and hoses for cracks, tears, or signs of wear. Replace them promptly to ensure proper sealing and prevent leaks during use.

Figure 5: A collection of durable O-rings, essential for maintaining tight seals across all connections in the coolant system tester kit.
Troubleshooting
| Problem | Possible Cause | Solution |
|---|---|---|
| Pressure/Vacuum does not hold | Loose connection, damaged adapter, worn O-ring, actual system leak. | Check all connections for tightness. Inspect adapter and O-rings for damage and replace if necessary. If the tool holds pressure/vacuum but the system does not, a leak exists in the vehicle's cooling system. |
| Difficulty attaching adapter | Incorrect adapter size, debris on radiator neck/adapter. | Ensure the correct adapter is selected for your vehicle. Clean the radiator neck and adapter threads/sealing surfaces. |
| Gauge not reading correctly | Gauge damage, internal tool blockage. | Inspect the gauge for physical damage. Ensure hoses are not kinked or blocked. If issues persist, contact customer support. |
| Coolant not drawing during vacuum refill | Insufficient vacuum, hose not submerged, air leak in setup. | Ensure a strong vacuum is established and held. Verify the filling hose is fully submerged in coolant. Check all connections for air leaks. |
Specifications
- Model: RCP
- Item Weight: 9.28 pounds
- Product Dimensions: 16.93 x 13.78 x 6.3 inches
- Pressure Gauge Range: 0-35 psi (0-2.5 bar)
- Vacuum Gauge Range: 0 to -30 inHg (-10 to -76 cmHg)
- Thermometer Range: 32-400°F (0-200°C)
- Material: Aluminum alloy, nylon, rubber, brass
- Adapters: 22 radiator adapters + 1 universal adapter

Figure 6: Detailed view of the three main gauges included in the kit: the vacuum filler gauge, the probe thermometer, and the vacuum pump pressure gauge, showing their respective measurement ranges.
Warranty and Support
For warranty information or technical support, please refer to the contact details provided with your purchase or visit the official Orion Motor Tech website. Keep your purchase receipt as proof of purchase for any warranty claims.
Orion Motor Tech Store: Visit Store


