1. Product Overview
The Orion Motor Tech 22-Piece Coolant System Pressure Tester and Vacuum Refill Kit (Model: MPN1RCP0022-01) is designed for efficient diagnosis and maintenance of vehicle cooling systems. This kit facilitates pressure leak testing and air-pocket-free coolant refilling, ensuring optimal performance and preventing potential engine damage.
Constructed with quality aluminum alloy, nylon, rubber, and brass, this kit is built for enhanced strength and consistent performance.

Image 1: Orion Motor Tech 22-Piece Coolant System Pressure Tester and Vacuum Refill Kit.
2. Components Included
The 22-piece kit includes the following items, neatly organized within a custom molded carrying case:
- 13x Radiator Adapters
- 1x Universal Adapter
- 1x Manual Vacuum Pump with Gauge
- 1x Vacuum Purge & Refill Tool with Gauge
- 1x Probe Thermometer
- 1x Filling Hose
- 7x O-Rings
- 1x European Air Intake Joint
- 1x American Air Intake Joint
- 1x Wrench
- 1x Instruction Manual

Image 2: All components of the 22-piece kit.
3. Compatibility
This kit features 14 different radiator adapters, ensuring broad compatibility with numerous vehicle makes and models. The color-coded adapters and molded size markings facilitate easy identification of the correct adapter for your specific vehicle.
Compatible with vehicles from manufacturers such as BMW, Ford, Fiat, VW, Porsche, Mercedes-Benz, Nissan, Peugeot, Chrysler, Acura, Mitsubishi, Mazda, Toyota, Infiniti, Geo, Suzuki, Isuzu, Honda, Volvo, Saab, Citroen, Renault, Alfa, and Audi.
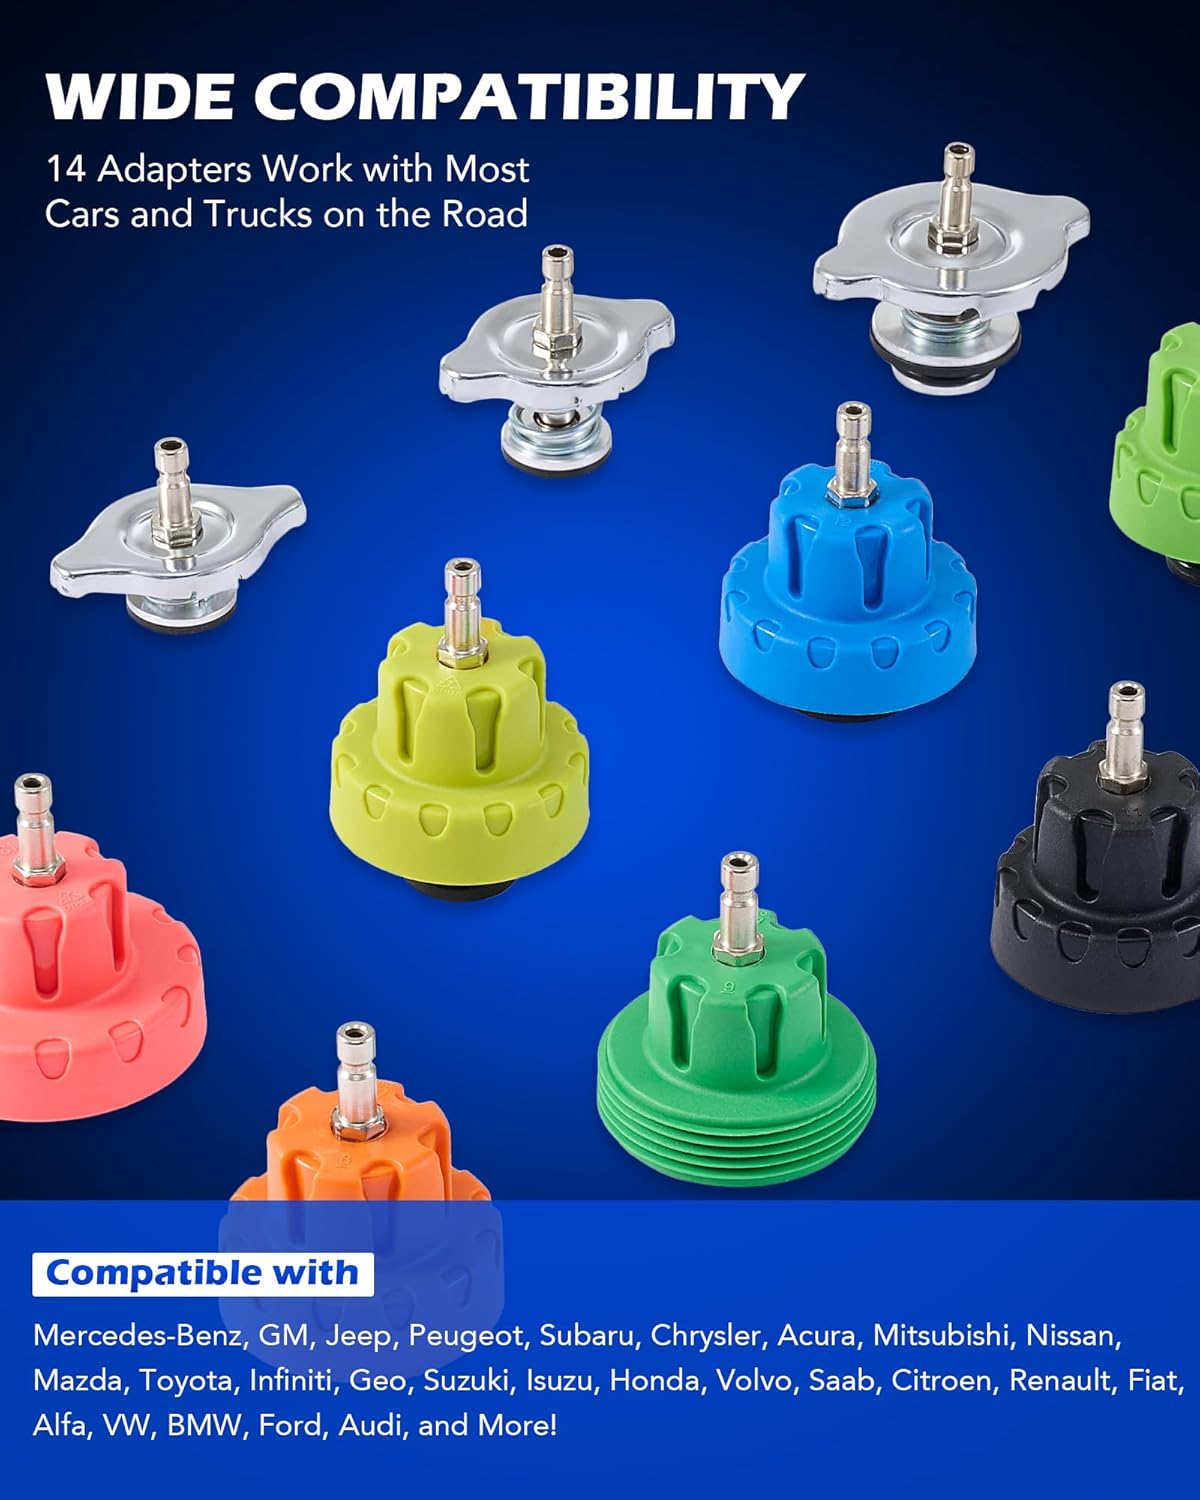
Image 3: Selection of radiator adapters for wide vehicle compatibility.
4. Safety Precautions
- Always ensure the engine is completely cool before opening the radiator cap or performing any cooling system service. Hot coolant can cause severe burns.
- Wear appropriate personal protective equipment, including safety glasses and gloves.
- Do not over-pressurize the cooling system beyond the manufacturer's recommended specifications.
- Dispose of old coolant responsibly according to local regulations.
5. Operating Instructions
5.1. Cooling System Pressure Test
This procedure helps identify leaks in the radiator, heater core, hoses, and other cooling system components.
- Prepare the Vehicle: Ensure the engine is cool. Remove the vehicle's radiator cap.
- Select Adapter: Choose the appropriate radiator adapter from the kit that securely fits your vehicle's radiator neck. Refer to the included instruction manual for specific vehicle compatibility.
- Attach Adapter: Securely attach the selected adapter to the radiator neck.
- Connect Hand Pump: Connect the manual vacuum pump (with its integrated pressure gauge) to the adapter using the quick-release coupling.
- Pressurize System: Pump the hand pump to pressurize the cooling system. Do not exceed the vehicle manufacturer's recommended pressure (typically 10-15 PSI). Observe the pressure gauge.
- Monitor for Leaks: Allow the system to sit under pressure for several minutes. If the pressure drops, there is a leak. Visually inspect all cooling system components (radiator, hoses, connections, water pump, heater core) for signs of coolant leakage.
- Release Pressure: After testing, press the thumb-operated relief valve on the hand pump to safely release all pressure from the system before disconnecting the tools.
- Remove Tools: Disconnect the hand pump and remove the radiator adapter. Reinstall the vehicle's original radiator cap.

Image 4: Performing a cooling system pressure test.
Video 1: Demonstration of the Orion Motor Tech Coolant Pressure Tester Kit in use.
5.2. Coolant Vacuum Purge & Refill
This method ensures the cooling system is refilled without air pockets, which can cause overheating.
- Prepare for Refill: After any repairs, ensure the cooling system is empty of old coolant.
- Select Adapter: Choose the correct radiator adapter for your vehicle and attach it securely to the radiator neck.
- Connect Vacuum Purge Tool: Connect the vacuum purge and refill tool to the adapter. Ensure the valve on the tool is in the "OFF" position.
- Connect Air Supply: Attach an air compressor (not included) to the air intake joint on the vacuum purge tool.
- Create Vacuum: Turn the air switch on the vacuum purge tool to "ON". This will draw a vacuum in the cooling system. Monitor the vacuum gauge until it reaches -20 to -25 inHg (-50 to -60 cmHg). Once the desired vacuum is reached, turn the air switch to "OFF".
- Check for Leaks (Vacuum): Observe the vacuum gauge for 1-2 minutes. If the vacuum holds steady, the system is sealed. If the vacuum drops, there is a leak that needs to be addressed before refilling.
- Prepare Coolant: Place the filling hose into a container of new, pre-mixed coolant. Ensure the end of the hose is submerged.
- Refill System: Open the coolant switch connection valve on the vacuum purge tool. The vacuum in the cooling system will draw the coolant from the container into the system. The gauge will return to 0 as the system fills.
- Complete Refill: Continue the refilling process until the system is full and the gauge reads 0. Close the coolant switch connection valve.
- Disconnect Tools: Disconnect the air supply, remove the vacuum purge tool, and then remove the radiator adapter. Reinstall the vehicle's original radiator cap.
Video 2: Demonstration of the Coolant Vacuum Refill Kit in operation.
6. Maintenance and Storage
- Cleaning: After each use, clean all components, especially adapters and hoses, to remove any coolant residue. Use a damp cloth and mild soap if necessary. Ensure all parts are dry before storage.
- Storage: Store the kit in its custom molded carrying case. The case is designed for effortless storage and transport, keeping all components organized and protected.
- O-Rings: Periodically inspect the O-rings for wear or damage. Replace them if necessary to maintain a tight seal. The kit includes spare O-rings.
7. Troubleshooting
- Pressure/Vacuum Does Not Hold:
- Ensure the correct adapter is used and is securely tightened onto the radiator neck.
- Check all hose connections for tightness.
- Inspect O-rings for damage or improper seating.
- If connections are secure, a leak exists within the vehicle's cooling system.
- Adapter Does Not Fit:
- Refer to the compatibility chart in the instruction manual to ensure the correct adapter number is selected for your vehicle's make and model.
- The kit includes a universal adapter for less common radiator neck designs.
- Coolant Does Not Draw During Refill:
- Verify that a sufficient vacuum has been established in the system (gauge reading -20 to -25 inHg).
- Ensure the filling hose is fully submerged in the coolant container.
- Confirm the coolant switch connection valve on the vacuum purge tool is fully open.
8. Specifications
| Feature | Detail |
|---|---|
| Manufacturer | Orion Motor Tech |
| Model Number | MPN1RCP0022-01 |
| Item Weight | 7.39 pounds |
| Package Dimensions | 16.38 x 13.7 x 4.45 inches |
| Material | Aluminum alloy, Nylon, Rubber, Brass |
| Pressure Gauge Range | 0-35 PSI (0-2.5 bar) |
| Vacuum Filler Gauge Range | 0 to -30 inHg (-10 to -76 cmHg) |
| Thermometer Range | 32-400°F (0-200°C) |
9. Warranty and Support
For warranty information, technical support, or replacement parts, please refer to the contact details provided on the product packaging or visit the official Orion Motor Tech website. Keep your purchase receipt for warranty claims.


