
1. Introduction
Thank you for choosing the SMARTKLIK R10 4K 75MP Digital Camera. This camera is designed for both photography and videography enthusiasts, offering high-resolution imaging, versatile features, and user-friendly operation. Please read this manual carefully to understand how to properly use and maintain your camera.
2. What's in the Box
- Camera Body & Accessories
- USB Cable
- Rechargeable Li-ion Battery (x2)
- 64GB SD Card
- Instruction Manual
- Wide/Macro Angle Camera Lens (x1)
Video 2.1: Unboxing the SMARTKLIK R10 4K Digital Camera. This video demonstrates the contents of the product package and the initial unboxing experience.
3. Product Overview
The SMARTKLIK R10 is a compact digital camera featuring a 3-inch 180° flip screen, 75MP photo resolution, and 4K video capabilities. It includes a 16x digital zoom and comes with interchangeable wide-angle and macro lenses for diverse shooting needs. The camera supports Wi-Fi transfers, can function as a webcam, and offers various shooting modes and filters.
3.1. Camera Components and Controls

Image 3.1: Overview of the SMARTKLIK R10 camera, highlighting its 3.0-inch screen, 1500mAh batteries, 64GB SD card, and various control buttons and mode dial settings.
- Mode Dial: Switch between photo, video, time-lapse, and other shooting modes.
- Shutter Button: Press halfway to focus, fully to capture a photo or start/stop video recording.
- Power Button: Turns the camera on or off.
- Zoom Buttons (W/T): Adjust digital zoom.
- OK Button: Confirm selections in menus.
- Menu Button: Access camera settings.
- Display Screen: 3-inch 180° flip screen for viewing and navigation.
4. Setup
4.1. Battery Installation and Charging
The camera uses rechargeable Li-ion batteries. Ensure batteries are charged before first use.

Image 4.1: Step-by-step guide for inserting the battery into the camera, emphasizing correct orientation of positive and negative terminals.
- Open the battery cover located at the bottom of the camera.
- Insert the Li-ion battery, ensuring the positive and negative terminals are correctly aligned as indicated inside the compartment.
- Close the battery cover securely.
- Connect the camera to a power source using the provided USB Type-C cable to charge the battery. The camera supports charging while recording.
4.2. SD Card Insertion
The camera comes with a 64GB SD card. Insert it into the designated slot before use.
- Locate the SD card slot, usually near the battery compartment.
- Insert the 64GB SD card with the metal contacts facing down until it clicks into place.
4.3. Lens Installation
The camera includes a wide-angle lens with macro capability. To install:

Image 4.2: Illustration of the wide-angle and macro lens attachment process, demonstrating how they expand the camera's photographic capabilities.
- Remove the protective cap from the camera's main lens.
- Align the wide-angle or macro lens with the camera's lens thread.
- Gently screw the lens onto the camera until it is secure.
5. Operating Instructions
5.1. Power On/Off
Press and hold the Power button on the top of the camera to turn it on or off.
5.2. Photo and Video Capture

Image 5.1: Visual comparison demonstrating the superior clarity of 4K video and 75MP photos compared to lower resolutions.
- Taking Photos: Rotate the mode dial to the photo icon. Press the shutter button halfway to focus, then fully to capture the image. The camera supports up to 75MP resolution.
- Recording Videos: Rotate the mode dial to the video icon. Press the shutter button to start recording, and press it again to stop. The camera records in 4K Ultra HD.
- Continuous Shooting: Select the continuous shooting mode from the dial to capture a rapid sequence of photos.
- Time-Lapse: Choose the time-lapse mode to capture images at set intervals and combine them into a video.
- Slow Motion: Select slow motion mode for dramatic video effects.
- Looping Recording: Enable looping recording for continuous video capture, overwriting older files when the memory card is full.
5.3. Digital Zoom

Image 5.2: Demonstration of the camera's 16X digital zoom, allowing users to bring distant subjects closer. Note that digital zoom may reduce image clarity at higher magnifications.
Use the W/T buttons on the back of the camera to zoom in (T) or zoom out (W) while in photo or video mode. The camera supports up to 16x digital zoom.
5.4. 180° Flip Screen
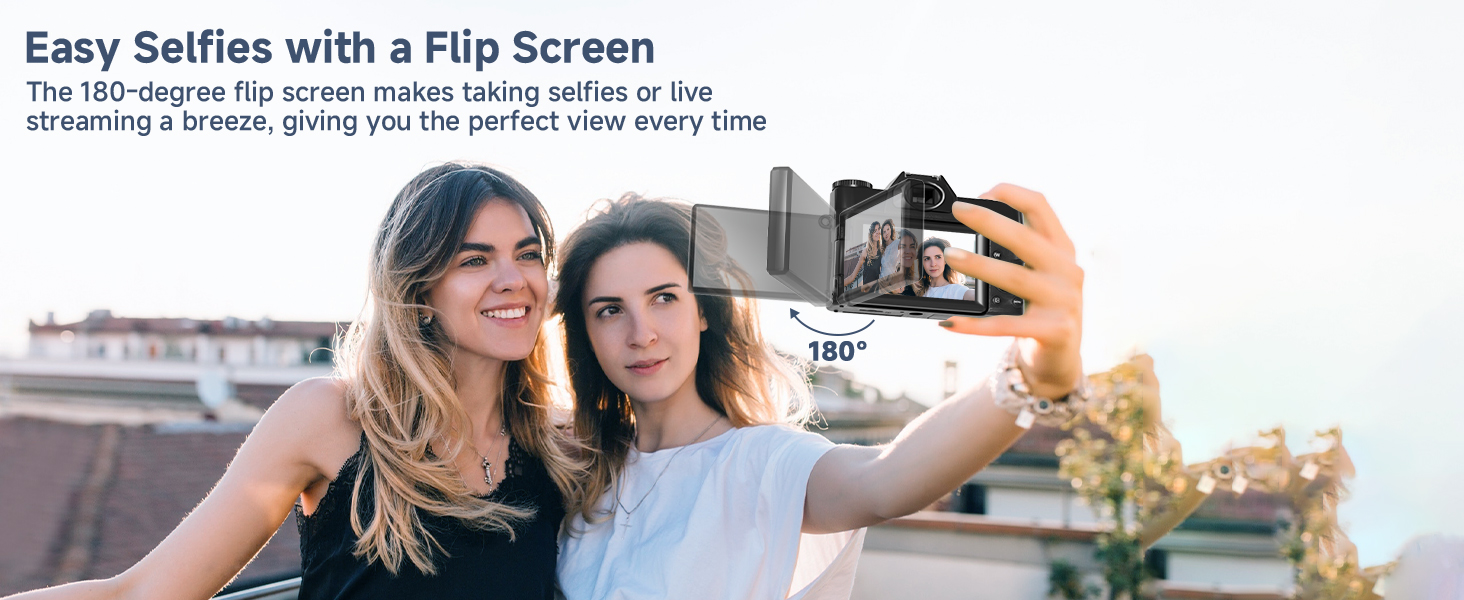
Image 5.3: The 180° flip screen feature, ideal for vlogging, selfies, and ensuring you are perfectly framed.
The 3-inch display can be flipped 180 degrees, making it convenient for self-portraits, vlogging, and reviewing your shots from various angles.
5.5. Wi-Fi Connectivity and Webcam Function
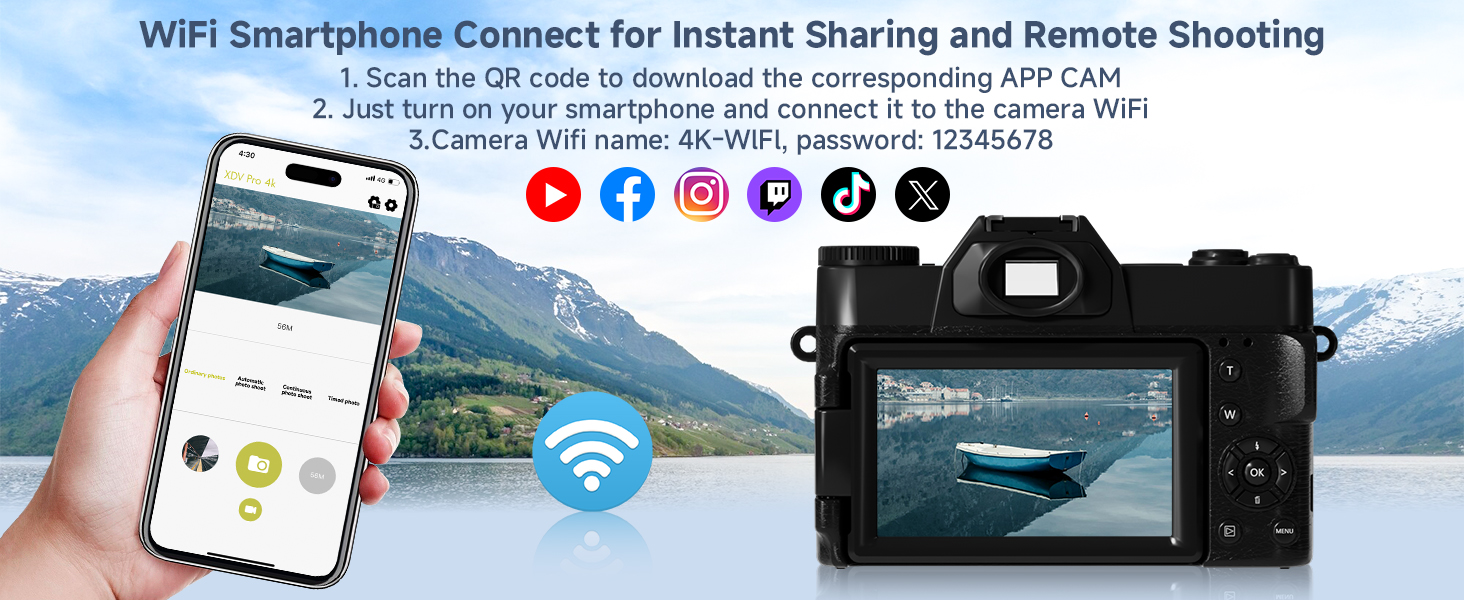
Image 5.4: Instructions for connecting the camera to a smartphone via Wi-Fi for instant photo sharing and remote control.
- Wi-Fi Transfer: Connect your smartphone to the camera's Wi-Fi network (named "4K-WIFI", password: 12345678) to transfer photos and videos or remotely control the camera via a dedicated app.
- Webcam Function: Connect the camera to your computer via USB to use it as a webcam for live streaming on platforms like YouTube or TikTok.
Video 5.1: Demonstration of the SMARTKLIK R10's 4K vlogging capabilities, showcasing its use for video recording and content creation.

Image 5.5: The camera's webcam functionality, illustrating its use for live streaming and video calls, with options for external devices.
5.6. Advanced Shooting Features

Image 5.6: The camera's 360° multifunctional rotary button for easy switching between various photo and video modes.
- Autofocus: The camera features innovative autofocus (contrast detection, face detection) to ensure sharp images. Lightly press the shutter button to activate autofocus.
- Self-Timer: Set a delay of 3, 5, 10, or 20 seconds before capturing a photo.
- Built-in Flash: Use the built-in flash for improved lighting in low-light conditions.
- Pause Function: Pause and resume video recording without creating multiple files.
- Filters: Experiment with 22+ built-in filters to enhance your photos and videos.
- Beauty Function: Apply the beauty function to refine portraits directly in-camera.
- Exposure Compensation: Adjust exposure levels from -3 to +3 to control image brightness.
- White Balance: Choose from Auto, Cloudy, Custom, Daylight, Fluorescent, or Incandescent settings to ensure accurate color representation.
- Framing Grid: Use the framing grid on the display for better composition.

Image 5.7: Visual representation of the camera's innovative autofocus system, ensuring subjects are sharp and clear.

Image 5.8: The built-in flash feature, providing necessary illumination for high-quality pictures in dark environments.

Image 5.9: The beauty function, designed to enhance portraits and reduce the need for post-editing.

Image 5.10: Visual guide to exposure compensation and ISO brightness settings, allowing users to control the light in their shots.

Image 5.11: The wide-angle lens capability, expanding the field of view to 120 degrees for capturing expansive scenes.
6. Maintenance
- Keep the camera clean by wiping it with a soft, dry cloth.
- Avoid exposing the camera to extreme temperatures, humidity, or direct sunlight for prolonged periods.
- Store the camera in a dry, dust-free environment when not in use.
- Clean the lens gently with a lens cleaning cloth and solution.
7. Troubleshooting
7.1. Common Issues and Solutions
- Camera not turning on: Ensure the battery is correctly inserted and fully charged.
- Blurry images: Check if autofocus is enabled. Ensure sufficient lighting. Clean the lens.
- SD card error: Reinsert the SD card. Ensure it is not full or corrupted. Format the card if necessary (this will erase all data).
- Wi-Fi connection issues: Verify the Wi-Fi password and ensure the camera's Wi-Fi is enabled. Try restarting both the camera and your smart device.
- Short battery life: Ensure batteries are fully charged. Reduce screen brightness or disable unnecessary features like Wi-Fi when not in use.
For further assistance, please refer to the support information in Section 9.
8. Specifications
| Feature | Specification |
|---|---|
| Brand | SMARTKLIK |
| Model Name | R10 |
| Effective Still Resolution | 75 MP |
| Video Resolution | 4K (2160p) |
| Optical Zoom | 16 x |
| Digital Zoom | 16 x |
| Screen Size | 3 Inches |
| Display Type | LCD, 180° Flip Screen |
| Image Stabilization | Digital |
| Photo Sensor Technology | CMOS |
| Memory Storage Capacity | 64 GB (SD Card included) |
| Connectivity Technology | HDMI, Wi-Fi |
| Special Features | Autofocus, Webcam, Time-lapse, Slow Motion, Self-timer, Filters, Looping Recording, Pause Function, Fill Light, Framing Grid, Beauty Function |
| Item Weight | 226 Grams |
Video 8.1: A brief overview of the SMARTKLIK R10's 75MP digital camera features and capabilities.
9. Warranty and Support
9.1. Warranty Information
The SMARTKLIK R10 Digital Camera comes with a 1-year warranty from the date of purchase. This warranty covers manufacturing defects and malfunctions under normal use. It does not cover damage caused by misuse, accidents, unauthorized repairs, or natural disasters.
9.2. Customer Support
For technical support, troubleshooting assistance, or warranty claims, please contact SMARTKLIK customer service through the following channels:
- Online: Visit the official SMARTKLIK website or Amazon store page for FAQs and support resources.
- Email: Refer to your purchase documentation for specific customer service email addresses.
Please have your product model (R10) and purchase date available when contacting support.