
1. Introduction
This manual provides detailed instructions for the assembly, operation, and maintenance of your tectake Greenhouse. Designed with an anodized aluminum frame and 4mm UV-resistant polycarbonate panels, this greenhouse offers an optimal environment for cultivating plants, protecting them from adverse weather conditions, and extending your growing season.
Key features include a robust chassis, sufficient height for various plants, superior insulation, and efficient ventilation through a sliding door and roof window. Proper assembly and anchoring are crucial for stability and longevity.

Image 1: tectake Greenhouse in a garden environment.
2. Safety Information
Please read all safety instructions carefully before assembly and use. Failure to follow these instructions may result in injury or damage to the product.
- Assembly Precautions: Exercise caution during assembly due to potential sharp edges on aluminum components and the weight of certain parts. It is recommended that two people assemble the greenhouse.
- UV Exposure: Be aware of UV exposure when working with polycarbonate panels.
- Anchoring: The greenhouse must be adequately anchored to the ground to ensure stability, especially in windy conditions. Consider using appropriate tectake foundations, which should be concreted into the ground for sufficient stability. The greenhouse must be properly fixed to the foundation frame.
- Ventilation: Ensure adequate ventilation to prevent overheating inside the greenhouse and promote healthy plant growth.
- Placement: Choose a level and stable site for installation, away from overhead power lines or other obstructions.
3. Package Contents
Before beginning assembly, verify that all components are present and undamaged. If any parts are missing or damaged, contact customer support.
- Aluminum frame components (anodized)
- Polycarbonate panels (4mm thick, UV-resistant)
- Base frame (galvanized steel)
- Fasteners and hardware (screws, nuts, clips, etc.)
- Sliding door components
- Roof window components
- Assembly instructions

Image 2: Technical diagram of greenhouse components.
4. Setup and Assembly
Assembly requires careful attention to detail. It is highly recommended to have at least two people for assembly. Refer to the included assembly instructions for step-by-step diagrams.
- Site Preparation: Choose a flat, level, and well-drained area for your greenhouse. Clear any debris or vegetation.
- Base Frame Assembly: Assemble the galvanized steel base frame according to the instructions. Ensure it is square and level. This base provides crucial stability.
- Anchoring the Base: Securely anchor the base frame to the ground. For maximum stability, especially in areas prone to strong winds, concrete the base into the ground.
- Main Frame Assembly: Begin assembling the aluminum frame structure. Follow the diagrams carefully, ensuring all profiles are correctly oriented and securely fastened. Pay close attention to the roof and wall sections.
- Panel Installation: Carefully slide the polycarbonate panels into the designated channels of the aluminum frame. Ensure the UV-protected side of the panels faces outwards. Use the provided clips to secure the panels.
- Door and Window Installation: Assemble and install the sliding door and the roof window. Ensure they operate smoothly and seal properly when closed. The roof window is designed for ventilation.
- Final Checks: Once assembled, check all connections and fasteners to ensure they are tight and secure. Verify that the door slides freely and the roof window opens and closes correctly.

Image 3: Detailed views of greenhouse features and assembly points.
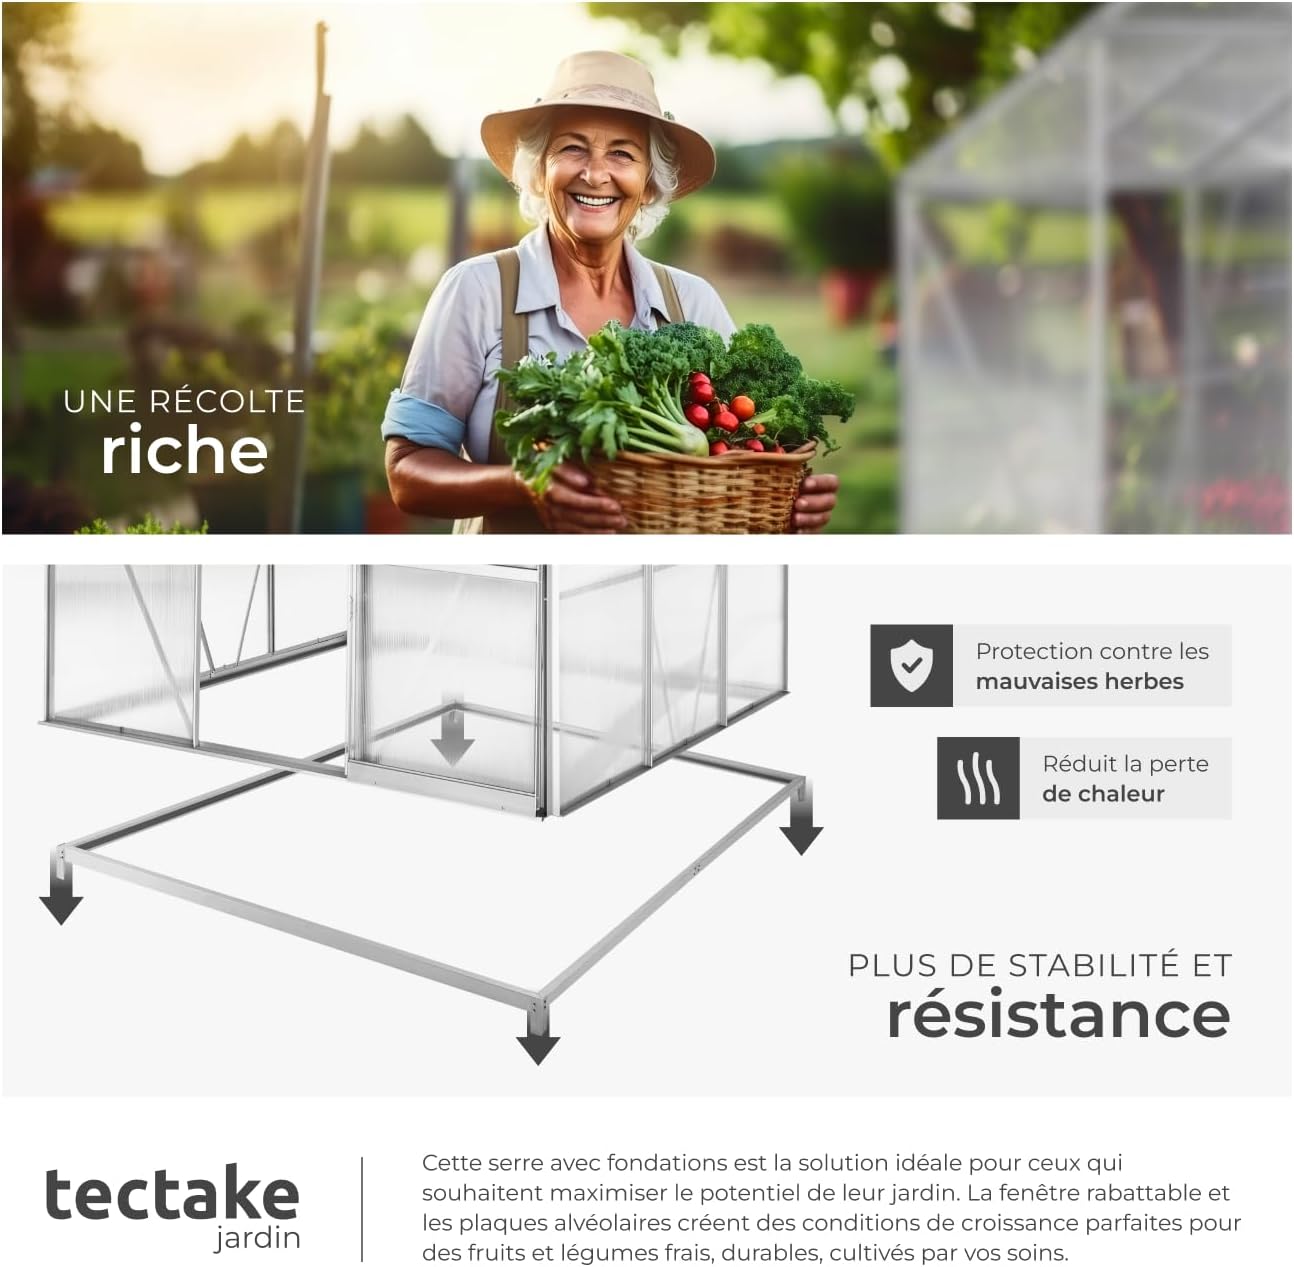
Image 4: Installation of the greenhouse base frame.
5. Operating Instructions
To maximize the benefits of your tectake Greenhouse, follow these operating guidelines:
- Ventilation: Use the roof window to regulate temperature and humidity inside the greenhouse. Open it on warm days to prevent overheating and reduce condensation. Close it during cold weather or at night to retain heat.
- Access: The sliding door provides easy access. Ensure it is fully closed when not in use to maintain internal temperature and protect plants.
- Plant Placement: Arrange plants to optimize light exposure and air circulation. Taller plants should be placed where they do not shade smaller ones excessively.
- Watering: Monitor soil moisture regularly. Greenhouses can dry out faster or slower depending on ventilation and external conditions.
- Temperature Monitoring: Consider using a thermometer inside the greenhouse to monitor temperatures and adjust ventilation as needed.
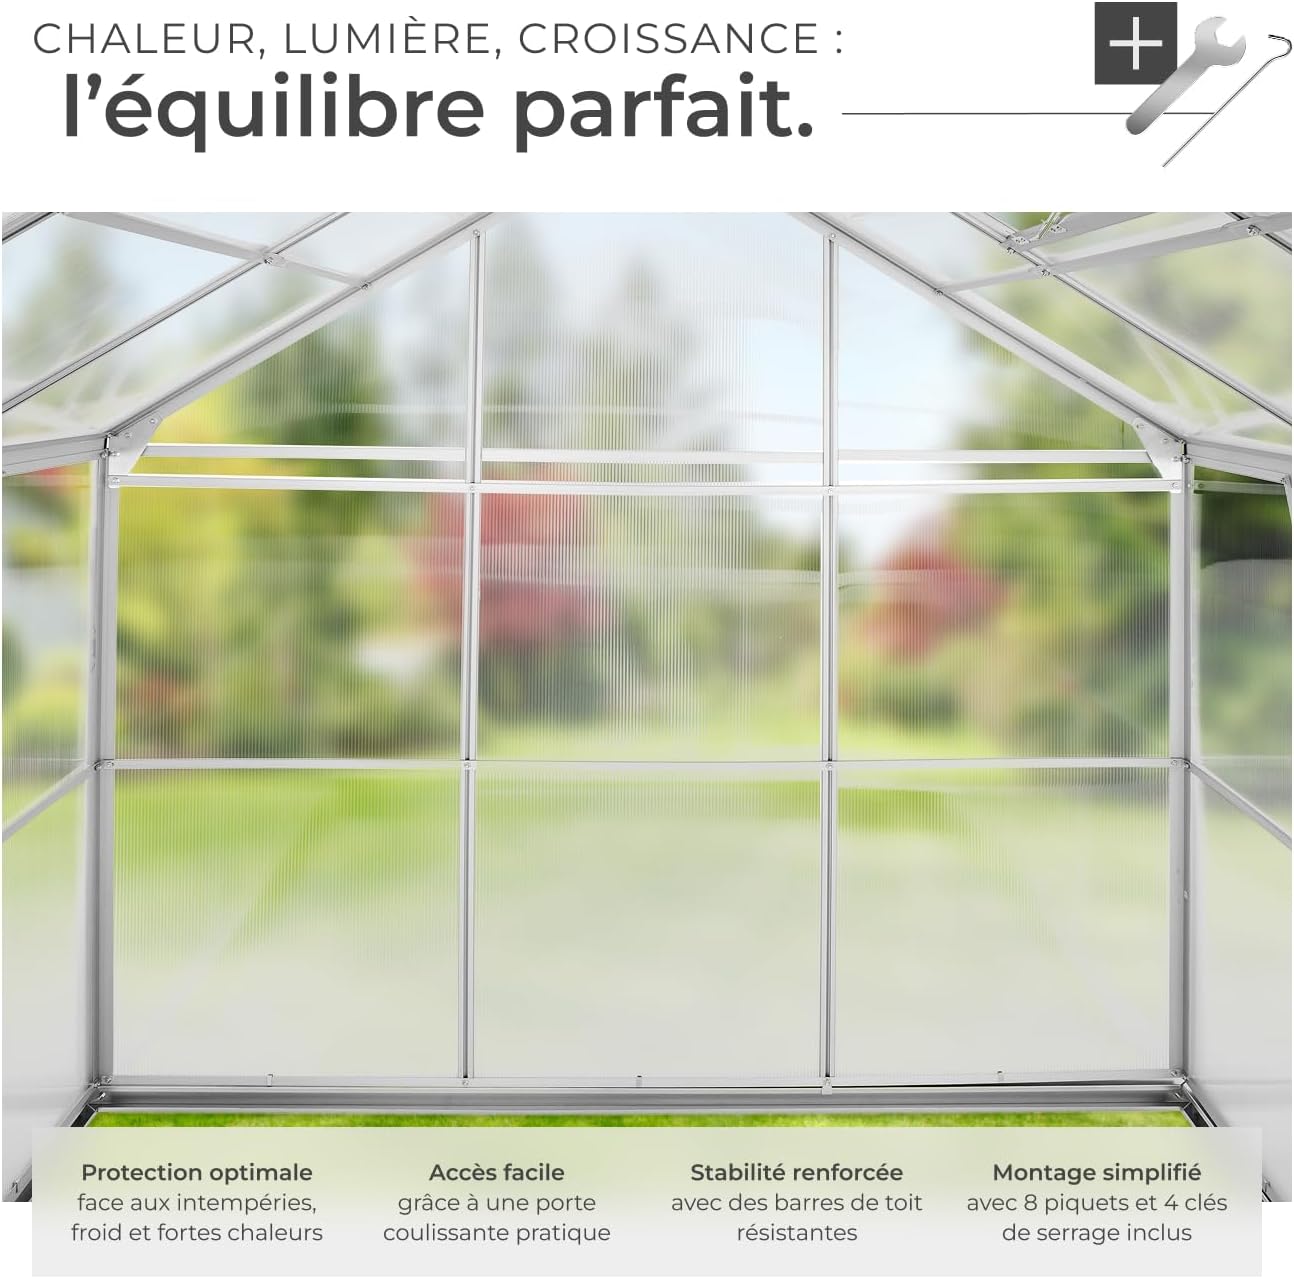
Image 5: Interior view of the greenhouse.
6. Maintenance
Regular maintenance will extend the life and efficiency of your greenhouse.
- Cleaning Panels: Periodically clean the polycarbonate panels with mild soap and water to remove dirt, algae, or dust that can reduce light transmission. Avoid abrasive cleaners or tools that could scratch the panels.
- Frame Inspection: Annually inspect the aluminum frame for any signs of corrosion, loose fasteners, or damage. Tighten any loose screws and replace damaged parts if necessary.
- Door and Window Tracks: Keep the sliding door and roof window tracks clean and free of debris to ensure smooth operation. Lubricate if necessary.
- Winter Preparation: In areas with heavy snowfall, consider clearing snow from the roof to prevent excessive weight buildup. Ensure all panels are securely fastened to withstand winter winds.

Image 6: Greenhouse demonstrating resistance to rain and sun.
7. Troubleshooting
Here are solutions to common issues you might encounter:
| Problem | Possible Cause | Solution |
|---|---|---|
| Greenhouse unstable in wind | Insufficient anchoring; loose frame connections; panels not fully secured. | Ensure the base frame is securely anchored, ideally concreted. Tighten all frame bolts and ensure all polycarbonate panels are firmly held by clips and frame channels. |
| Panels detaching or rattling | Clips are missing or loose; panels not fully inserted into channels. | Check all panel clips and replace any missing ones. Ensure panels are fully seated in their frame channels. |
| Excessive condensation inside | Poor ventilation; high humidity. | Increase ventilation by opening the roof window and/or sliding door more frequently, especially during humid periods. |
| Door sticking or difficult to slide | Debris in the track; misaligned door. | Clean the door track thoroughly. Check if the door is properly aligned on its rollers. |
8. Specifications
| Feature | Detail |
|---|---|
| Brand | tectake |
| Model Dimensions (L x W x H) | 190 x 185 x 195 cm |
| Product Weight | Approximately 25 kg |
| Frame Material | Anodized Aluminum |
| Covering Material | 4mm Polycarbonate (PC) |
| Base Material | Galvanized Steel |
| Number of Doors | 1 (Sliding Door) |
| Roof Window | Yes, for ventilation |
| Usage | Outdoor |
| Country of Origin | China |
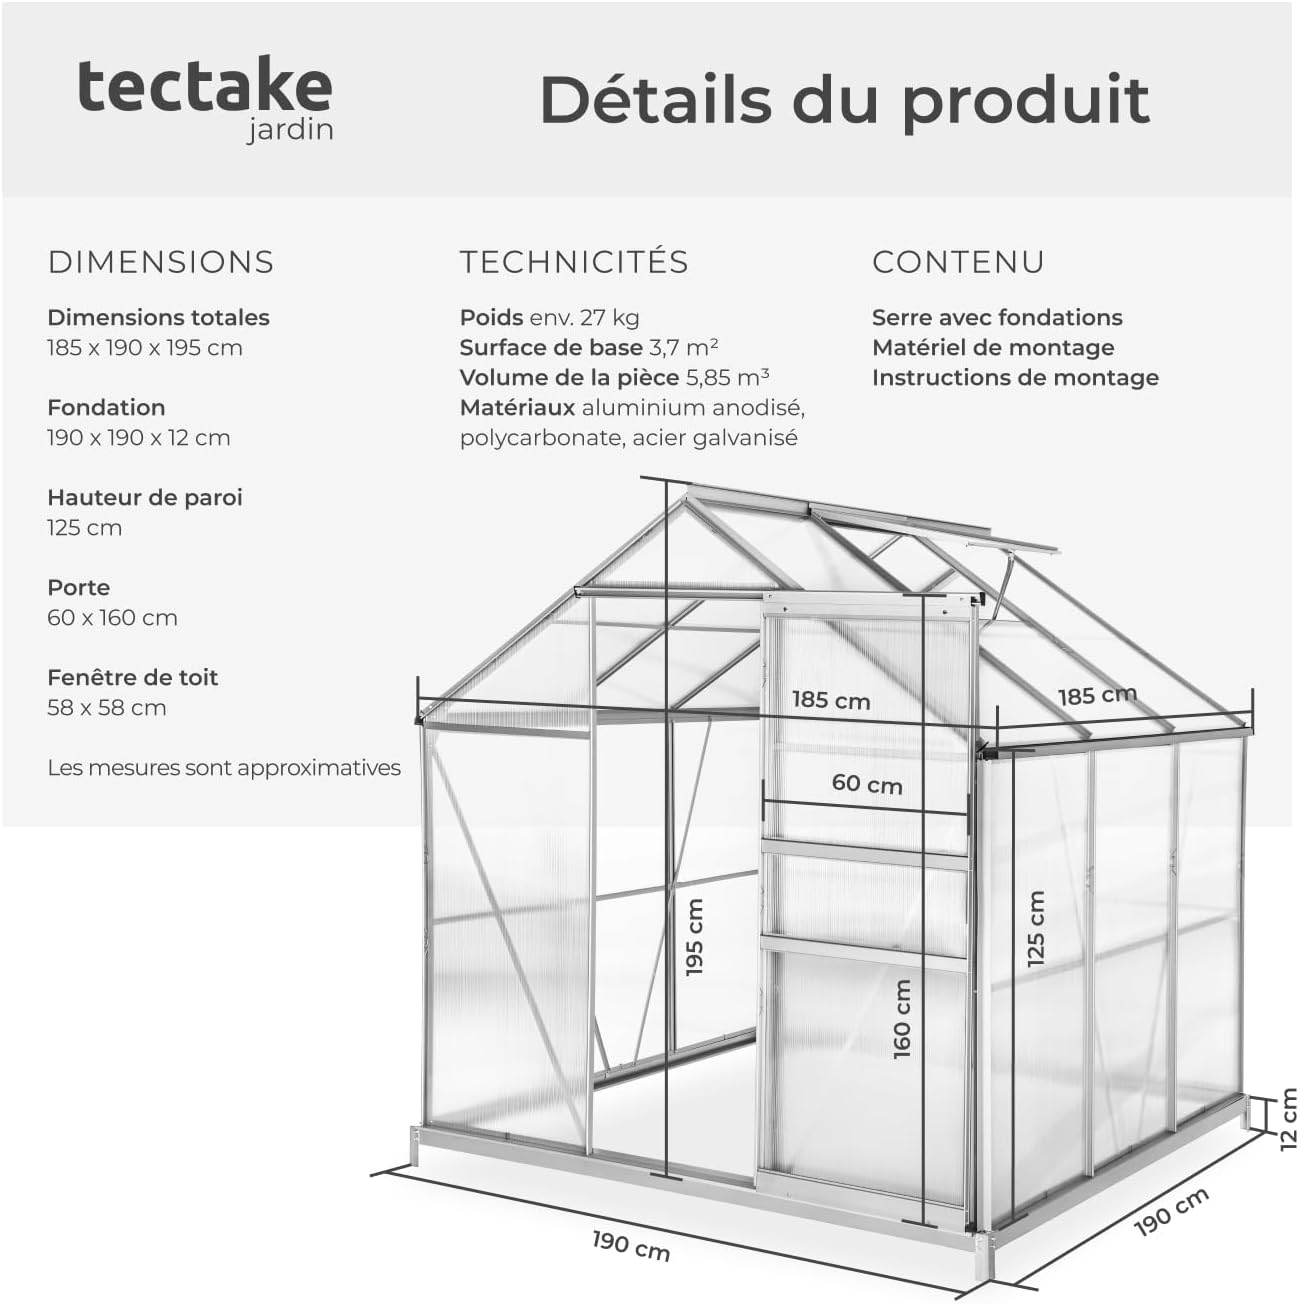
Image 7: Detailed dimensions of the greenhouse.
9. Warranty and Support
Your tectake Greenhouse is supplied by Made4Home SAS and manufactured by TecTake GmbH.
- Returns: The product is eligible for 30-day returns.
- Legal Guarantees: The product is covered by standard legal guarantees.
- Customer Support: For any questions regarding assembly, missing parts, or product issues, please contact the seller, Made4Home SAS, through your purchase platform.


