
Introduction
This manual provides detailed instructions for the installation, operation, and maintenance of your Genérico TREO NANOHD5 5-Channel Mini Class D Amplifier. Please read this manual thoroughly before attempting installation or operation to ensure proper use and to prevent damage to the unit or your vehicle's audio system. Keep this manual for future reference.
Safety Information
- Professional Installation Recommended: Due to the complexity of car audio systems, professional installation is highly recommended.
- Power Connections: Always disconnect the vehicle's negative battery terminal before making any power connections to prevent electrical shorts.
- Proper Wiring: Ensure all wiring is correctly connected and insulated to prevent short circuits and potential fire hazards. Use appropriate gauge wiring for power and ground connections.
- Ventilation: Mount the amplifier in a location that allows for adequate air circulation to prevent overheating. Do not cover the amplifier's cooling fins.
- Moisture and Heat: Avoid mounting the amplifier in areas exposed to direct sunlight, excessive heat, or moisture.
- Volume Levels: Prolonged exposure to high volume levels can cause hearing damage. Adjust volume to a safe level.
Product Overview
The Genérico TREO NANOHD5 is a compact yet powerful 5-channel Class D amplifier designed for car audio systems. It features high efficiency and a small footprint, making it suitable for various installations. Below is an illustration of the amplifier's layout and its key components.
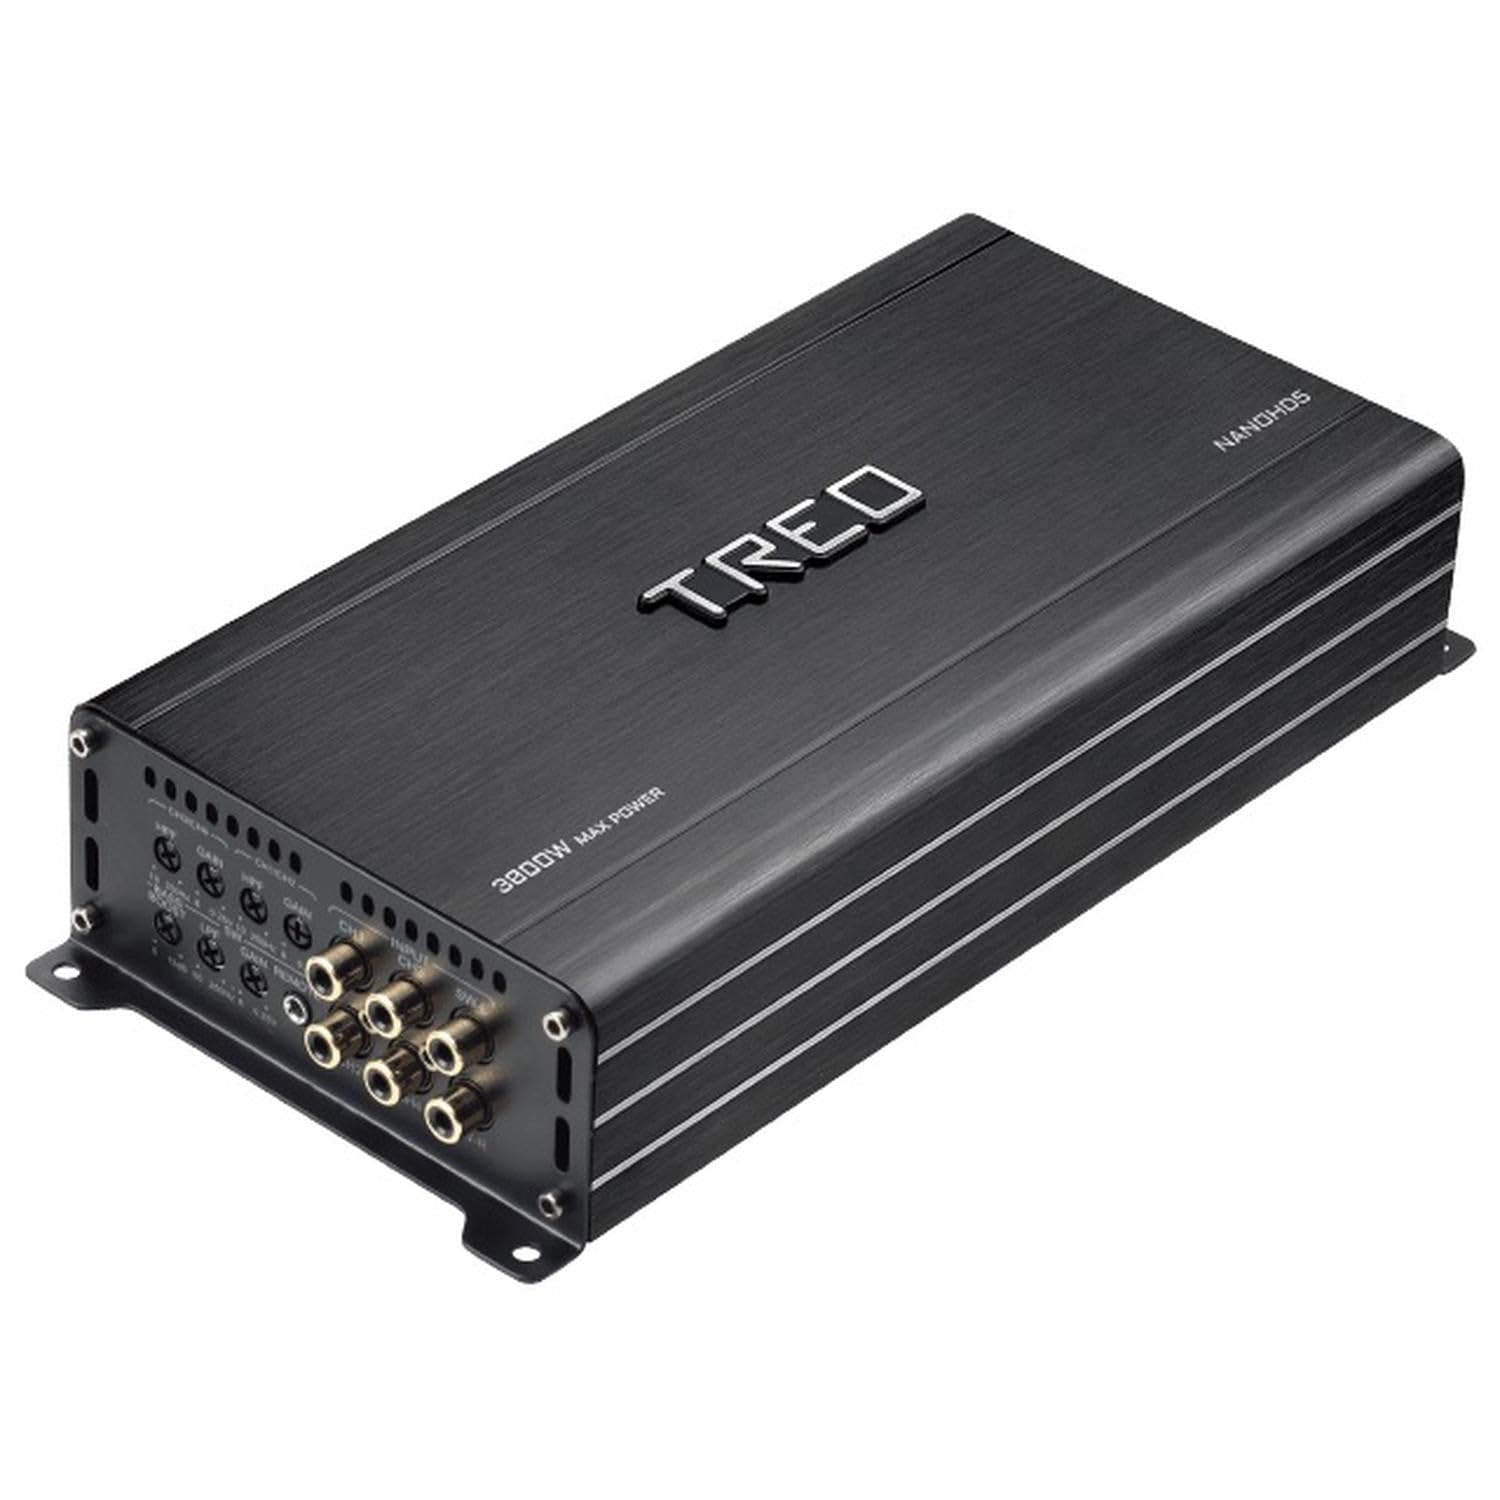
Description of Components:
The main image displays the amplifier's top panel with the 'TREO' logo and 'NANOHD5' model name. The side views illustrate the connection and control panels.
Power Input Side (Bottom-Left Inset): This side features terminals for power, ground, and remote turn-on. 'GND' is for the ground connection, '+12V' is for the main power input from the battery, and 'REM' is for the remote turn-on signal from your head unit. Adjacent to these are the 'SPEAKER OUTPUT' terminals, providing connections for your five speakers. Indicator LEDs for 'PRO' (Protection) and 'PWR' (Power) are also present.
Signal Input and Control Side (Bottom-Right Inset): This side includes the 'INPUT' RCA jacks for channels CH1, CH2, CH3, CH4, and dedicated 'SW-L' (Subwoofer Left) and 'SW-R' (Subwoofer Right) RCA inputs. Control knobs are provided for 'HFF' (High-Pass Filter), 'LPF' (Low-Pass Filter), 'GAIN' for adjusting input sensitivity, and 'BASS BOOST' for enhancing low frequencies. A 'GAIN REMOTE' port is available for connecting an optional remote level control.
Setup and Installation
Mounting
Choose a mounting location that is dry, well-ventilated, and secure. Ensure the amplifier is not exposed to direct sunlight or excessive heat. Use the provided mounting hardware to securely fasten the amplifier to a solid surface in your vehicle, such as under a seat or in the trunk. Allow at least 2 inches (5 cm) of clearance around the amplifier for proper heat dissipation.
Wiring Connections
Before making any connections, ensure the vehicle's battery negative terminal is disconnected. Refer to the diagram in the Product Overview section for terminal locations.
- Power Connection (+12V): Connect a heavy-gauge power cable (e.g., 4 AWG or 8 AWG depending on total power draw) from the vehicle's positive battery terminal to the '+12V' terminal on the amplifier. Install an appropriate fuse holder with a fuse (not included) within 18 inches (45 cm) of the battery.
- Ground Connection (GND): Connect a heavy-gauge ground cable of the same size as the power cable from the 'GND' terminal on the amplifier to a clean, unpainted metal surface on the vehicle's chassis. Ensure a good electrical connection.
- Remote Turn-On (REM): Connect a smaller gauge wire (e.g., 18 AWG) from the remote output of your head unit (or other switched 12V source) to the 'REM' terminal on the amplifier. This wire turns the amplifier on and off with your head unit.
- RCA Input Connections: Connect RCA cables from the pre-amp outputs of your head unit to the corresponding 'INPUT' RCA jacks (CH1, CH2, CH3, CH4, SW-L, SW-R) on the amplifier. Ensure correct channel matching.
- Speaker Output Connections: Connect your speakers to the 'SPEAKER OUTPUT' terminals. Pay close attention to polarity (+ and -) for each speaker and channel. Incorrect polarity can lead to poor sound quality. The amplifier supports 1-4 Ohm impedance.
Operating Instructions
Initial Power-Up
After all connections are made and verified, reconnect the vehicle's negative battery terminal. Turn on your head unit. The 'PWR' indicator LED on the amplifier should illuminate. If the 'PRO' LED illuminates, there may be a fault; refer to the Troubleshooting section.
Adjusting Controls
- Gain Control: The 'GAIN' controls adjust the input sensitivity of the amplifier to match the output voltage of your head unit. Start with the gain set to minimum. Play a familiar track at about 75% of your head unit's maximum volume. Slowly increase the amplifier's gain until you hear distortion, then back it off slightly.
- High-Pass Filter (HPF): The 'HFF' (High-Pass Filter) control allows frequencies above the set point to pass through to the speakers, blocking lower frequencies. This is typically used for full-range speakers to prevent them from playing bass frequencies they cannot reproduce effectively.
- Low-Pass Filter (LPF): The 'LPF' (Low-Pass Filter) control allows frequencies below the set point to pass through, blocking higher frequencies. This is typically used for subwoofers to ensure they only reproduce bass frequencies.
- Bass Boost: The 'BASS BOOST' control provides an adjustable increase in bass output at a specific frequency. Use this sparingly and adjust carefully to avoid distortion or damage to your speakers.
- Input Sensitivity: The amplifier has an input sensitivity range of 0.25V to 8V, allowing compatibility with a wide range of head units.
Maintenance
- Cleaning: Periodically clean the amplifier's exterior with a soft, dry cloth. Do not use harsh chemicals or abrasive cleaners. Ensure cooling fins are free of dust and debris.
- Connection Checks: Occasionally check all power, ground, remote, and speaker connections to ensure they are secure and free from corrosion.
- Ventilation: Ensure the amplifier's mounting location remains clear and well-ventilated.
Troubleshooting
| Problem | Possible Cause | Solution |
|---|---|---|
| No Power (PWR LED off) | Blown fuse, poor power/ground connection, no remote signal. | Check inline fuse, verify +12V and GND connections, check remote wire connection. |
| Protection Mode (PRO LED on) | Overheating, speaker short circuit, low impedance load, DC offset. | Check ventilation, inspect speaker wiring for shorts, verify speaker impedance, disconnect speakers to check for DC offset. |
| No Sound Output | No input signal, incorrect gain setting, speaker wires disconnected. | Verify RCA input connections, adjust gain, check speaker wiring. |
| Distorted Sound | Gain set too high, improper crossover settings, poor ground connection. | Reduce gain, adjust HPF/LPF settings, ensure solid ground connection. |
| Engine Noise/Whine | Poor ground, RCA cables too close to power wires, ground loop. | Improve ground connection, reroute RCA cables away from power wires, use a ground loop isolator if necessary. |
Specifications
| Feature | Value |
|---|---|
| Channels | 5 |
| RMS Power Output (4 Ohms) | 110W x 4 + 450W x 1 (at 2 Ohms for subwoofer) |
| RMS Power Output (2 Ohms) | 220W x 4 + 900W x 1 (at 1 Ohm for subwoofer) |
| RMS Power Output (Bridged 4 Ohms) | 450W x 2 + 900W x 1 (at 1 Ohm for subwoofer) |
| Maximum Power | 3000 Watts |
| Frequency Response | 15Hz – 30KHz |
| Impedance | 1-4 Ohms |
| Input Sensitivity | 0.25V - 8V |
| Bass Boost | 0-12dB |
| THD (Total Harmonic Distortion) | <0.05% |
| S/N Ratio (Signal-to-Noise Ratio) | >98dB |
| Dimensions (L x W x H) | 10 x 10 x 10 centimeters |
| Weight | 1 Kilogram |
| Manufacturer | PROTECH |
| Included Components | Mini Amplificador 5 Canales Treo NANOHD5 3000 Watts Clase D, Remote Control |
Warranty Information
This Genérico TREO NANOHD5 amplifier comes with a 30-day warranty from the date of purchase. This warranty covers manufacturing defects under normal use. It does not cover damage caused by improper installation, misuse, accident, neglect, or unauthorized modifications. Please retain your proof of purchase for any warranty claims.
Customer Support
If you encounter any issues not covered in this manual or require further assistance, please contact your retailer or the manufacturer's customer support. Provide your product model number (NANOHD5) and a detailed description of the problem to facilitate quicker resolution.